With Hyvor Blogs, you can easily create and manage a multi-language blog without having to worry about external plugins. All the features you need for a multi-lingual blog come in-built with Hyvor Blogs. You can also host your blog with Hyvor Blogs on a free subdomain or on your own custom domain.
Why a multi-language blog?
There are a lot of advantages to blogging in multiple languages:
More traffic
You can reach a global audience and increase traffic to your blogMore engagement
Because languages are a huge part of cultures, it is easy to build a strong relationship with your audience when using native languages.More sales
If you have a business blog, you can blog in different languages to target customers in multiple regions.
Hyvor Blogs Multi-Language Features
Hyvor Blogs is a fully-featured blogging platform that makes managing a multi-language website super easy than most other platforms. With Hyvor Blogs, you can
Add any number of languages to your blog
Translate your posts easily manually or automatically using AI
Translate theme strings
Translate tags, author names, navigation anchors, and other blog data.
Hyvor Blogs takes care of all technical SEO aspects of your multi-language blog.
Creating a Multi-language Blog with Hyvor Blogs
1. Create your blog
Let’s start by creating a blog. Head over to blogs.hyvor.com/console. You will be asked to create a Hyvor account to start. After creating your account, you will see the Hyvor Blogs Console.
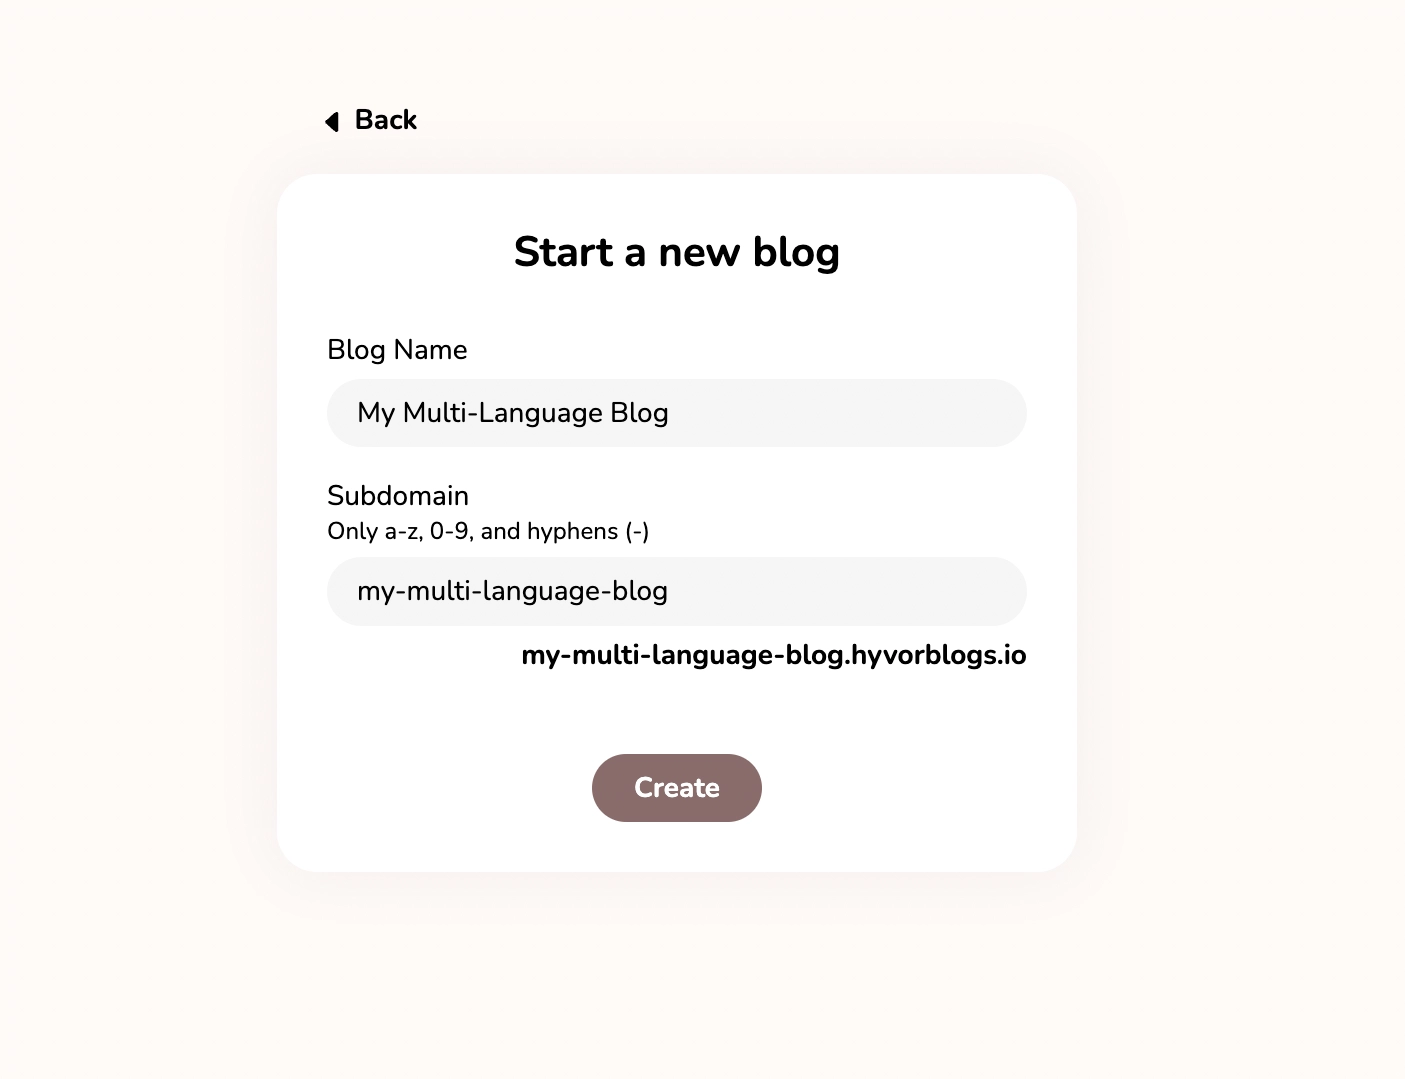
Fill in the name and choose a subdomain. You can use the subdomain to host your blog until you connect a custom domain later.
After you create your blog, visit yoursubdomain.hyvorblogs.io to preview your blog. You can also try editing some posts in the Posts section, and also try changing the blog theme.
2. Changing the Primary Language (Optional)
A blog has one primary language and any number of other languages. The primary language is shown by / on your blog. Other languages are prefixed. For example, if the language is fr (French), the /fr route of your blog will have French content.
By default, the primary language of your blog is set to en (English). If English is not the language you are blogging primarily, you should update this setting.
Go to Settings -> Languages
Change the language name and code
The language code should be a valid HTML lang attribute value. Here are some examples:
enen-USfrfr-FR
3. Adding Other Languages
It’s time to define other languages of your blog. Go to Console -> Settings -> Languages, and click the NEW + button.
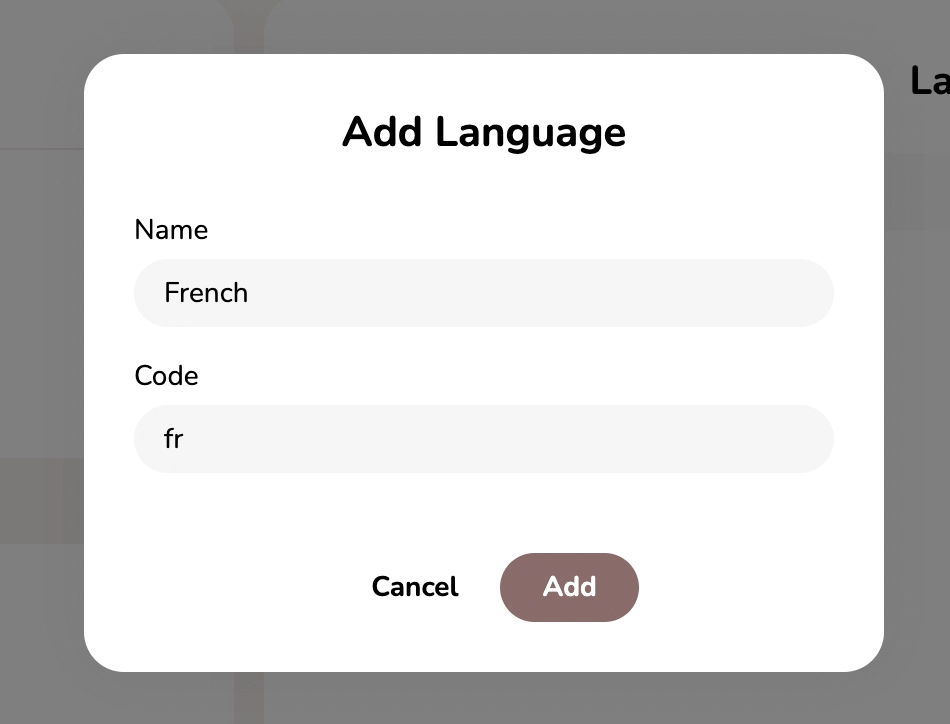
If you need, you can create multiple other languages.
Now, you have set up your language. Let’s start translating parts of your blog.
Writing Translated Posts
The most significant part of your blog is your posts. When you add a new language to your blog, you will see a variant button in each of your posts.
Go to Console -> Posts, and select a post. Click the language code at the top of the post to create a language variant draft for that post. Then, you can edit the title and content of the post.
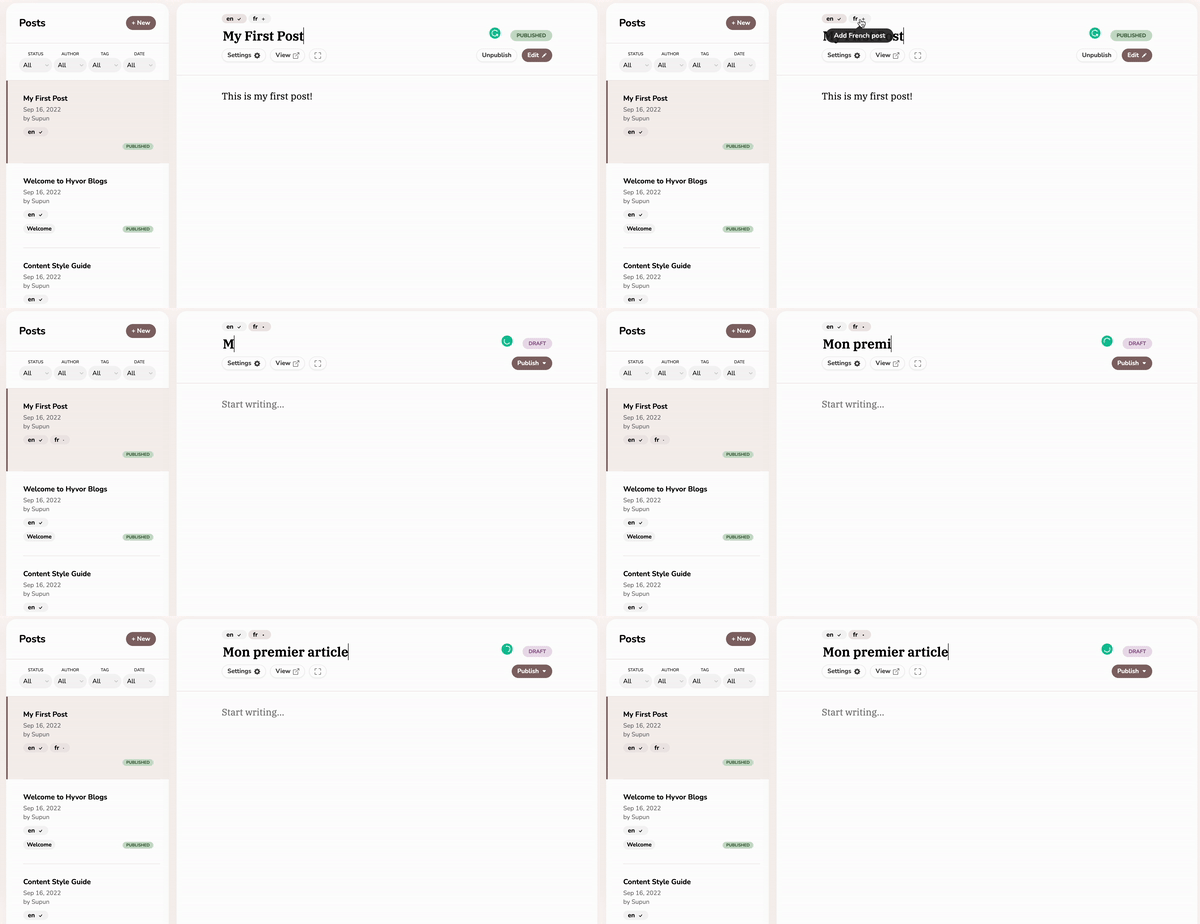
Usually, the best way to translate content is to copy the whole content from the primary language and translate the words in it. By doing this, you will not need to re-upload any media to language variant posts.
In Settings, you can set a slug for your post. Let’s assume you set it to first-post. Then, in your blog
/first-postwill be the post in the primary language/fr/first-postwill be the French translation
Note that each translation should be published independently of the other.
In post settings, you can also translate the post description.
Automatically Translating Posts using AI
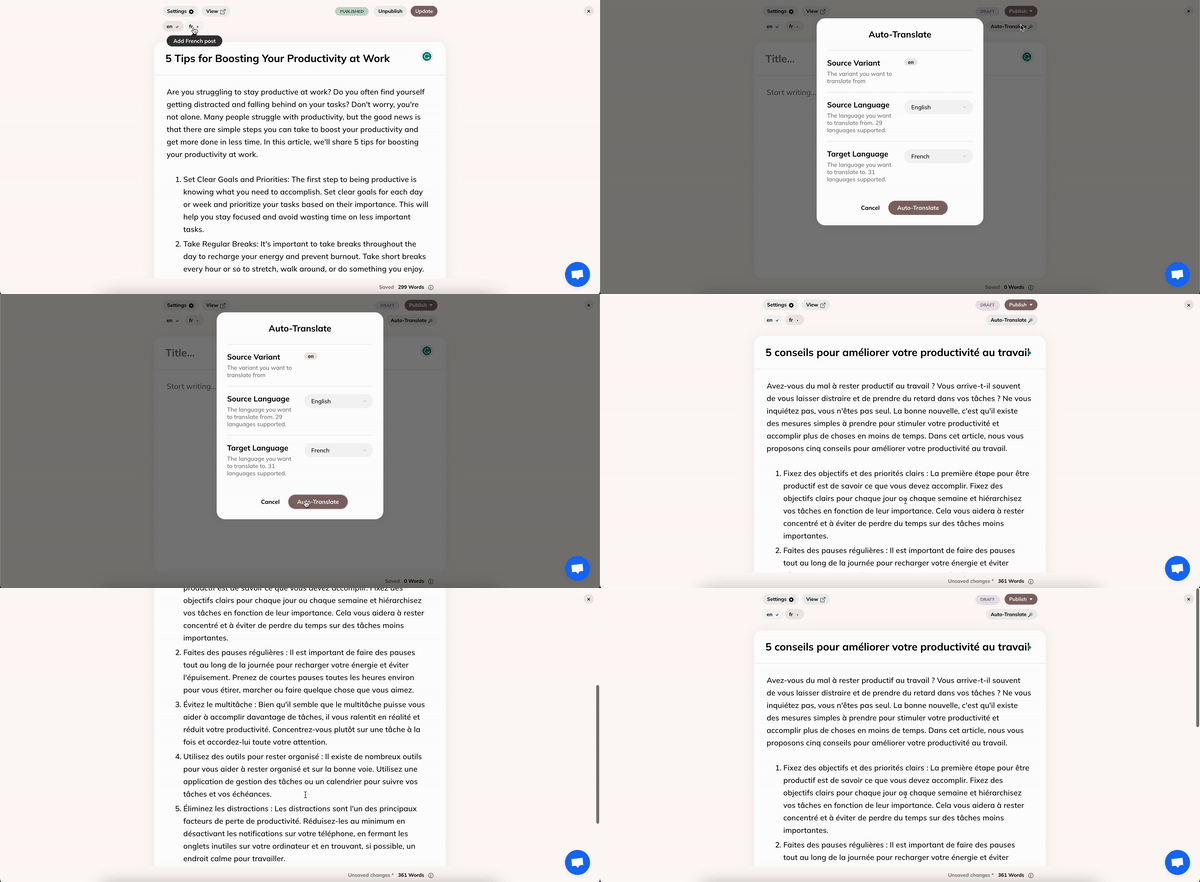
You can also easily translate your posts into more than 30 different languages using our AI-powered automatic translator tool.
Translating Tags, Authors, Navigation, and Blog Settings
Translating these can be done in a similar fashion to posts.
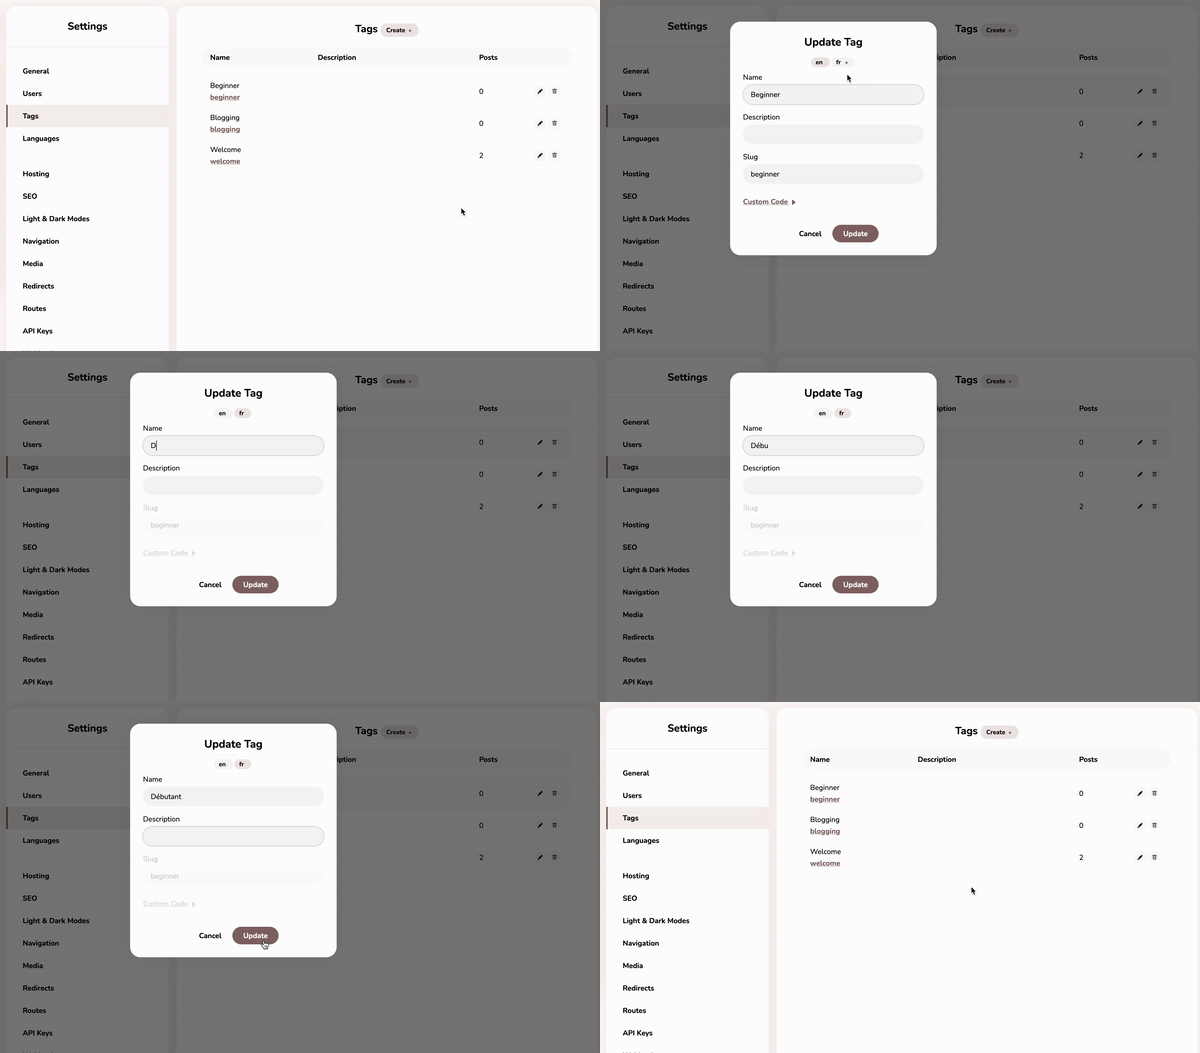
You can translate each item in the following locations
Blog name and description: Settings -> General
Tags name and description: Settings -> Tags
Authors name, bio, and location: Settings -> Users
Navigation anchor: Settings -> Navigation
Translating Theme Strings
If you visit your translated posts now, you will notice that even though the post is translated, the strings (words and phrases) in the theme are not translated.
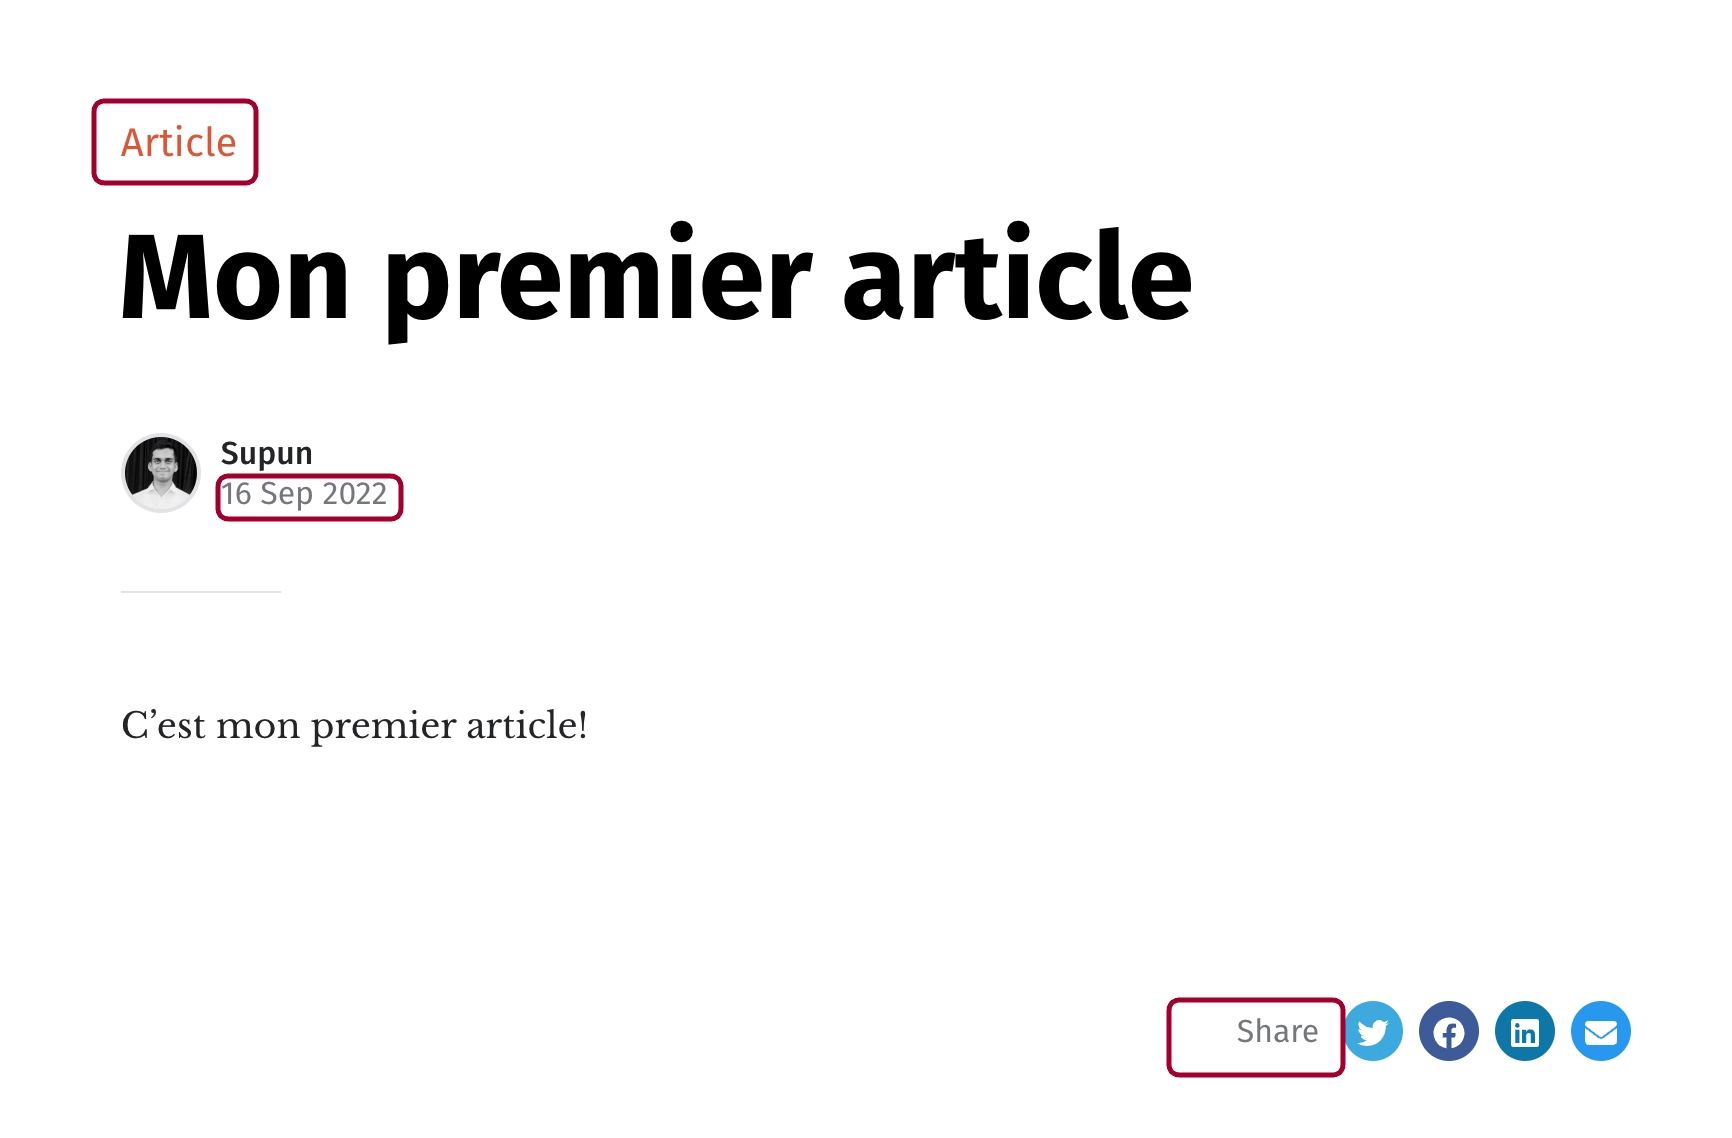
To translate these, you have to edit some theme files.
Go to Console -> Theme, and open the lang folder. By default, you will have en.yaml there, which is the default language file. You have to create new language files using the language code (fr.yaml for fr) and add translated strings there.
YAML is an easy-to-understand configuration language that we use in themes. YAML files ends with the
.yamlextension.
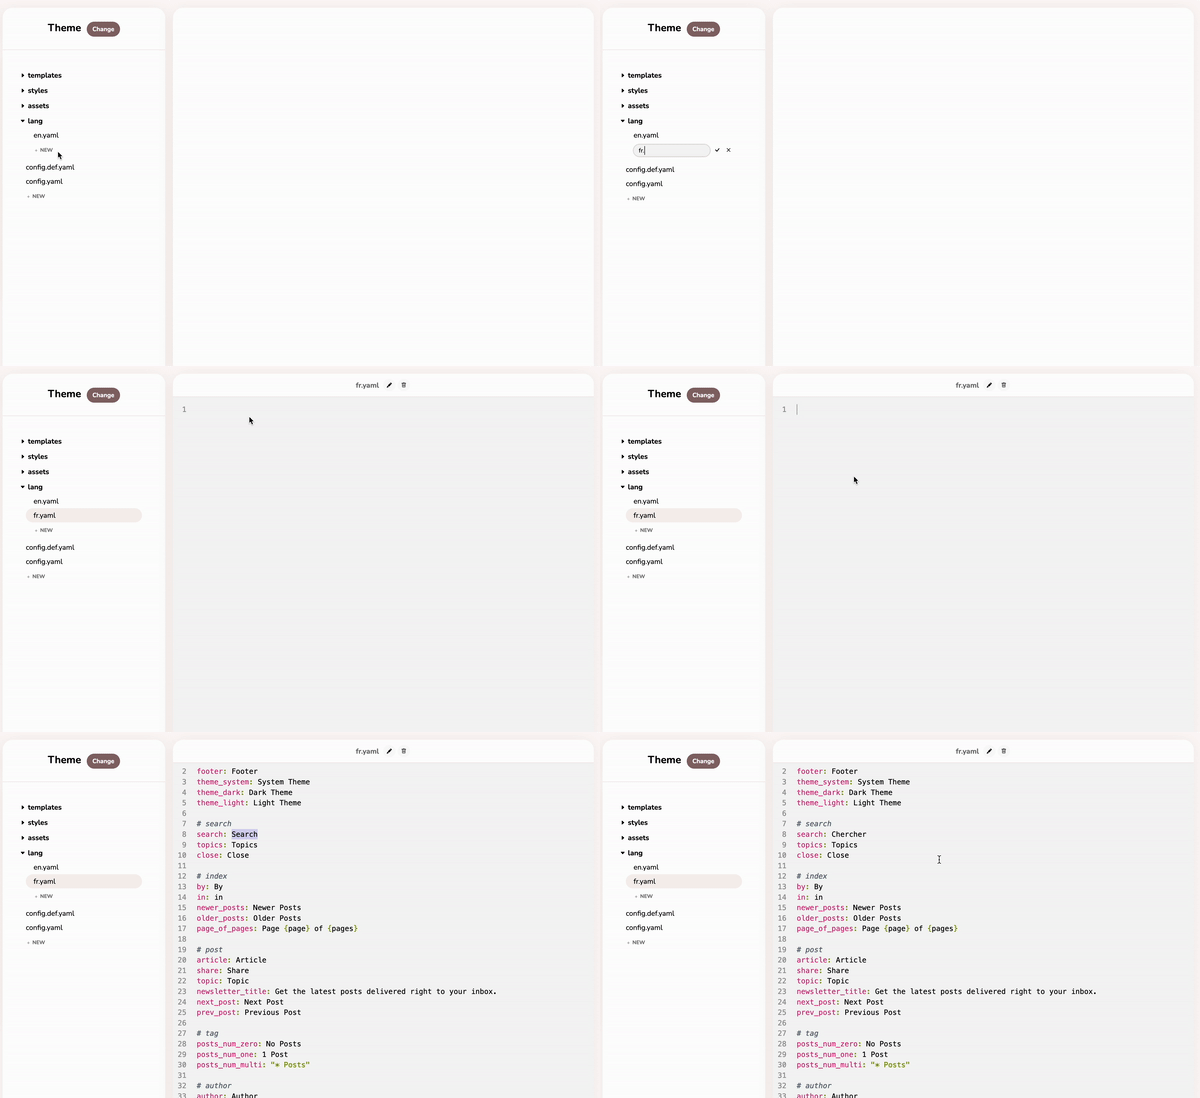
As you can see, in the .yaml file, you have to edit the content after the semicolon (:) in each line.
SEO
Search Engine Optimization (SEO) is a big part of a multi-lingual blog. If you had to do it yourself, you will have to mess with different kinds of HTML tags and attributes to optimize your blog for multi-language SEO. However, Hyvor Blogs takes care of everything for you.
It adds the correct HTML lang tag for all pages, and creates a alternate link tags for variants.
Simply saying, search engines will perfectly understand your multi-language blog, and will show the correct variant to different parts of the world.
After the initial setup, all you have to do is write your blog posts in multiple languages.
Conclusion
Hyvor Blogs makes it super easy to create and manage a multi-language blog. If you were to use another platform, you will spend a lot of time fixing bugs and upgrading software, while Hyvor Blogs let you peacefully write content. As a starter, you can start with a bilingual blog, and then add more languages as your blog grows.
If you have any questions, please let us know below.

Comments