Ghost is a blogging platform built for just blogging. Therefore, if you want a website just to publish blog posts, Ghost is a great option. There are two ways you can start a blog with Ghost: self-hosting or using Ghost-Pro, the paid-hosted version of Ghost. In this article, we'll see some advantages of using Ghost and how to start a blog with it.
Some Ghost Features
A nice dashboard
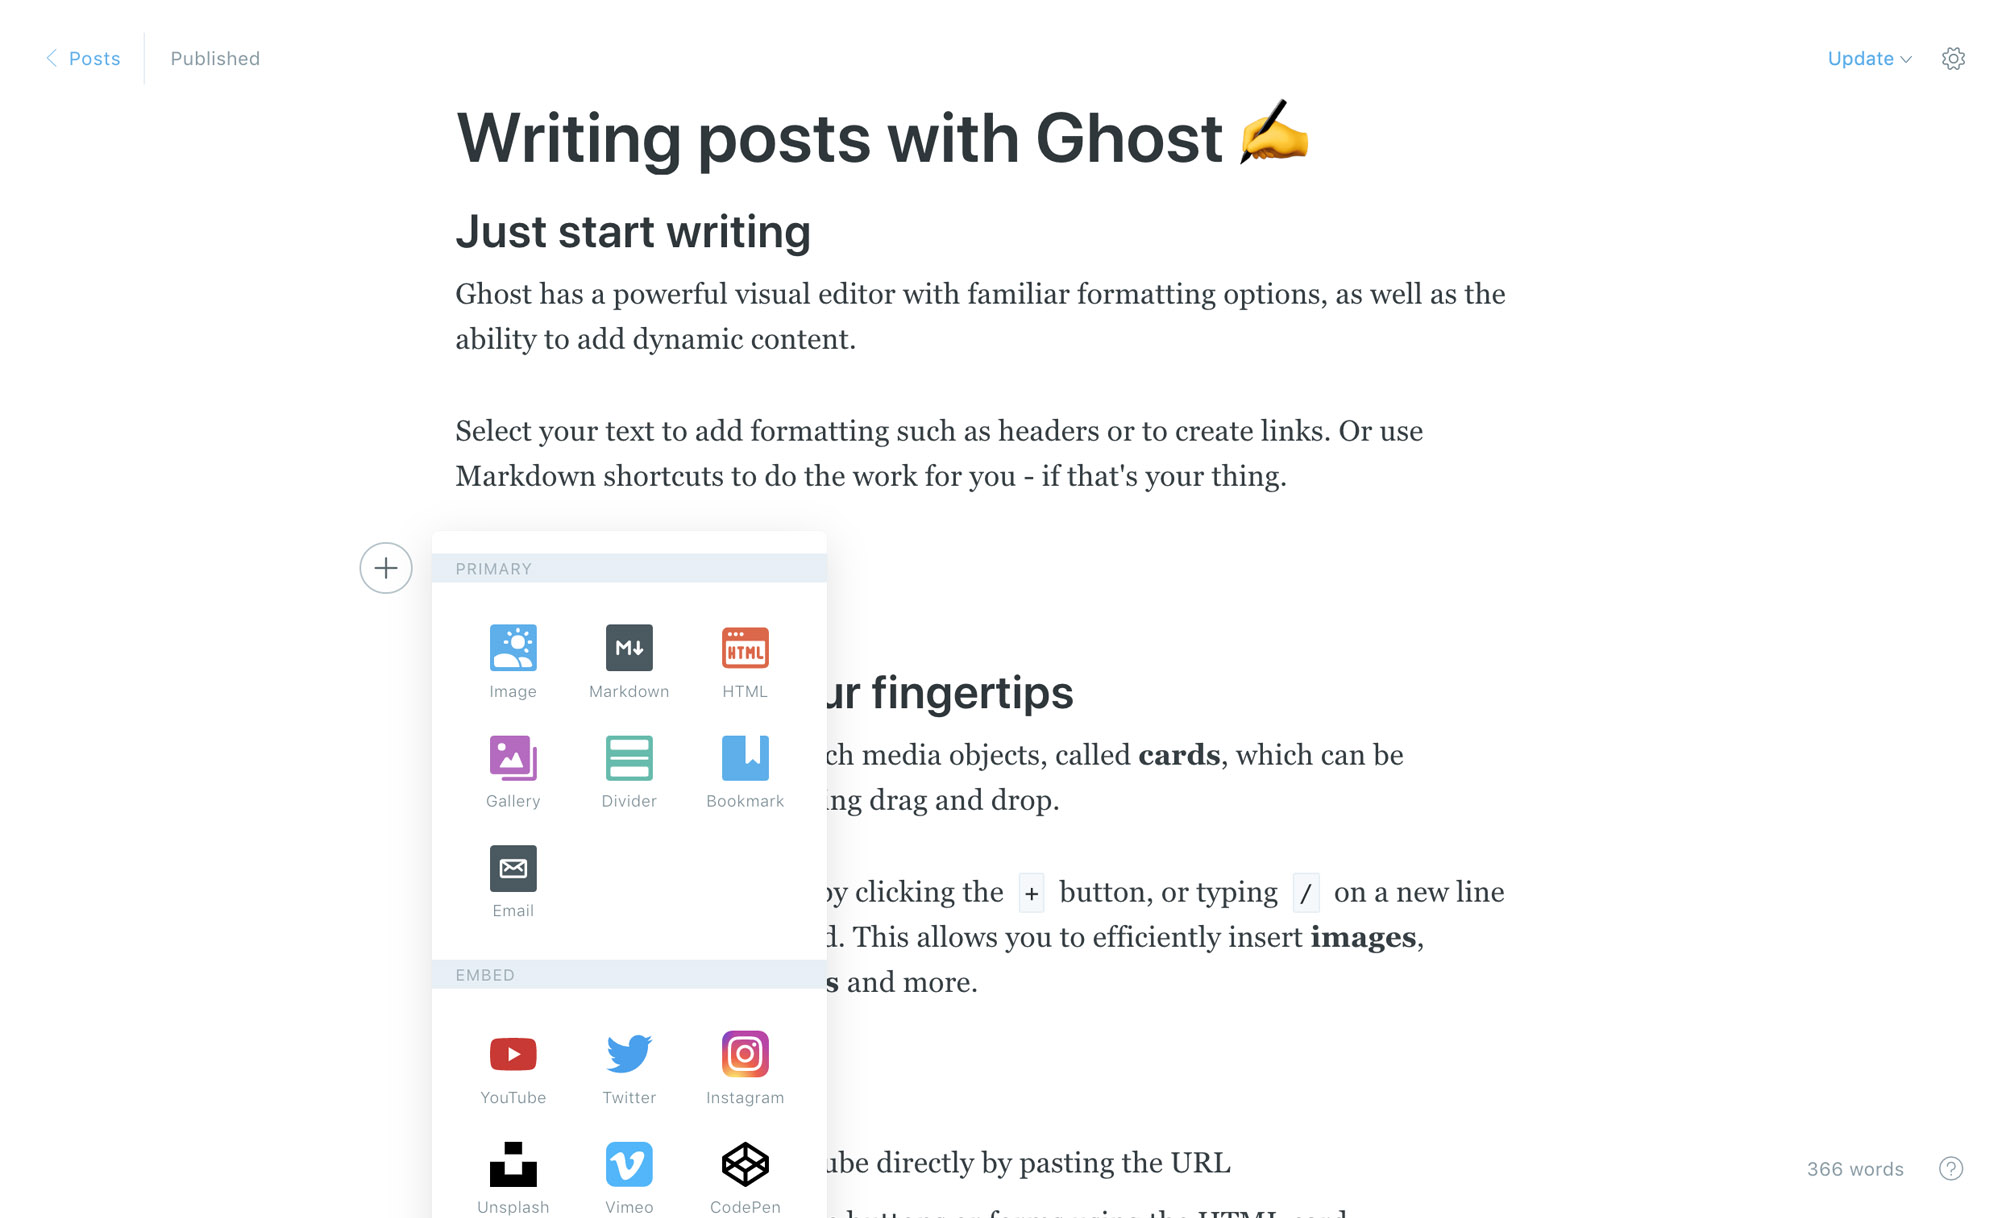
Great writing experience with a markdown-aware rich text editor
Customizable themes and a themes marketplace
Free/paid memberships
Integrations with platforms like Google Analytics, Stripe, Mailchimp, etc.
Ghost vs WordPress
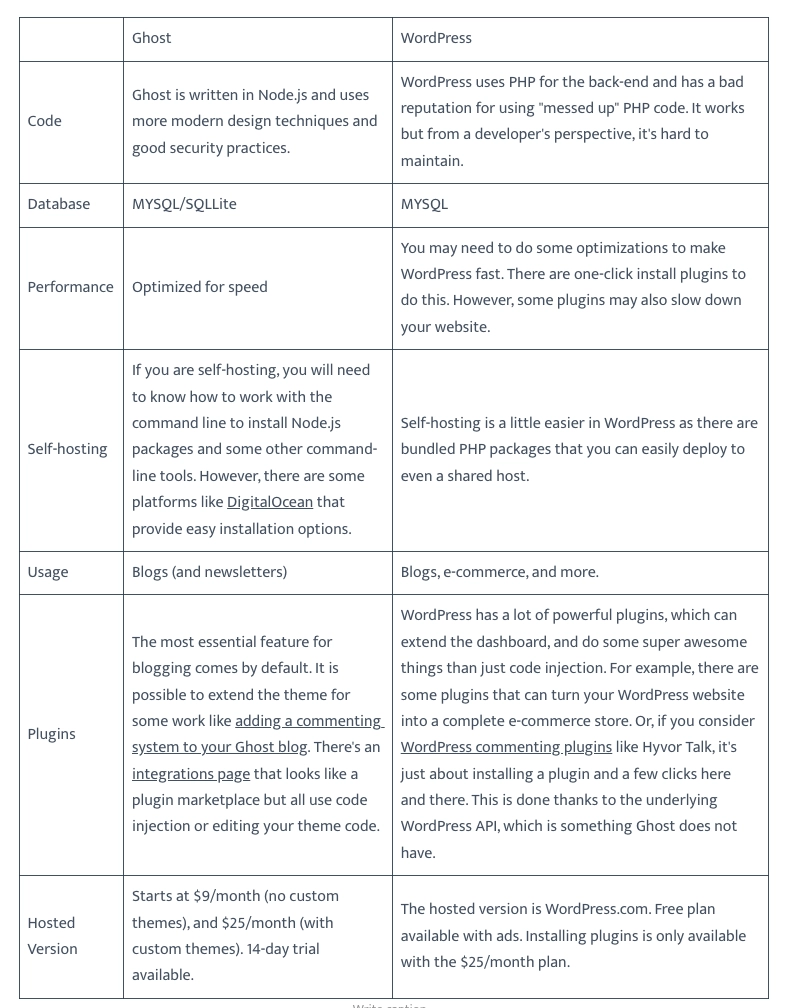
WordPress is the leader of CMSs with a stunning 40% market share. If you are deciding between Ghost and WordPress, here's a quick comparison.

In short, Ghost has all the functionalities (editing posts, media, SEO) you need for blogging or starting a newsletter. On the other hand, WordPress is great for any kind of website. Choosing the best pricing and hosting is up to you.
How to Start a Ghost Blog?
Let's get into the basics of running a website. You need to serve your website to your visitors using a server. In Ghost, you can either have your own server (self-hosting) or let Ghost.org host your ghost blog for you (hosted version, Ghost Pro).
1. Self-hosting
If you are a developer who likes to mess with servers and maintain software installations, self-hosting is the best option. As Ghost is open-source, you can install it on your own server. Unfortunately, as Ghost is written in Node.js, it is not possible to host it on most shared hosts (they use PHP). So, you will need to buy a VPS server from a provider (do a Google search for this with the term "VPS provider"). Then, you will need to follow the official documentation on installing it on your server.
If you use AWS for your servers, check Installing Ghost on AWS EC2.
2. Ghost (Pro)
Ghost (Pro) is the hosted version provided by the Ghost team. This is easy to set up. You don't have to worry about updates and maintenance. Just go to Ghost.org and start your blog today. Pricing is as I showed in the WordPress comparison.
Publishing Your First Ghost Blog Post

Once you set up the Ghost account, it's time to start writing your first blog post. Here are some resources to get started.
Using the Ghost Editor
This article explains:Rich Text Editing
Adding Embeds, HTML, etc.
Programming Code and Snippets
Using Markdown
Uploading Images, setting alt tags and captions
Previewing, scheduling, and publishing posts
If you have previously written on platforms like Medium or WordPress, formatting is very similar to that. You have all the basic options like bold, italics, etc.
Before publishing, make sure to add a featured image (for social media and sharing) and a description. Ghost handles most things about SE,O so you don't have to worry much.
Members
Ghost introduced Members in Ghost 4.0. Just like you can log in to websites like Facebook, you can allow your visitors to create an account on your blog and become members. You can choose this to be free or paid, with multiple plans. You can also make each post available only for subscribers of a certain plan. Members provide their email when signing up. So setting up an email newsletter is really simple with Ghost and does not require additional third parties.
Embedding Hyvor Talk for Comments
To embed anything to your theme (commenting system, newsletter signup, advertisements), you will need to edit the Ghost theme files. The process is different depending on how you installed Ghost (self-hosted vs Ghost Pro). In self-hosted Ghost, you can easily edit your files by logging into your server. However, editing files in Ghost (Pro) is not that easy. You will need to download the theme, edit the files, and re-upload it to Ghost.
If you would like to collect feedback/thoughts from your readers, you can easily add comments to your blog with Hyvor Talk. Here, you will need to edit the Ghost theme.
Sign up for Hyvor Talk and get your installation code
Next, add the installation code to
post.hbsand save the fileRe-upload your theme (in Ghost Pro)
See adding comments to Ghost for more details, including connecting Ghost members with Hyvor Talk.
Similarly, you can embed a third-party newsletter signup form.
Code Injection (for Analytics, Live Chat) on Your Ghost Blog
If you want to add a code, for example, HTML code from your analytics provider's tracking code, follow these steps.
Ghost Dashboard -> Menu -> Settings -> Code Injection
Add your code to "Site Header" (between HTML <head> tags) or "Site Footer" (before the </body> tag)
Click the "Save" button
Useful Resources:
Tip: If you are feeling Ghost is not the best for you, try looking for ghost alternatives.

Comments