At Hyvor Blogs, we have been working on several different solutions to allow hosting a blog on a subdirectory. Out of all the solutions, Cloudflare Workers is by far the easiest solution if you are already using Cloudflare for DNS. It will only take about 10-15 minutes to complete the setup. No coding is required.
Learn more about Hyvor Blogs: all-in-one blogging platform.
By the way, here’s the video tutorial if you prefer it:
How it works
Sub-directory hosting is handled by our hyvor/hyvor-blogs-cloudflare-workers script, which you can easily deploy to your own Cloudflare account as a Worker. Here’s what it does under the hood (you don’t have to understand any of this to use it 🙏)
It uses Cloudflare Workers to create a serverless application to serve your blog.
It uses Hyvor Blogs Delivery API to fetch serving instructions from Hyvor Blogs.
Then, it caches responses in Cloudflare KV (key-value storage). All resources in your blog (images, CSS, JS, and even HTML files) are cached in Cloudflare’s global network. This means everything in your blog is served to end users from the nearest node in the network. Your blog will be blazingly fast!
Then, it uses Hyvor Blogs Webhooks to clear the cache when you update your blog posts. (Due to this, there can be a delay of a few seconds before you see updates in your blog after updating a post.)
Finally, we use Cloudflare Workers Routes of your domain to route all
example.com/blog*requests to the worker.
Let’s get started!
Prerequisites
A blog created on Hyvor Blogs.
A domain that uses Cloudflare for DNS. It must be proxied through Cloudflare (orange cloud turned on).
A GitHub account (free)
1. Hyvor Blogs
First, let’s make your blog hostable on a subdirectory. For demonstration purposes, I’m going to host the blog at https://ishini.io/blog .
1.1 Hosting URL
Go to Hyvor Blogs Console → Settings → Hosting and set the following options.
Option | Value |
|---|---|
Hosting on/at | Self-hosting |
Self-hosting URL | The full URL you will be hosting your blog at (including |
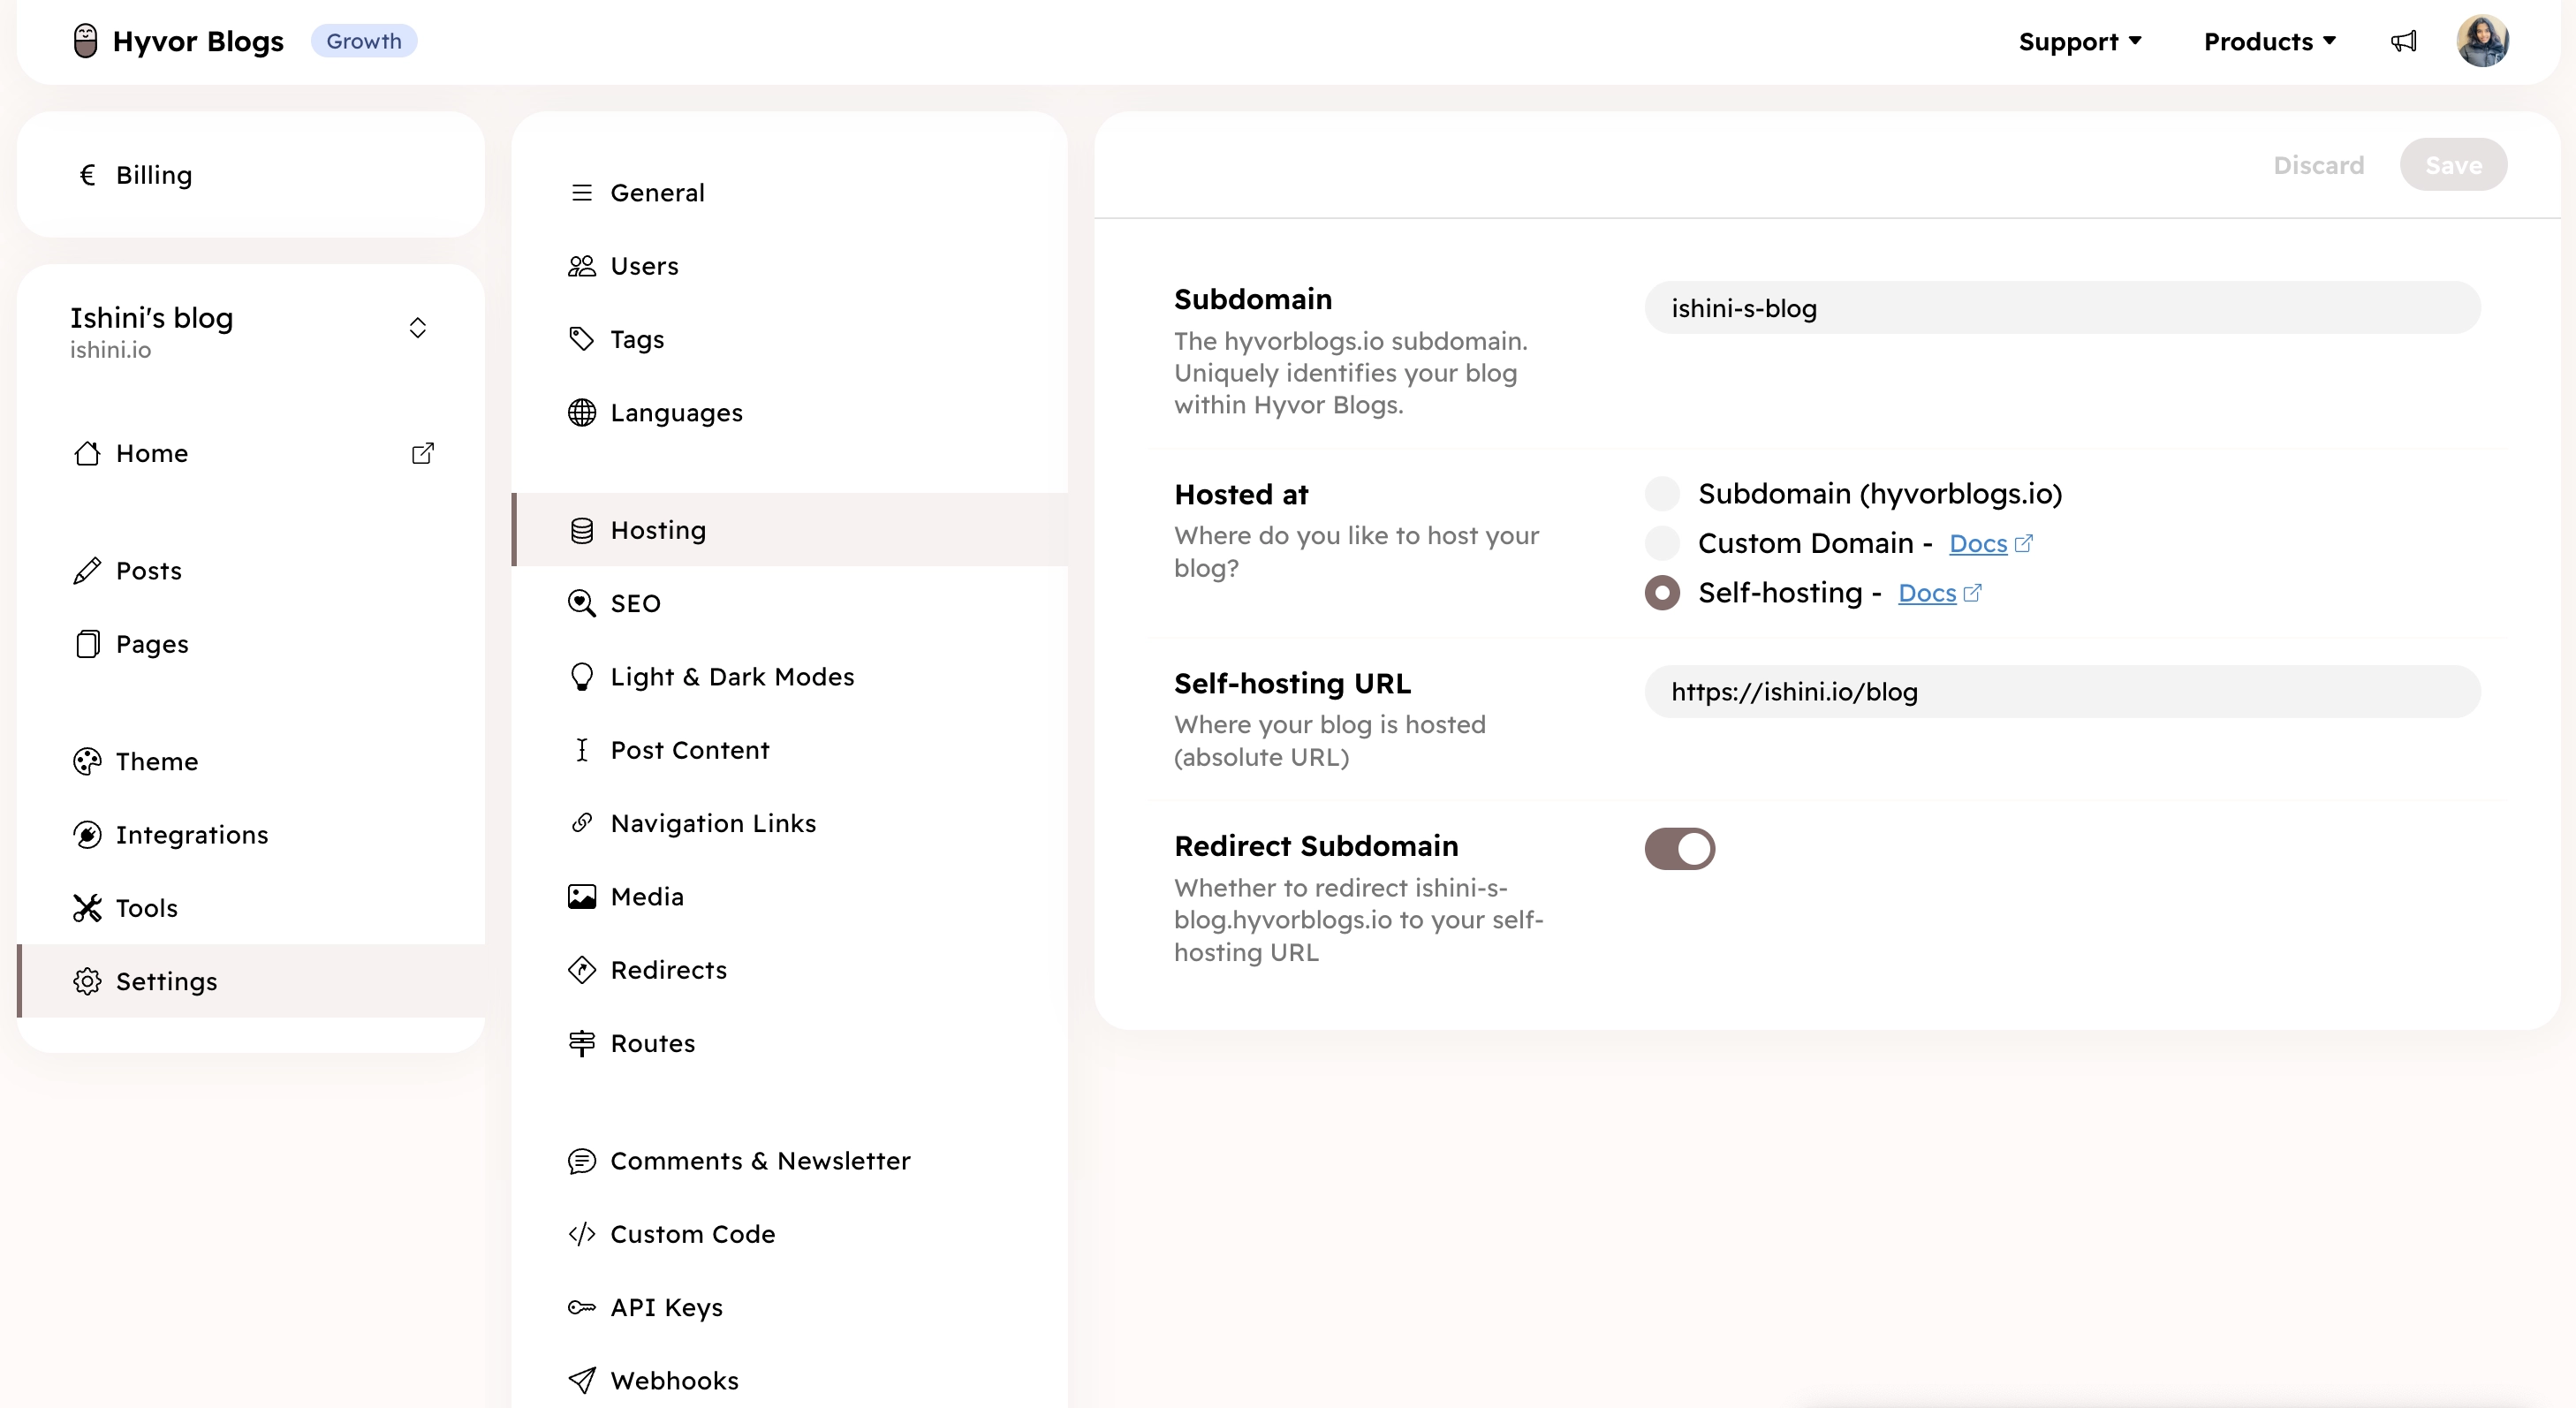
Then, save.
1.2 Delivery API Key
Go to Hyvor Blogs Console → Settings → API Keys and generate a Delivery API key.
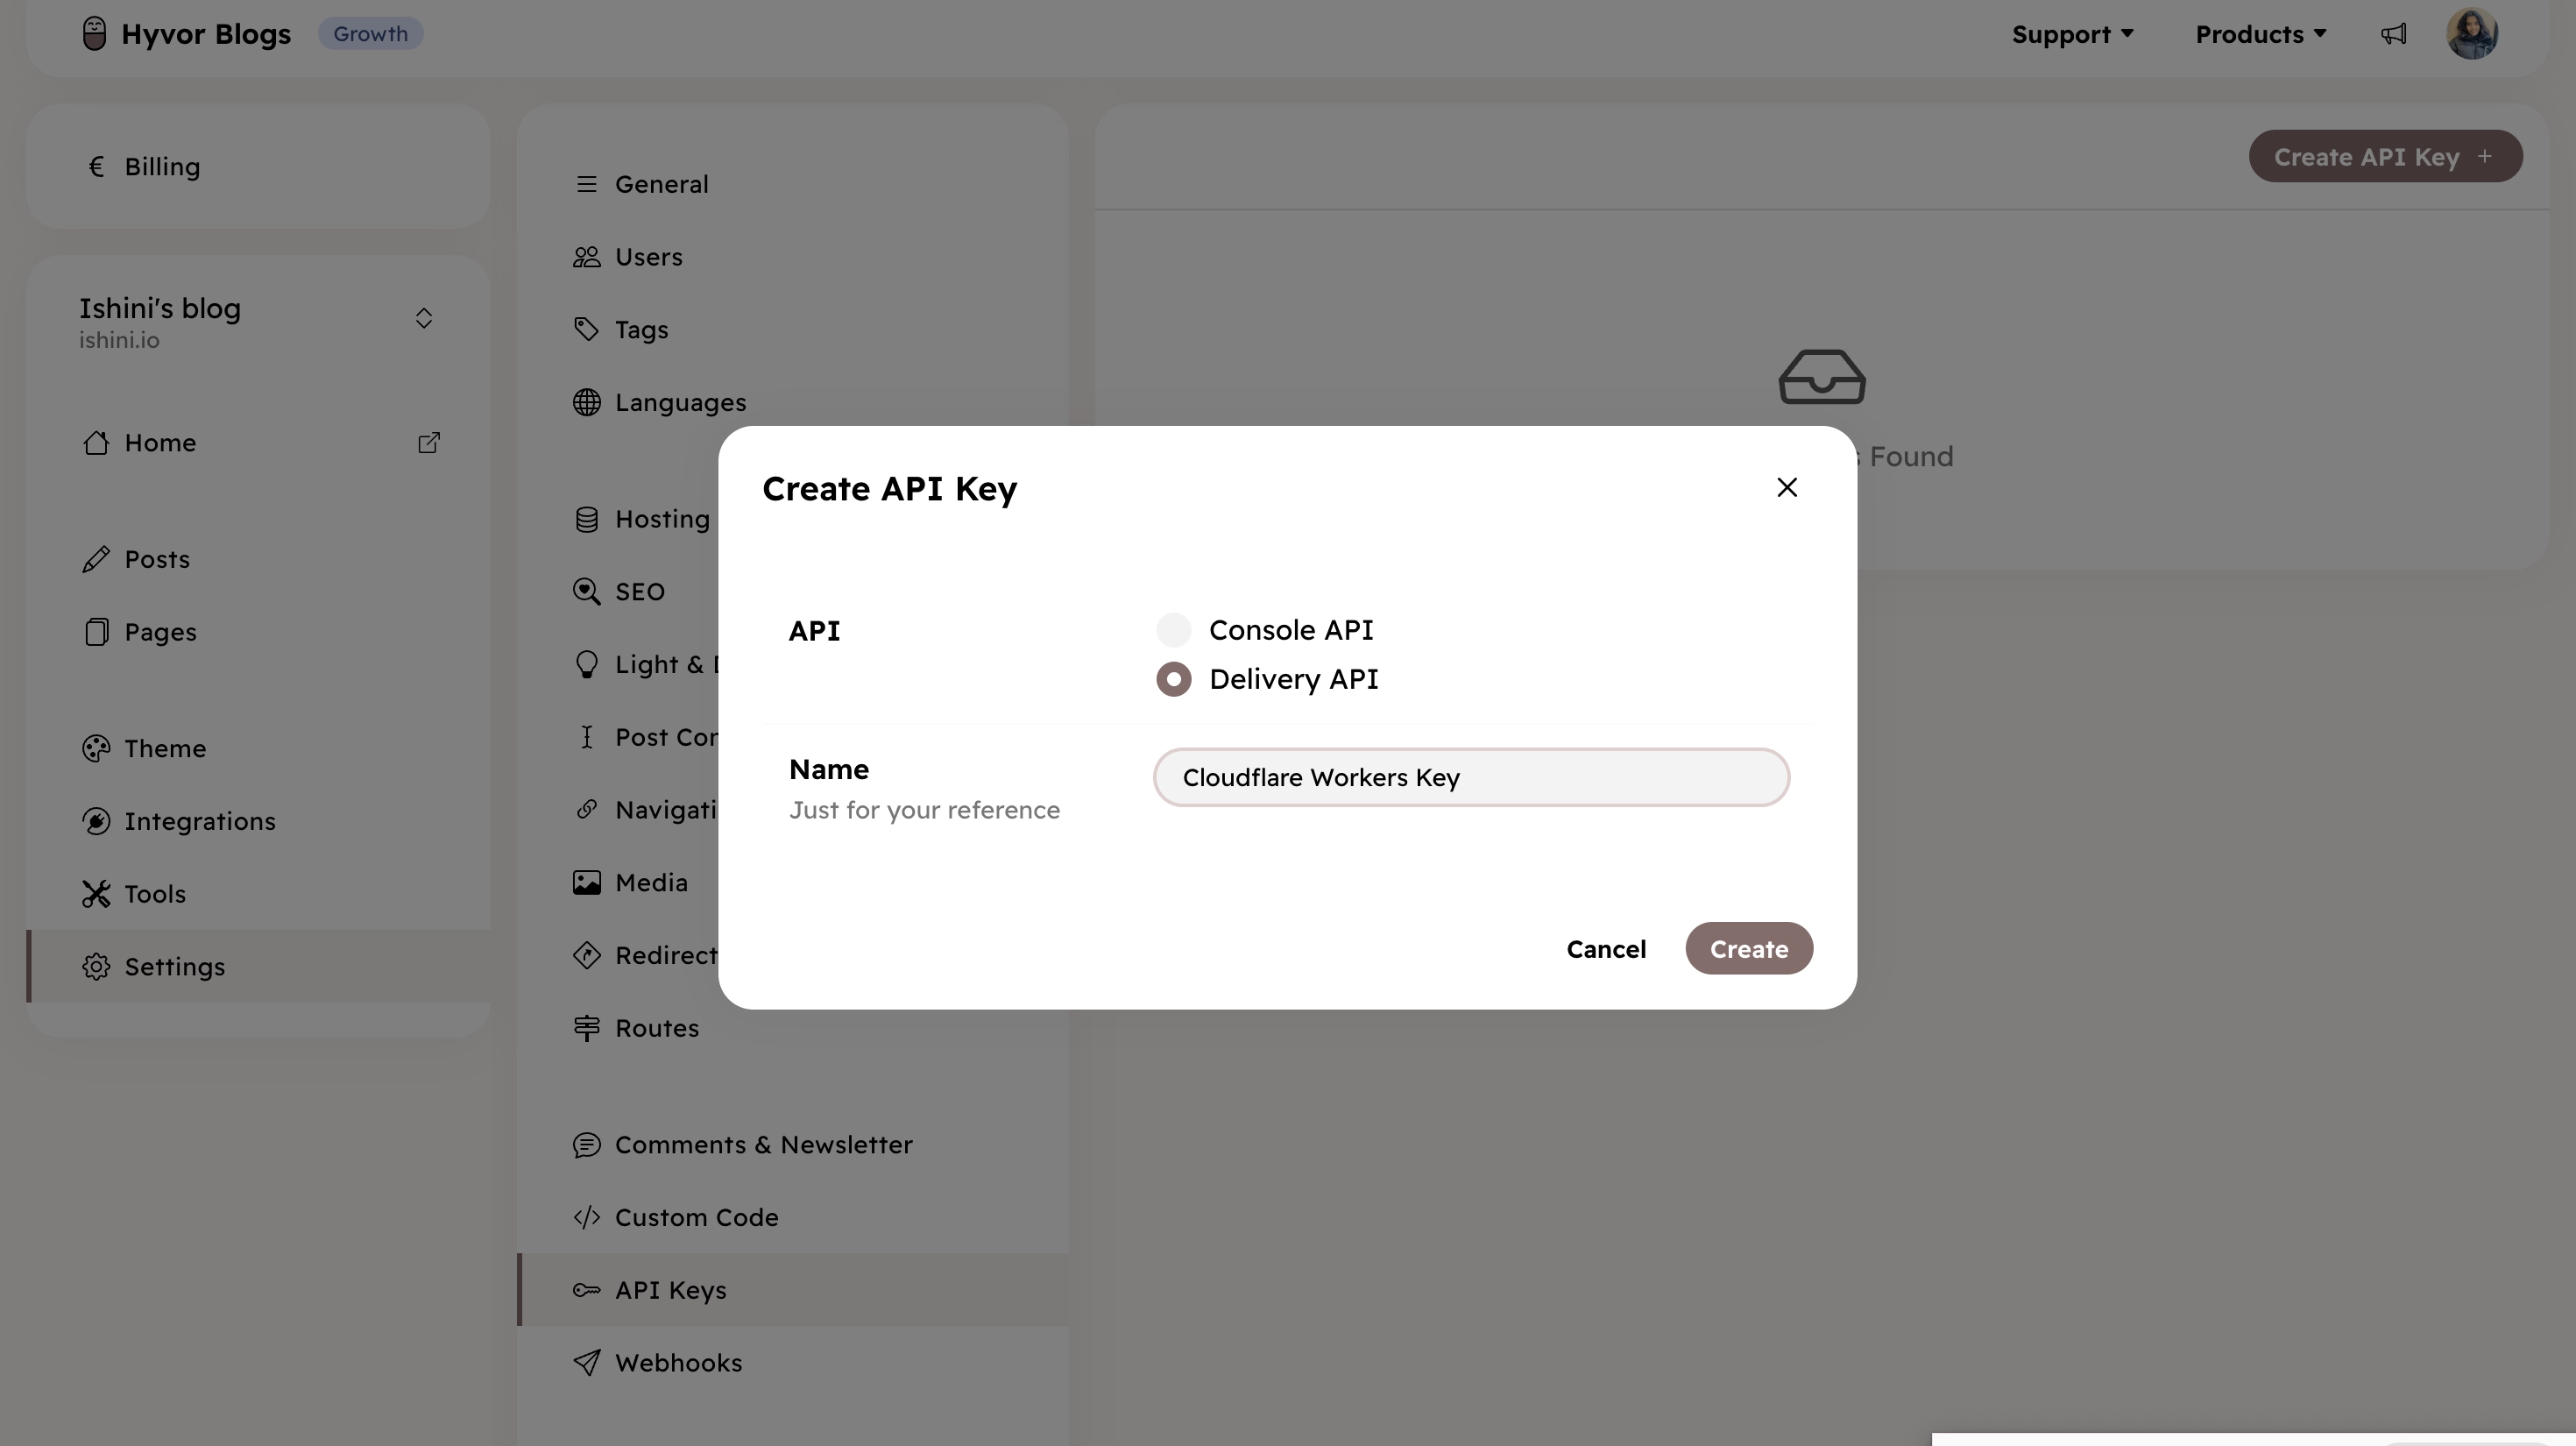
We’ll need the generated API key in a later step, which you can copy from the API Keys section.

1.3 Webhooks
Next, go to Hyvor Blogs Console → Settings → Webhooks and create a webhook with the following values.
Option | Value |
|---|---|
URL |
|
Events | Select these three:
|
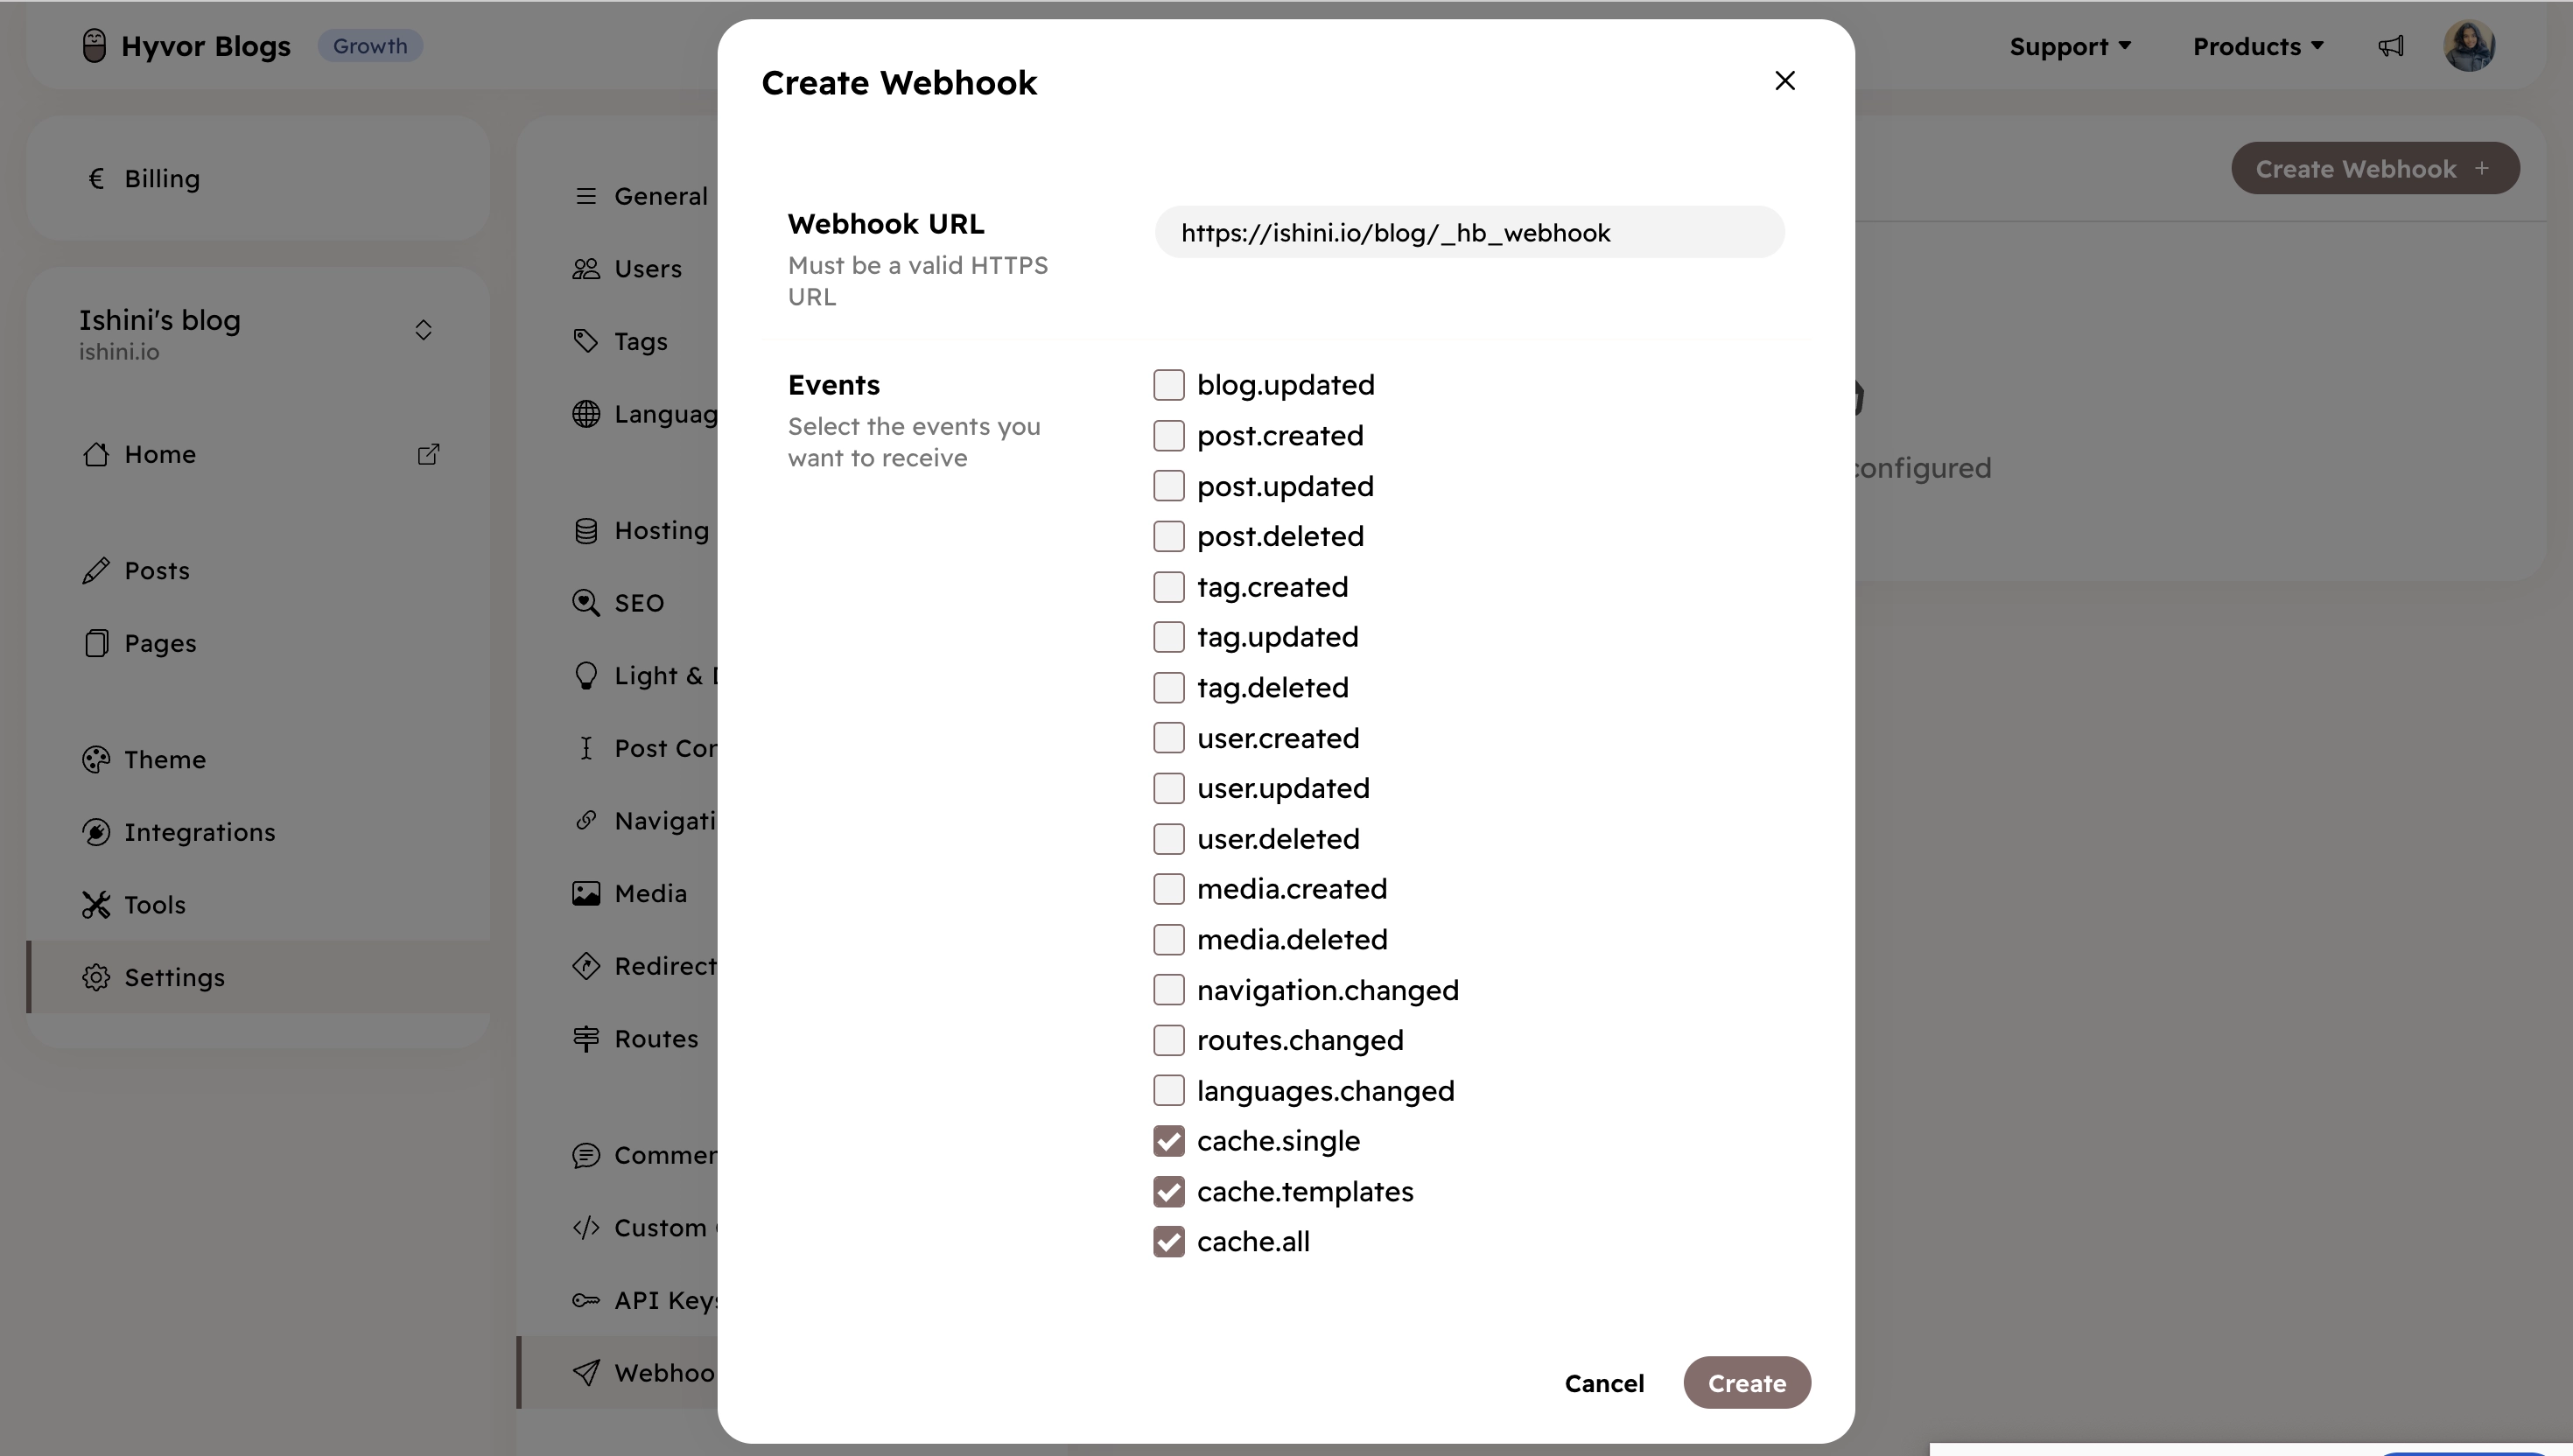
We’ll need the webhook secret in the next step.

2. Cloudflare Workers
Let’s create our worker.
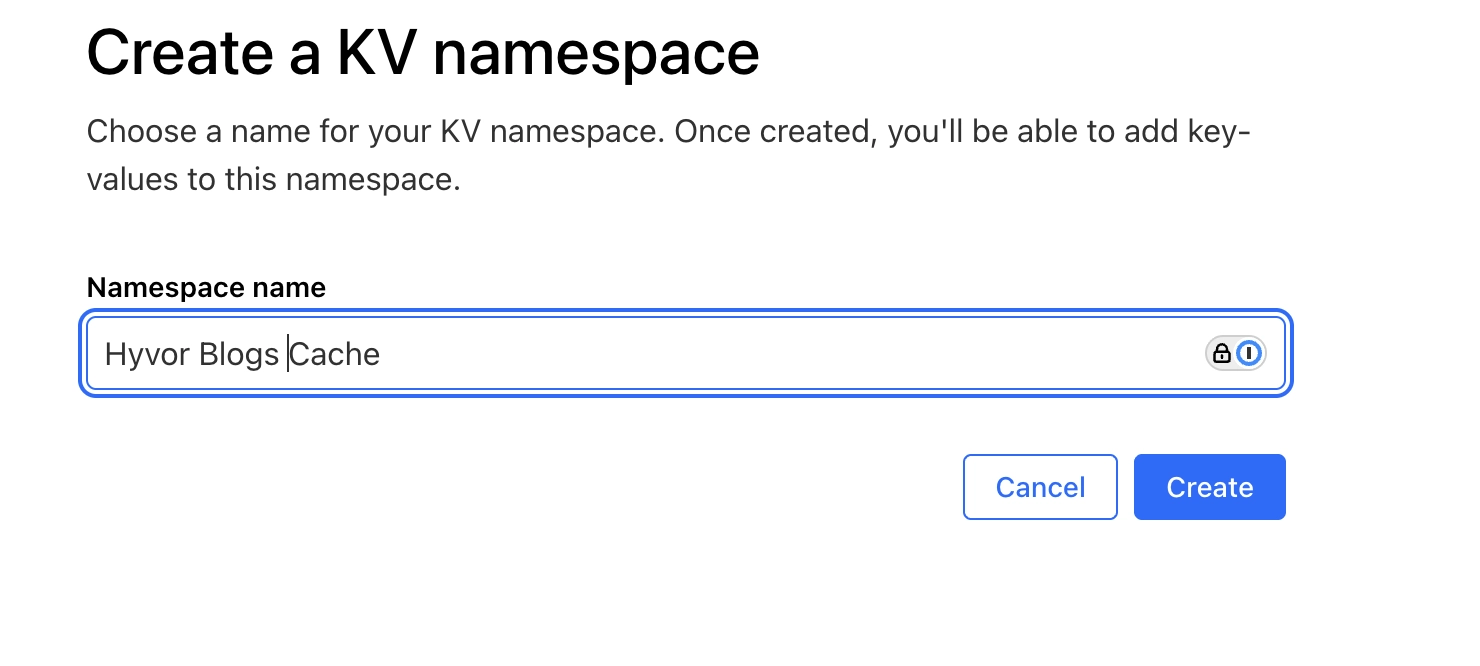
2.1 KV Store
Log in to the Cloudflare Dashboard. Then, navigate to Workers & Pages → KV.
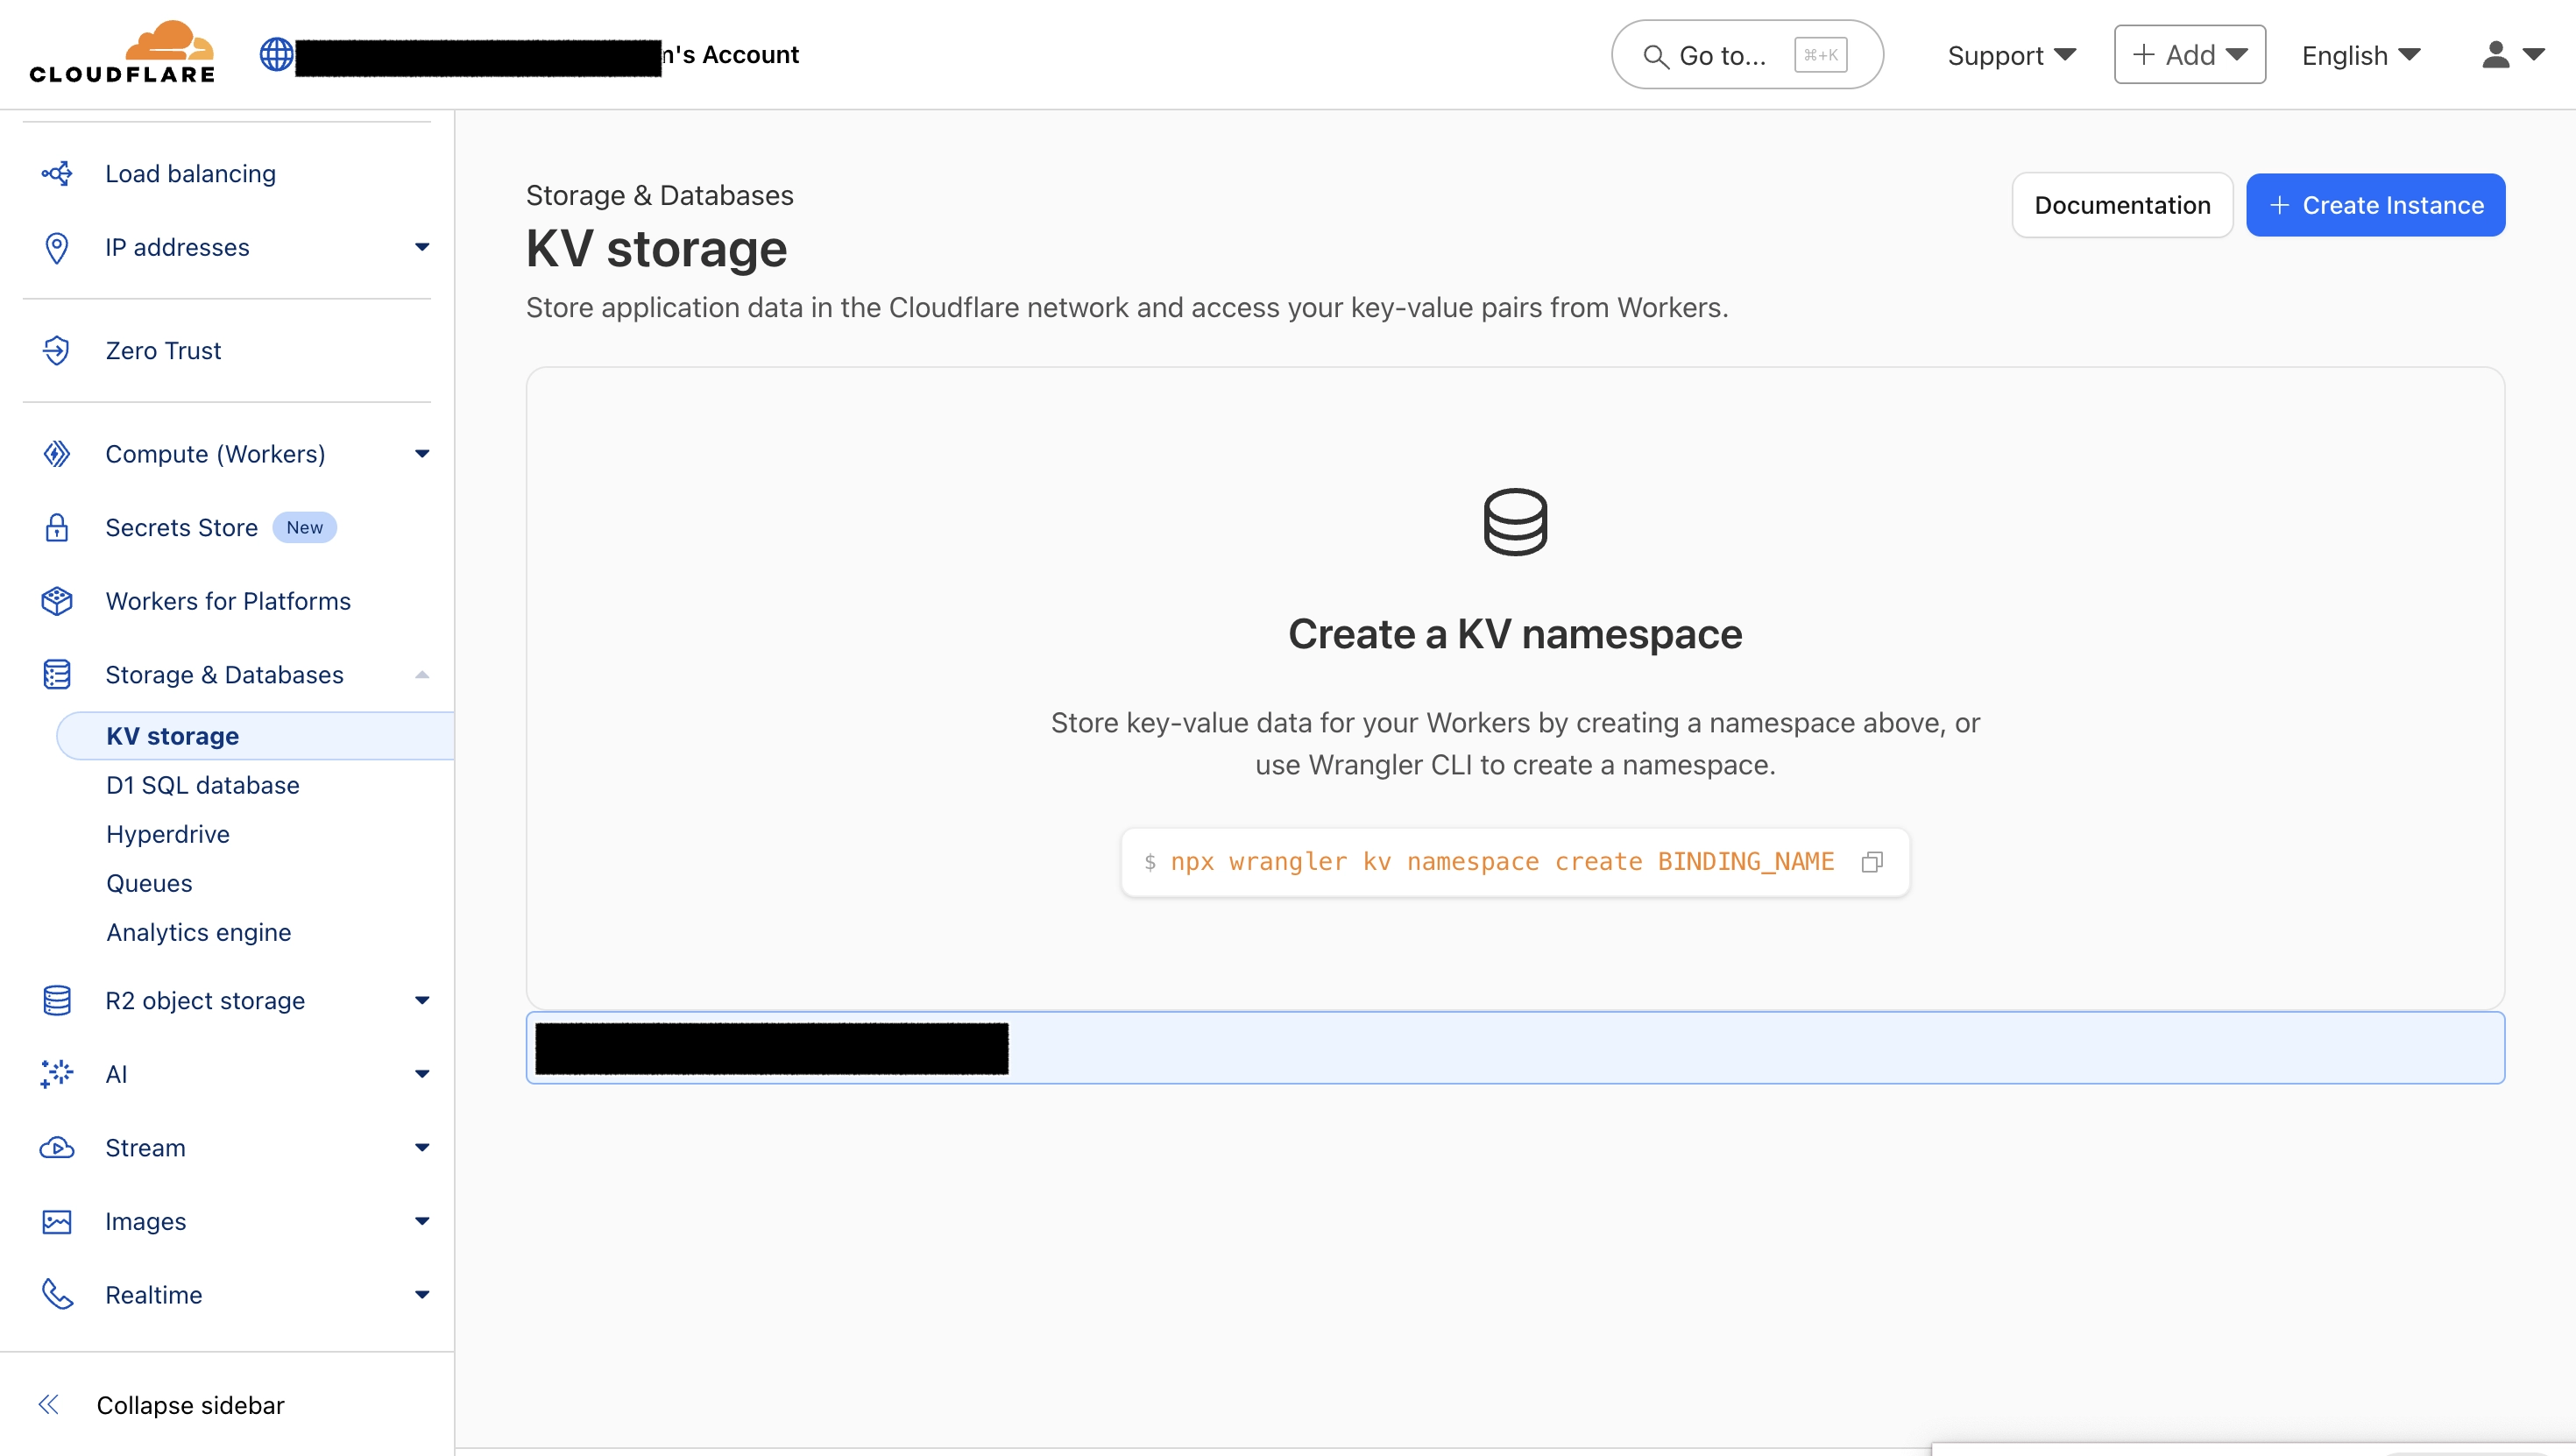
Then, create a new namespace with a descriptive name.
2.2 Deployment
Click the button below to initiate a new deployment to Cloudflare workers.
Next, we’ll follow the steps shown on the deployment page.
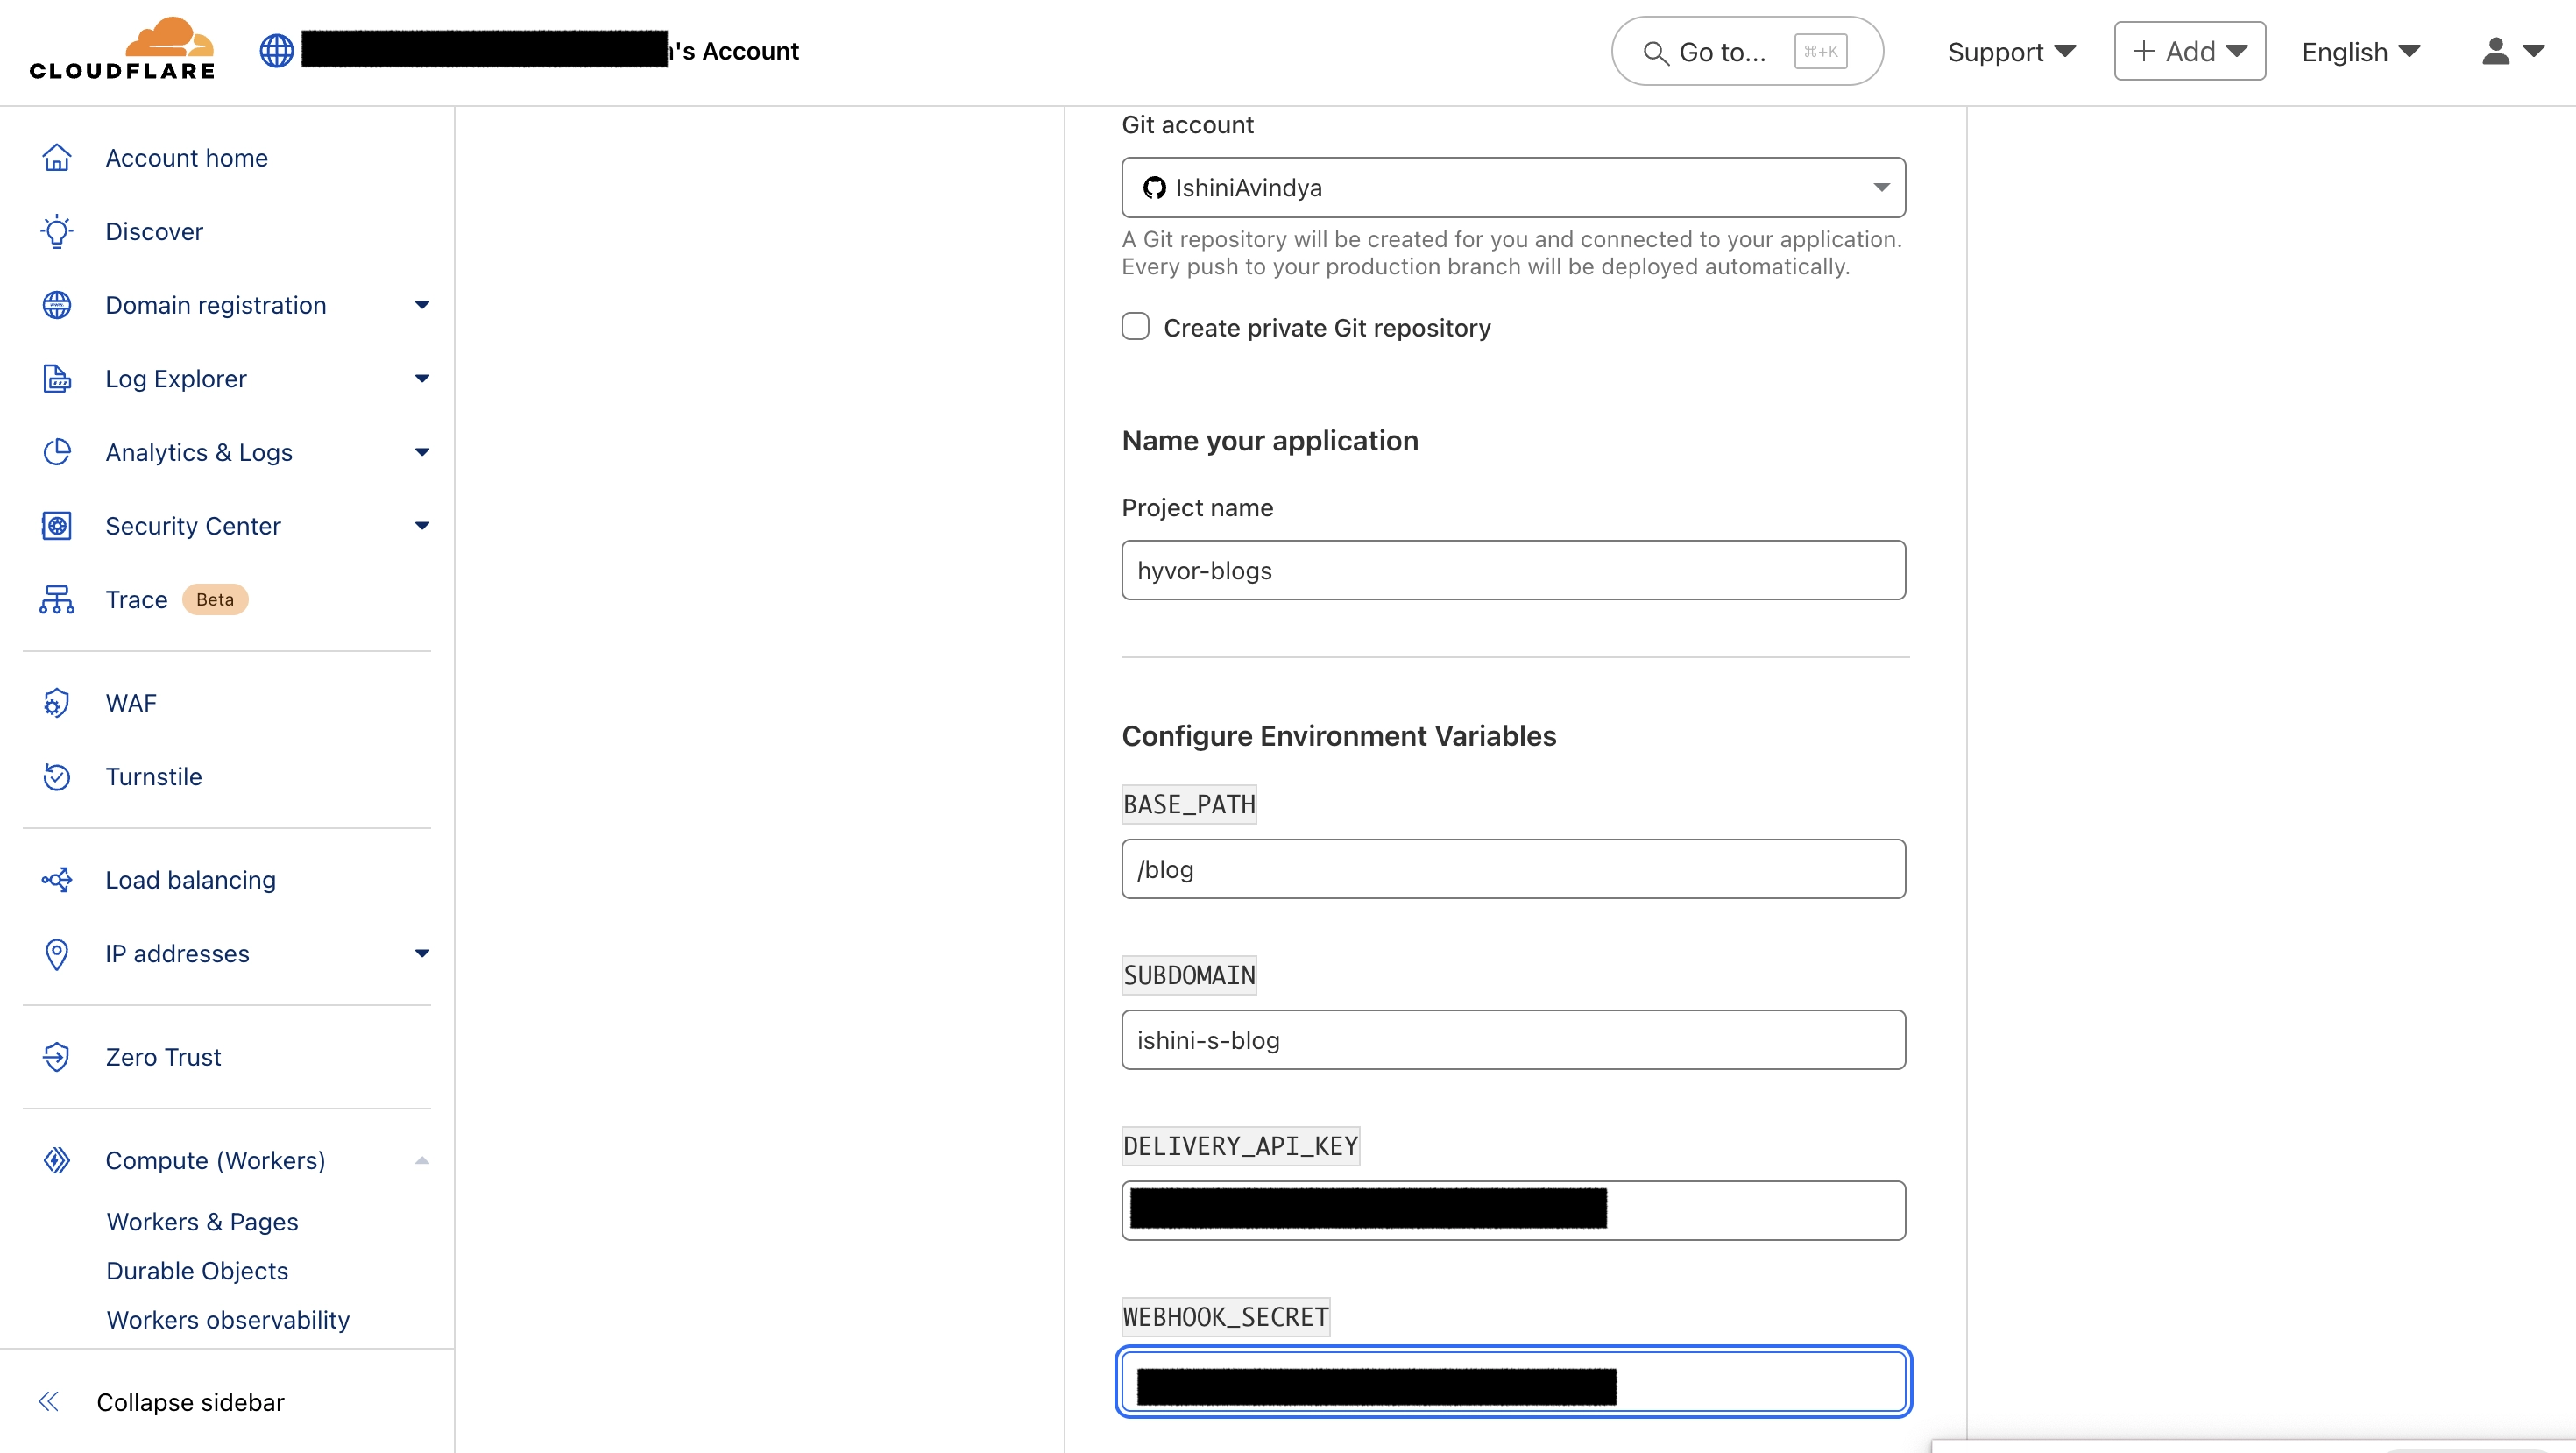
First, authorize GitHub to use Workers. You will need a free GitHub account to do this.
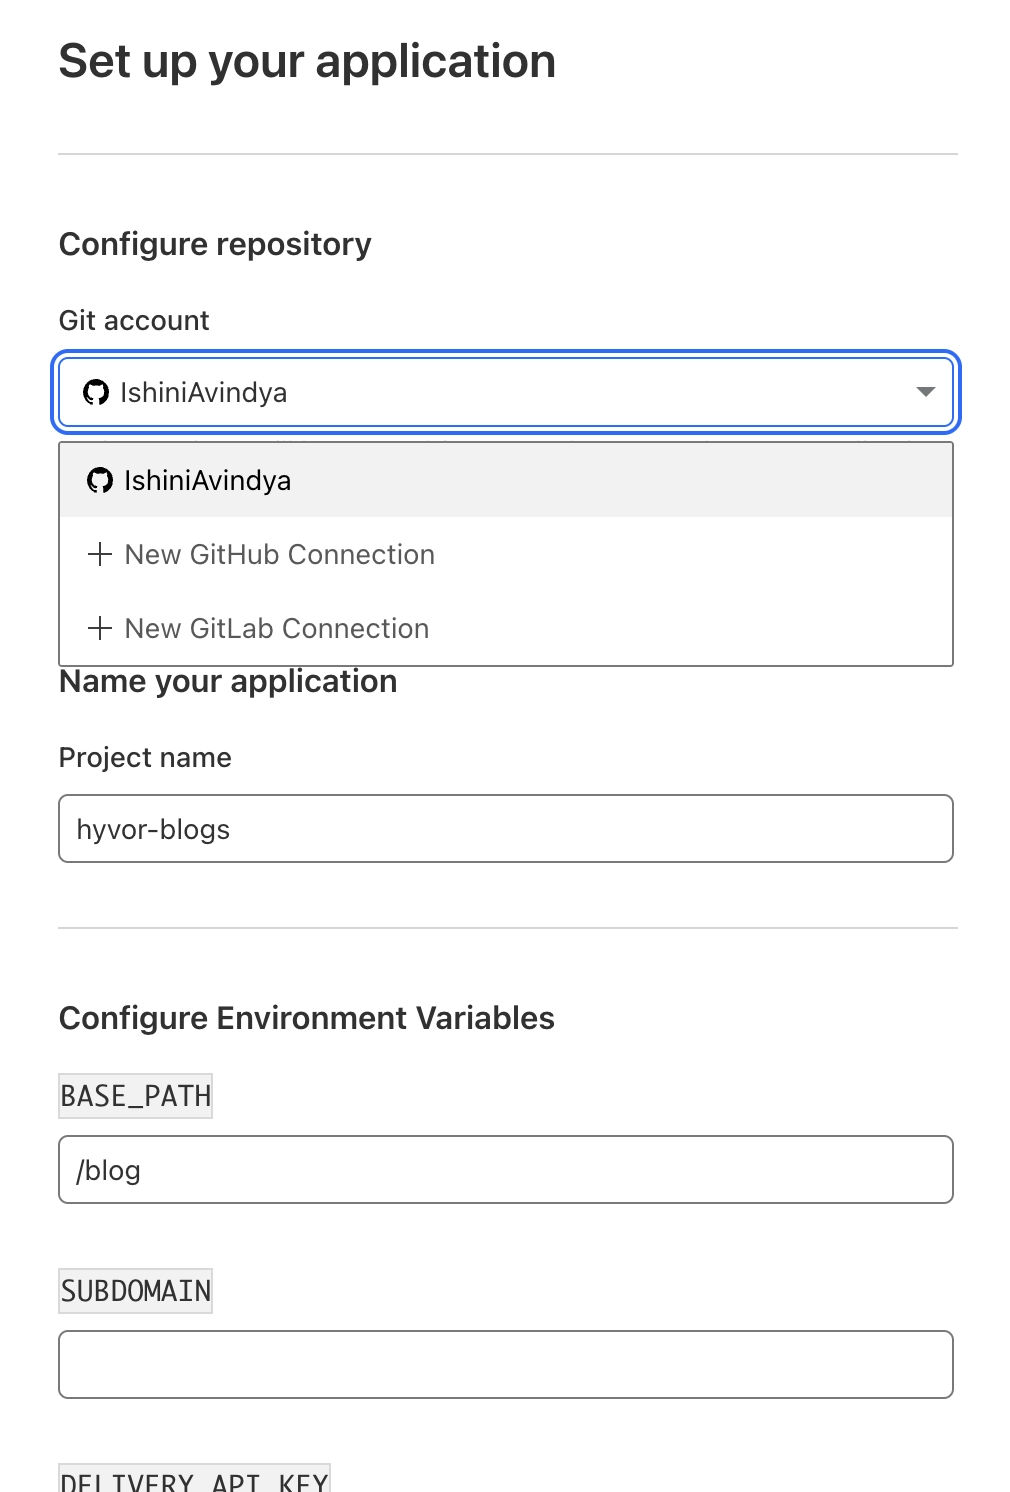
Choose your GitHub account.
Then, set the following variables in the relevant spaces.
Option | Value | Encrypt |
|---|---|---|
BASE_PATH | Base path of your blog. Ex: | No |
DELIVERY_API_KEY | Delivery API key from the above step 1.2. Get it from Console → Settings → API Keys | Yes |
SUBDOMAIN | Subdomain of your blog. Get it from Console → Settings → Hosting. Note that this is not the subdomain you will be hosting your blog on, rather the subdomain of | No |
WEBHOOK_SECRET | Webhook secret key from the above step 1.3. Get it from Console → Settings → Webhooks | Yes |
Click Save and Deploy.
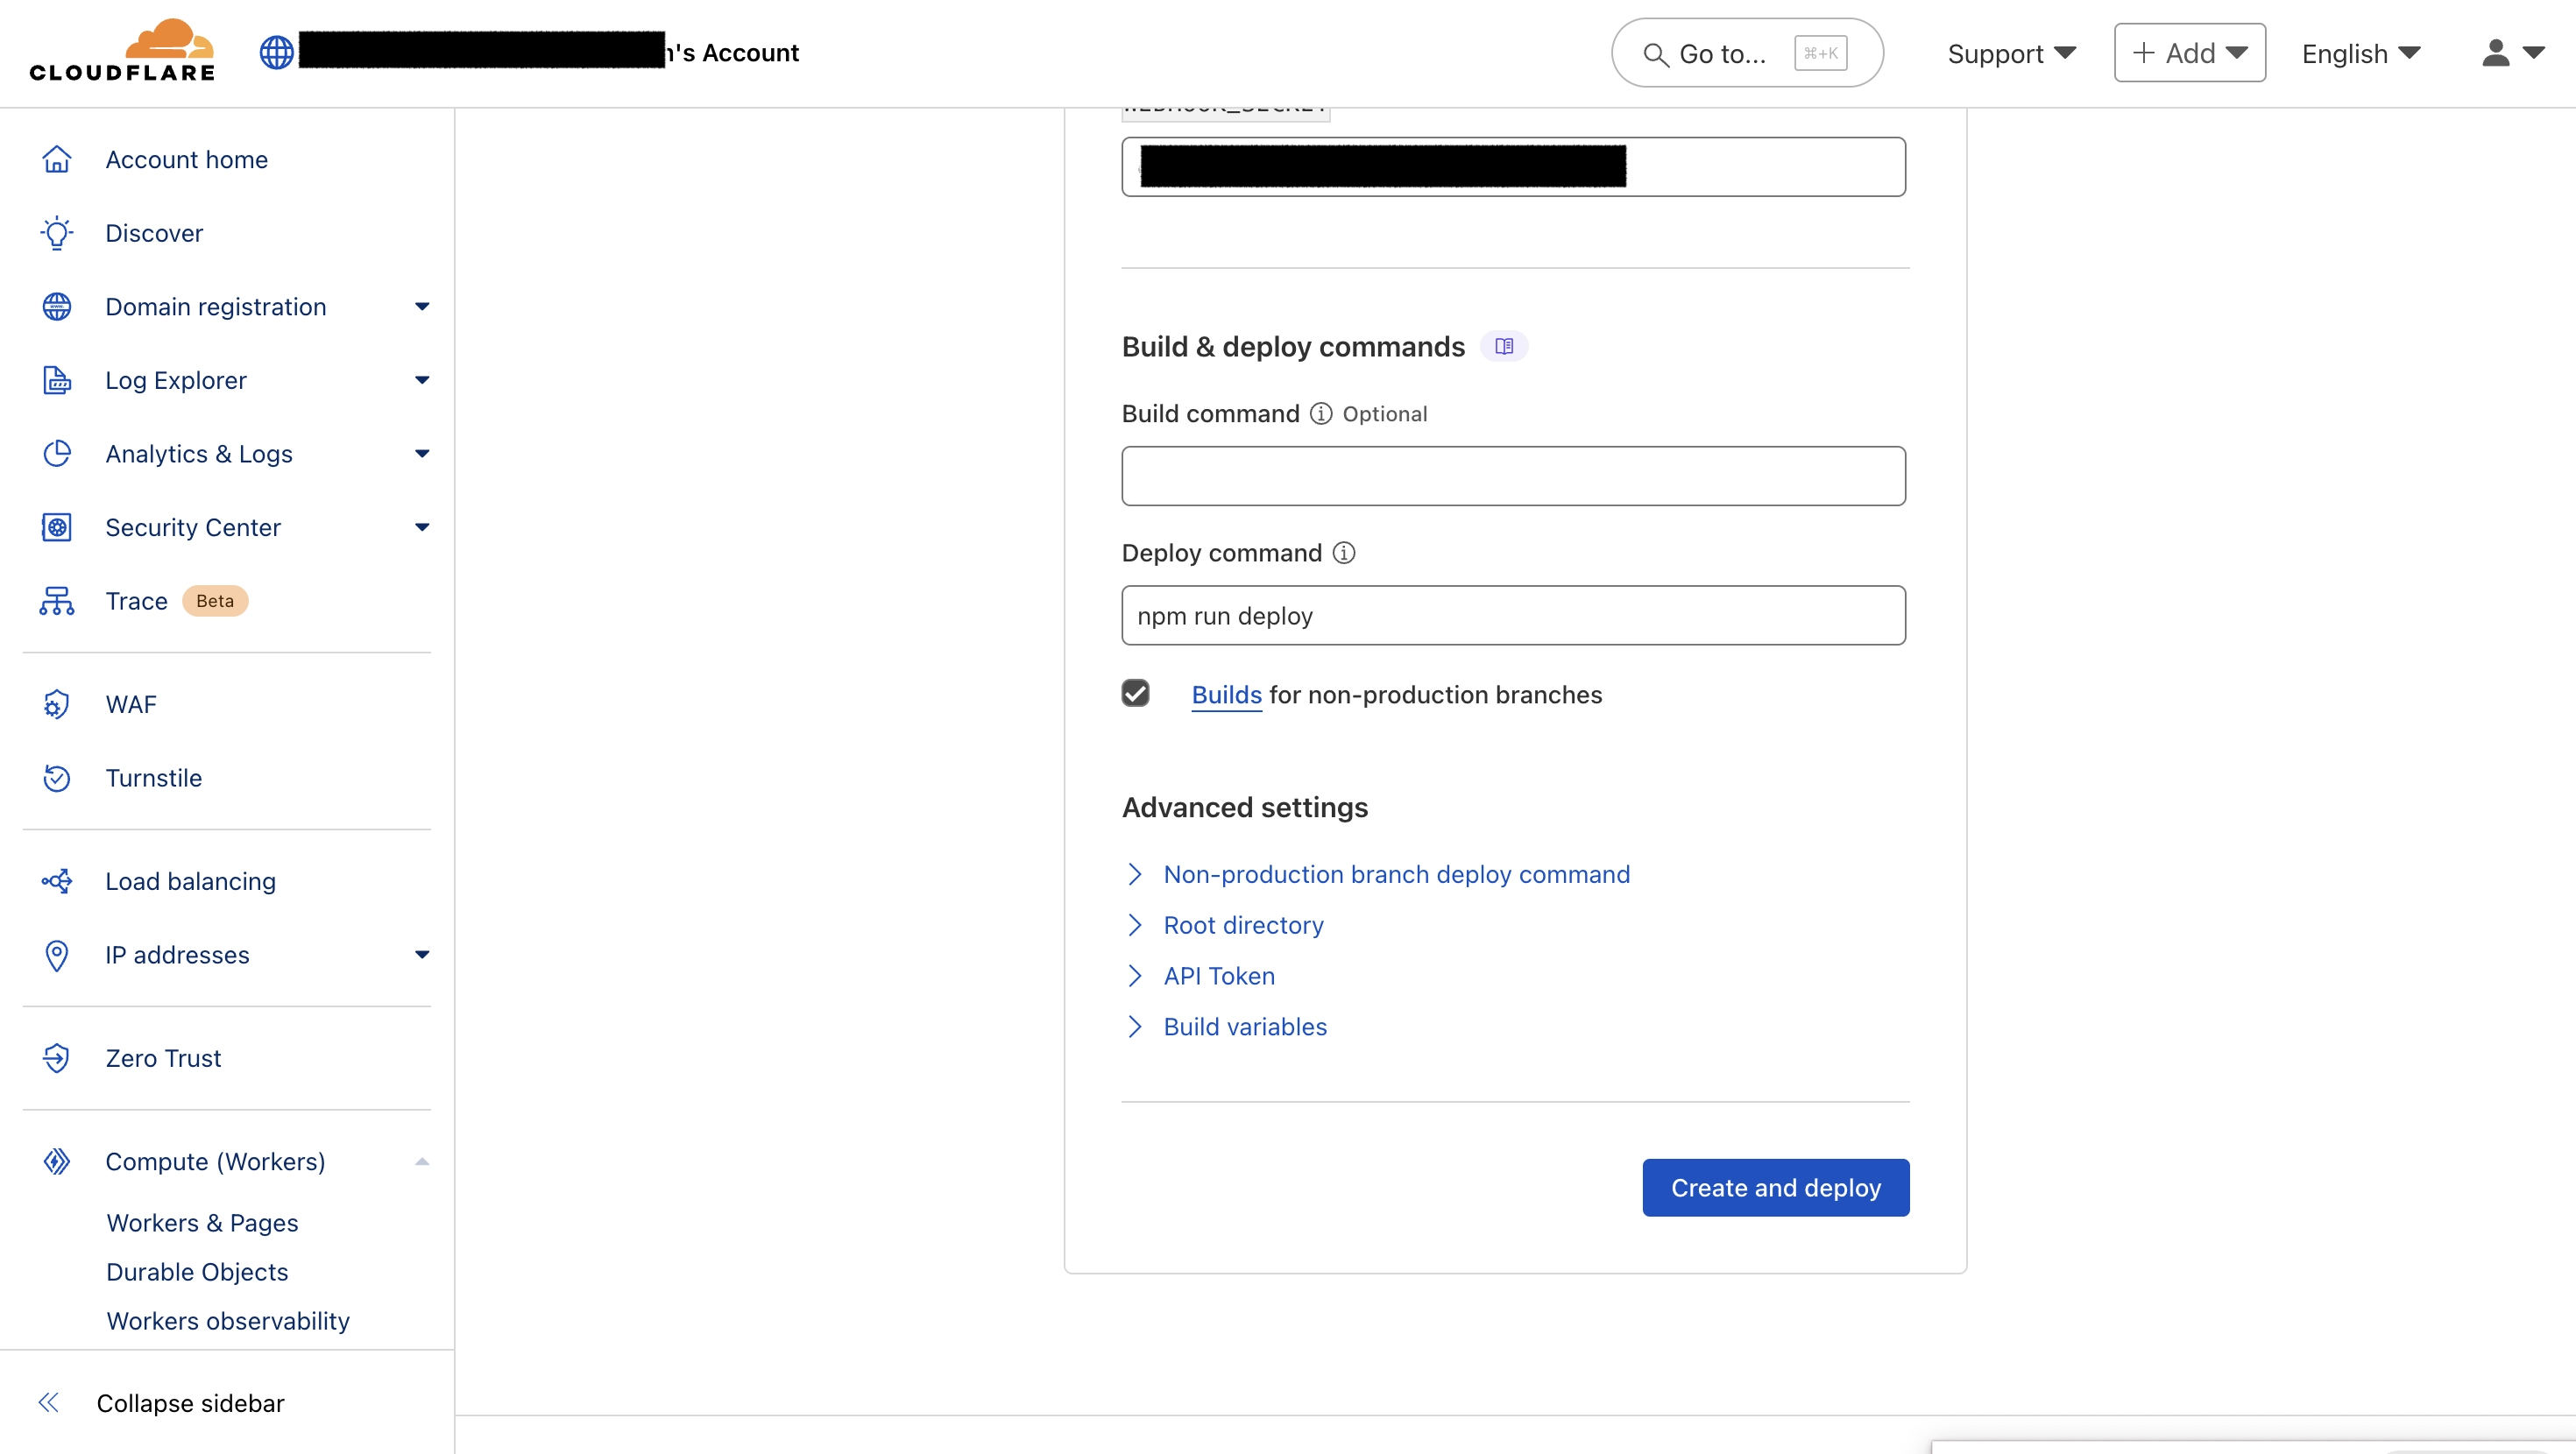
Your project will be built accordingly. And you will see a UI like this.
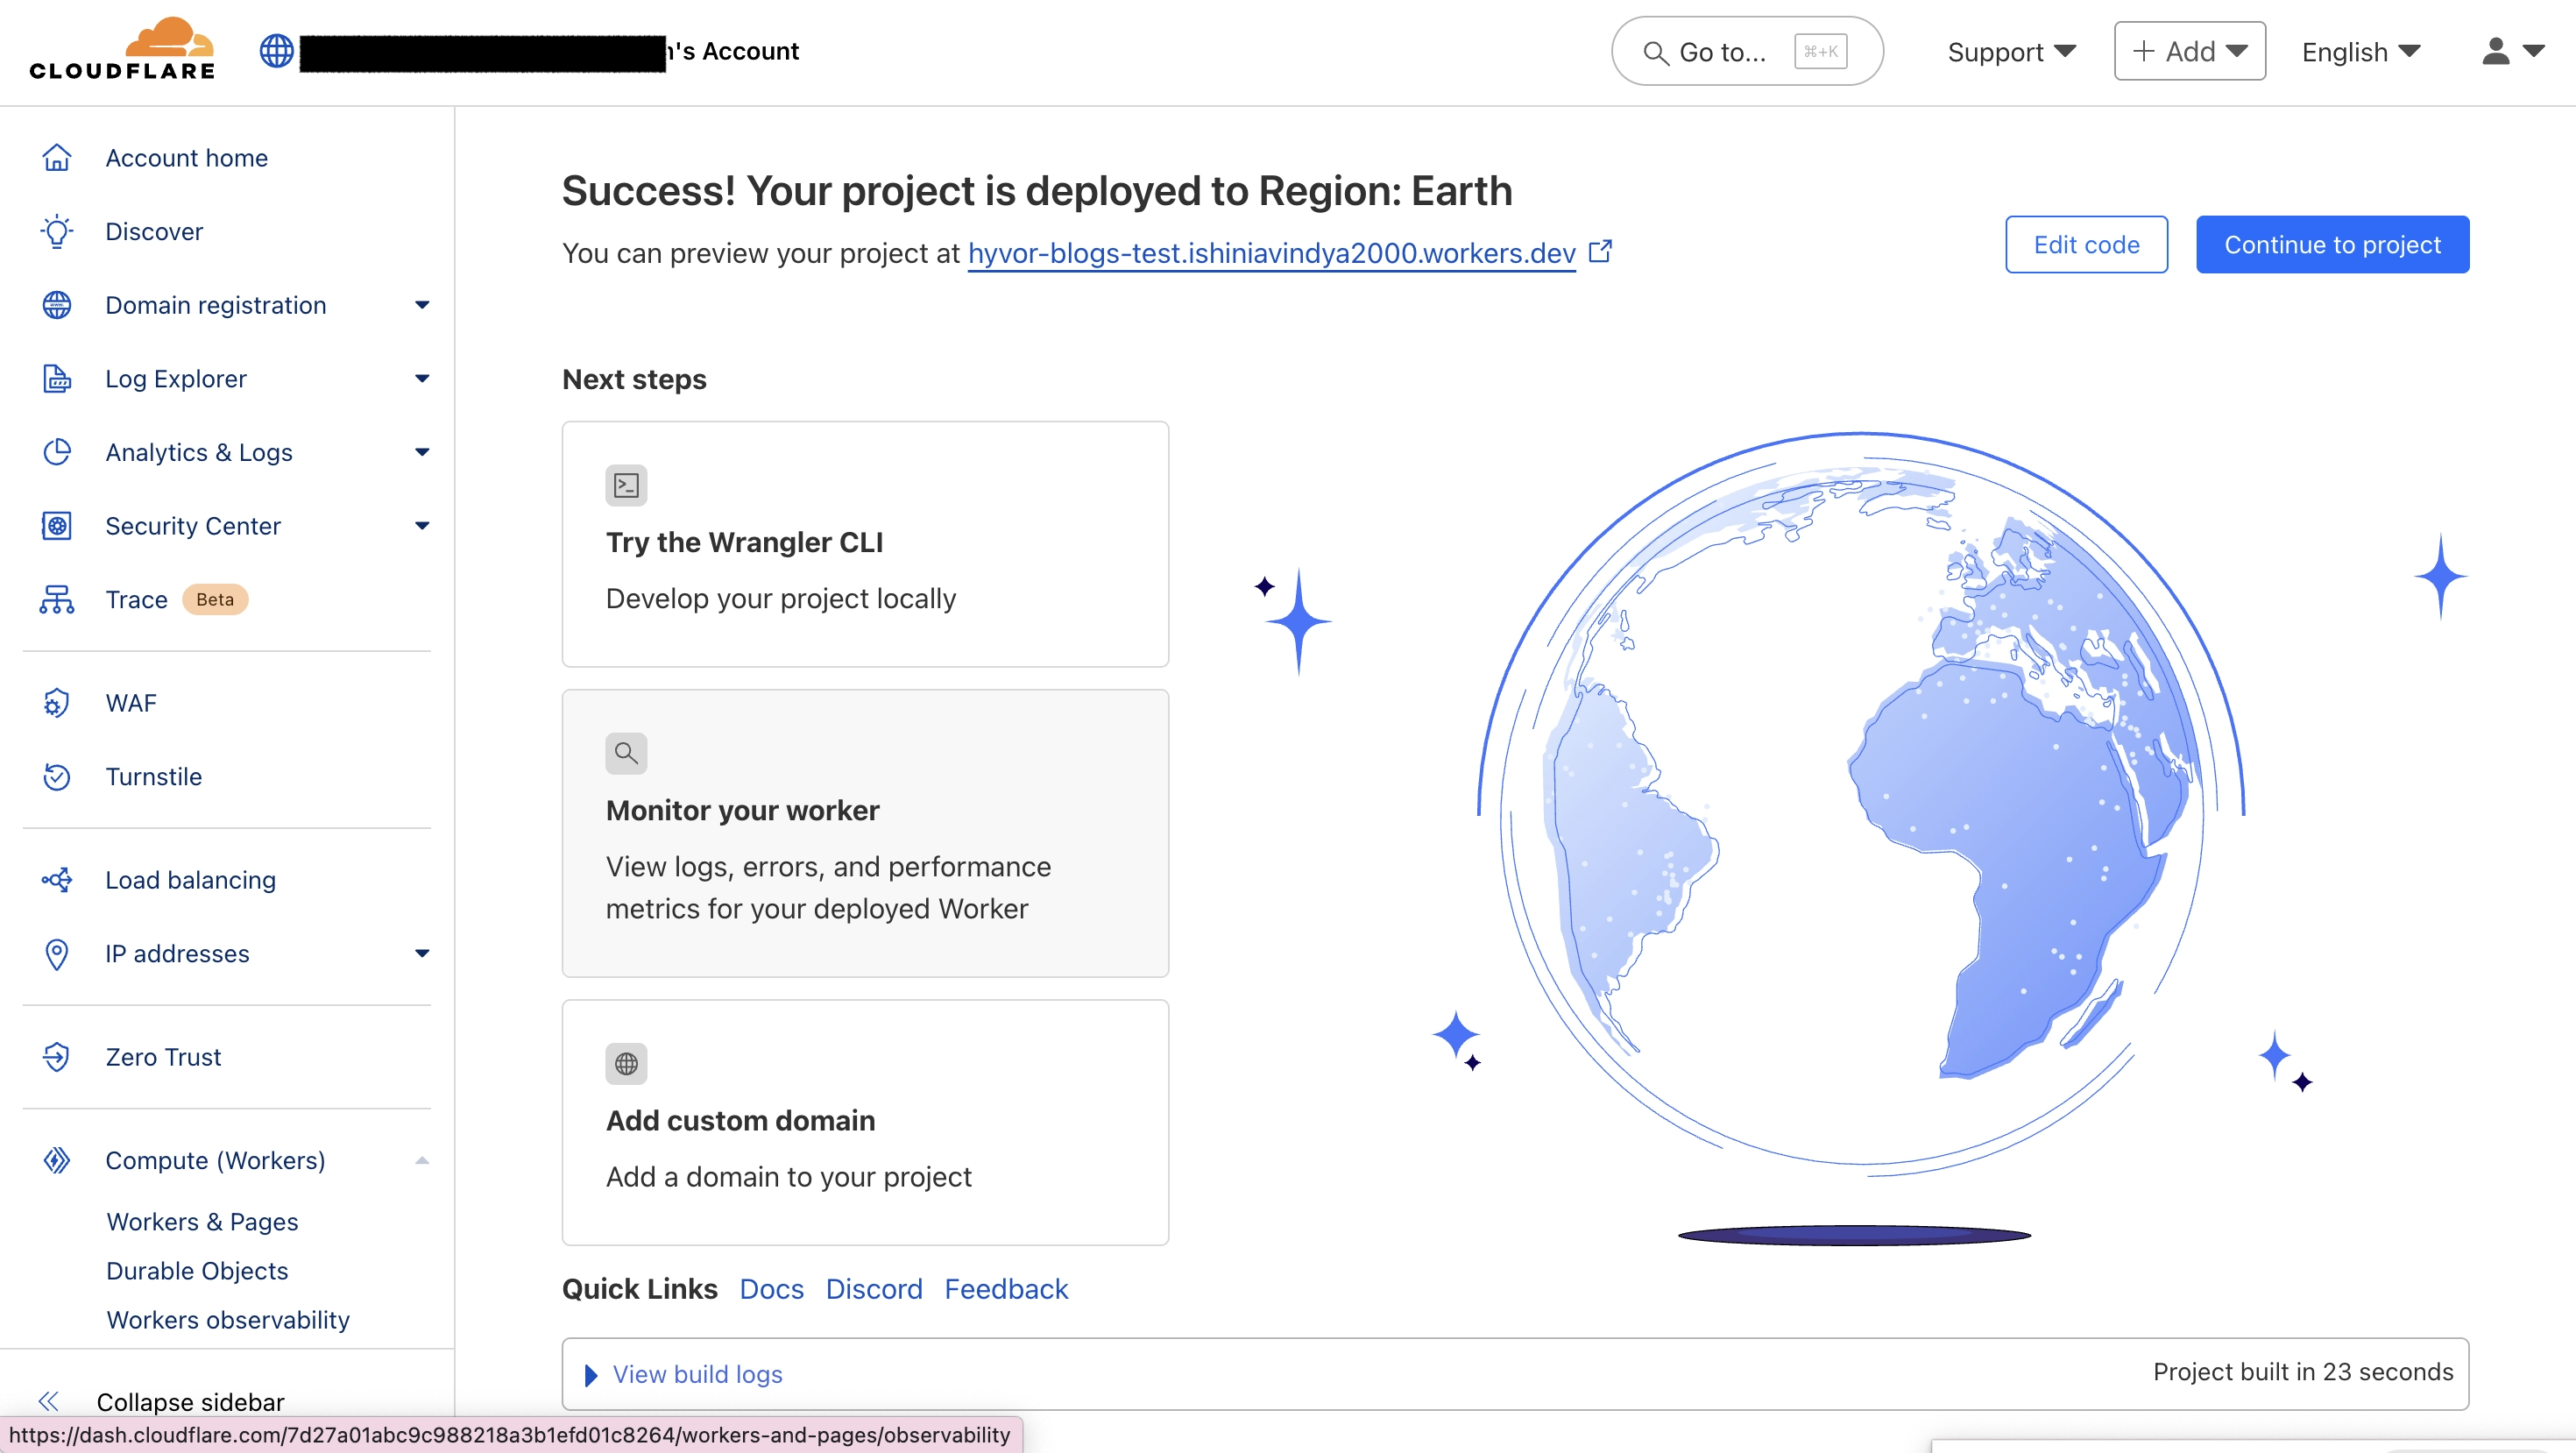
Click on Continue to Project.
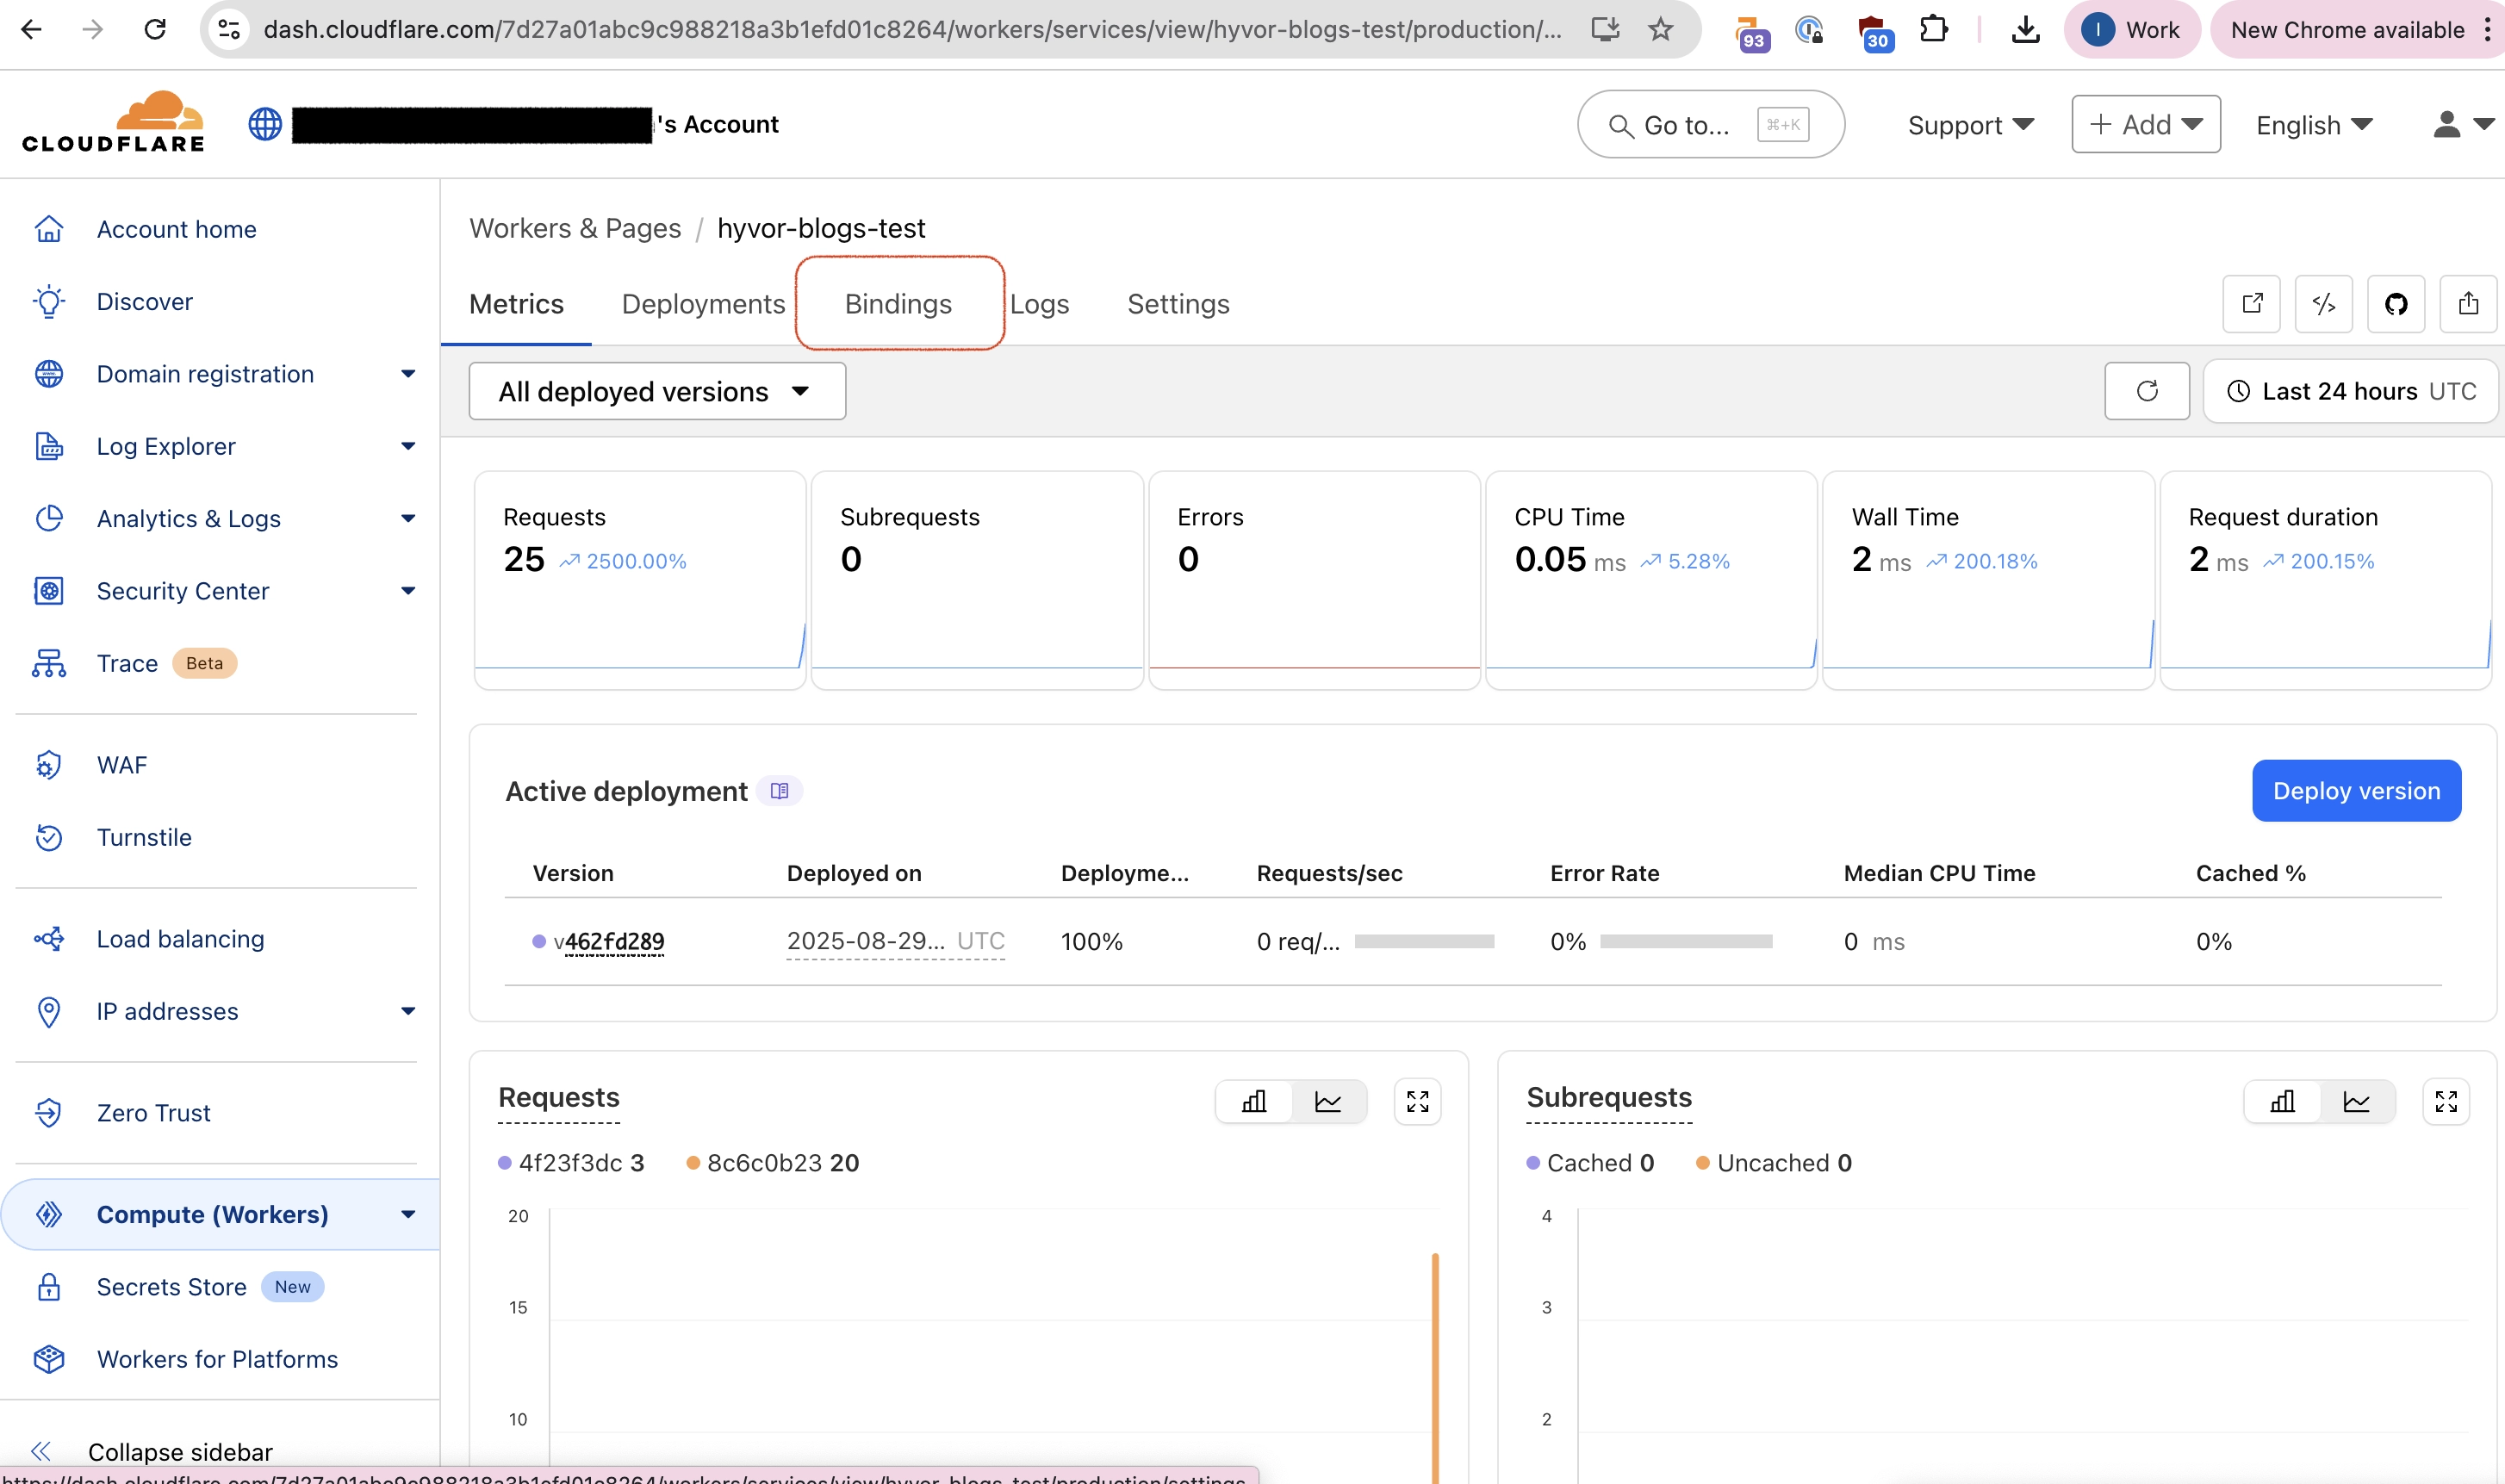
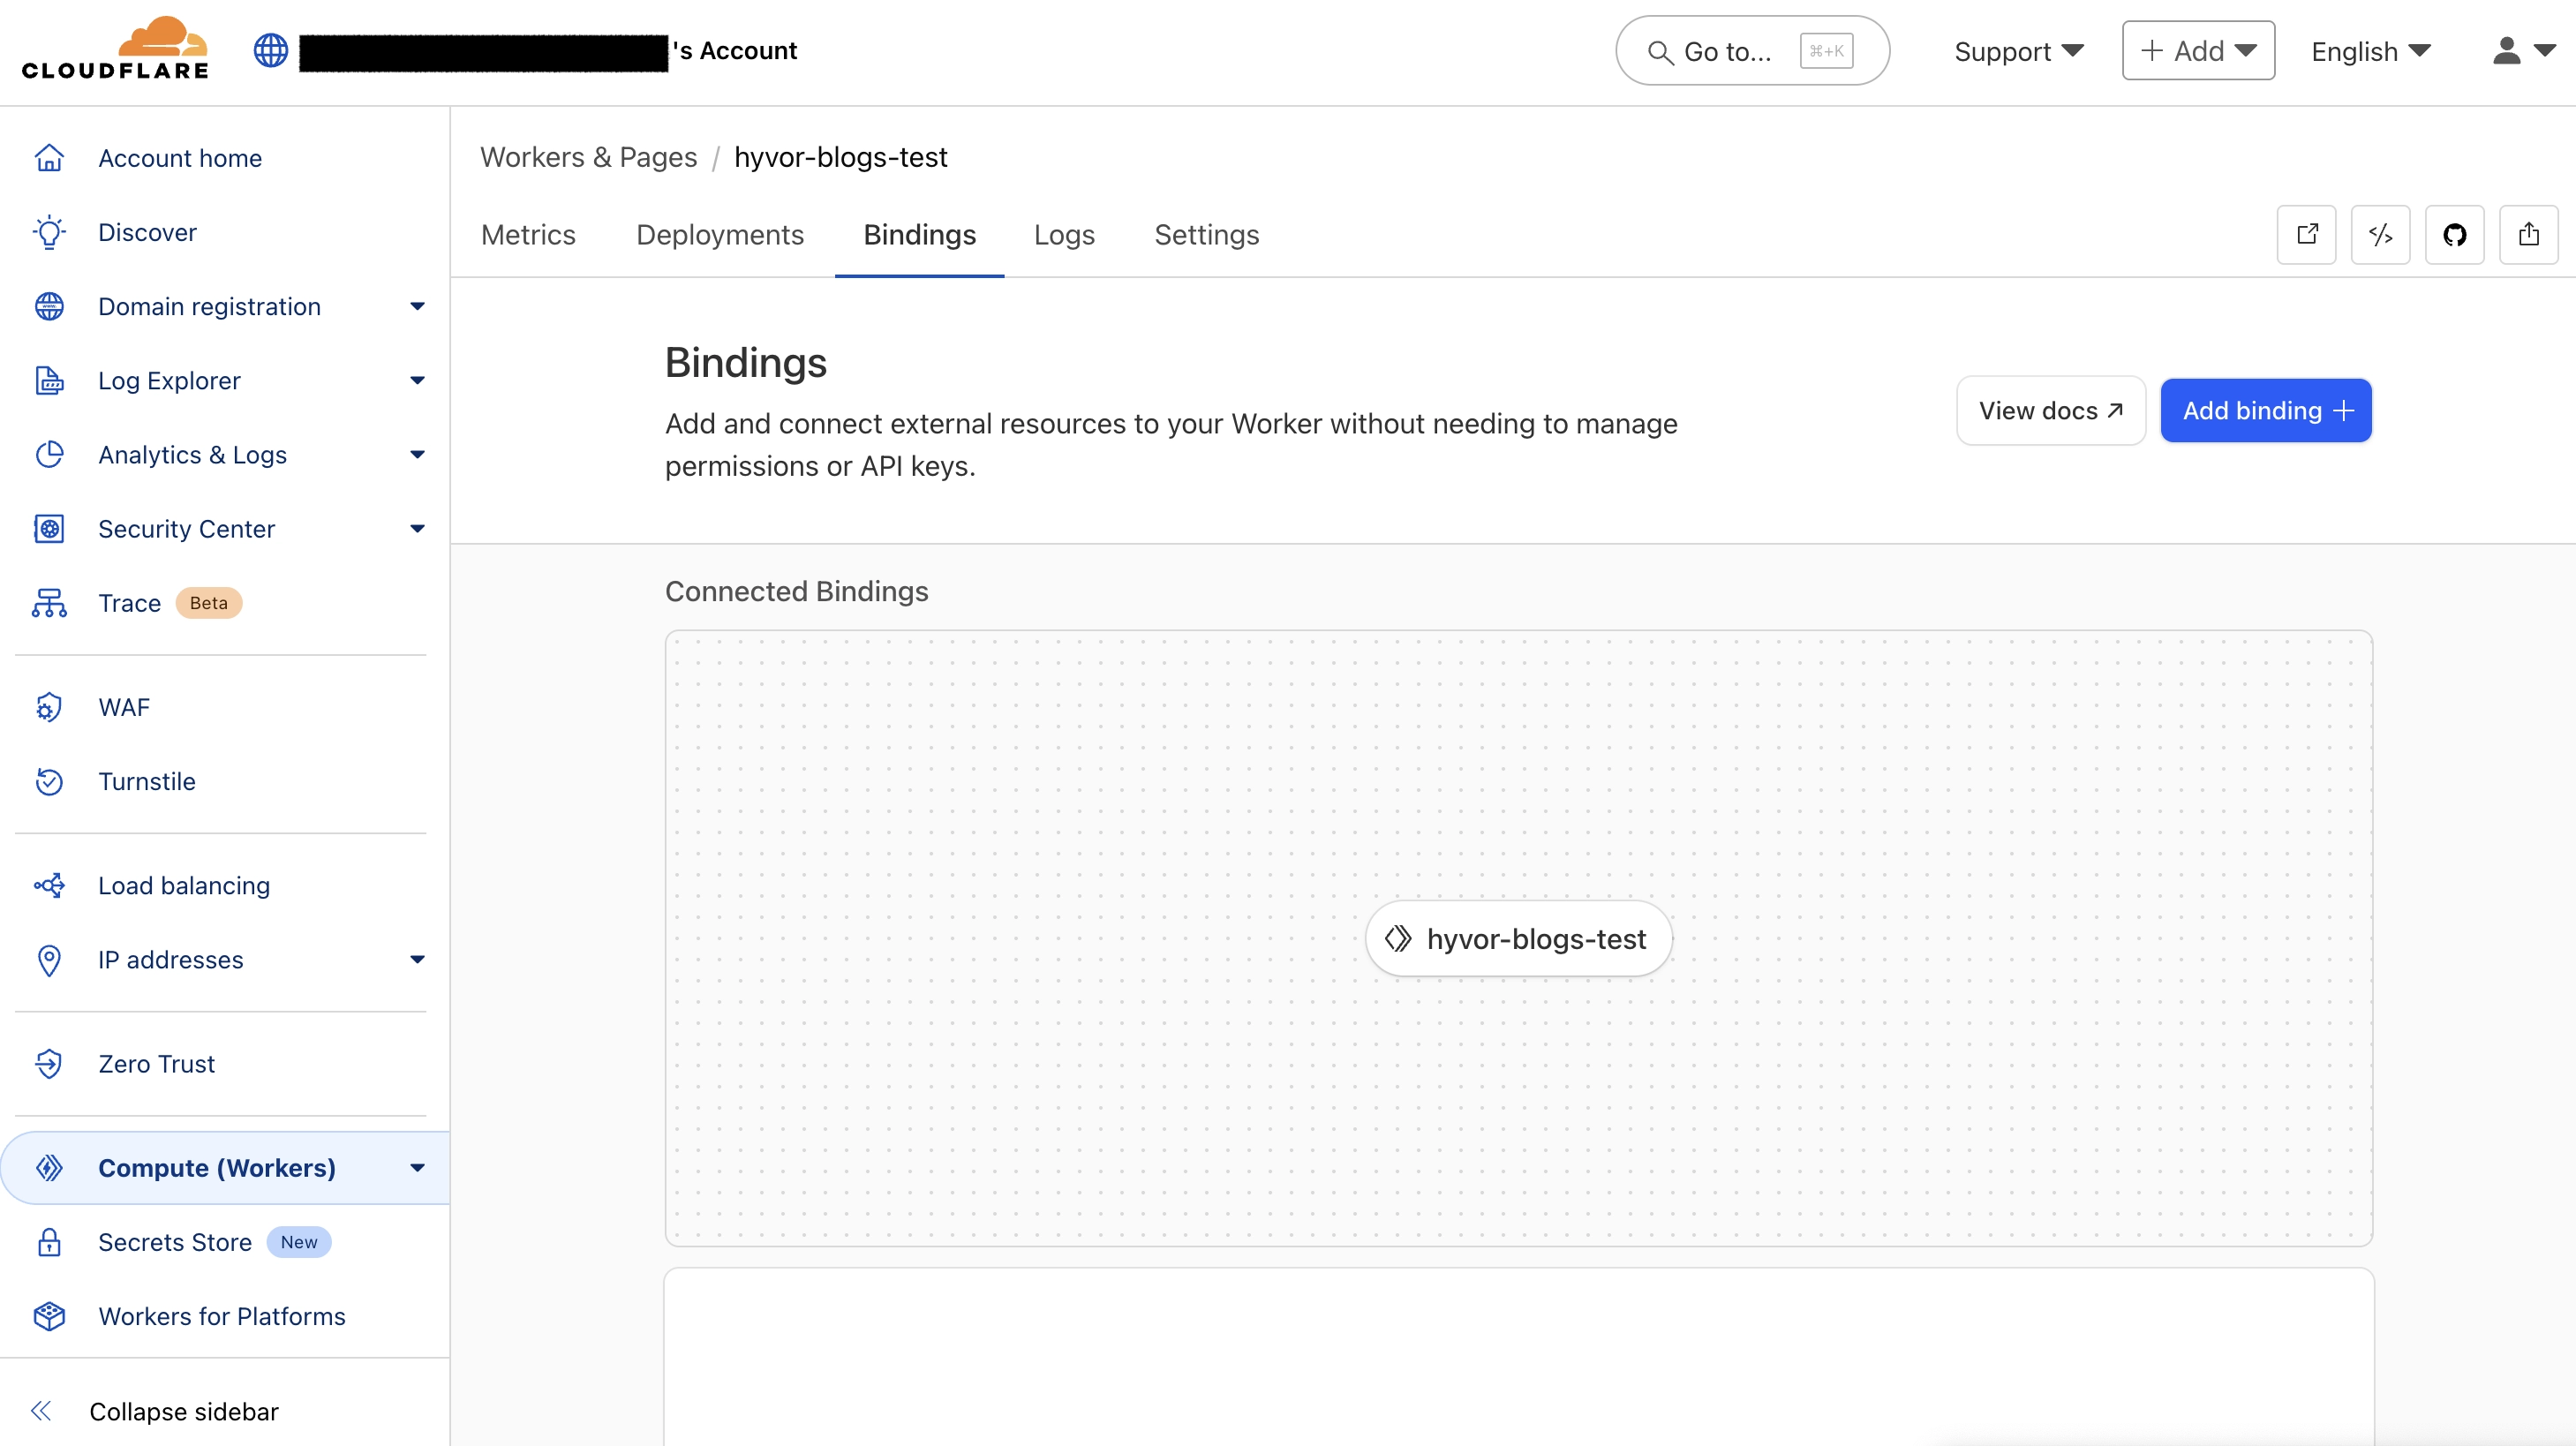
Then, go to Bindings.
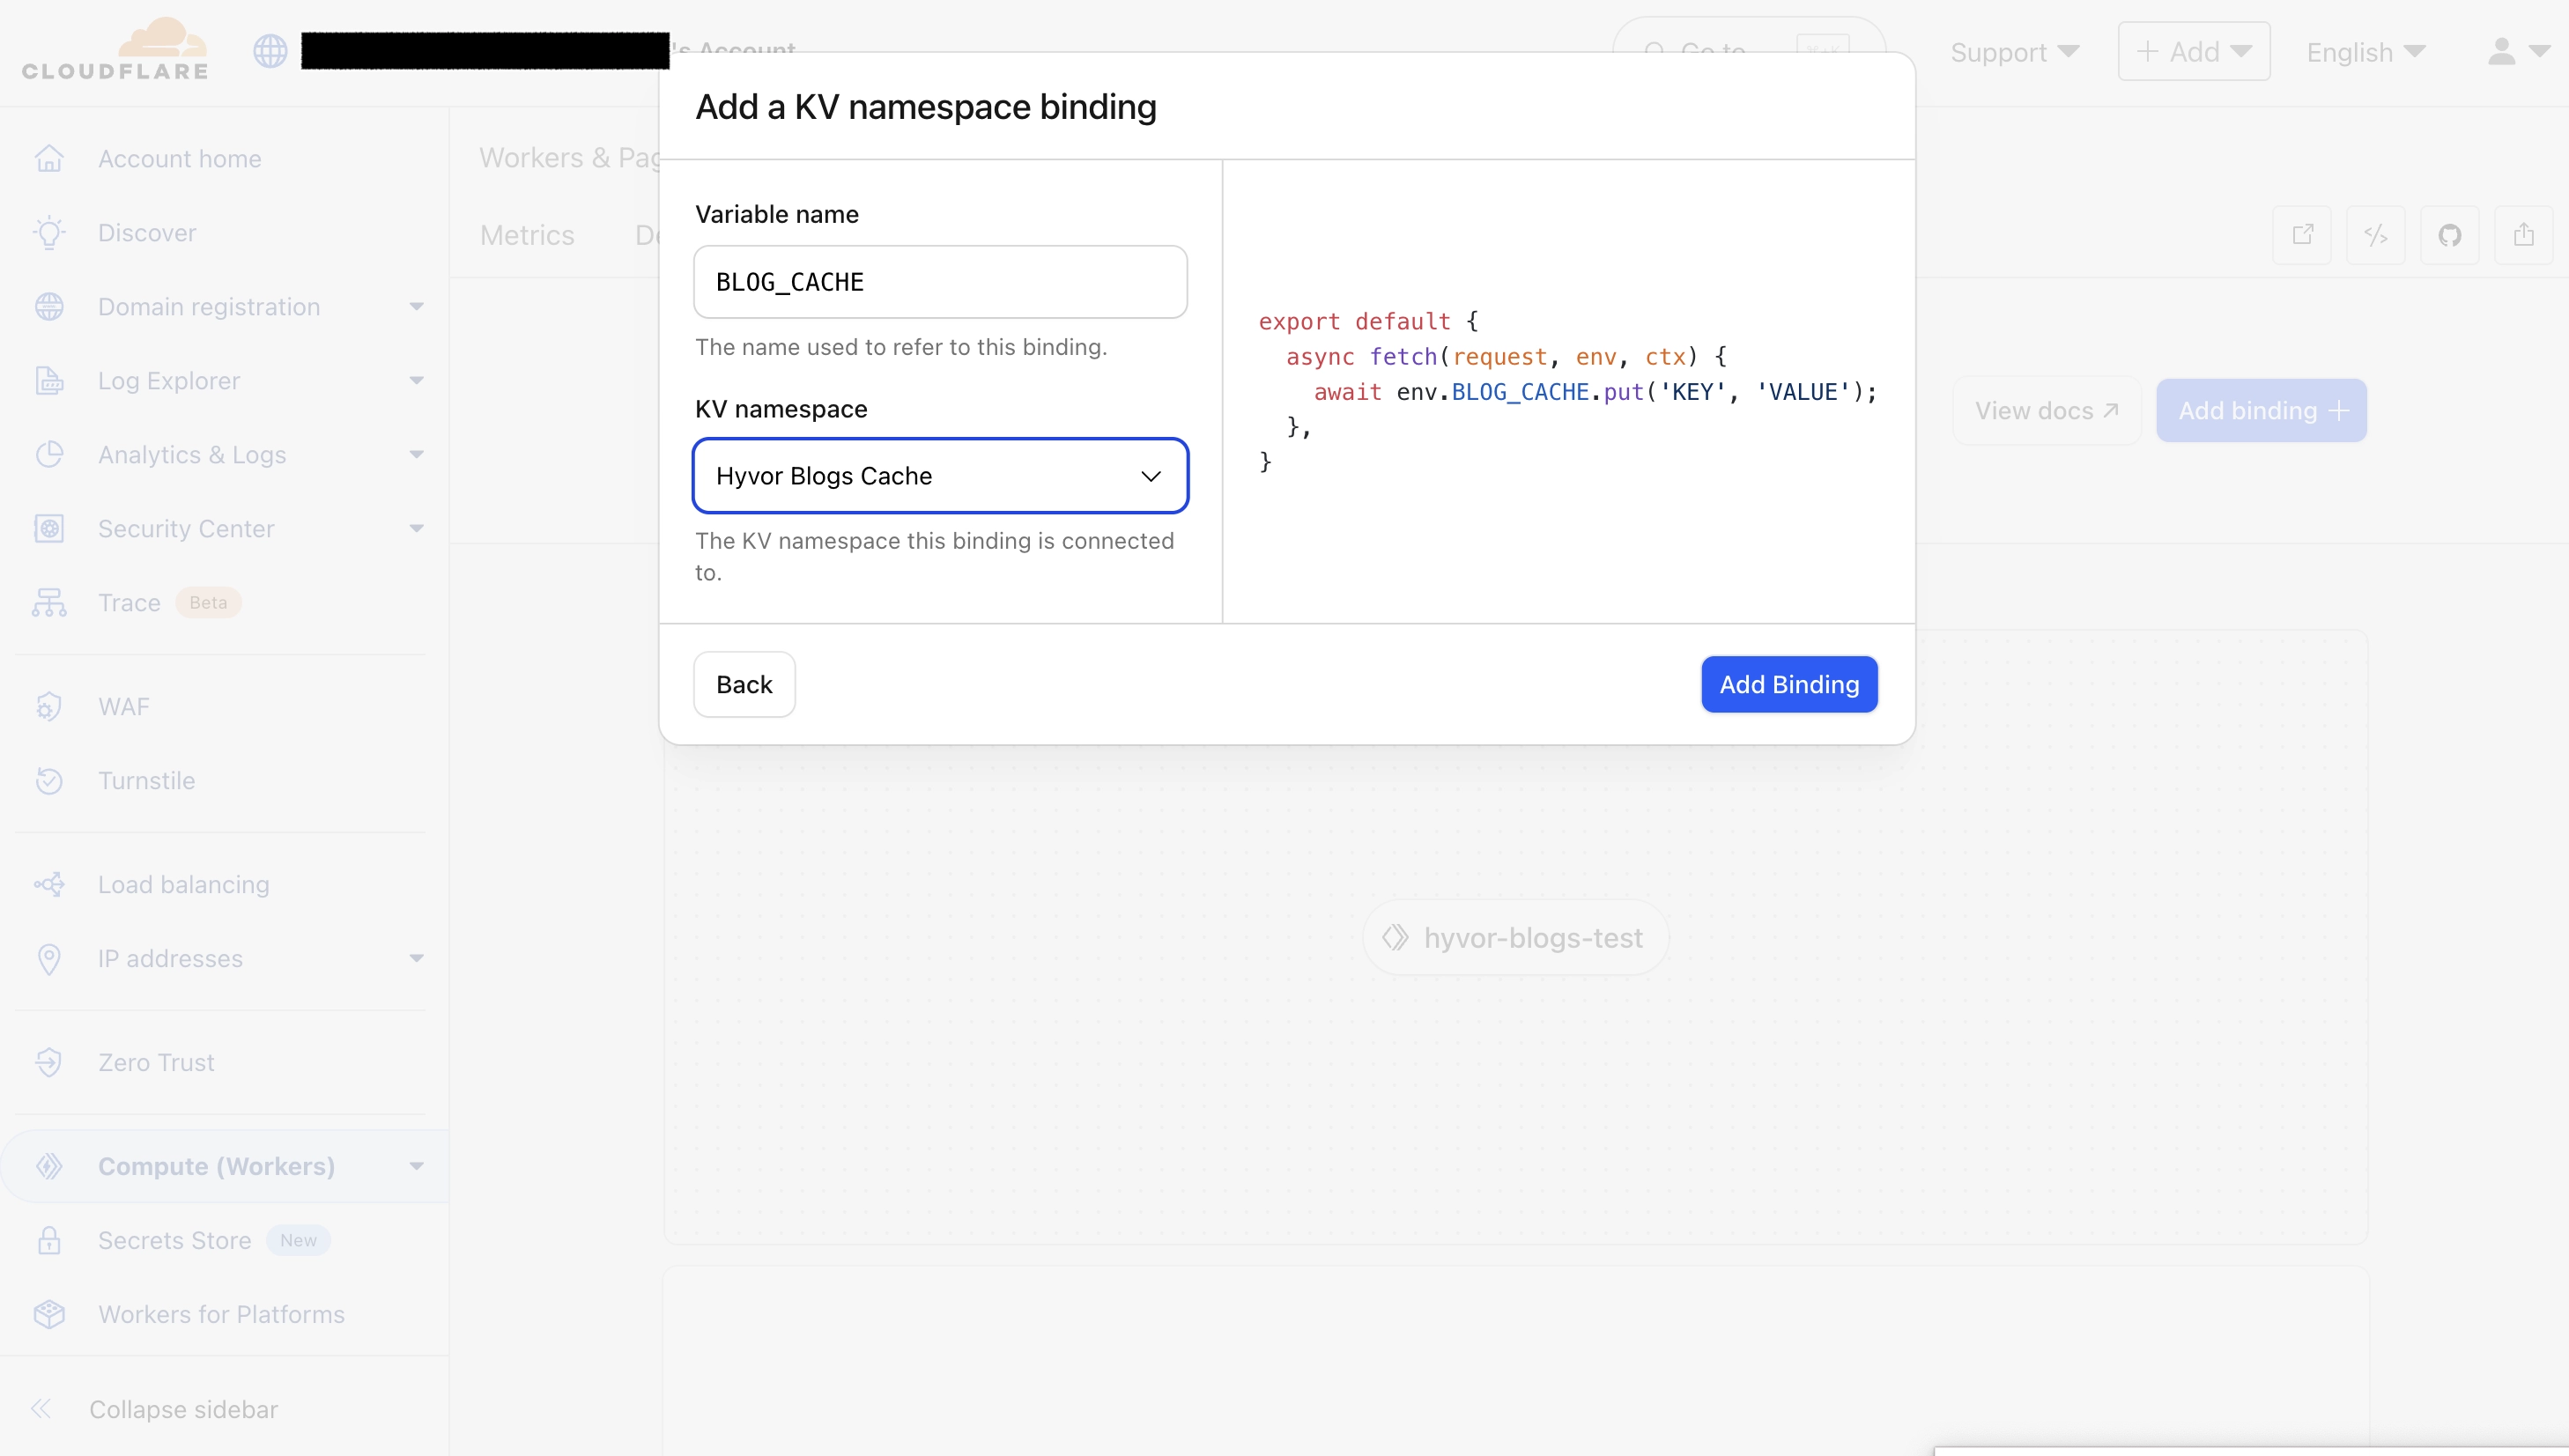
Click on “Add binding”.
Then, choose “KV Namespace”.
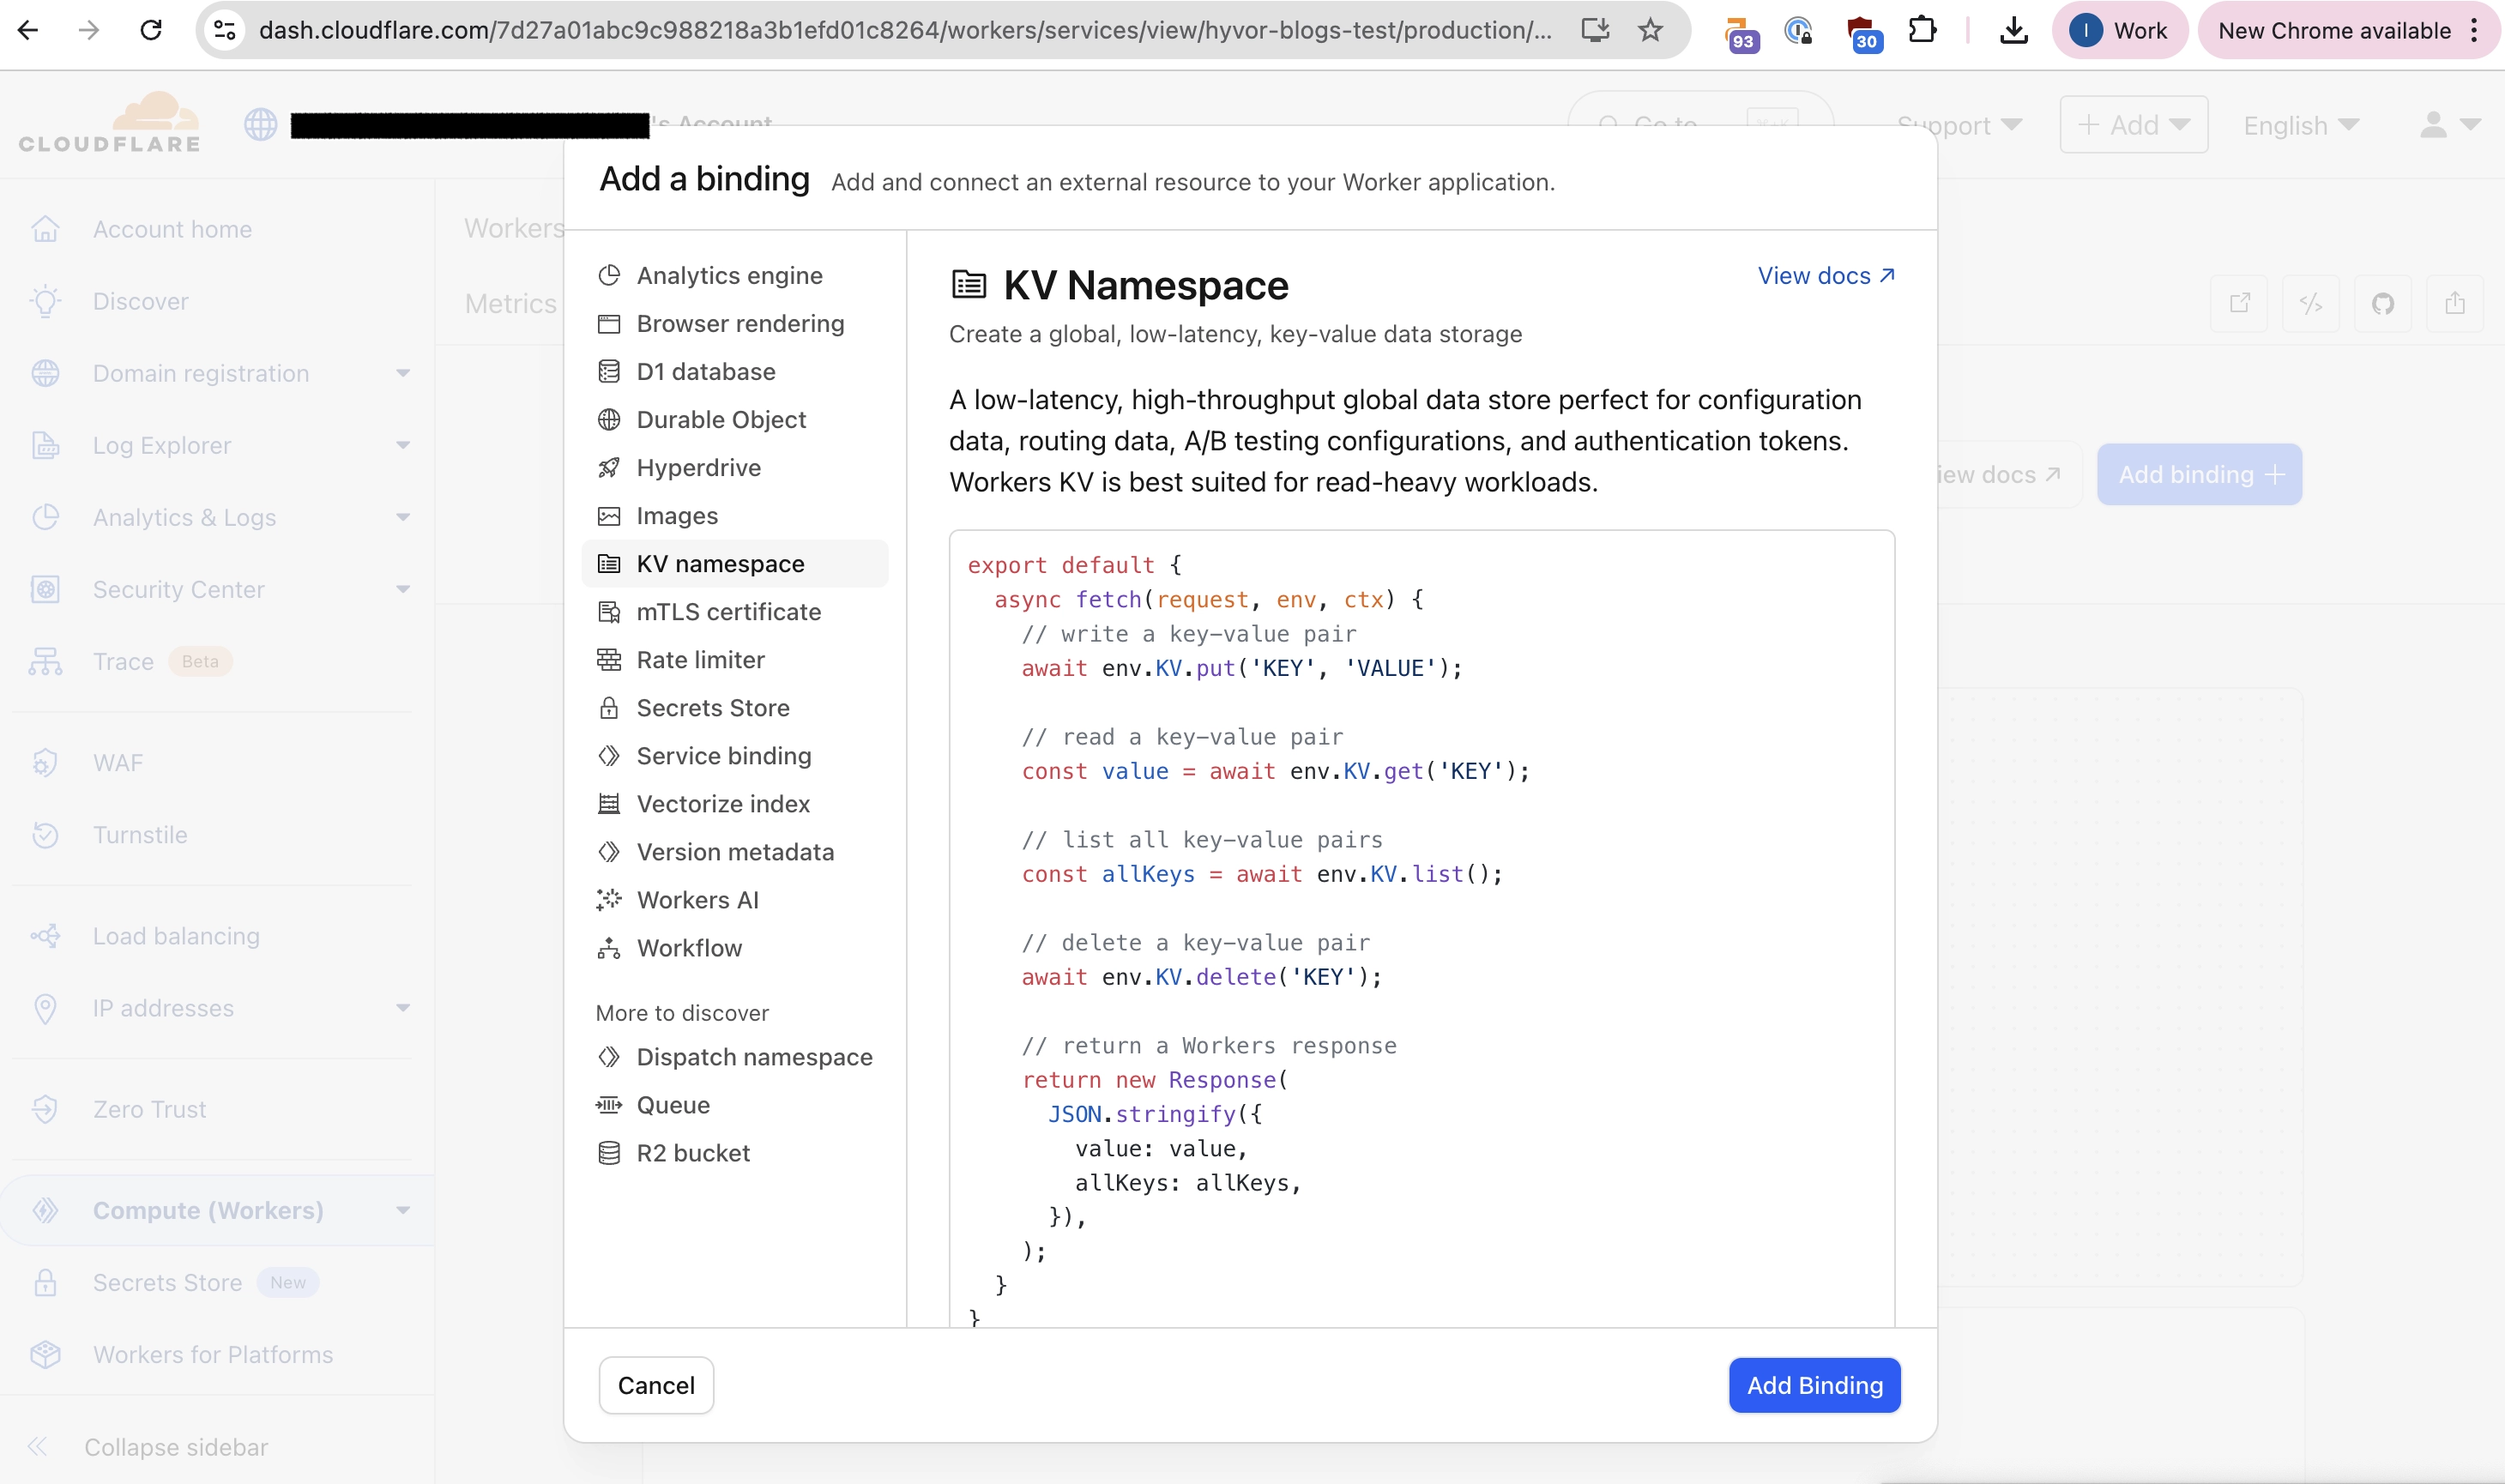
Use the variable name as exactly given in the following table and select the KV namespace that you created earlier.
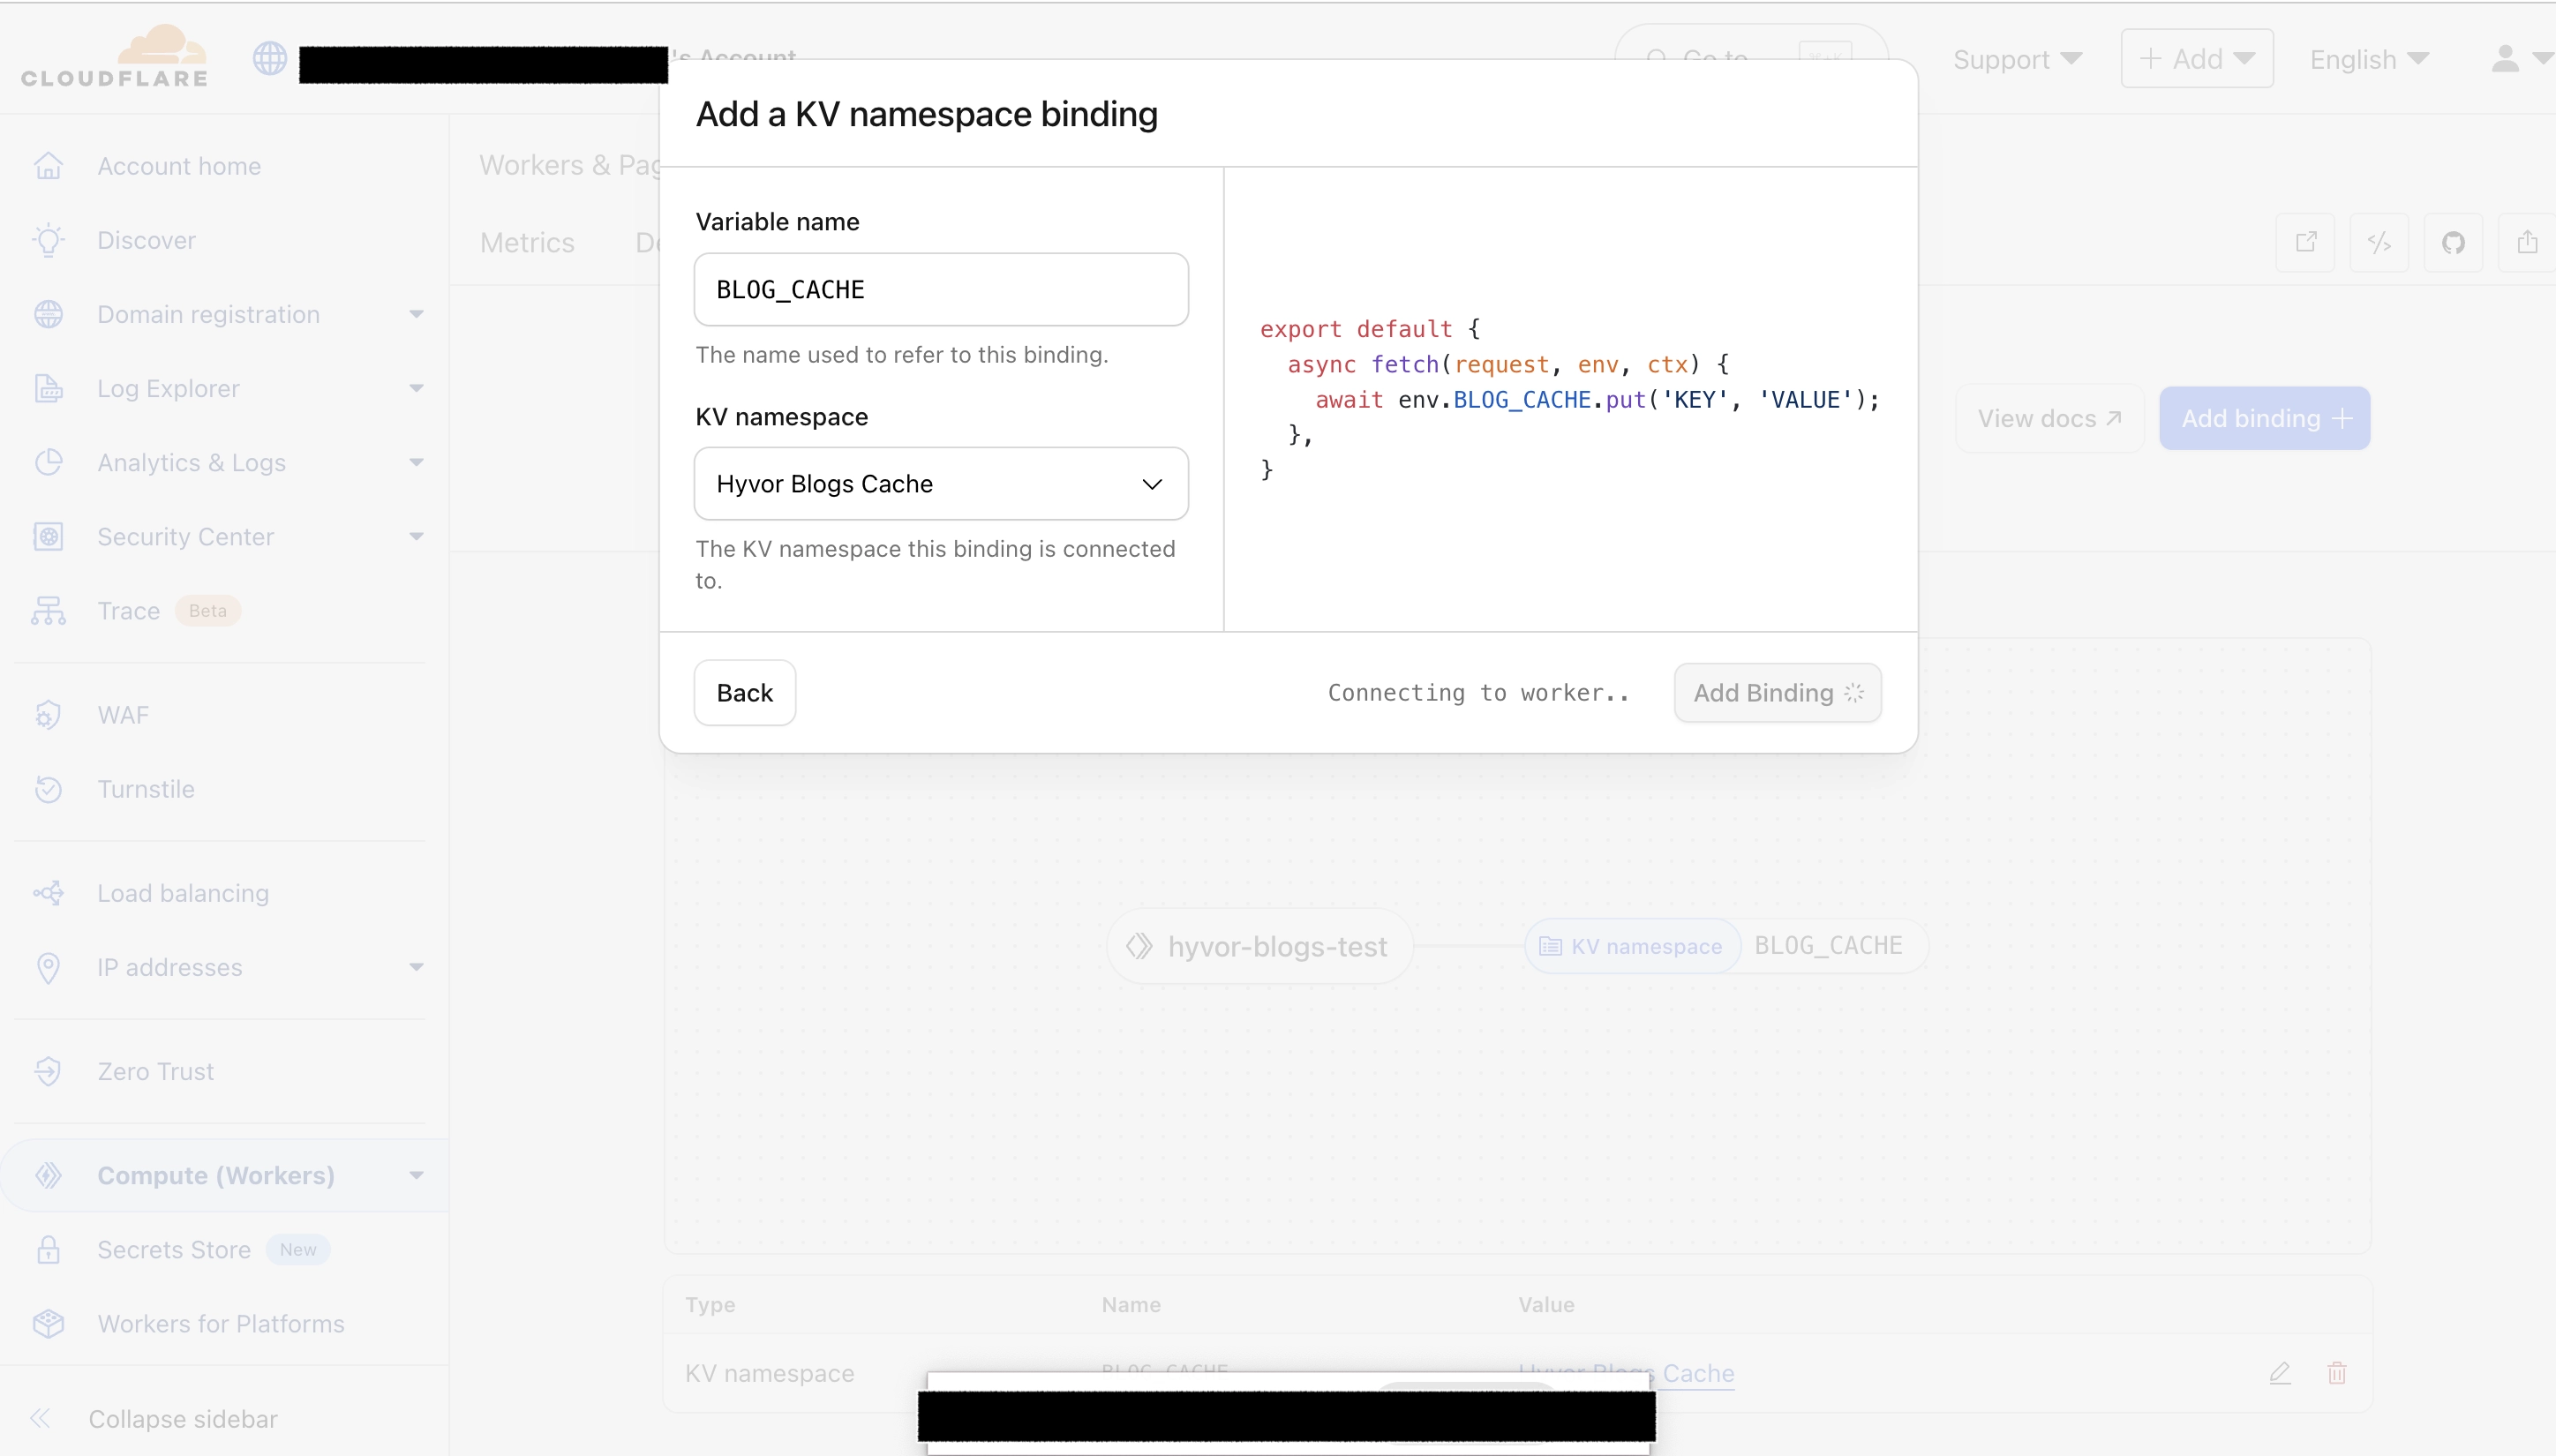
Option | Value |
|---|---|
Variable Name |
(this should be exact) |
KV Namespace | Select the KV namespace you created earlier. |
Click “Add binding”.
3. Cloudflare Workers Routes
The final step is to route traffic from your domain to the Worker we just created. To do that, we’ll use Cloudflare Workers Routes.
3.1 Set up Workers’ Routes
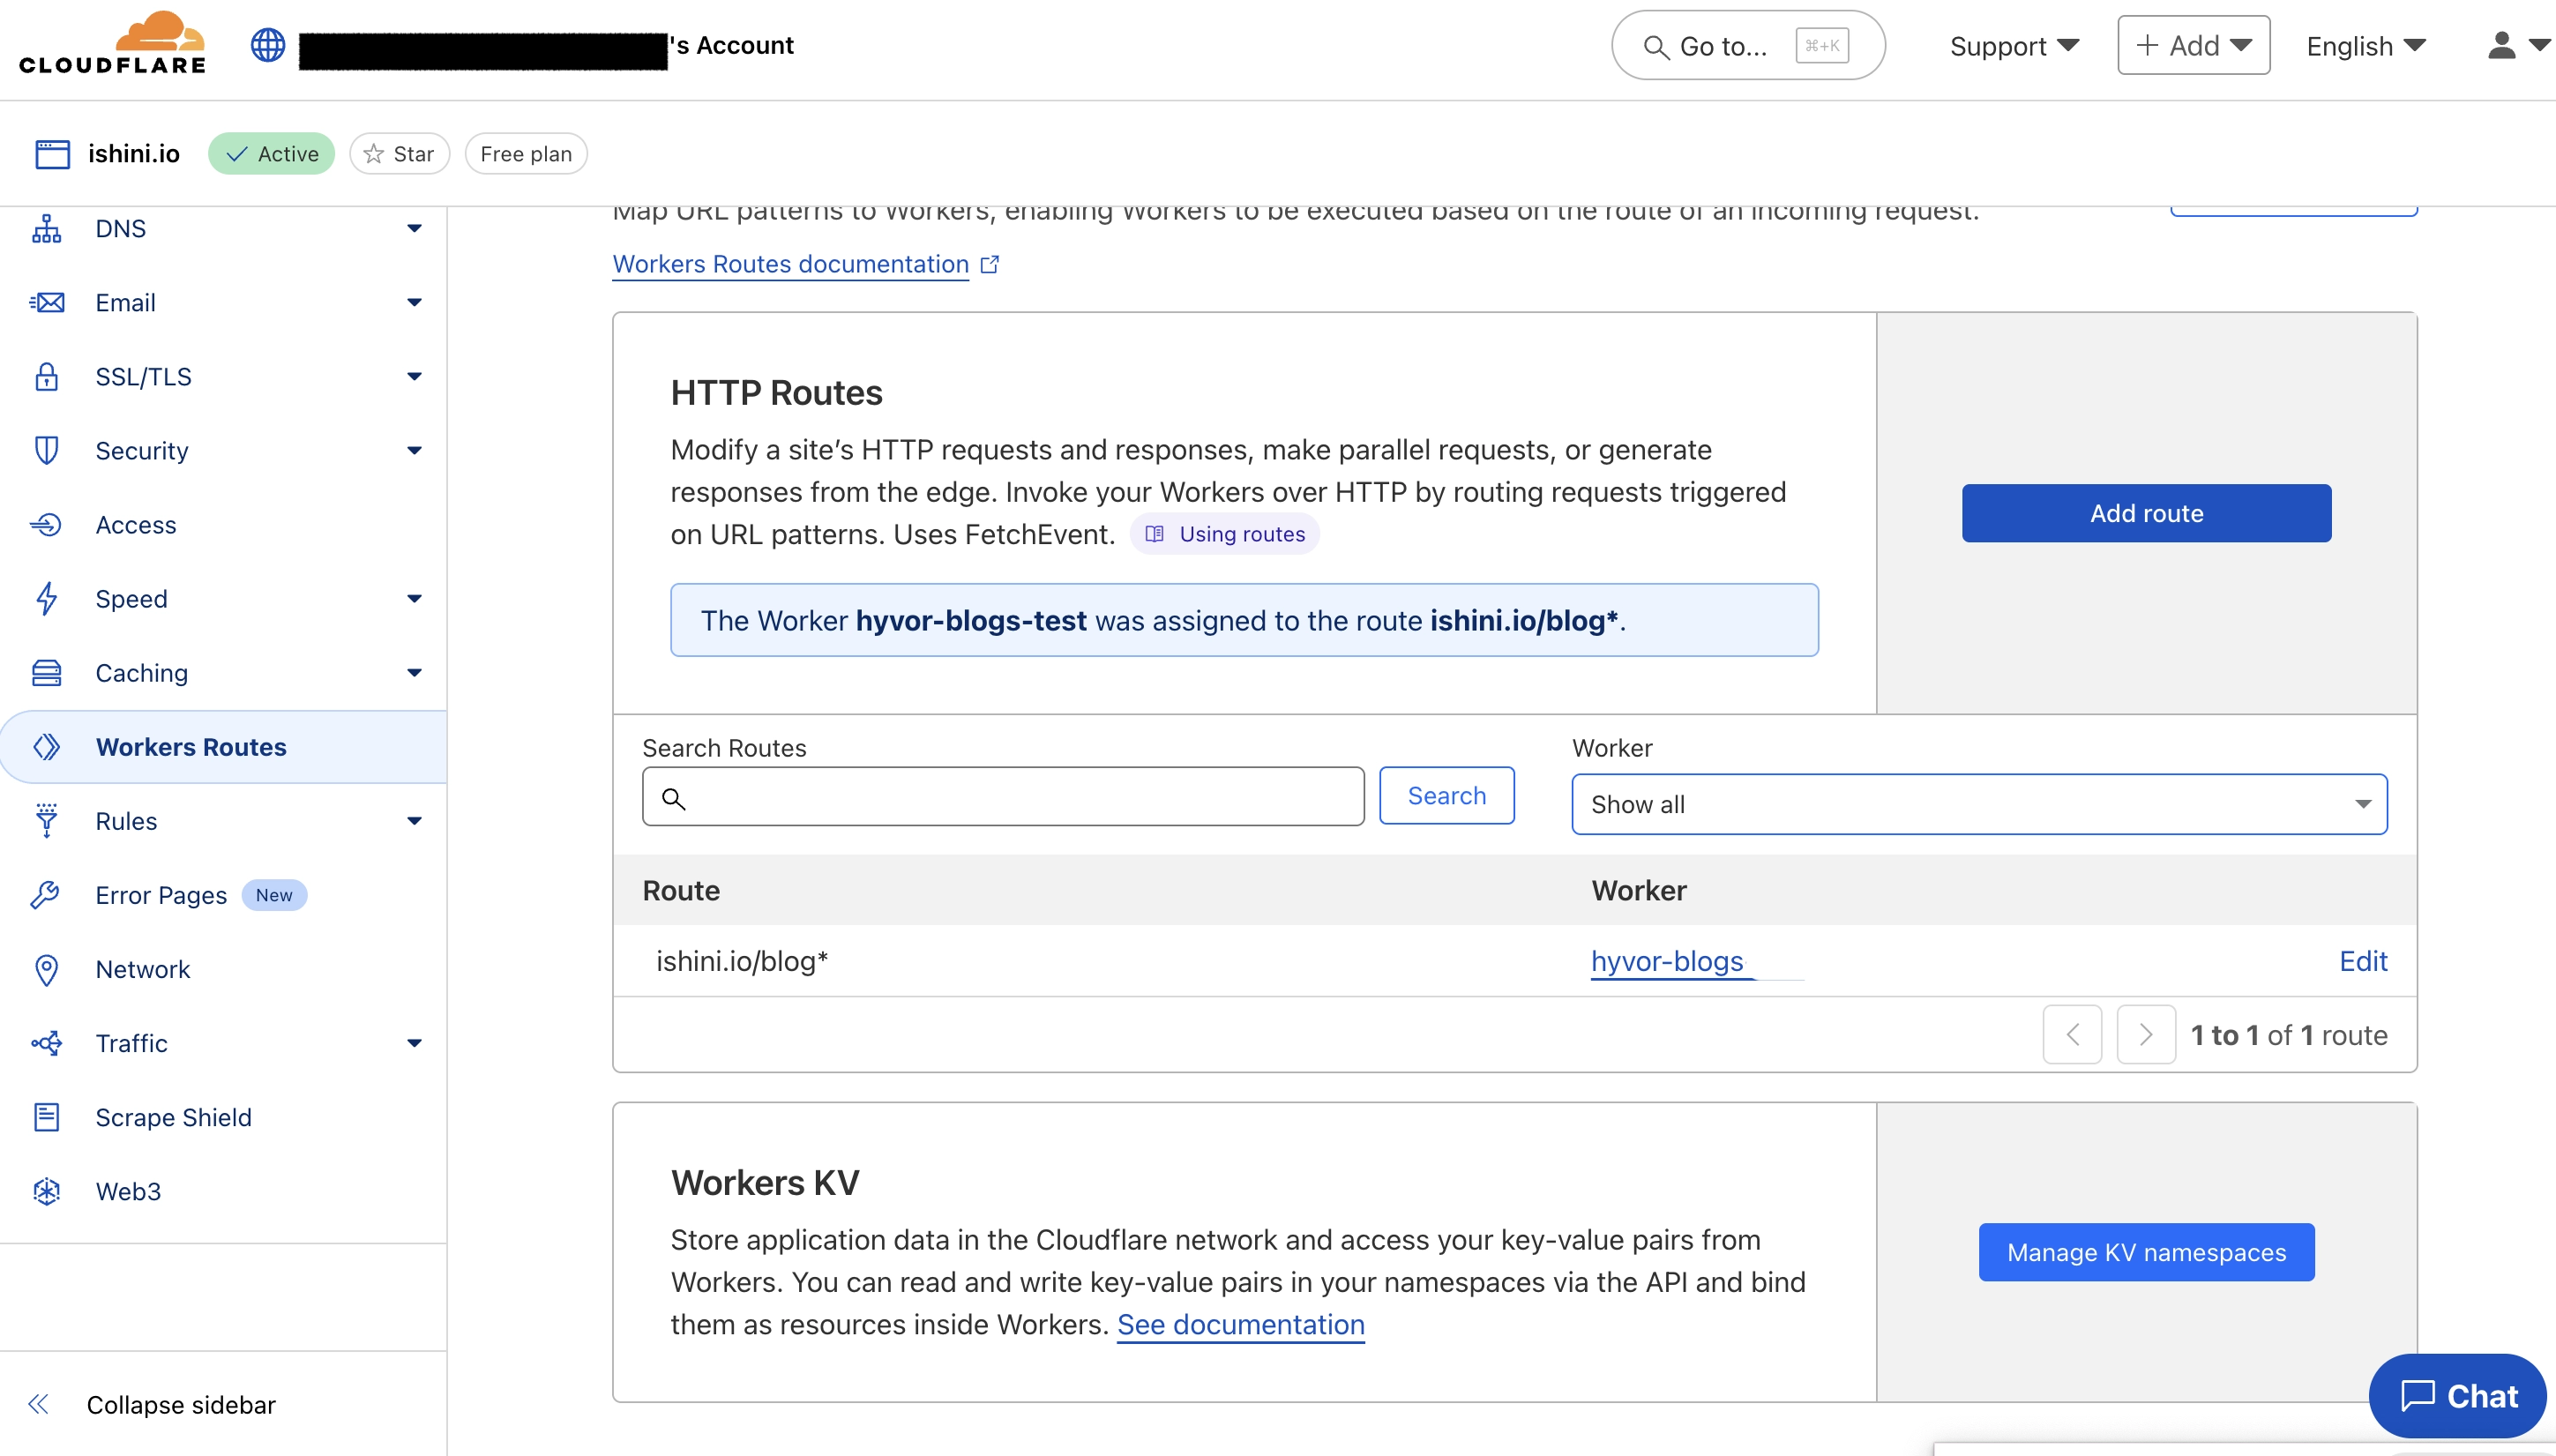
Go to Cloudflare Dashboard → Your Domain → Workers Routes. Then click “Add route”.
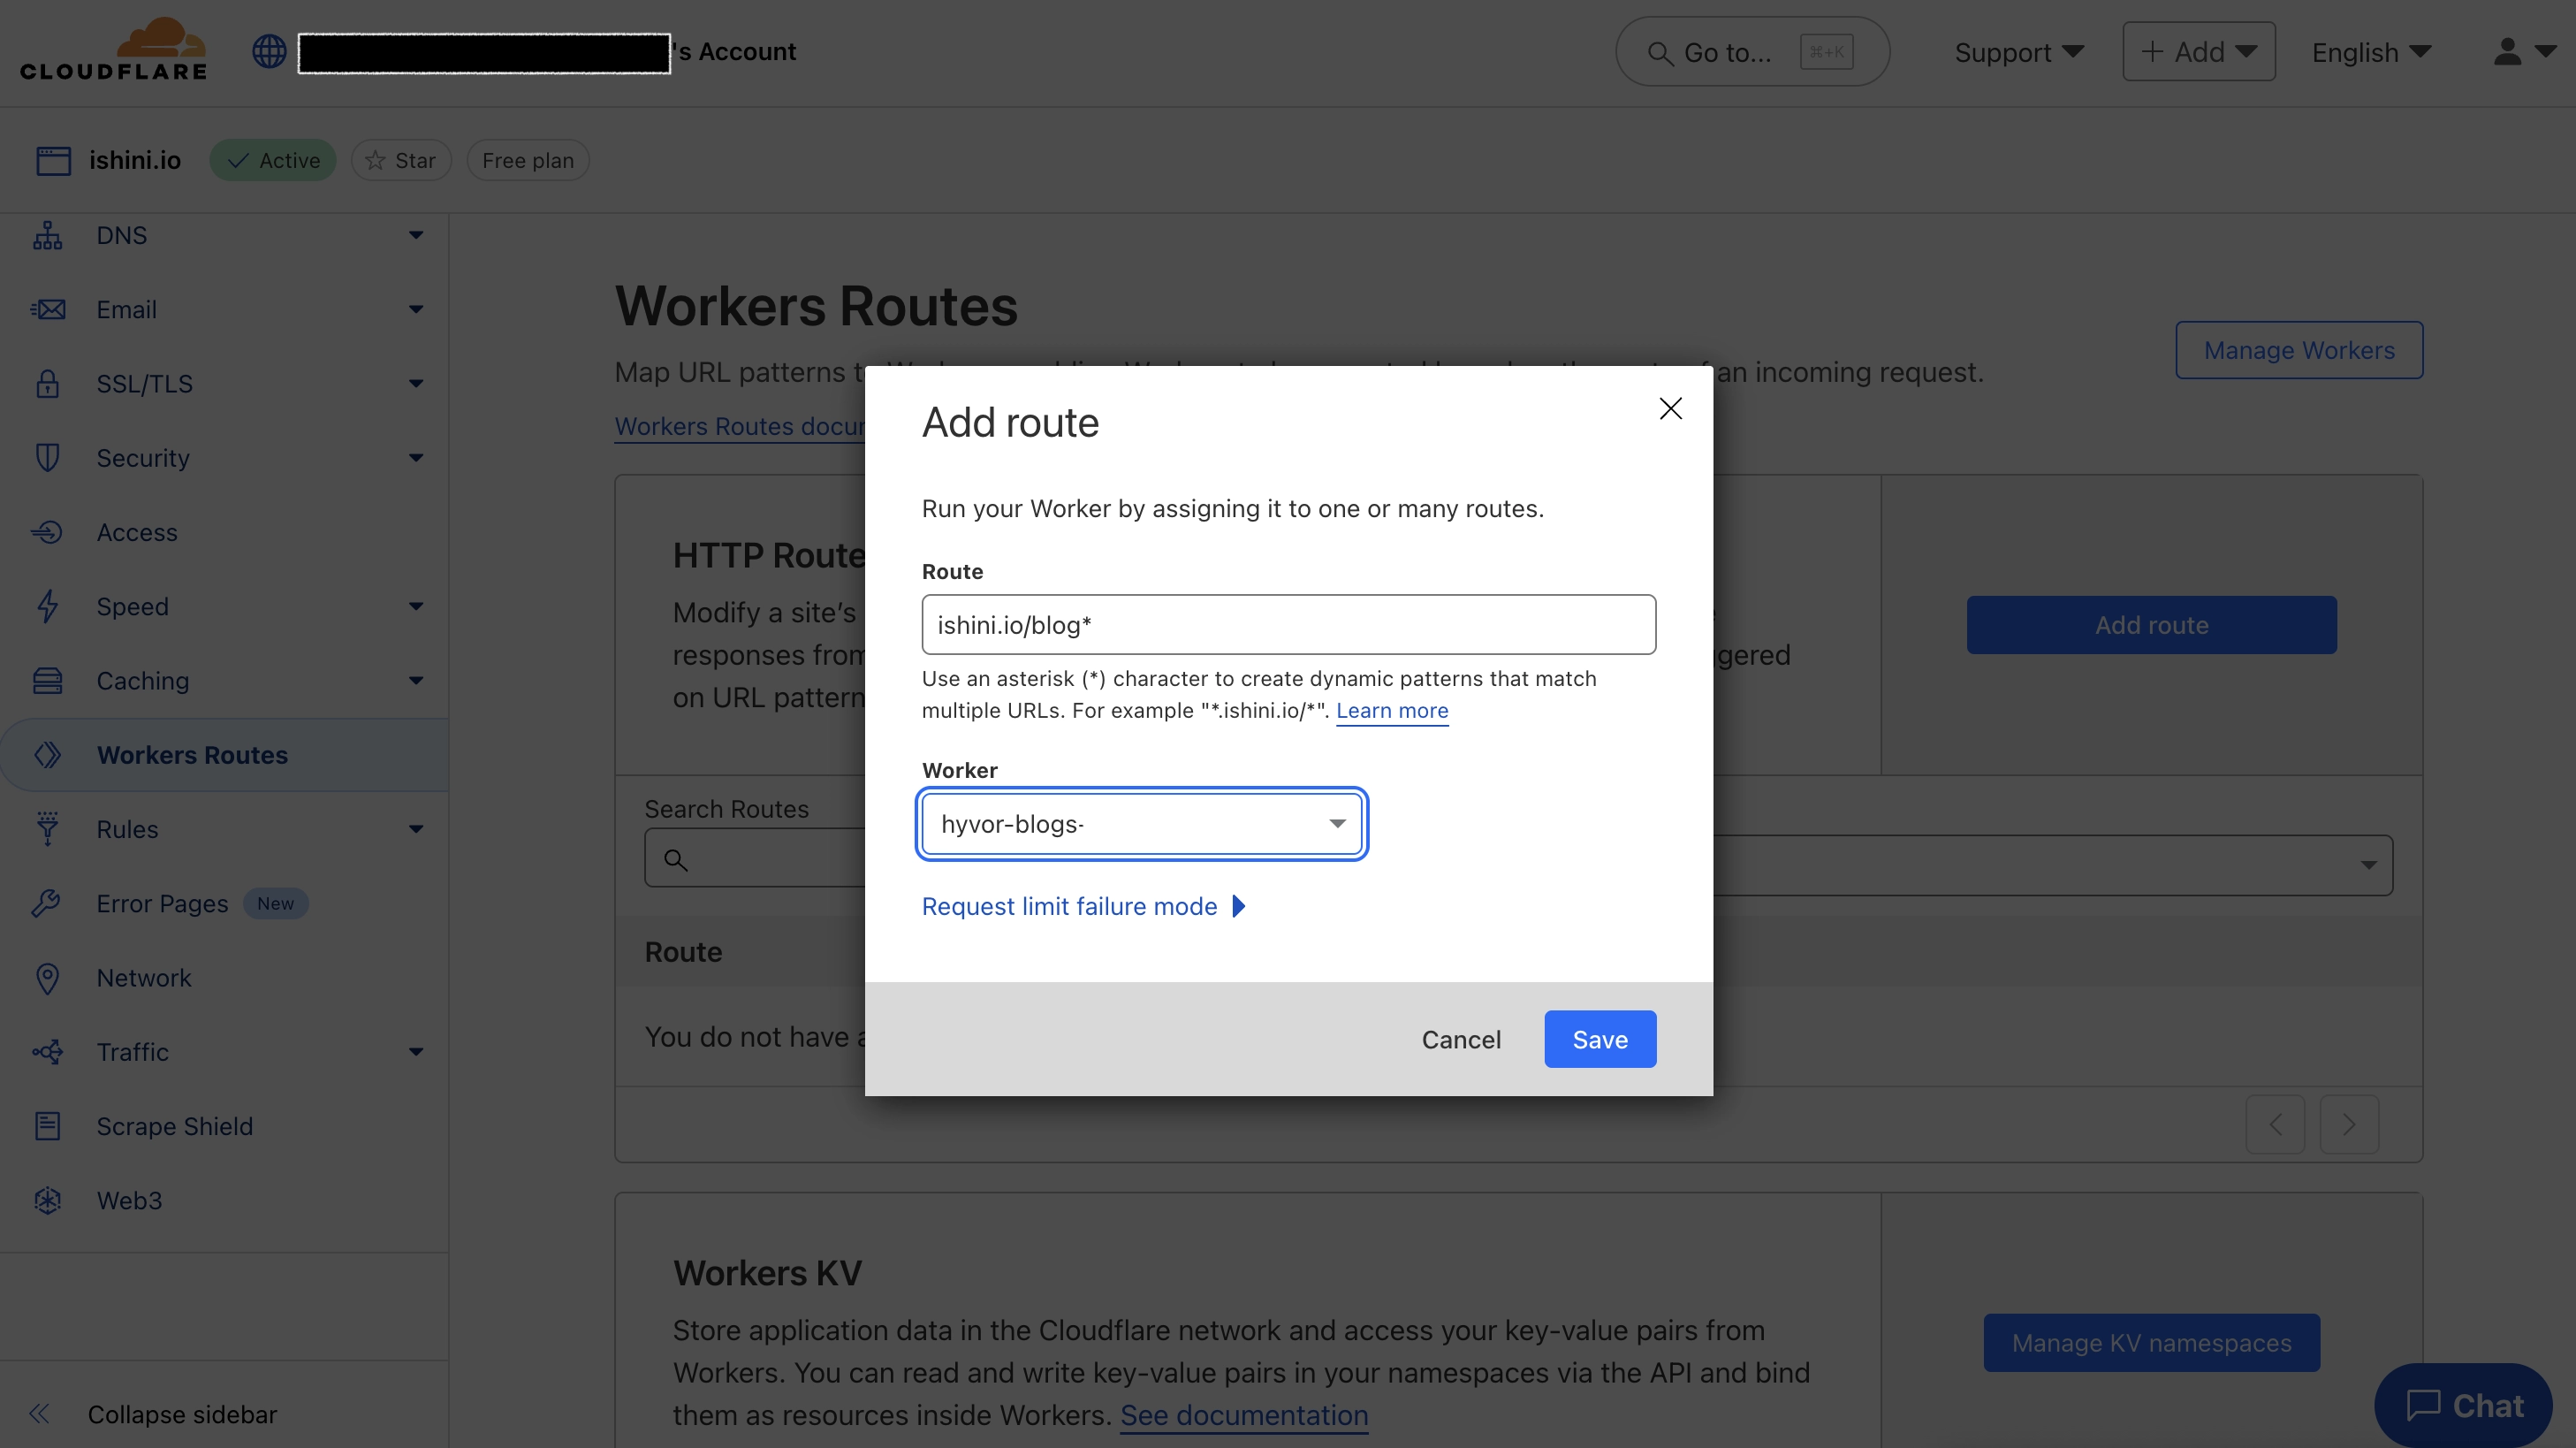
Add a route with the following values (make sure to replace ishini.io with your domain name. Also, /blog if you are using a different base path). Then, click Save.
Important: Make sure to keep the * at the end.
Now, open your blog URL in your browser. You should see your blog perfectly rendered.
4. Finalizing & Debugging
4.1 Verify Features
Follow these steps to make sure everything is working.
Make sure
/blogis loadingMake sure posts with images are loading
Update one of your posts from the Console. You should see the changes on your blog in a couple of seconds.
Open
https://{yourdomain.com}/blog/_cache_health. You should see a “Healthy ✅” message. If not, make sure you have connected the KV store correctly as explain above.
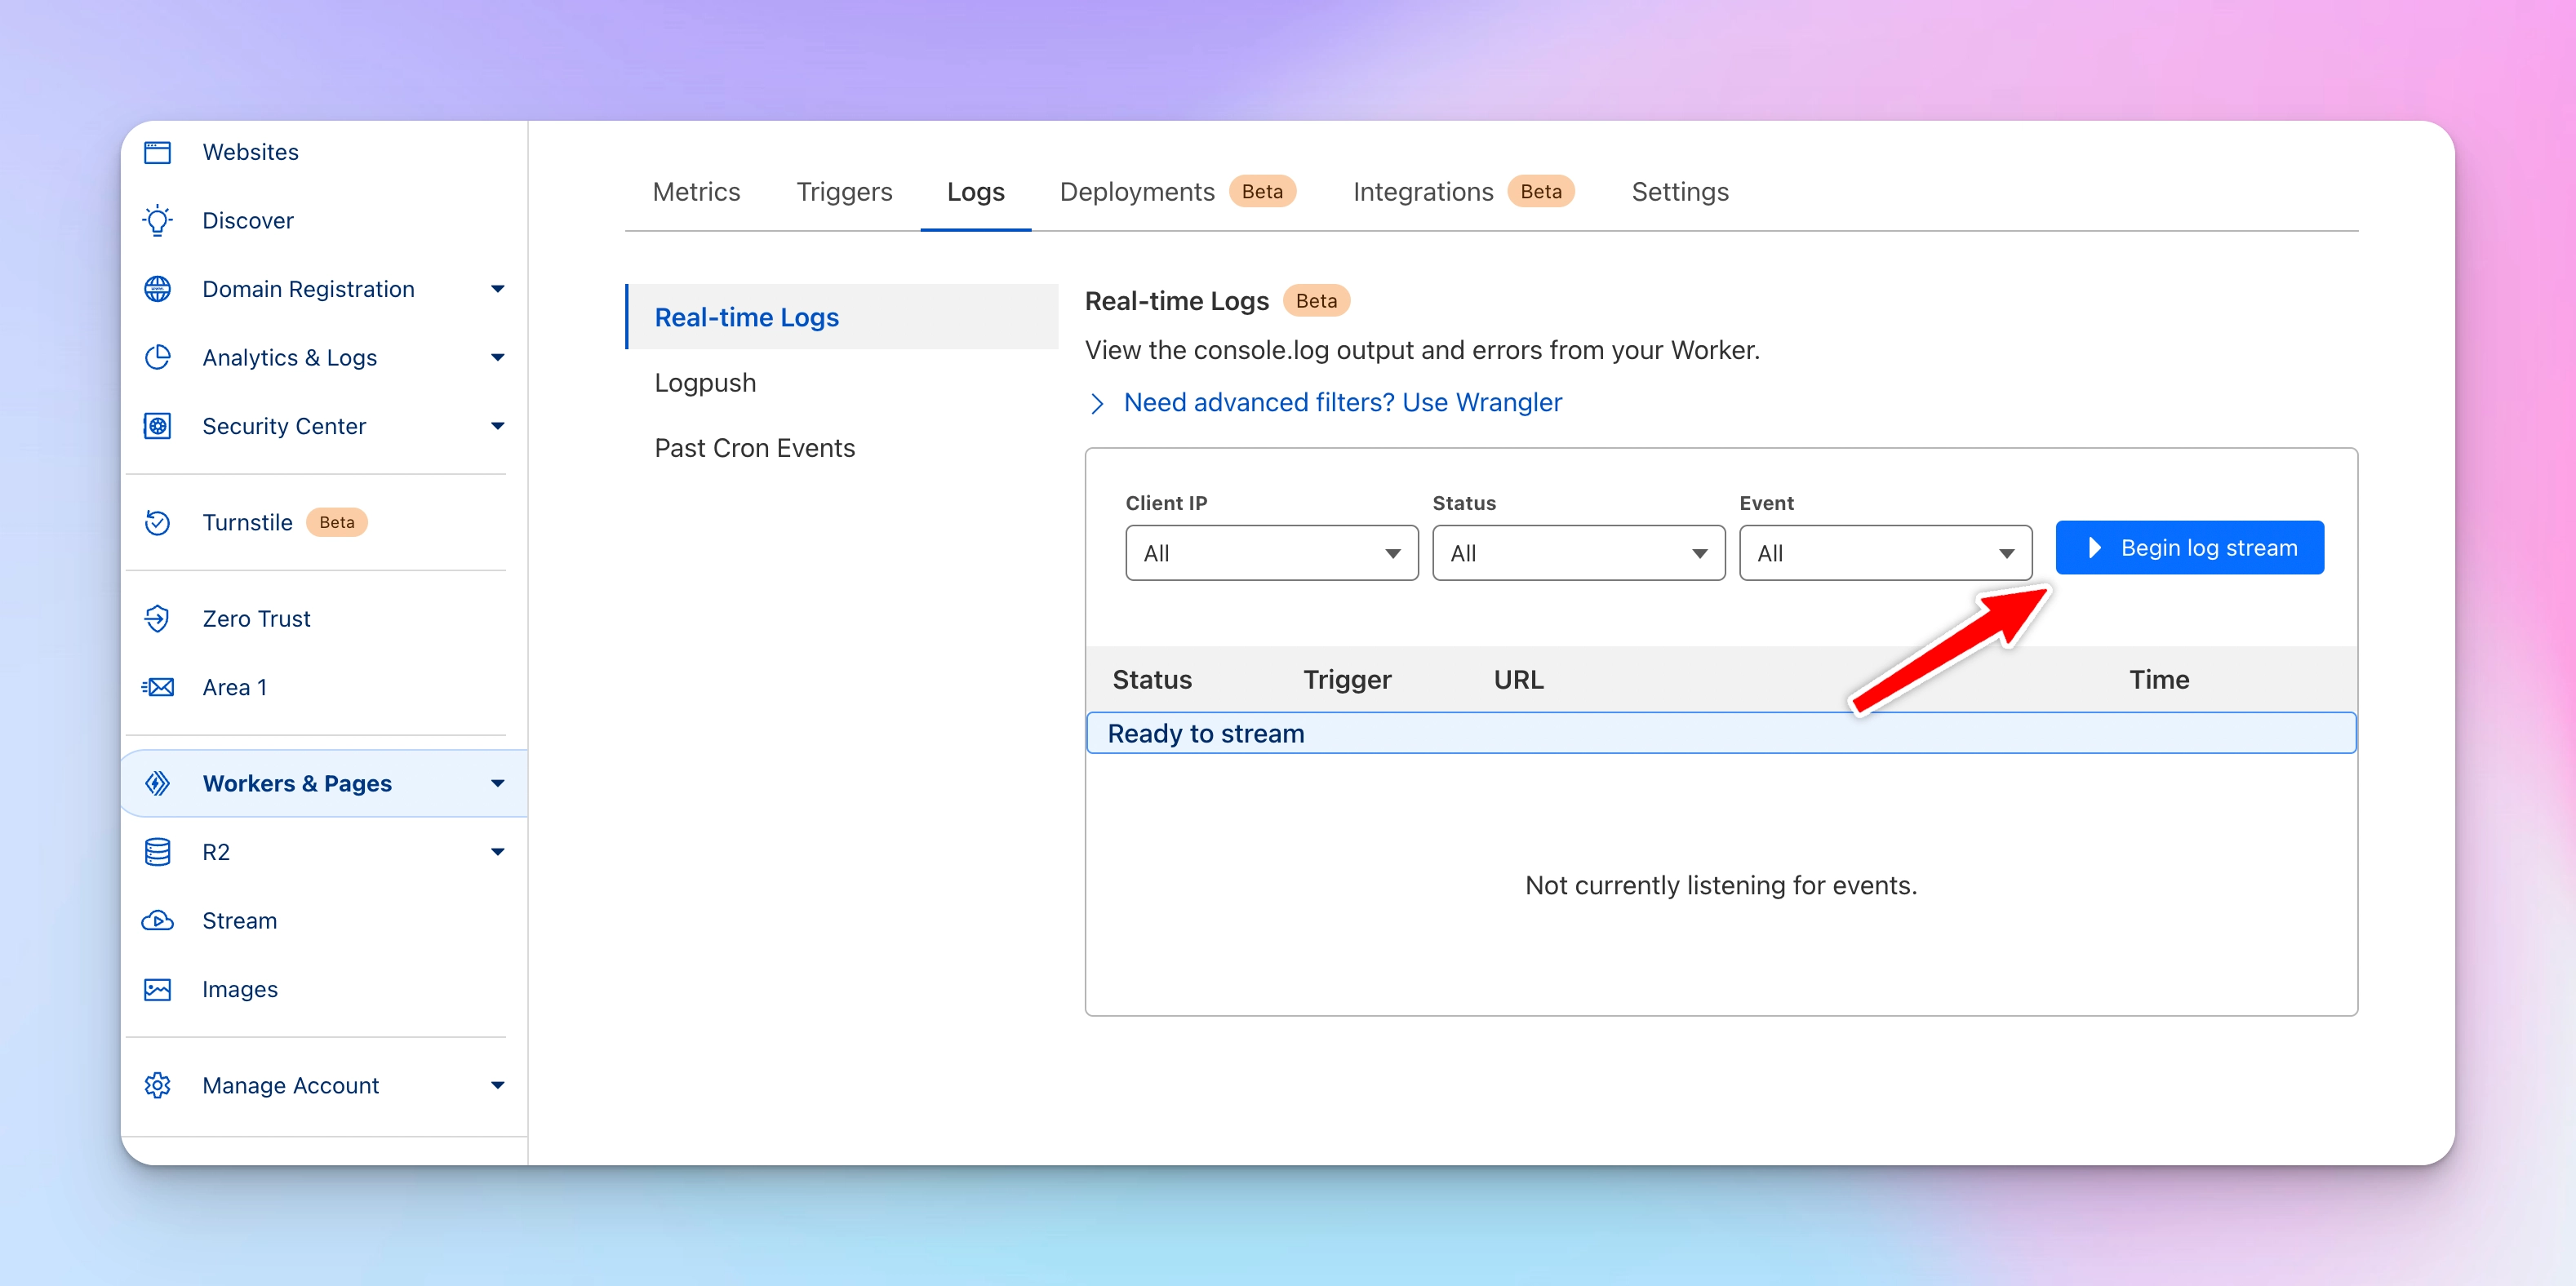
4.2 Cloudflare Worker Logs
If the blog is not loading at all, if you see an error on your blog page, or if updates are not shown on your blog, use Worker Logs to debug.
4.3 Clear Cache
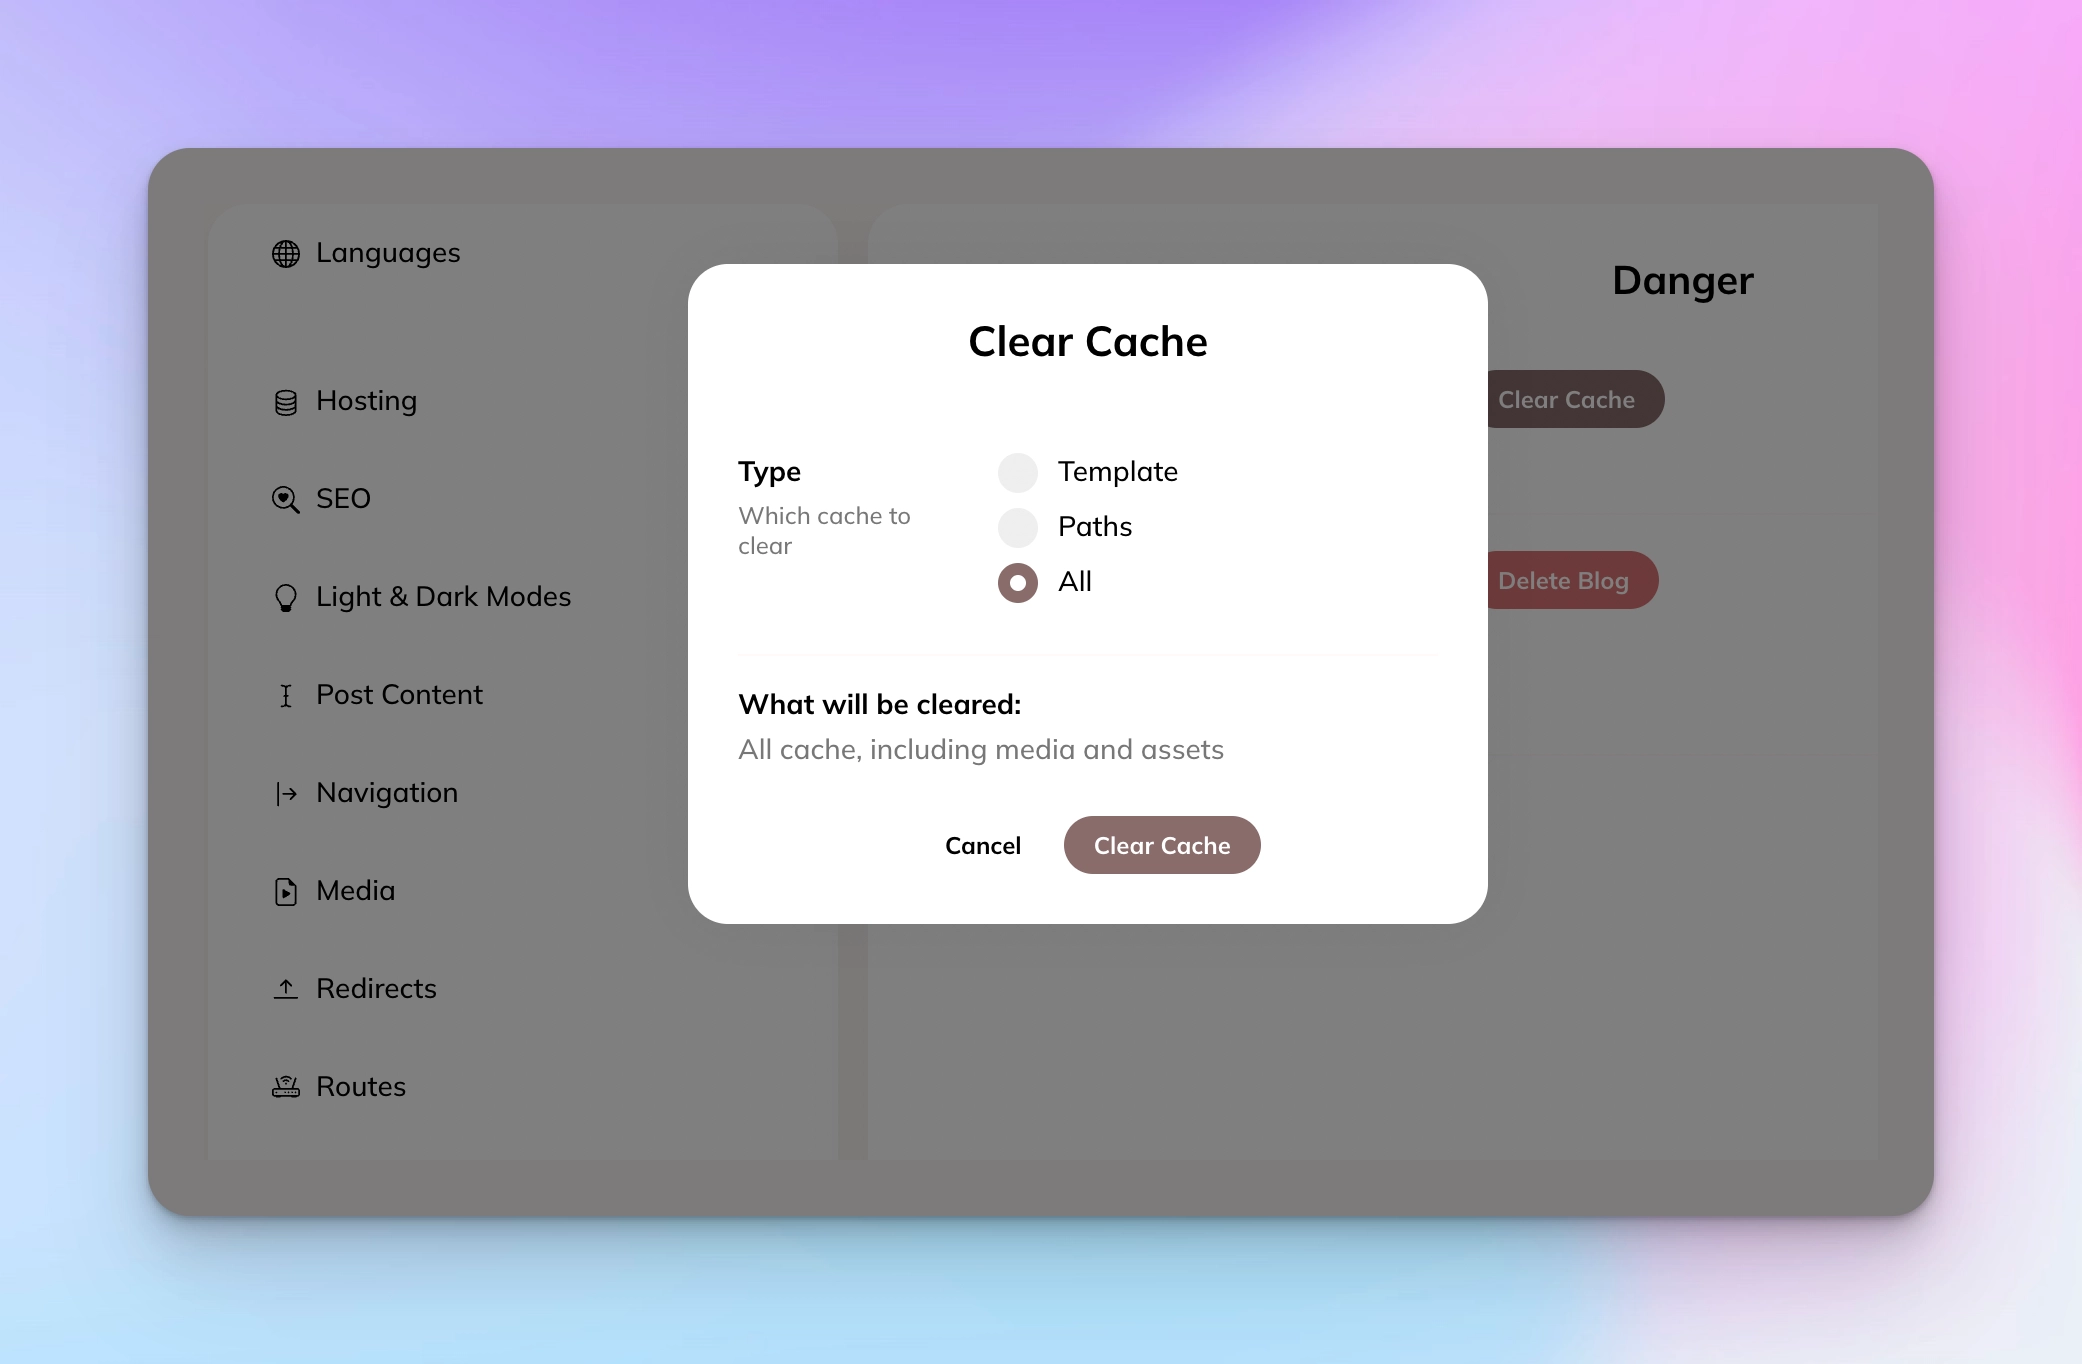
If you have any issues with styles or fonts in your blog, you can try to clear cache of your blog at Console → Settings → Danger Zone → Clear Cache. Select All as the Type.
The End
I hope this guide helped you set up your blog on a sub-directory using Cloudflare workers. If you need any help, feel free to comment below or contact Hyvor Blogs support. If you found anything confusing, please leave a comment below. It will help us make this guide better for future readers.
Resources:

Comments