Webflow Memberships + Hyvor Talk SSO Integration

This is a short guide on how to set up Hyvor Talk with Webflow native Memberships.

Webflow recently introduced native memberships. This is a short tutorial on how to set up Hyvor Talk commenting system with Webflow Memberships for authentication.

As of April 2023, Webflow does not have an official membership API to get the currently logged-in user’s data. For this integration, we’ll be using an open-source third-party library, Sygnal Attributes to get user data.

Setting up Hyvor Talk

First, create a new website at Hyvor Talk Console. You will get a website ID, which you will need in the next steps.

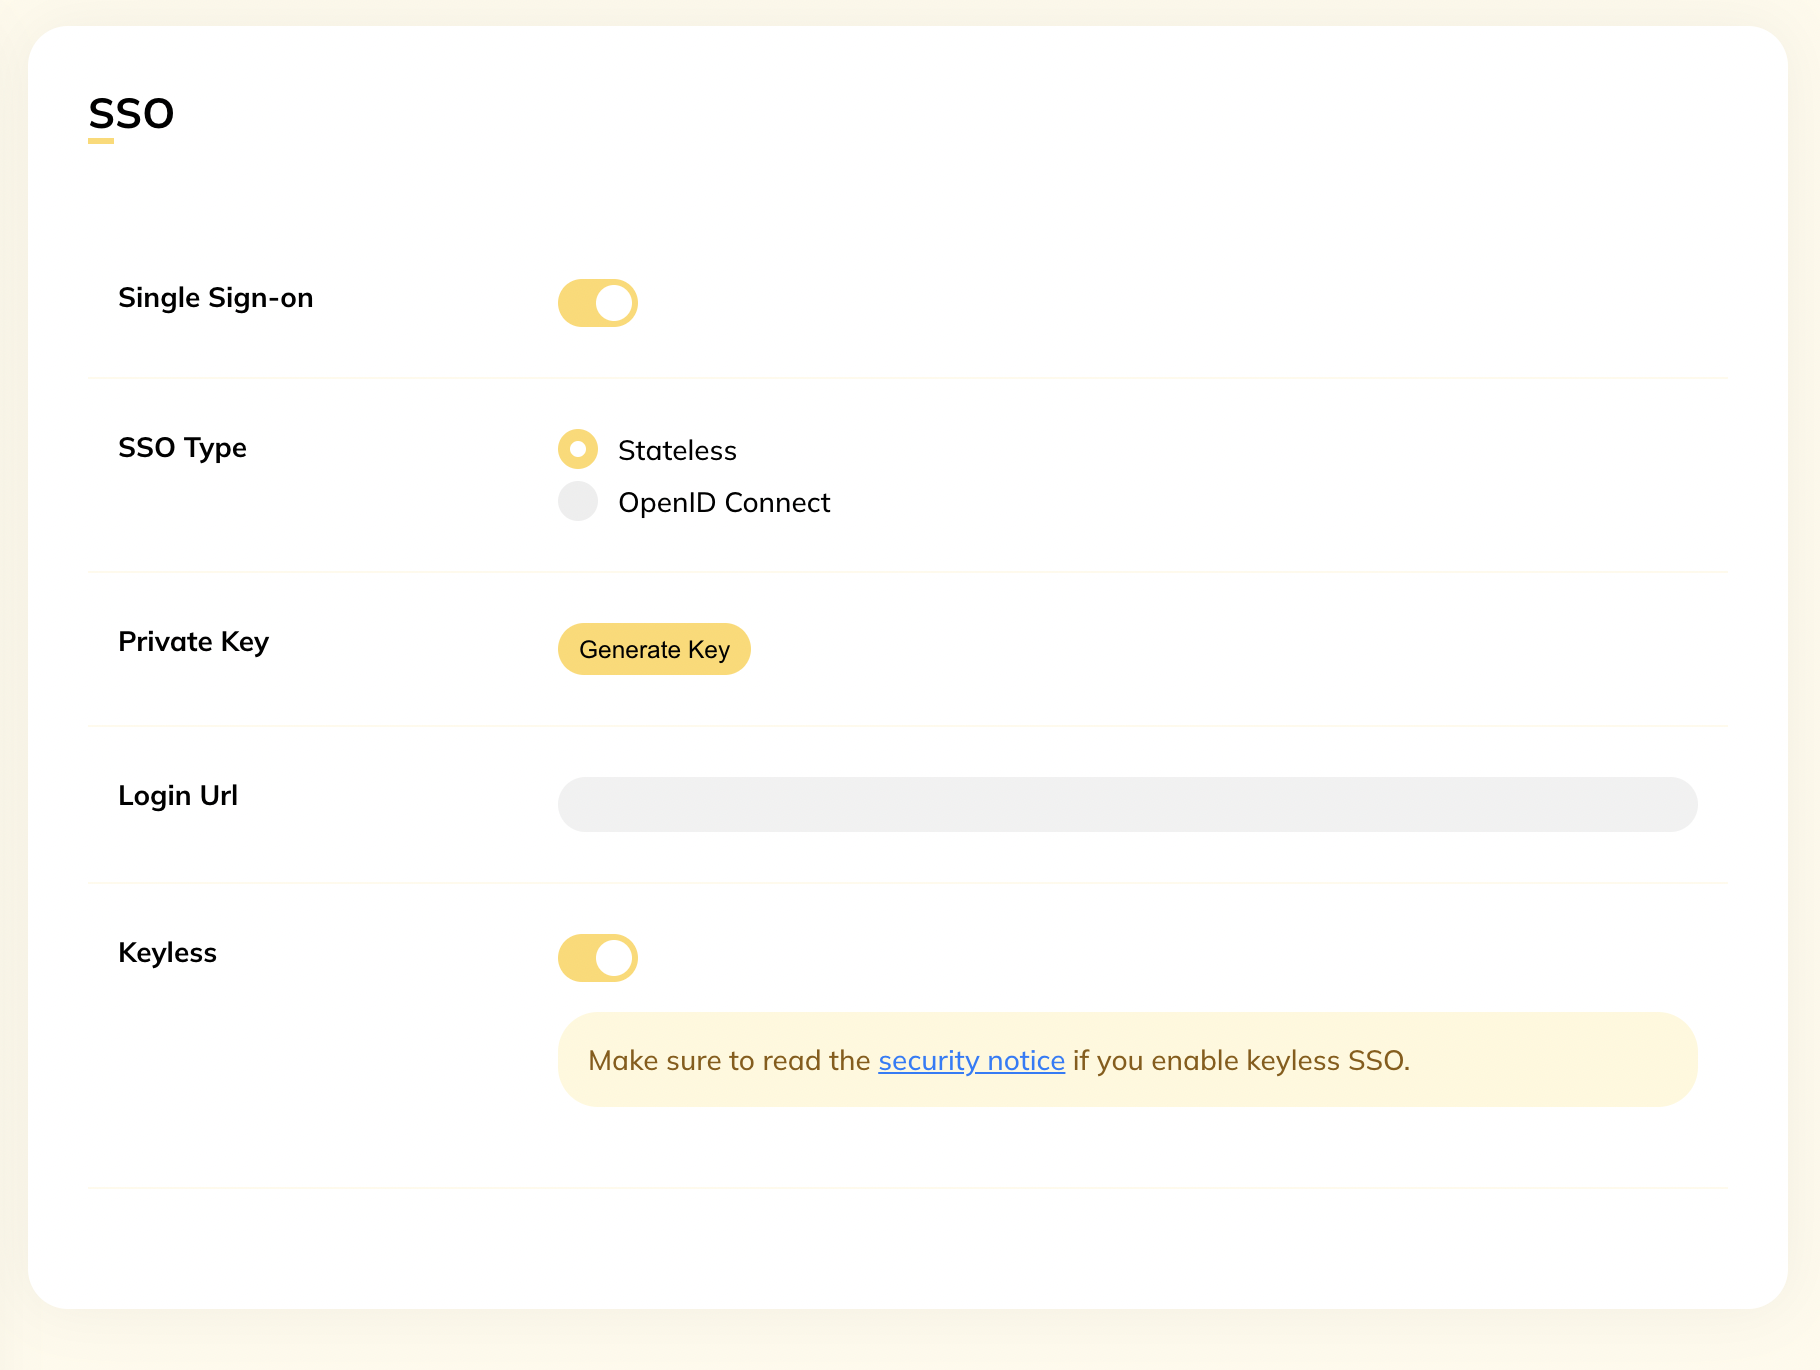
Then, go to Settings -> SSO settings.

  • Enable SSO

  • Select SSO type Stateless

  • Enable the Keyless option

  • Change the Login URL to your website’s login page URL

Enable Single Sign-on on Hyvor Talk
Enable Single Sign-on

Adding code to Webflow

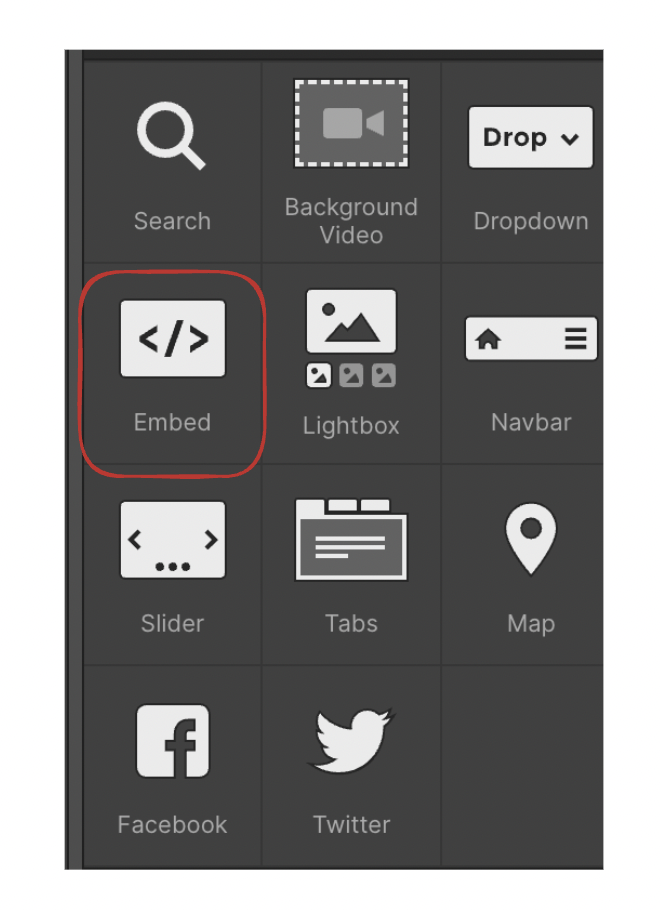
In the Webflow designer, add an Embed element (drag it to the place you need comments to load)

Adding an embed element in Webflow
Add Embed Element

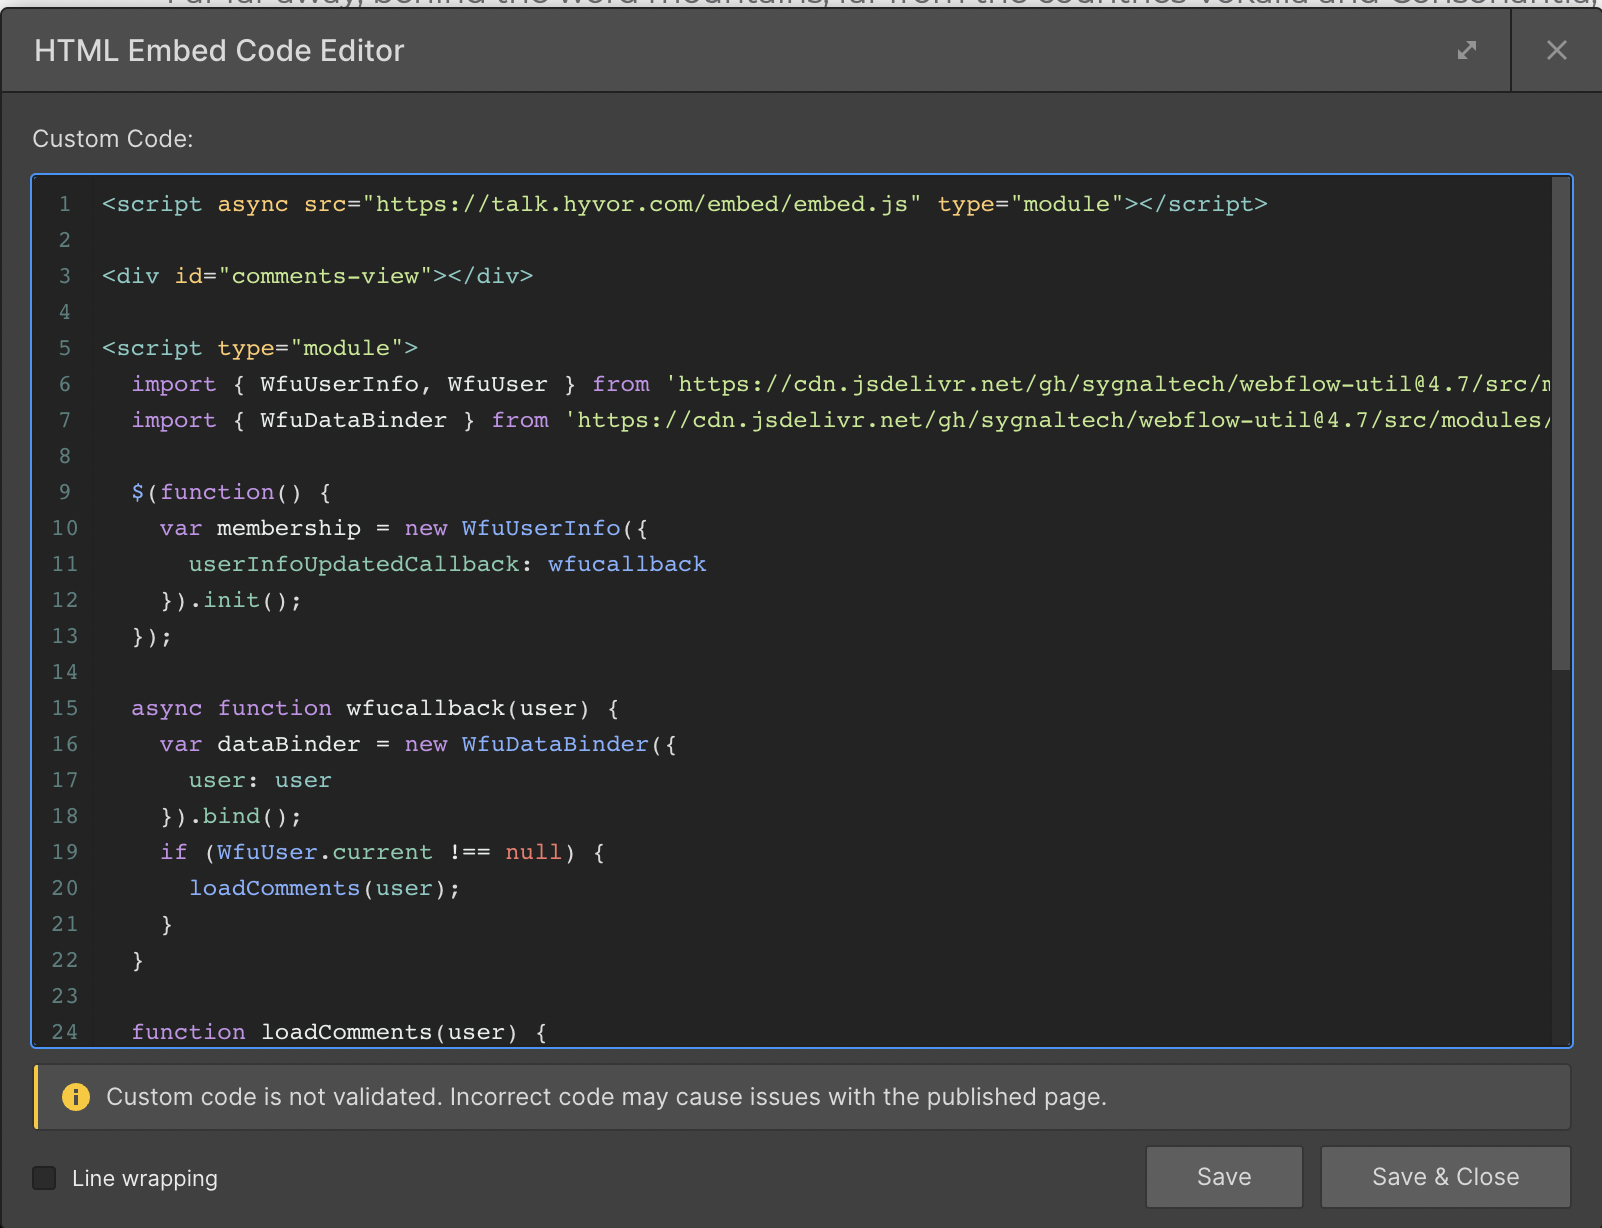
Paste the following code in the Code Editor.

1<script async src="https://talk.hyvor.com/embed/embed.js" type="module"></script>
2
3<div id="comments-view"></div>
4
5<script type="module">
6 import { WfuUserInfo, WfuUser } from 'https://cdn.jsdelivr.net/gh/sygnaltech/[email protected]/src/modules/webflow-membership.js';
7 import { WfuDataBinder } from 'https://cdn.jsdelivr.net/gh/sygnaltech/[email protected]/src/modules/webflow-databind.min.js';
8
9 $(function() {
10 var membership = new WfuUserInfo({
11 userInfoUpdatedCallback: wfucallback
12 }).init();
13 });
14
15 async function wfucallback(user) {
16 var dataBinder = new WfuDataBinder({
17 user: user
18 }).bind();
19 if (WfuUser.current !== null) {
20 loadComments(user);
21 }
22 }
23
24 function loadComments(user) {
25
26 const comments = document.createElement('hyvor-talk-comments');
27 comments.setAttribute('website-id', "YOUR_WEBSITE_ID");
28
29 if (user) {
30 comments.setAttribute('sso-user', btoa(JSON.stringify({
31 timestamp: Math.floor(Date.now() / 1000),
32 id: user.user_id_alt,
33 name: user.name_short_tcase || user.name || user.email.replace(/@.+/, ''),
34 email: user.email,
35 })))
36 }
37
38 document.getElementById("comments-view").appendChild(comments);
39
40 }
41
42</script>
  • Make sure to replace YOUR_WEBSITE_ID in line 27 (highlighted) with your actual website ID from the last step (number).

Webflow HTML Code Editor

That’s all! Publish your website and test the commenting system on your website. Make sure it is functional for both logged-in users and others. Check out our latest guide on how to create a blog on Webflow.

If you have any questions, feel free to comment below or contact us.

Comments