Hyvor Talk is a commenting system for websites. Hyvor Talk provides features like real-time comments, voting, reactions, ratings, email notifications, etc. which will help you build an engaging audience in your store. In this guide, I am going to explain how to add Hyvor Talk commenting system to your Shopify store (product or article pages) and how to connect your Shopify login with Hyvor Talk. After setting up, your customers will be able to comment using their accounts on your store.
Installing Hyvor Talk on Shopify is easy. All you have to do is copy and paste the installation code to a custom liquid block.
First, make sure Shopify's default comment system is turned off at Online Store -> Blog Posts -> Manage Blogs -> Your Blog -> Comments are Disabled.
Setting up Hyvor Talk
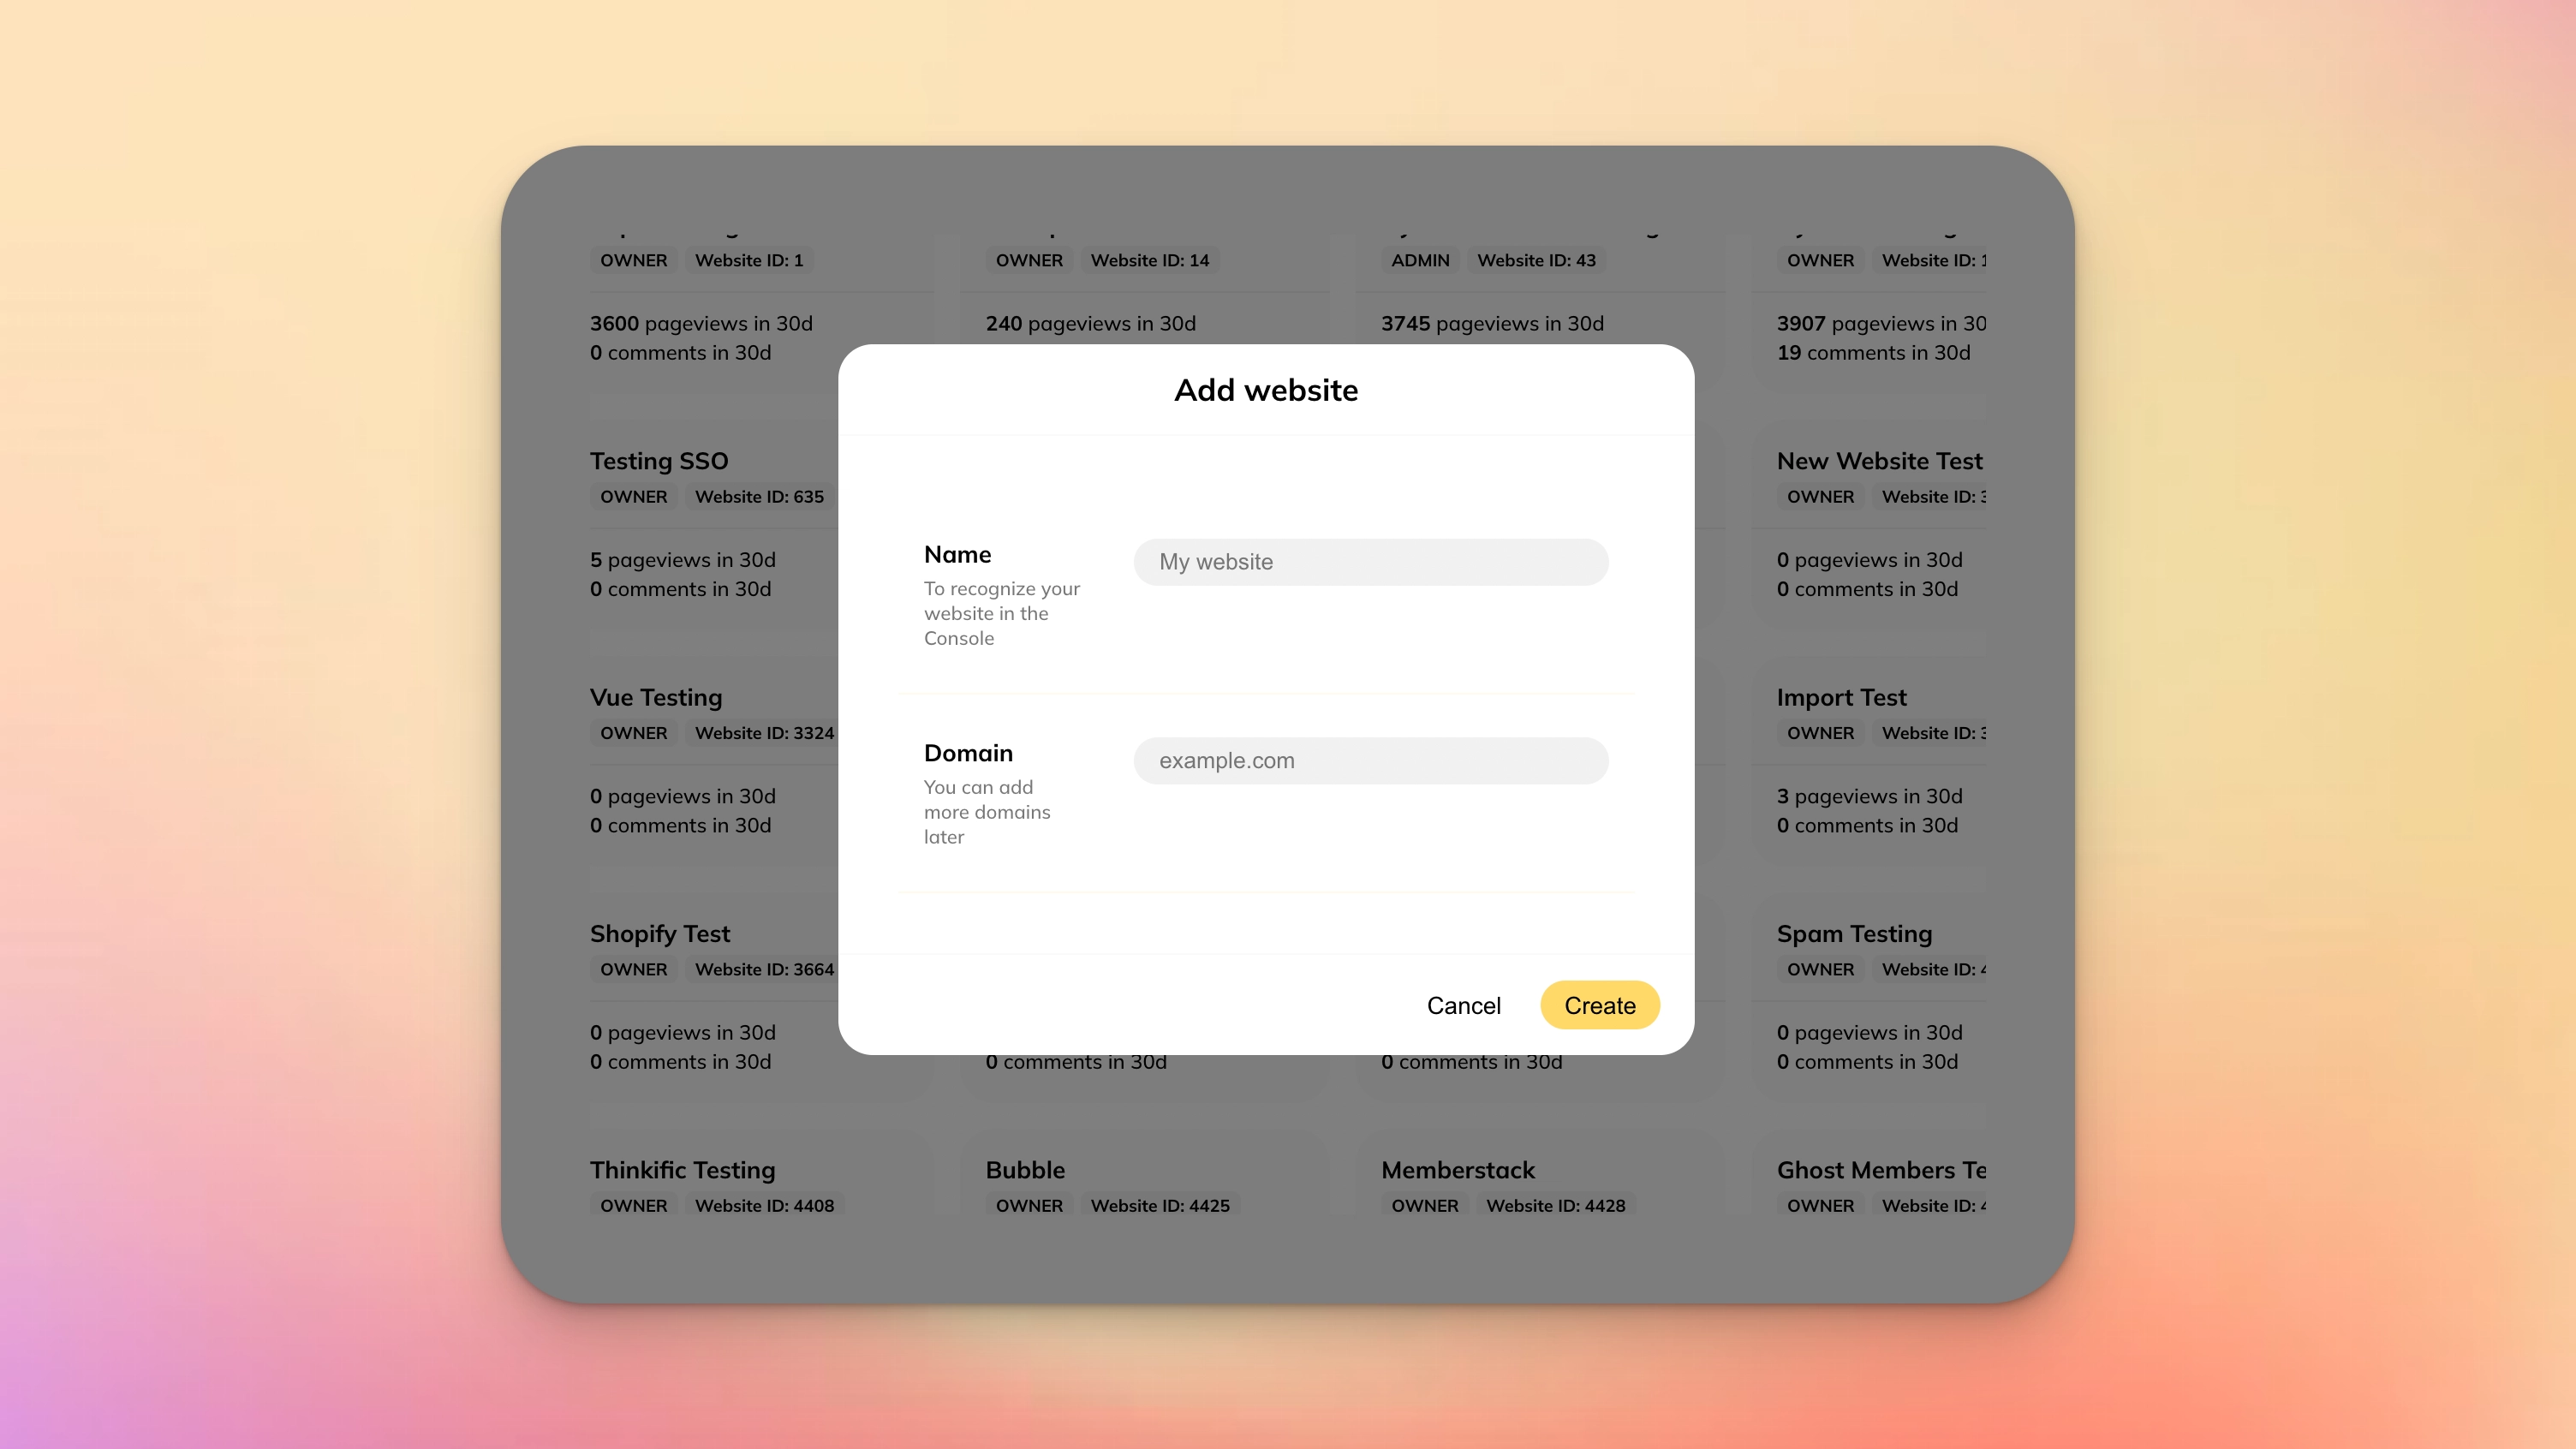
First, head over to the Hyvor Talk console. You will be asked to create a Hyvor account. After that, you will see the Add Website section in the console. You can register your website with Hyvor Talk here. Make sure to use your Shopify domain as the Website Domain.
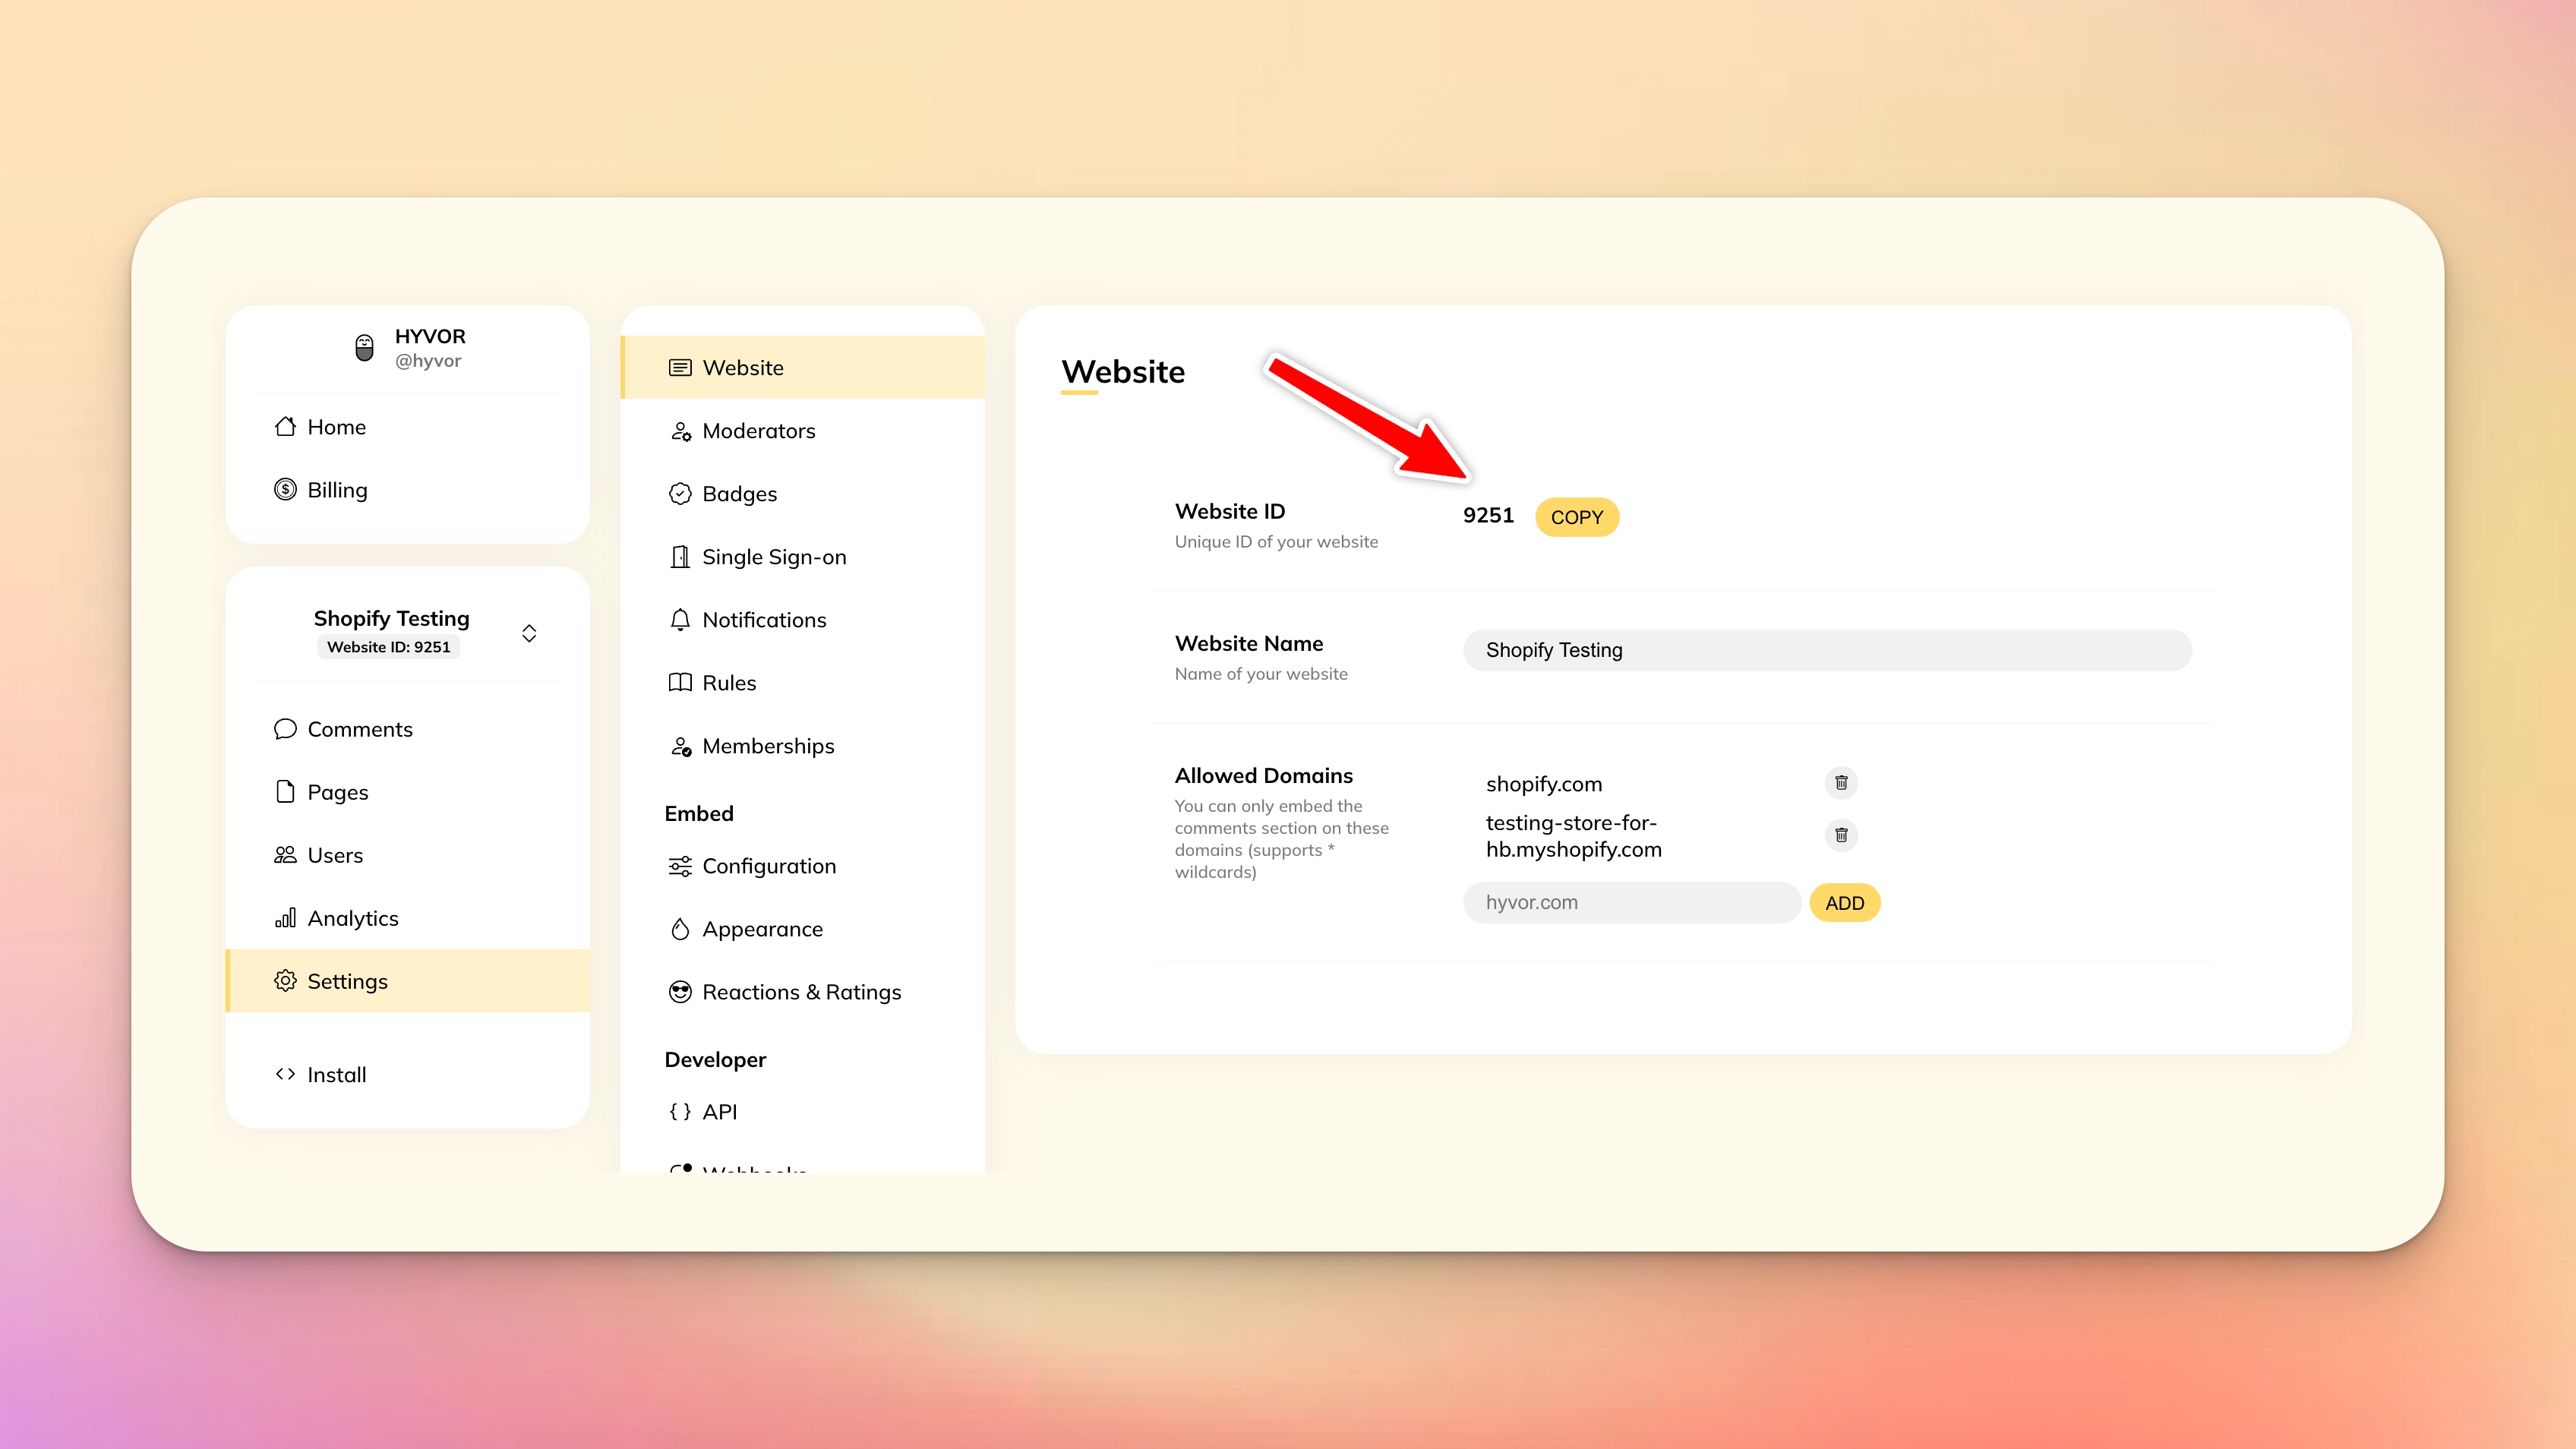
You will need your website ID (Settings -> Website) in the next step:
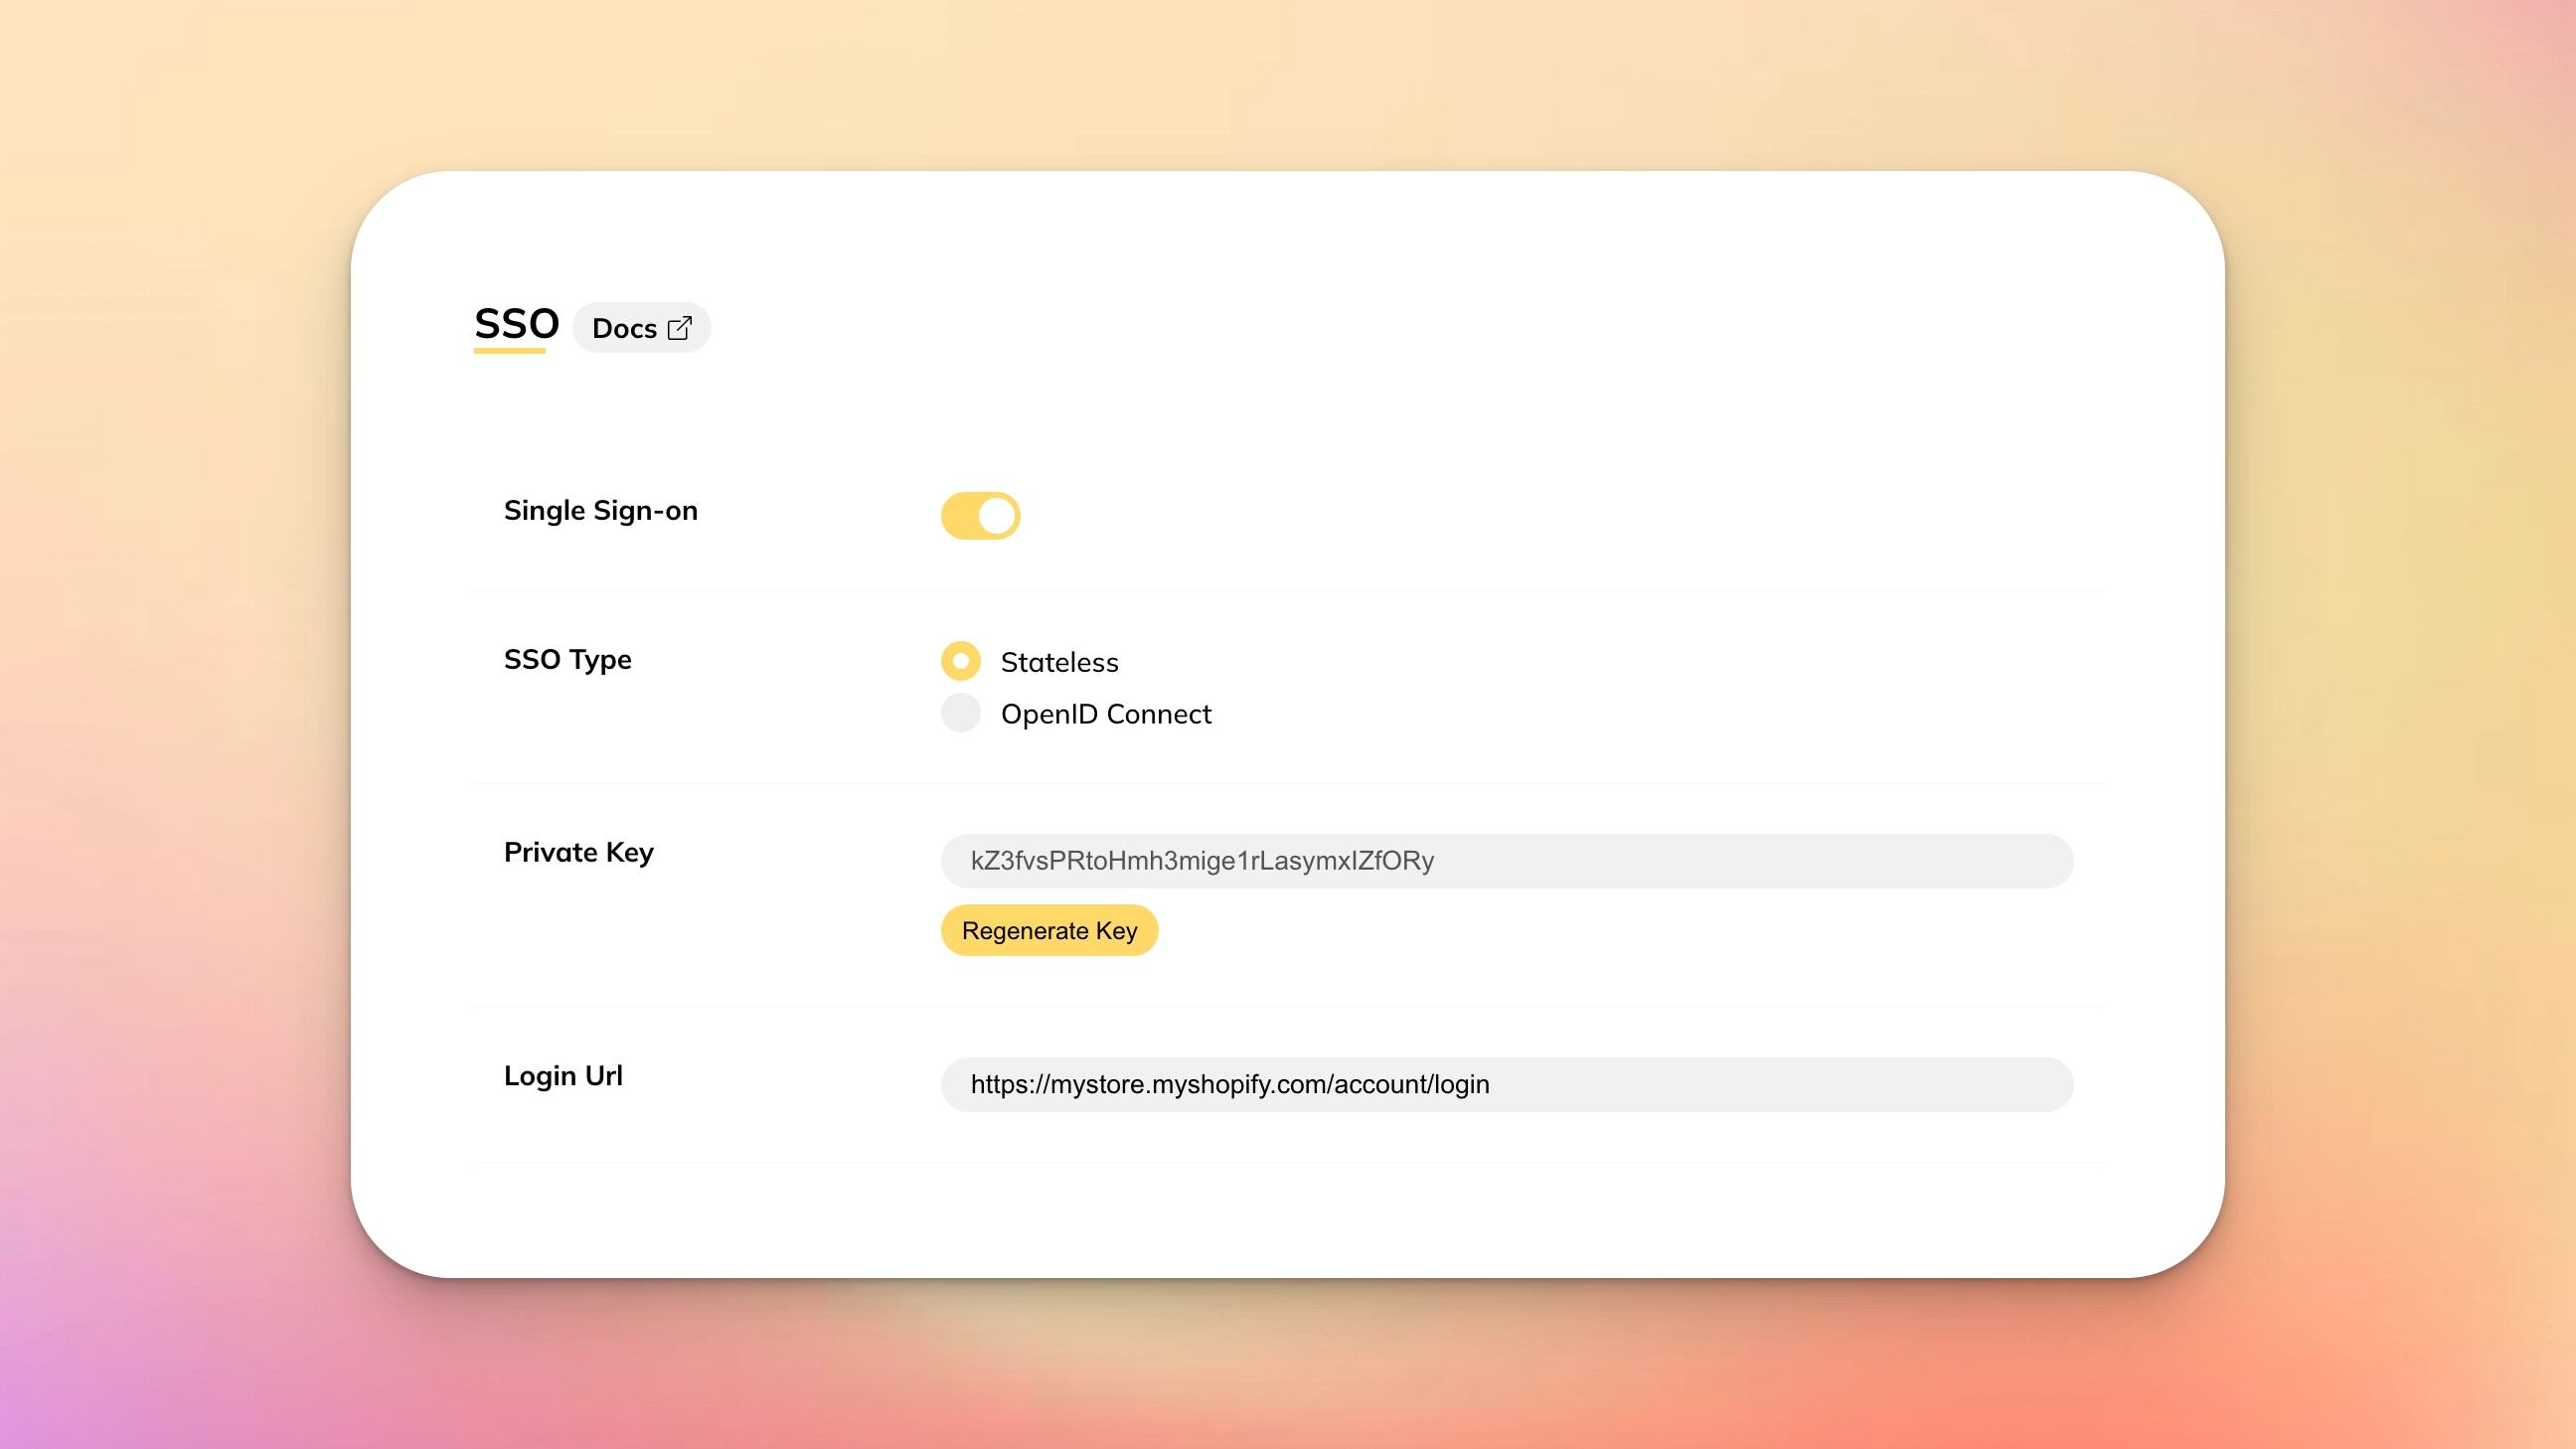
Setting up Single Sign-On
By default, users need a HYVOR account to comment. However, you can easily set up Single Sign-On to connect Shopify accounts with Hyvor Talk, allowing your users to comment easily.
Single Sign-on is only available in the business plan.
Here’s how to enable Single Sign-on:
Turn on Single Sign-On (Settings -> SSO)
Select type Stateless
Generate a Private key (you will need this later)
Set login URL. This will be
YOUR-SHOP-URL/account/login
Adding Hyvor Talk to Shopify
Let’s add Hyvor Talk to your Shopify store. This assumes that you are using an Online Store 2.0 theme. However, if you have an old theme, jump to the Adding to Vintage Themes section below.
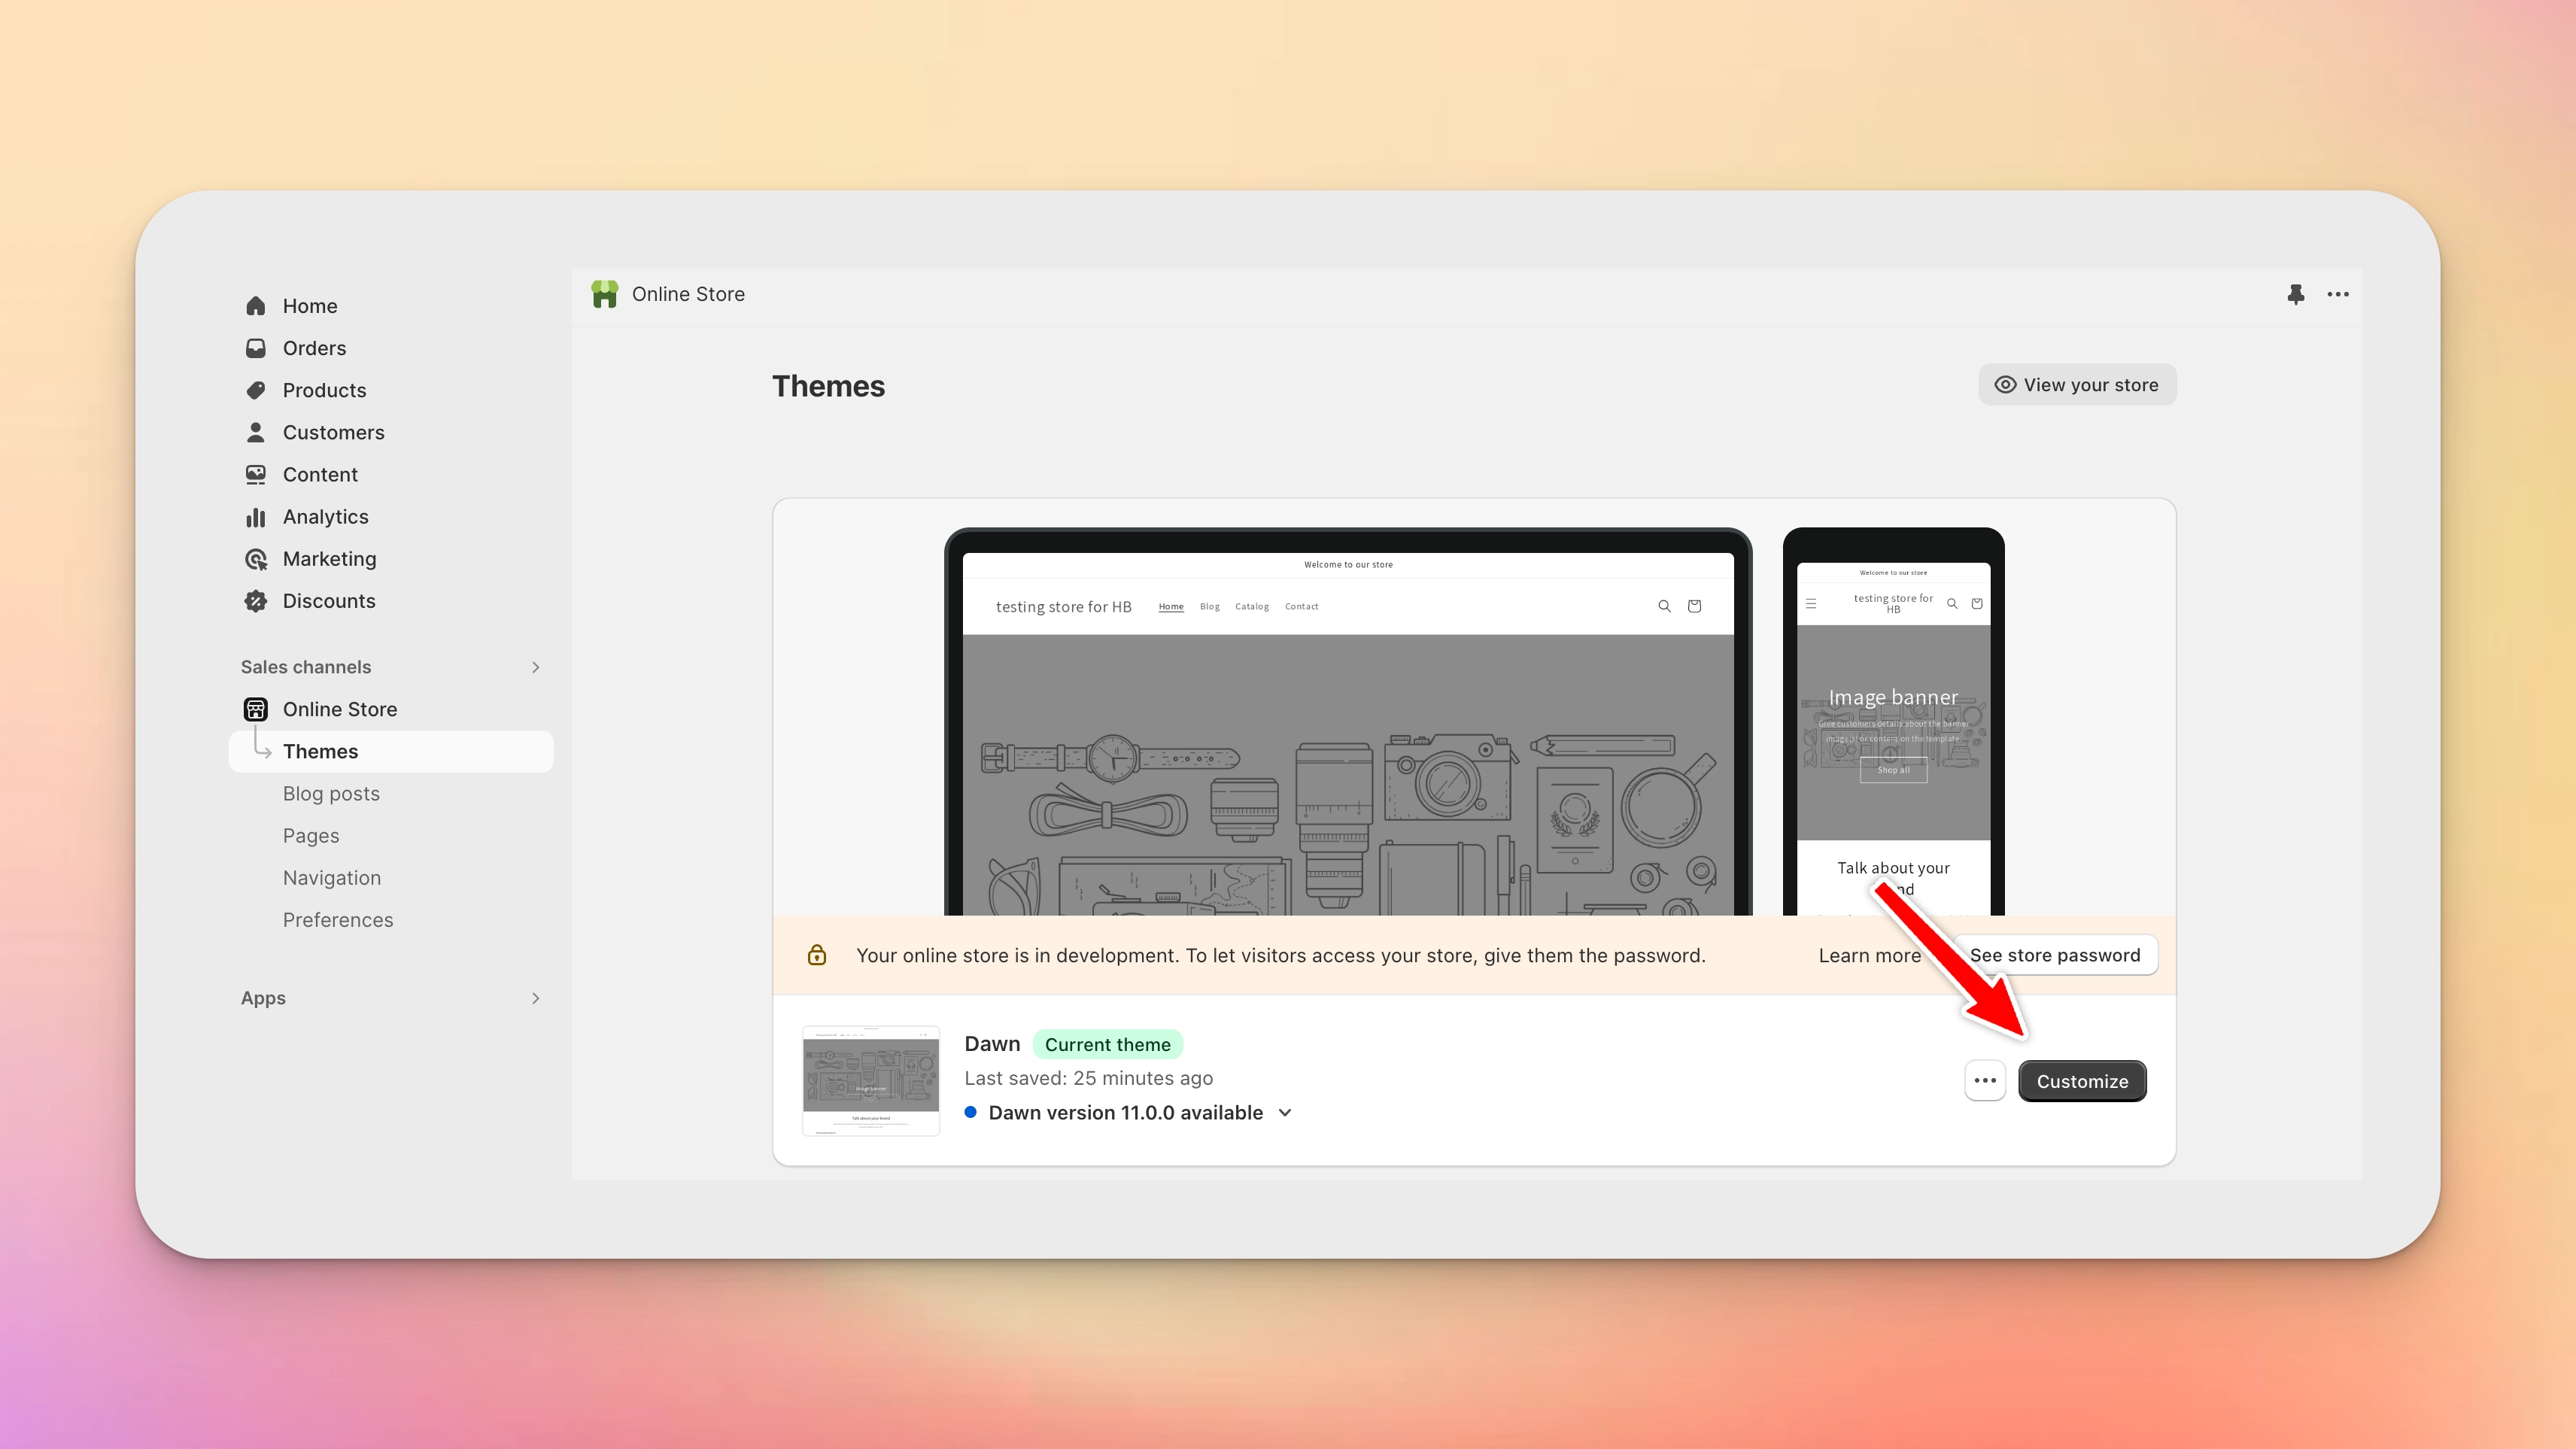
First, go to Online Store -> Themes, and Click Customize.
Then, add a Custom Liquid section to the page/place where you want to add comments.
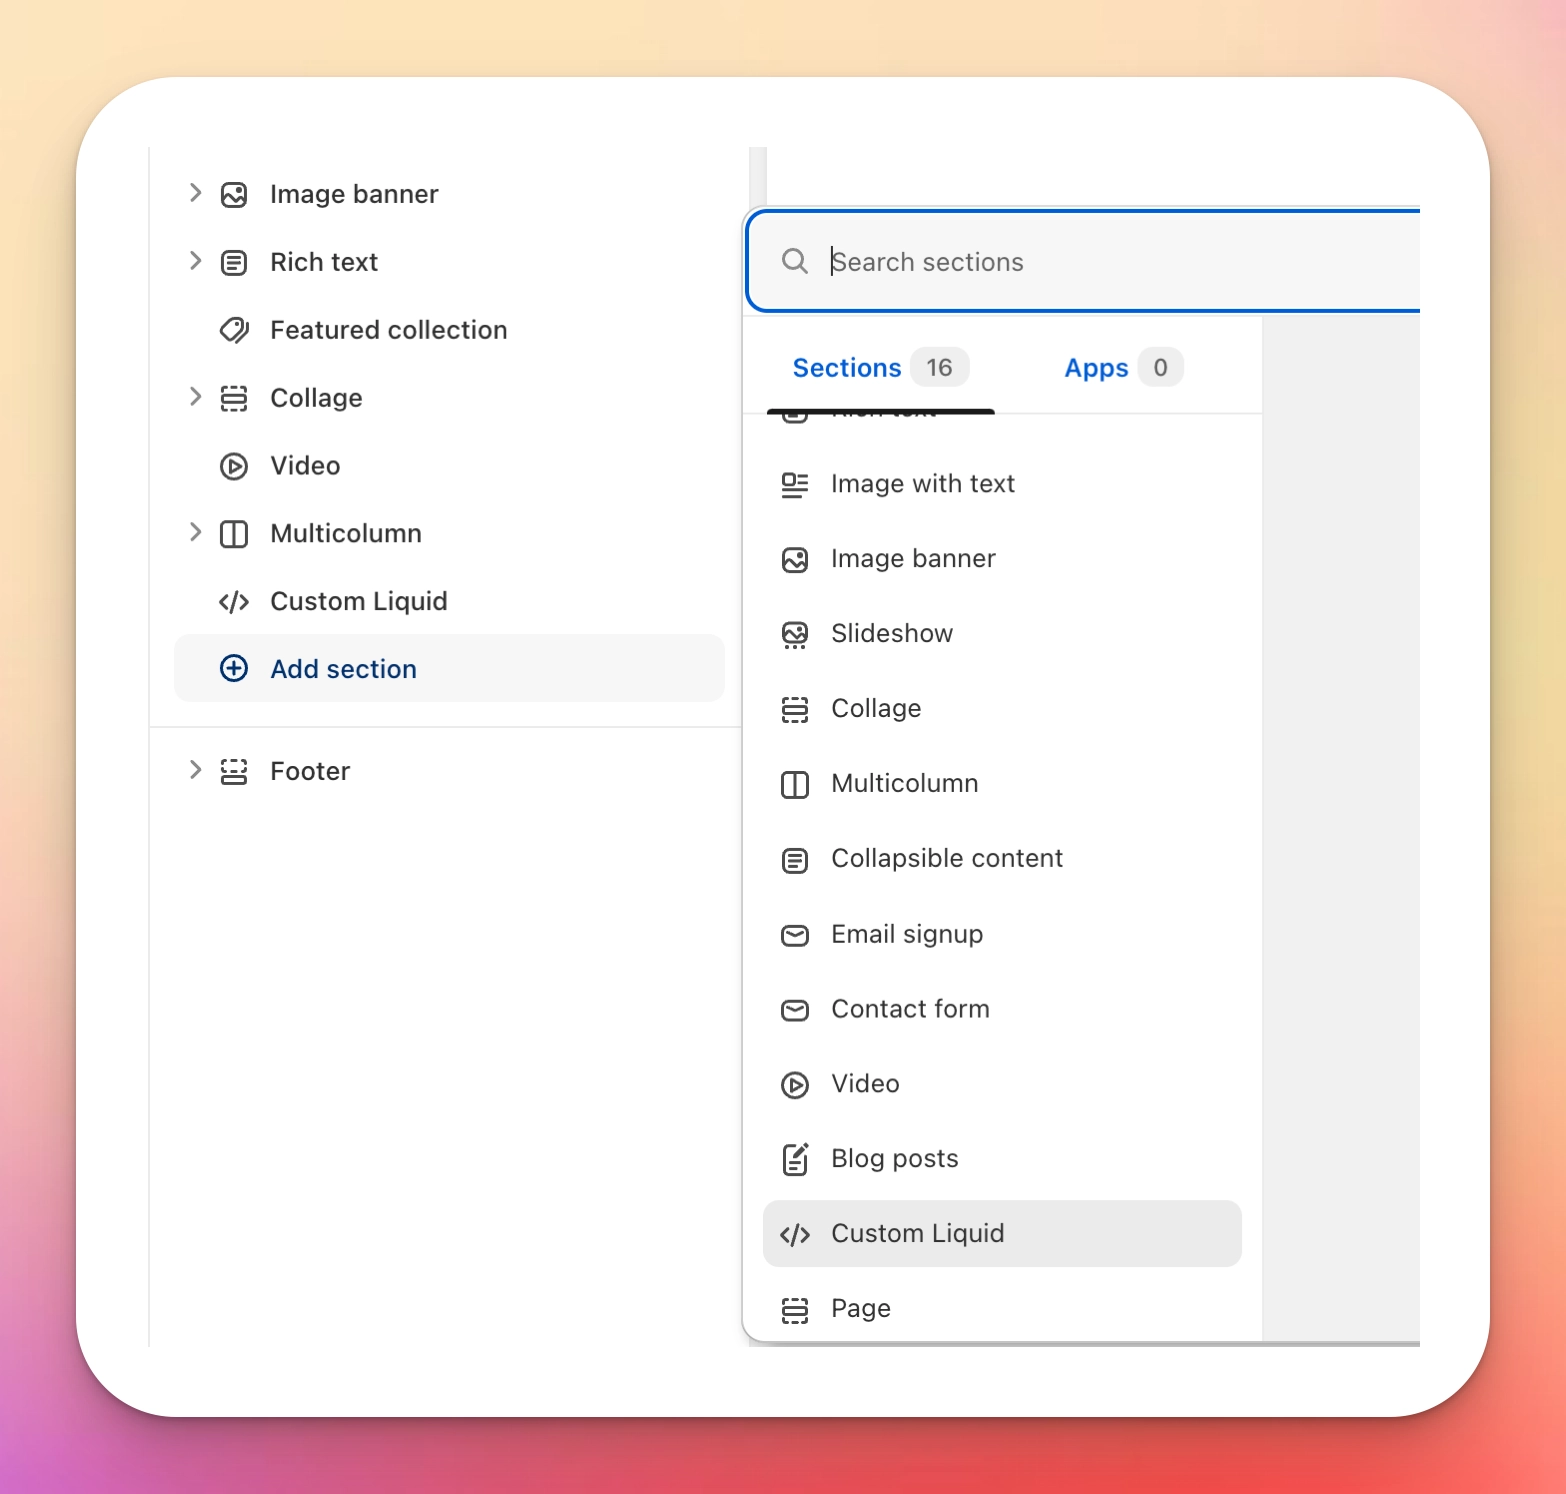
Paste the following code in the Custom Liquid code box:
1{% assign HT_WEBSITE_ID = YOUR_WEBSITE_ID %} 2{% assign PRIVATE_KEY = "YOUR_PRIVATE_KEY" %} 3{% assign user_data = "" %} 4{% if customer %} 5 {% capture user_data %}{ 6 "id": "{{ customer.id | escape }}", 7 "name": "{{ customer.name | escape }}", 8 "email": "{{ customer.email | escape }}", 9 "timestamp": "{{ 'now' | date: '%s' }}"10 }{% endcapture %}11 {% assign user_data = user_data | base64_encode %}12{% endif %}13{% assign hash = user_data | hmac_sha256: PRIVATE_KEY %}14{% if template contains "product" %}15 {% assign hyvor_page_id = product.id %}16{% elsif template contains "article" %}17 {% assign hyvor_page_id = article.id %}18{% else %}19 {% assign hyvor_page_id = '' %}20{% endif %}21Make sure to
Replace
YOUR_WEBSITE_ID(line 1) with your website ID from the first step.Replace
YOUR_PRIVATE_KEY(line 2) with your Single Sign-on private key from the previous step (keep quotes).
That’s all! You should see Hyvor Talk comments on your online store. Login into your shop as a customer to test Single Sign-on.
Adding to Vintage Theme
If you have an old Shopify theme, you will have to edit your theme files instead of adding a section as in the previous step.
Open the liquid file you want to add comments to. For example,
product.liquidThen, paste the same code in the previous step and replace the website ID and the private key.
The only difference is that you will be adding the code directly to liquid files instead of using new sections.
Finally
Next, go through the options in our Console to customize the comments section to match your website. Here are some resources for you:
If you have any questions or issues, feel free to comment below.

Comments