Do you have a website, application, or blog that is built with Vue.js? Or, are you using a Vue-based framework like Vuetify or Nuxt? This guide explains how to add comments to any Vue application using the Hyvor Talk commenting platform.
First, what is Hyvor Talk?
Hyvor Talk is an embeddable, fully-featured commenting platform for any website (that supports many platforms). Among the other similar options available in the market, Hyvor Talk is special due to many reasons.
Privacy-focused – never sell your or your visitors’ data, no ads/tracking on your website.
It is fast and lightweight.
Fully customizable.
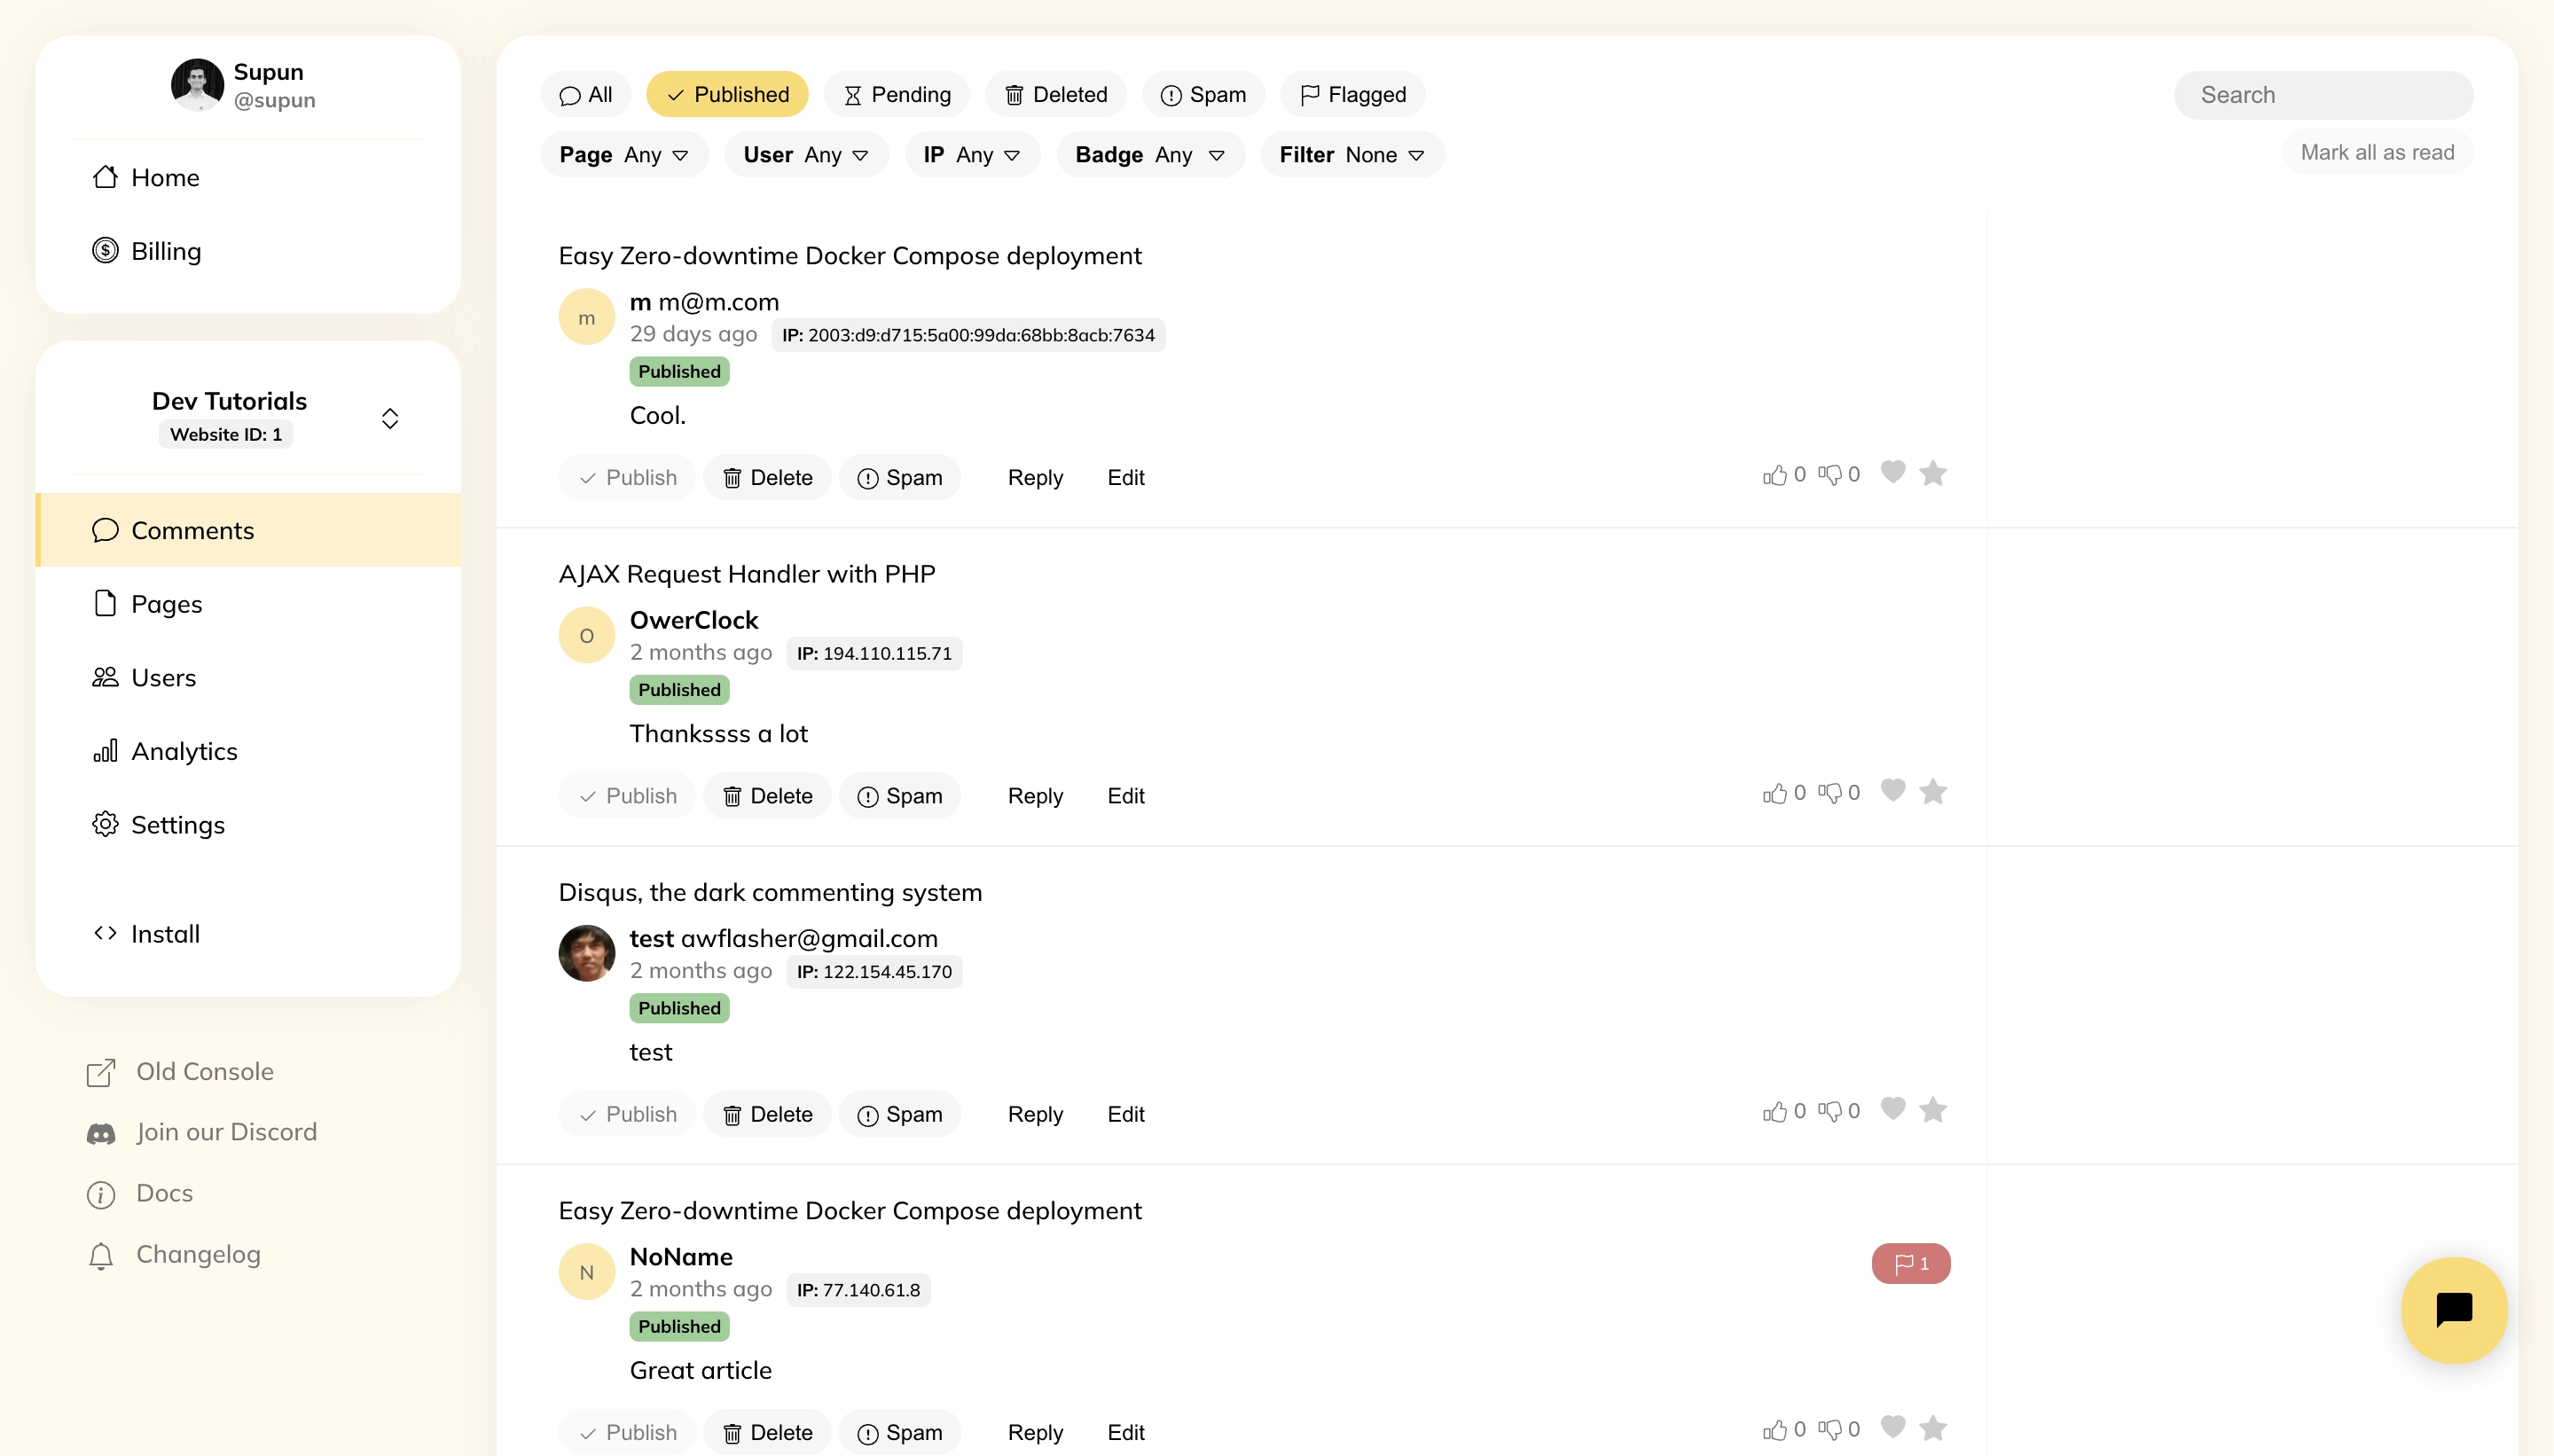
Top-notch moderation panel and tools.
How to Use Hyvor Talk on Your Vue App
Step 1: Register your site in Hyvor Talk Console
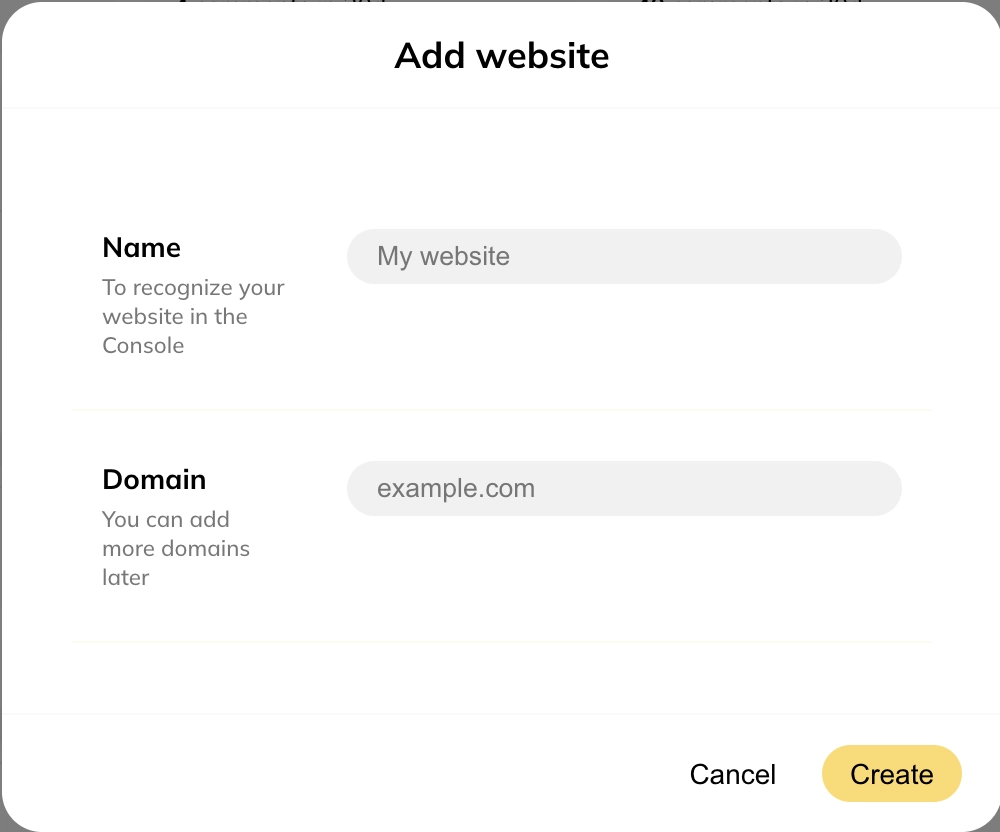
First of all, you need to create a website in Hyvor Talk from Hyvor Talk console. Once you create your HYVOR account, you will be see the form to add your website, with a name and domain (you can add more domains later).
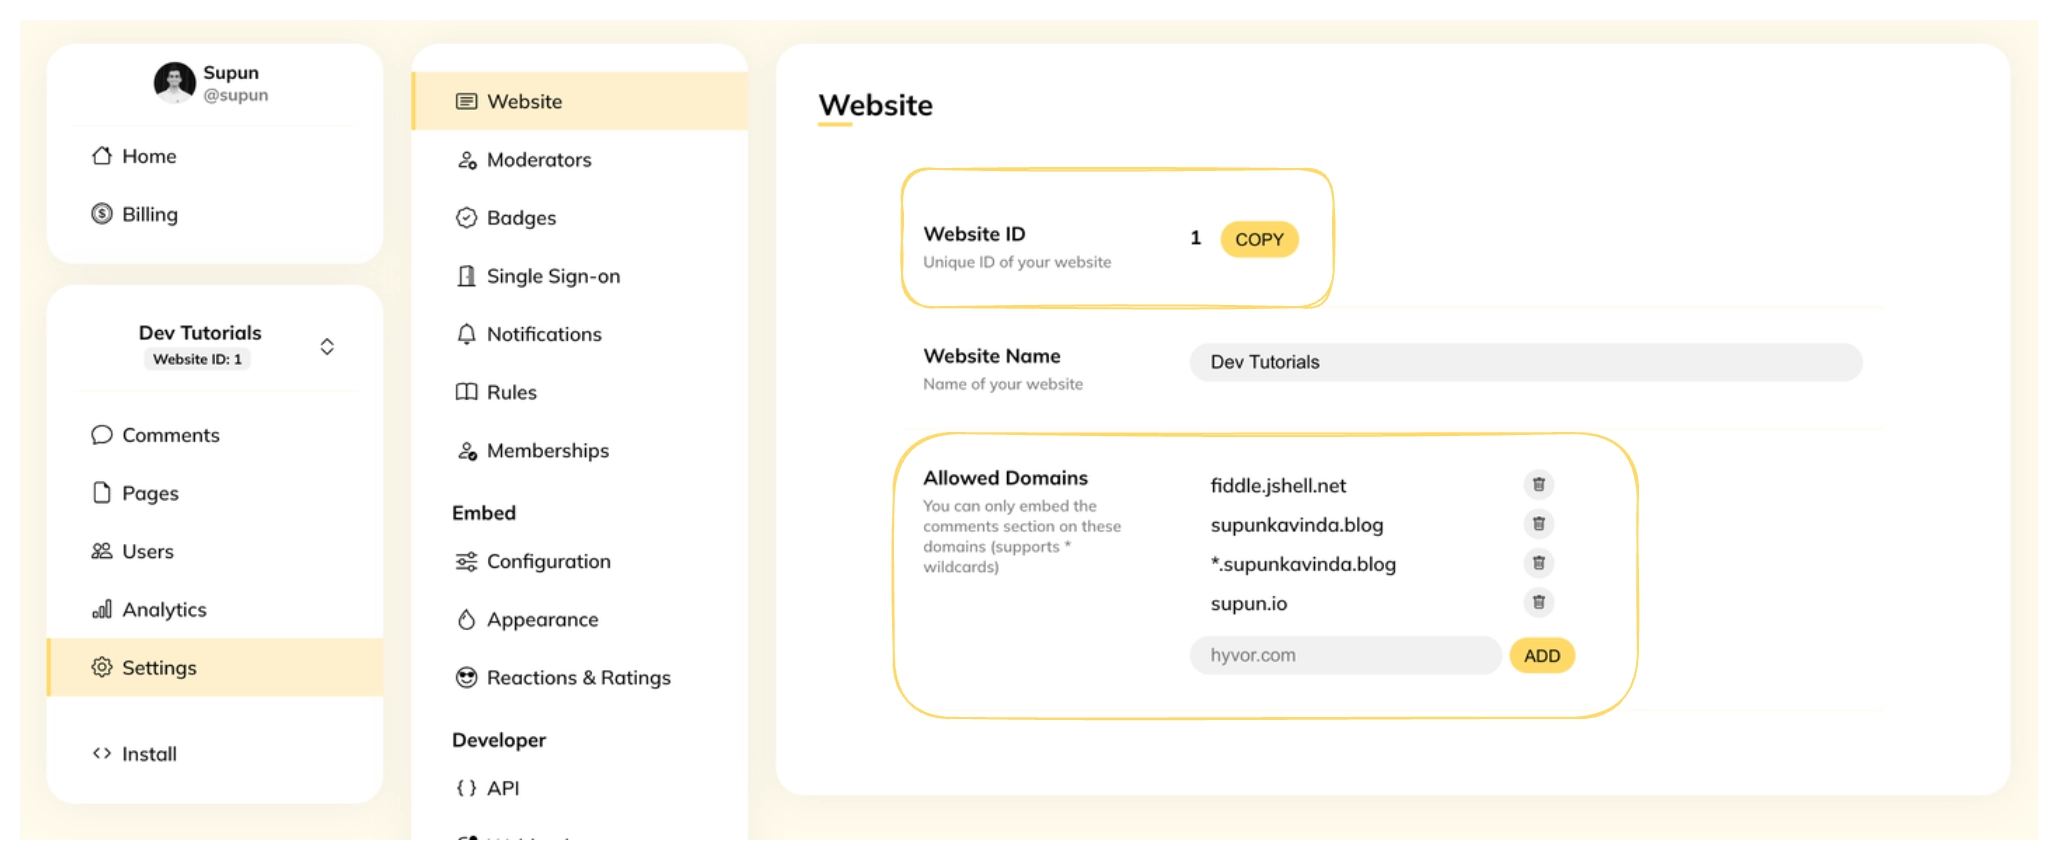
You can get your website ID, which we will need in the next steps, from settings. Also, if you need, you can add more domain names here.
Step 2: Integrate Hyvor Talk to your site
You can install Hyvor Talk on your Vue app using our @hyvor/hyvor-talk-vue library. Install it using your package manager:
1npm install @hyvor/hyvor-talk-vueor
1yarn add @hyvor/hyvor-talk-vueThis library provides two components:
<Comments>- comments embed<CommentCount>- display comment counts
Adding <Comments>
<Comments> is the main component to embed comments. It is a wrapper around our main web component, <hyvor-talk-comments>. Add the component to your app where you need comments to load.
1<script setup> 2import { Comments } from '@hyvor/hyvor-talk-vue'; 3</script> 4website-idis your Website ID from the last step. This is a number, therefore:is used.page-idis a unique identifier for each page. If you are adding Hyvor Talk to a blog, this would be a post ID. If this is omitted, the canonical URL of the page will be used as the identifier.
Tip: If you want to lazy load comments, use loading=”lazy”:
1<Comments2 :website-id="YOUR_WEBSITE_ID"3 page-id="UNIQUE_PAGE_ID"4 loading="lazy"5/>See all supported props in our documentation. Your IDE can also help if you use Typescript.
Listening to Events
Hyvor Talk comments embed emits a couple of events. You can listen to them in the Vue component using v-on or @.
1<Comments2 :website-id="YOUR_WEBSITE_ID"3 page-id="UNIQUE_PAGE_ID"4Check events docs to see all supported events.
Comment Counts
You can use the <CommentCount> component to display comment counts in your index pages or at the top of your pages. This can significantly increase engagement on your website.
1<script setup> 2import { onMounted } from 'vue'; 3import { CommentCount, loadCommentCounts } from '@hyvor/hyvor-talk-vue'; 4You can call the loadCommentCounts() function when all the <CommentCount> elements are mounted. This will populate comment counts using just one API call to our backend.
Resources
If you have any questions, please feel free to comment below.

Comments