Webflow offers creative professionals an easier, more visual way to design and host responsive websites. To date, web designers often simply outsource the work of coding a responsive site after first using something like Photoshop or Illustrator to create the design itself, or they use frameworks for front-end development. Webflow is different. It not only offers a visual editor that lets you drag and drop, customize responsive layouts, and define CSS styles for each device you want to support, but you can also publish your site immediately upon completion. In this article, I'll be guiding you on how to add comments to your Webflow website.
When you need to build an audience on your website, there are some key things that you need to do:
Adding social share buttons
Adding a comments section so that users can engage, share feedback, ask questions, and contribute to your content
Optionally, you can add a reactions system (so that users can add their reactions)
In this article, we are going to explain how to add comments to your Webflow website using the Hyvor Talk commenting platform. Surprisingly, Hyvor Talk comes with a reactions plugin. So, you can add reactions at the same time!
Why Hyvor Talk?
Hyvor Talk is a fully-featured commenting platform that you can embed on your Webflow website in a few minutes. It is also ad-free and privacy-focused. Unlike most other free plugins, Hyvor Talk does not place ads or affiliate links on your website to monetize your content. We are committed to protecting the privacy of your visitors. Hyvor Talk is fully customizable so that you can customize its colors, fonts, and texts so that it blends in seamlessly with the rest of your site or blog.
Additionally, the Webflow team has tested and listed Hyvor Talk as an official Webflow integration on Webflow University.
Installing Comments on Webflow
When it comes to the process of installing Hyvor Talk, you will realize that it is a seamless experience that is not fussy at all.
1. Sign Up for Hyvor Talk
Click over to Hyvor Talk and sign up.
Everything is controlled in the Hyvor Talk console. Click the link and create an account. After confirming the email, you'll be redirected to the console.
2. Adding Your Website to the Console
This step is easy. Just add a name and your website domain, and click "ADD".

2. Installing Hyvor Talk Comments on Webflow
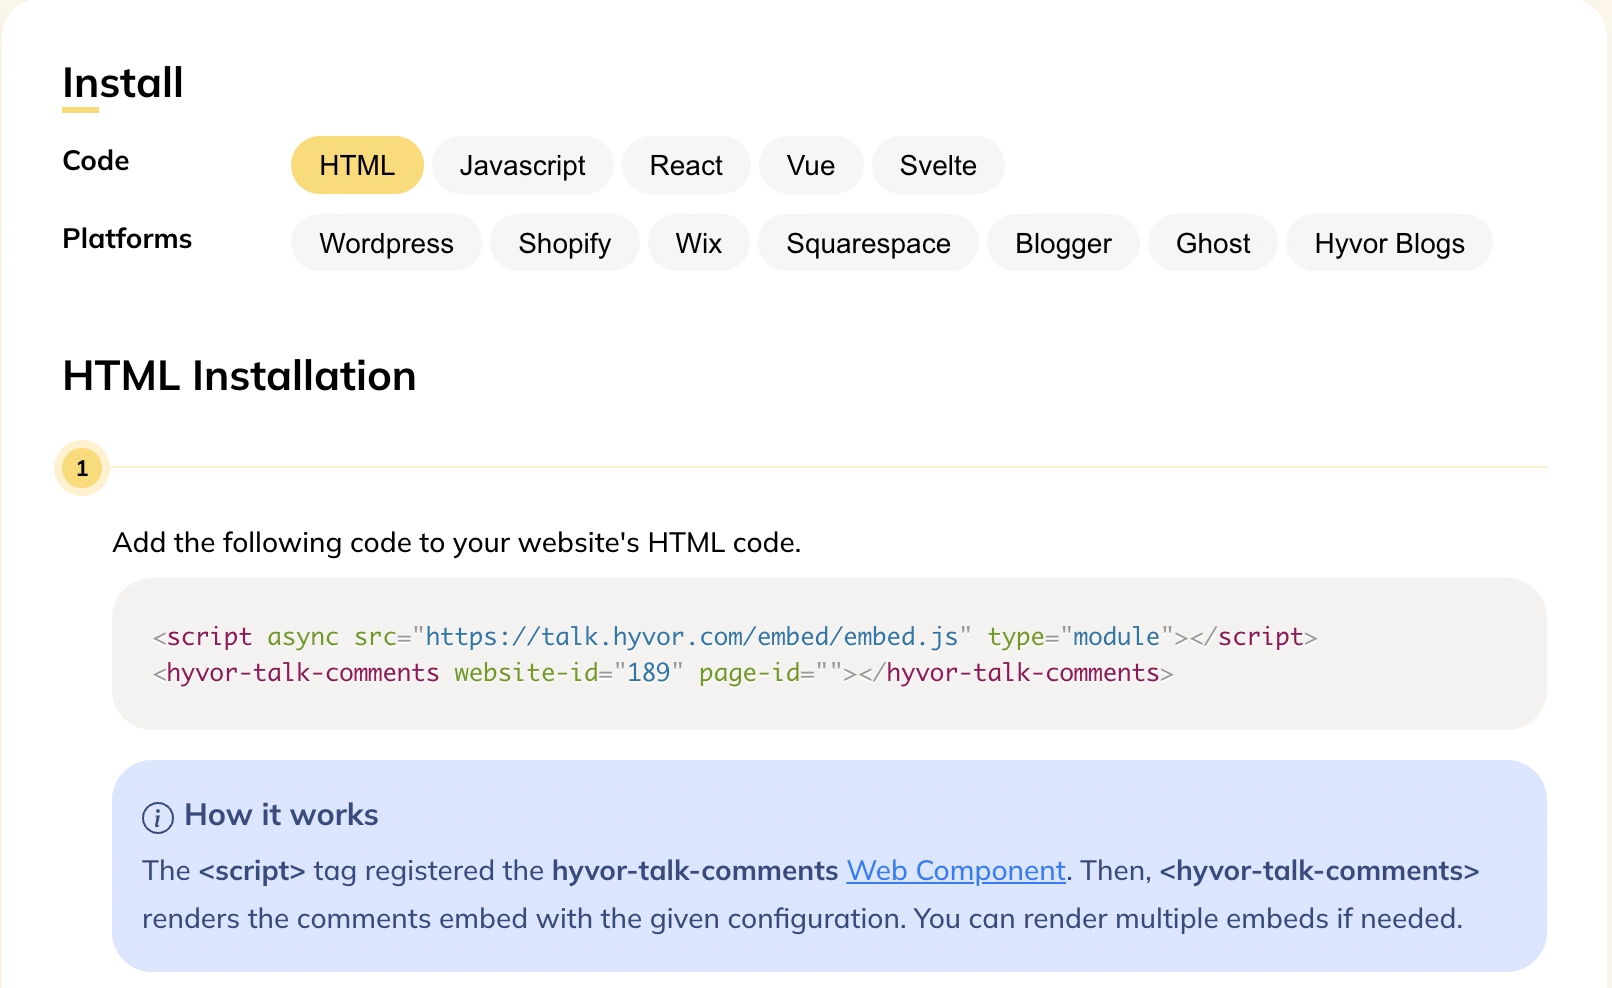
Copy the Embed code from the Install section. Note that website-id will be different in your case.

3. Now onto Webflow
We assume that you have already set up your Webflow website and you are familiar with the Webflow dashboard.
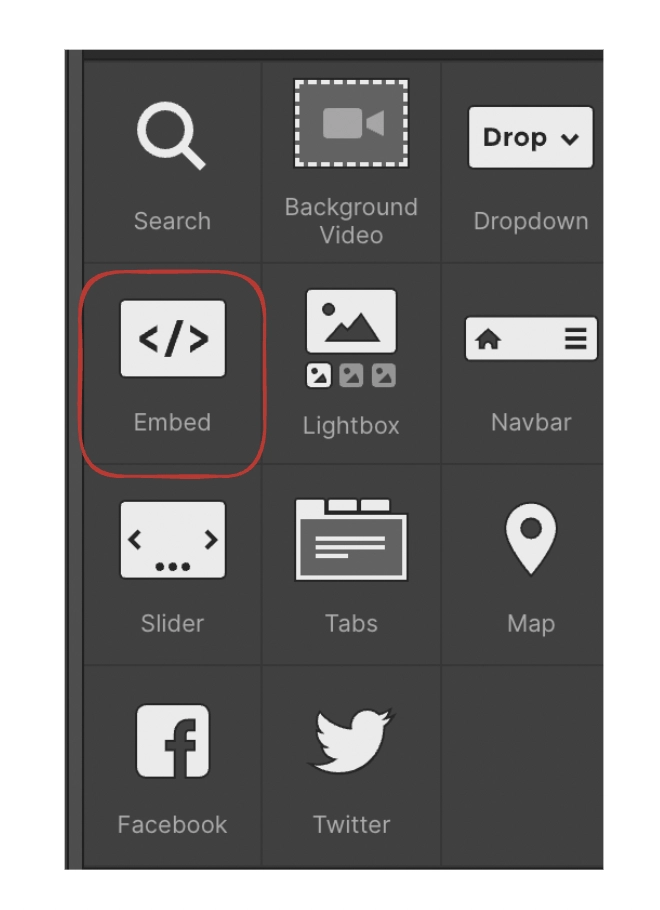
Then, add an embed component to the place you need comments to load (Usually after blog post contents).

Place the copied Hyvor Talk installation code in the code field of the embed. That's all! You'll now see the comments section with reactions.
Hyvor Talk has been embedded on your website!
4. (Optional) Set up Single Sign-on
If you have set up authentication on your Webflow website using Webflow Memberships or a third-party solution like Firebase or Memberstack, you can also set up Single Sign-on (SSO). This part is entirely optional. One benefit of using this method is that your users will be able to comment using accounts created on your website (no Hyvor account needed). We have tutorials on doing this on a few platforms.
If you are using any other platform for Authentication and looking to set up Single Sign-on, please contact us via the live chat. We are more than happy to help!
5. Tinker around with Hyvor Talk
In the console, you can customize the appearance of your commenting section with a few clicks. Check out our documentation to learn more about appearance customization.
After that, you can change how your users can comment, and what data to collect from them when commenting. Learn more about community settings.
Conclusion
There you have it: a simple and easy tutorial on how to install Hyvor Talk on your Webflow website. Usually, the best place to have comments is after blog posts. But, you can add it to any page you like. You can go through our documentation to learn more about Hyvor Talk.

Comments