If you're looking to offer exclusive content to your members, installing Memberstack can be a game-changer. Memberstack is a powerful tool that lets website owners easily add membership functionality to their website, without requiring any coding or development experience. In this article, we'll provide a step-by-step guide on how to install Memberstack onto your blog and create custom membership plans and features. With Memberstack, you can manage and monetize your user base, create personalized experiences for your members, and grow your online presence.
Let's get started!
Step 1 - Memberstack account setup
Sign up for a Memberstack account at https://www.memberstack.com
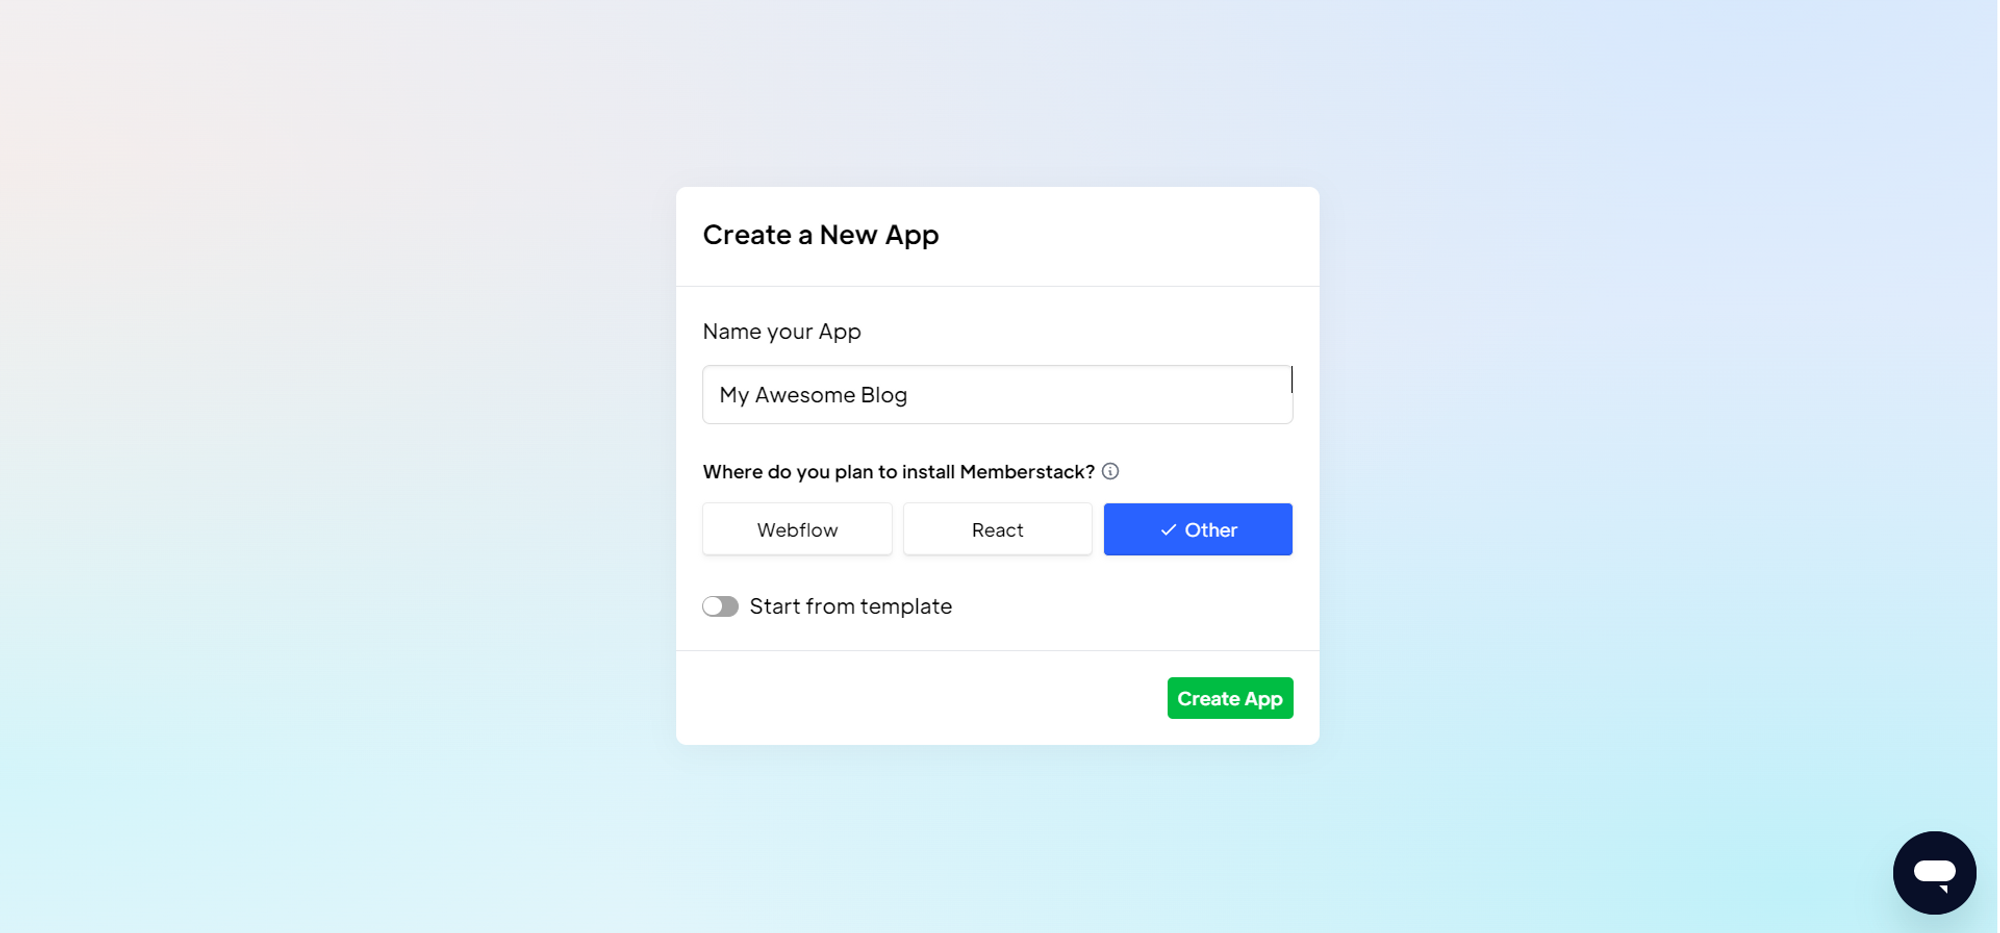
Create a New App
Name your app with the name of your blog.
To the “Where do you plan to install Memberstack?” question, choose Other.
You now have access to the Memberstack dashboard.
Step 2 - Link Memberstack to your blog
Go to the Settings → Application section.
Copy the Memberstack App ID.
Go to the Settings → Custom code section in your blog.
Copy the following code snippet and add it in the Head code section by replacing
MEMBERSTACK_APP_IDby your previously copied App ID:
1<script data-memberstack-app="MEMBERSTACK_APP_ID"2 src="https://static.memberstack.com/scripts/v1/memberstack.js"3 type="text/javascript">4</script>Click SAVE to apply the modifications.
Memberstack is now installed on your blog.
Step 3 - Creating Signup, Login, and Logout links
You may want your blog’s members to have access to specific content. The step is to allow your users to become members by signing up or logging in.
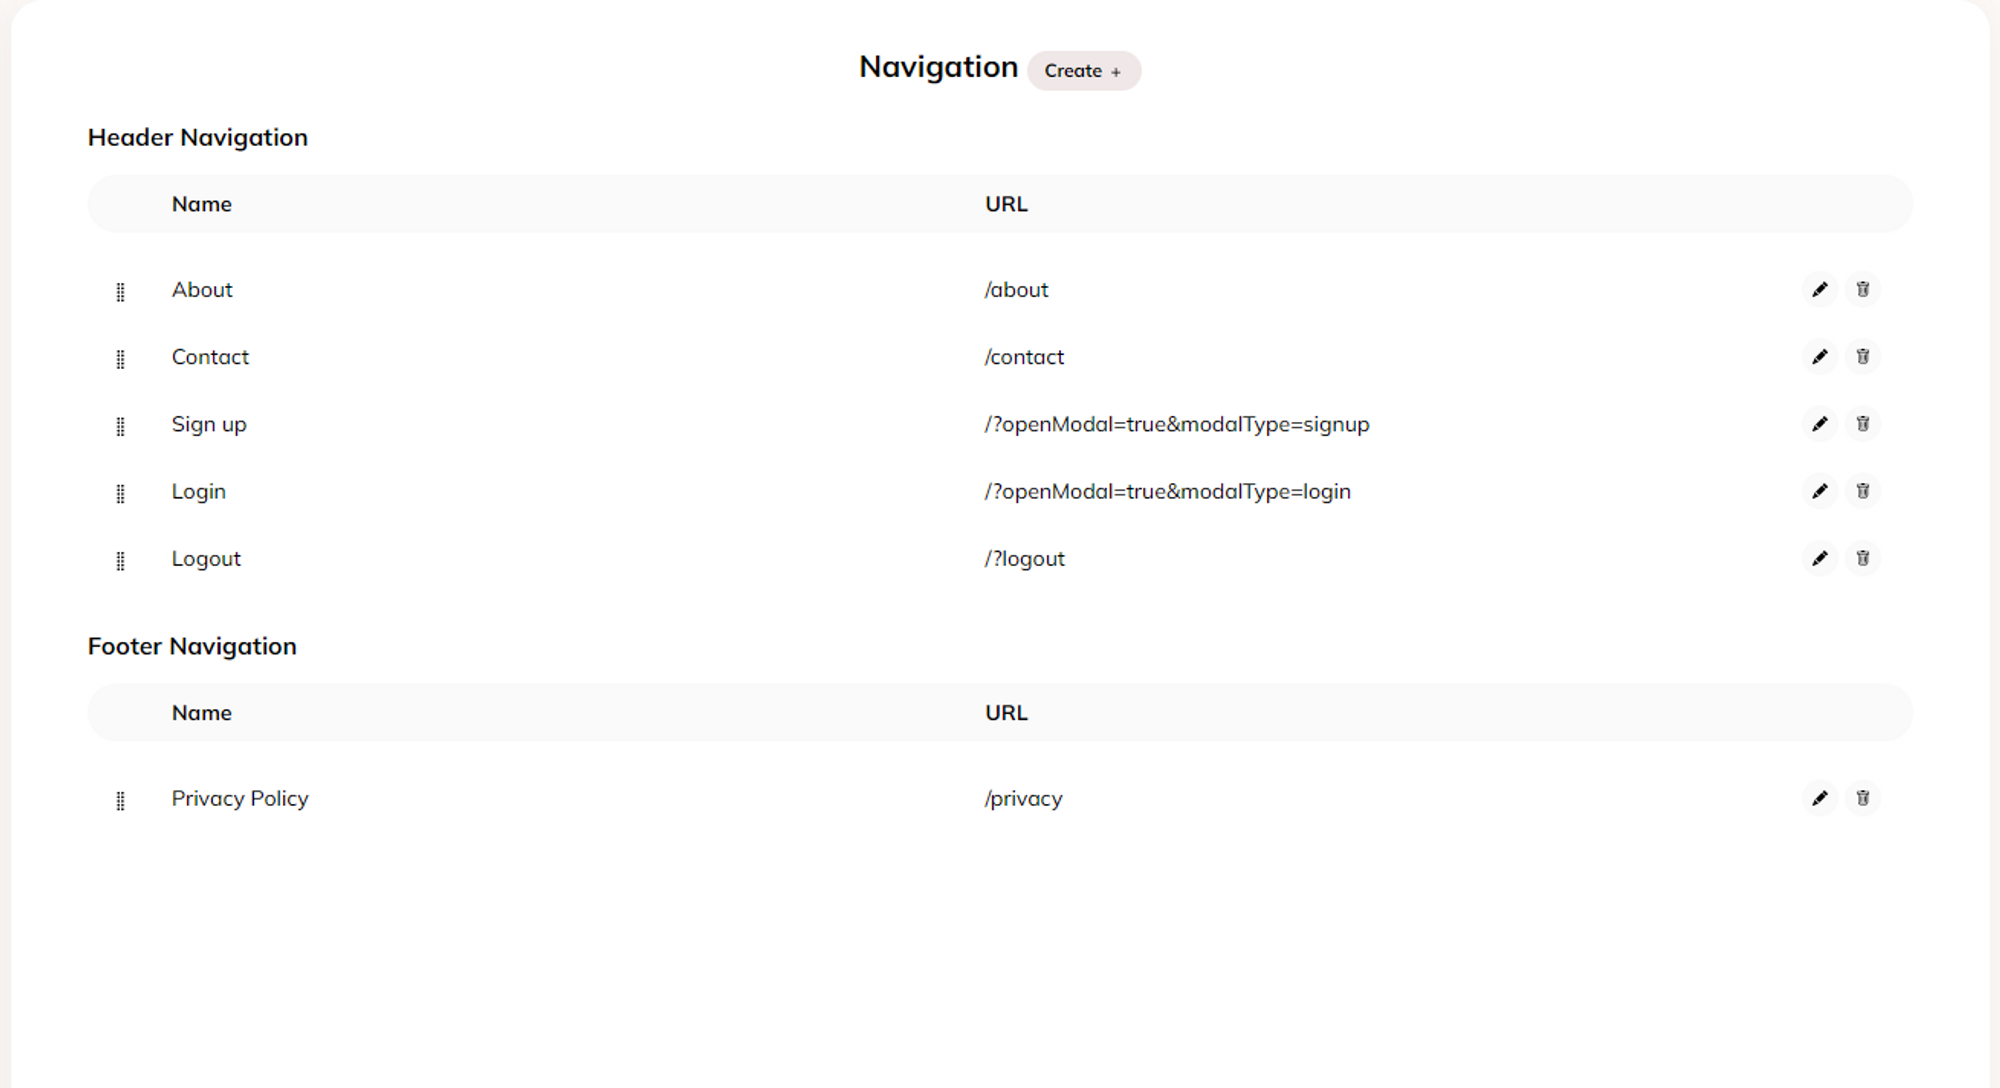
In the Settings → Navigation section of your blog, add the following links in the header
/?openModal=true&modalType=signup/?openModal=true&modalType=login/?logout
In the Settings → Custom Code section, disable Flashload. Since we will use advanced Javascript features, we need to disable this feature.

Add the following code snippet in the Foot Code section:
1<script type="module"> 2import * as queryString from "https://cdn.jsdelivr.net/npm/[email protected]/+esm"; 3Click Save to apply the modifications.
You now have Signup and Login links only available for your non-members and a Logout link only available for your members.
Step 4 - Make content available for members only
You may want your members to have access to some specific content that is hidden from your non-member users. This step will show how to hide a page from non-members.
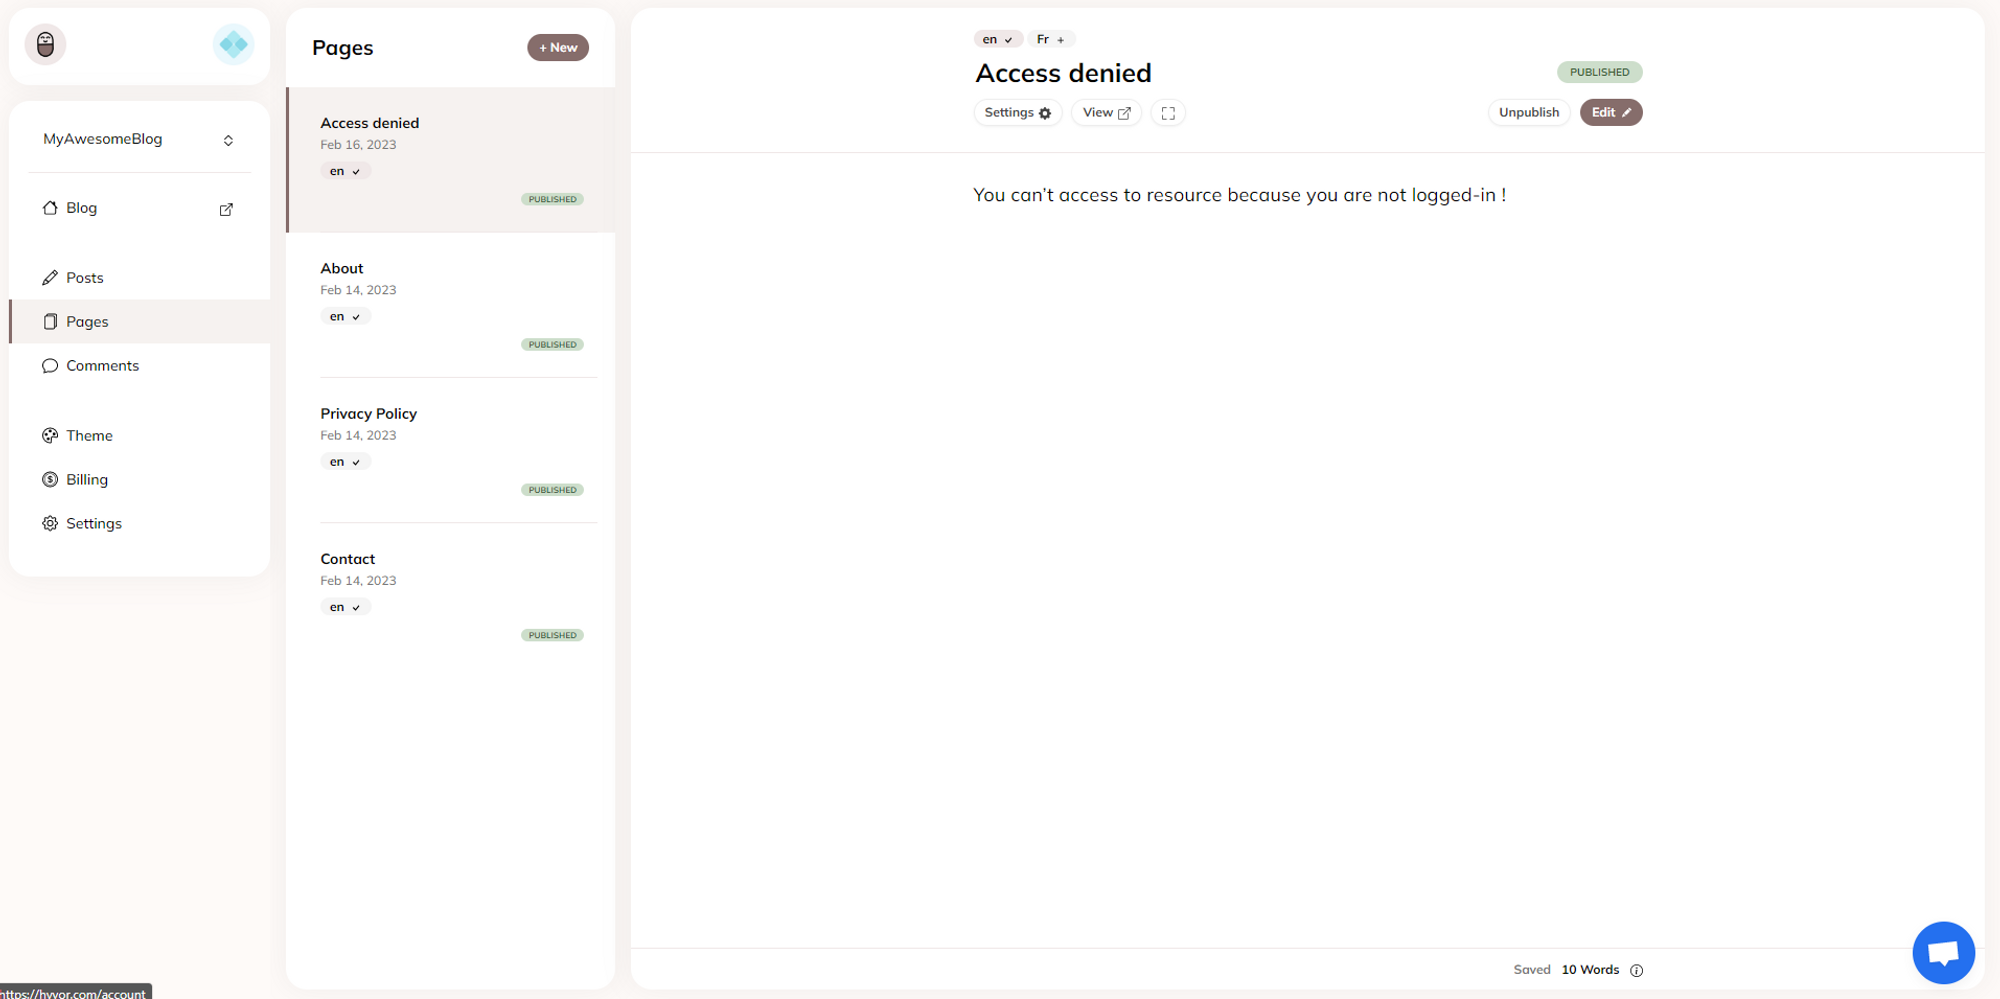
Create and publish a new page called Access Denied in which you explain why your user can’t access some contents when they are not logged in.
Create and publish a new page that you want to make available only for your members.

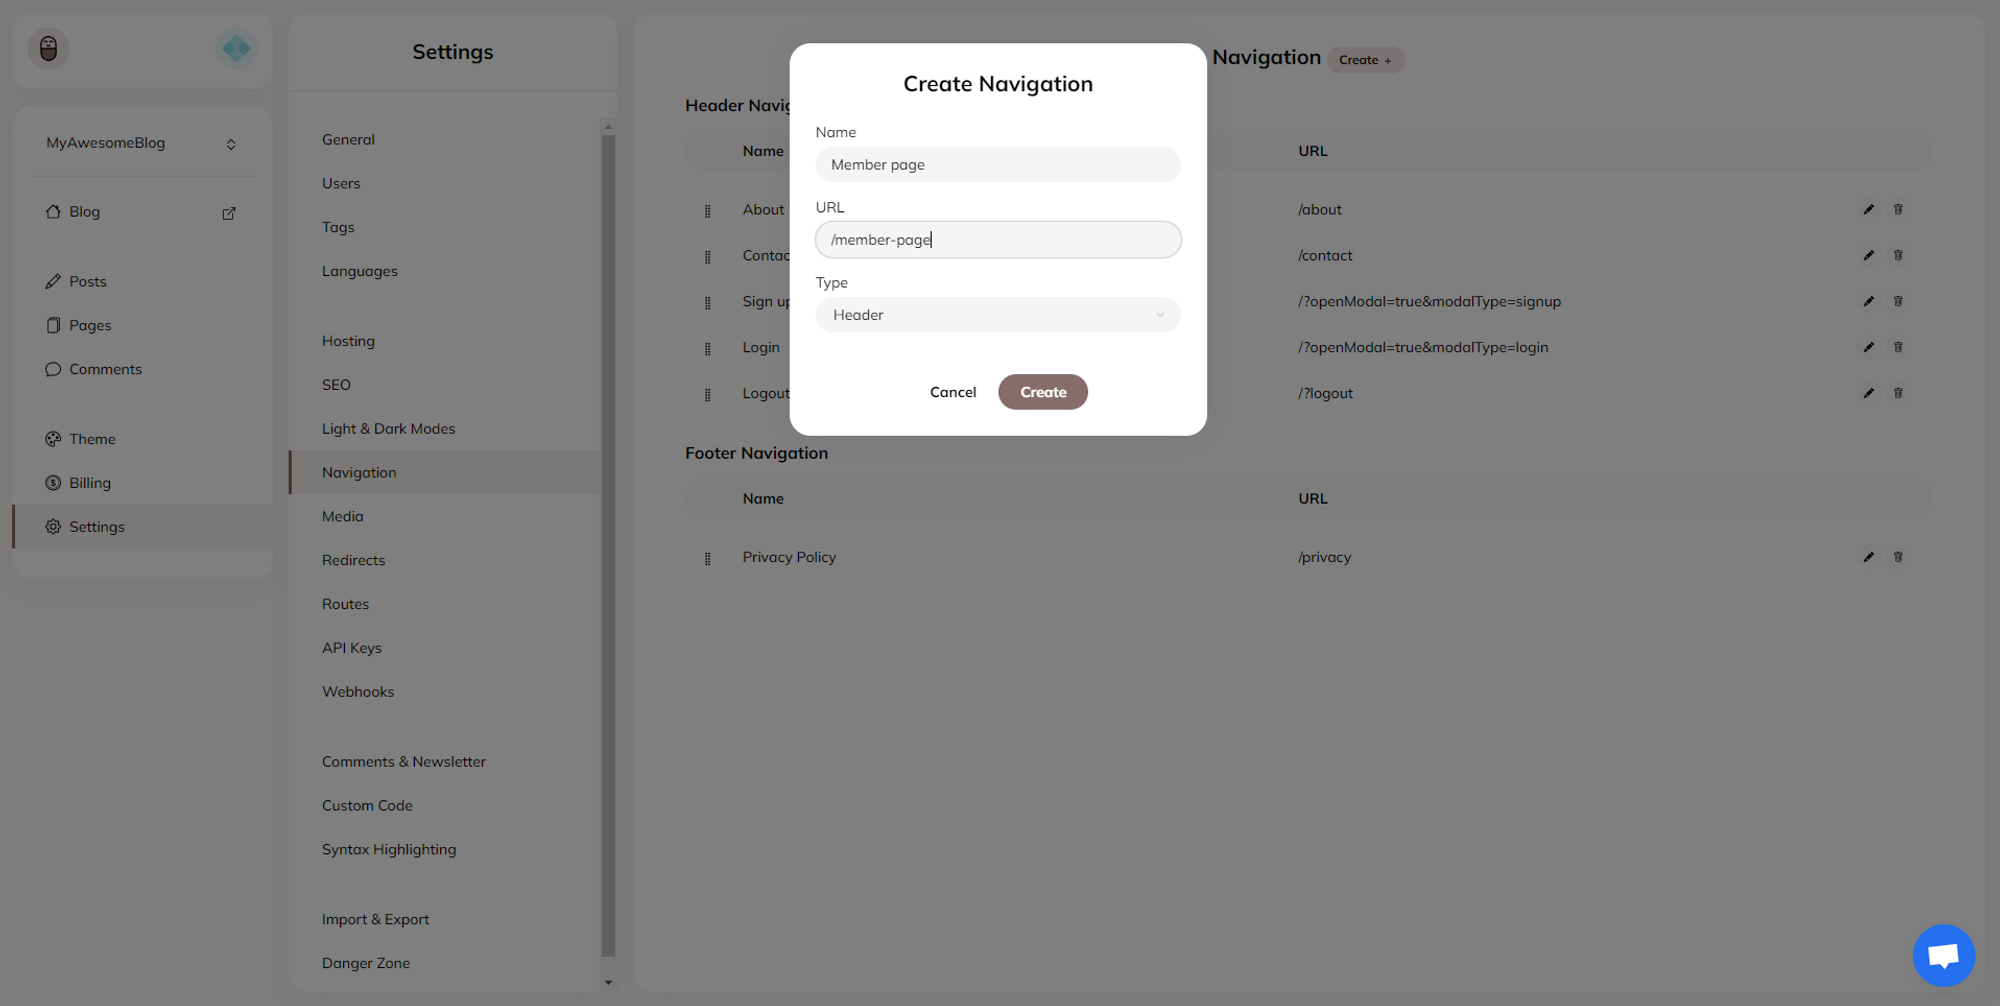
In the Settings → Navigation section of your blog, add navigation for the previously created page.
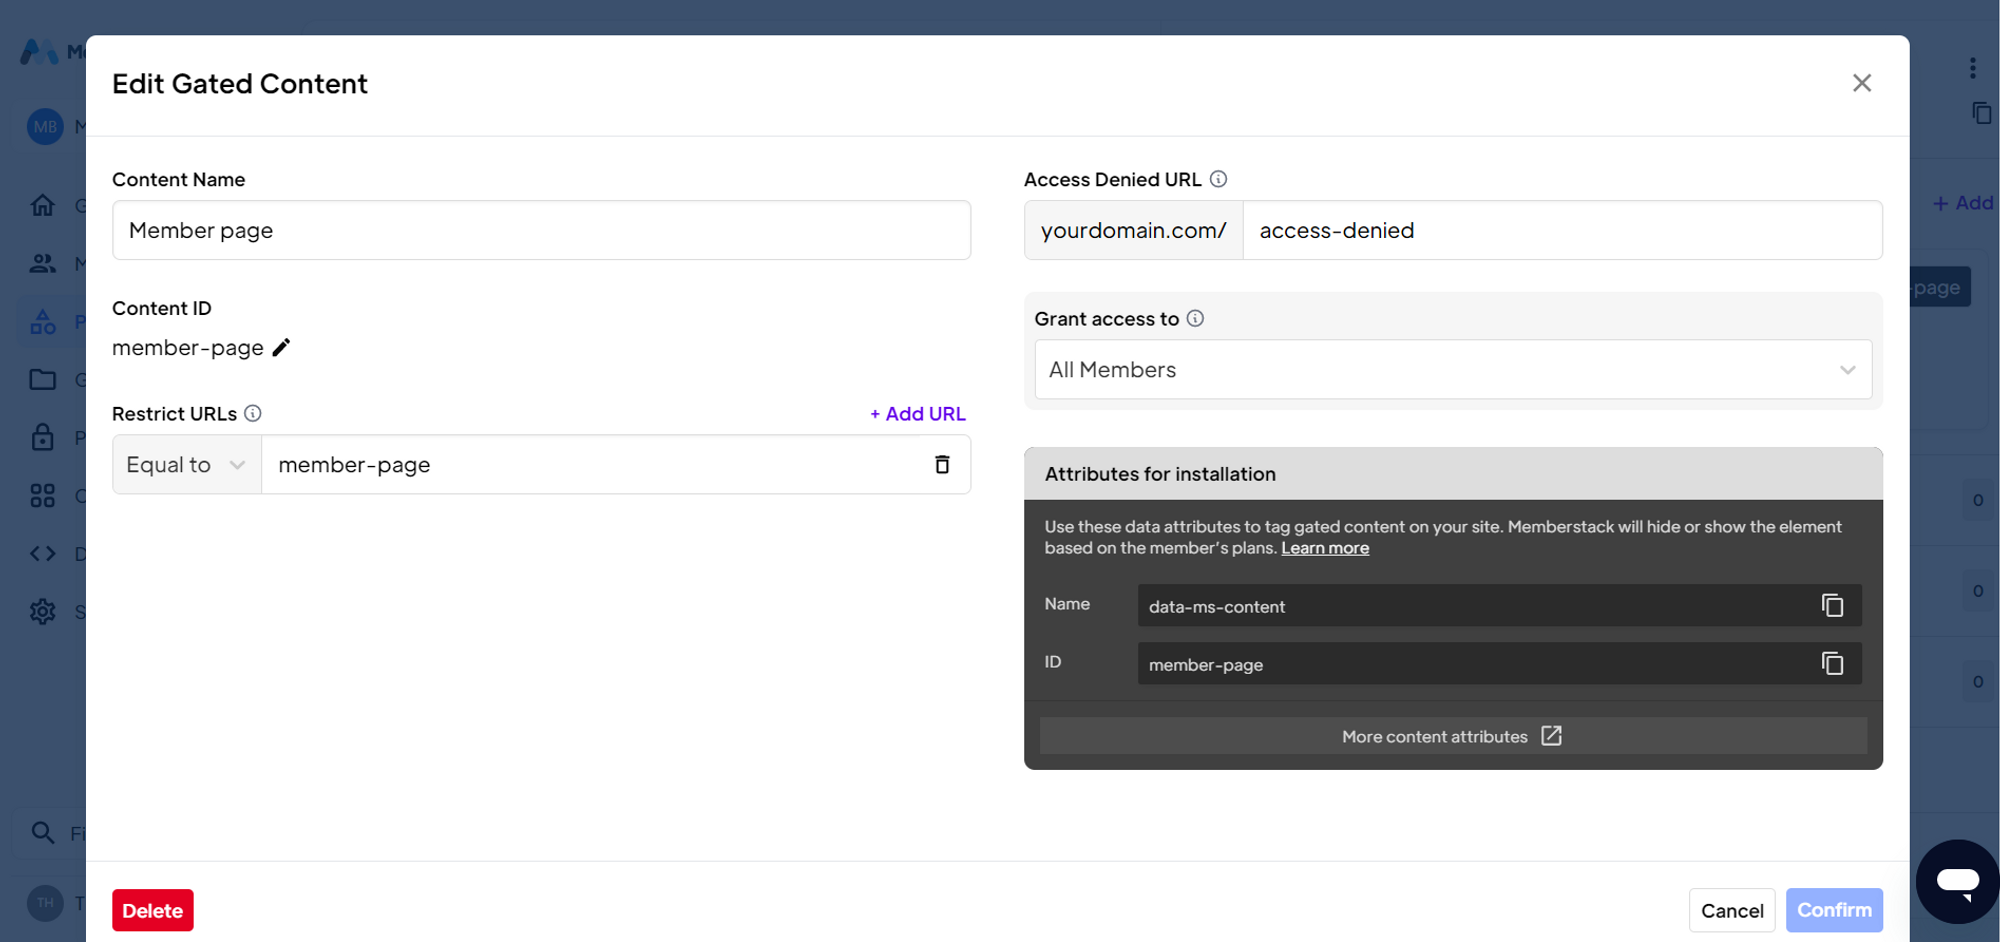
Go to the Gated Content section of your Memberstack console.
Click on +Add
Give a name to your content, and use the name of your member page.
Restrict the URL of your member page.
Redirect to the URL of your access denied page.
Grant access to All members.
Click Save.
This way, your non-members will be redirected to the access denied page and only your member will have to the member page. You can apply this step to blog pages and blog posts.
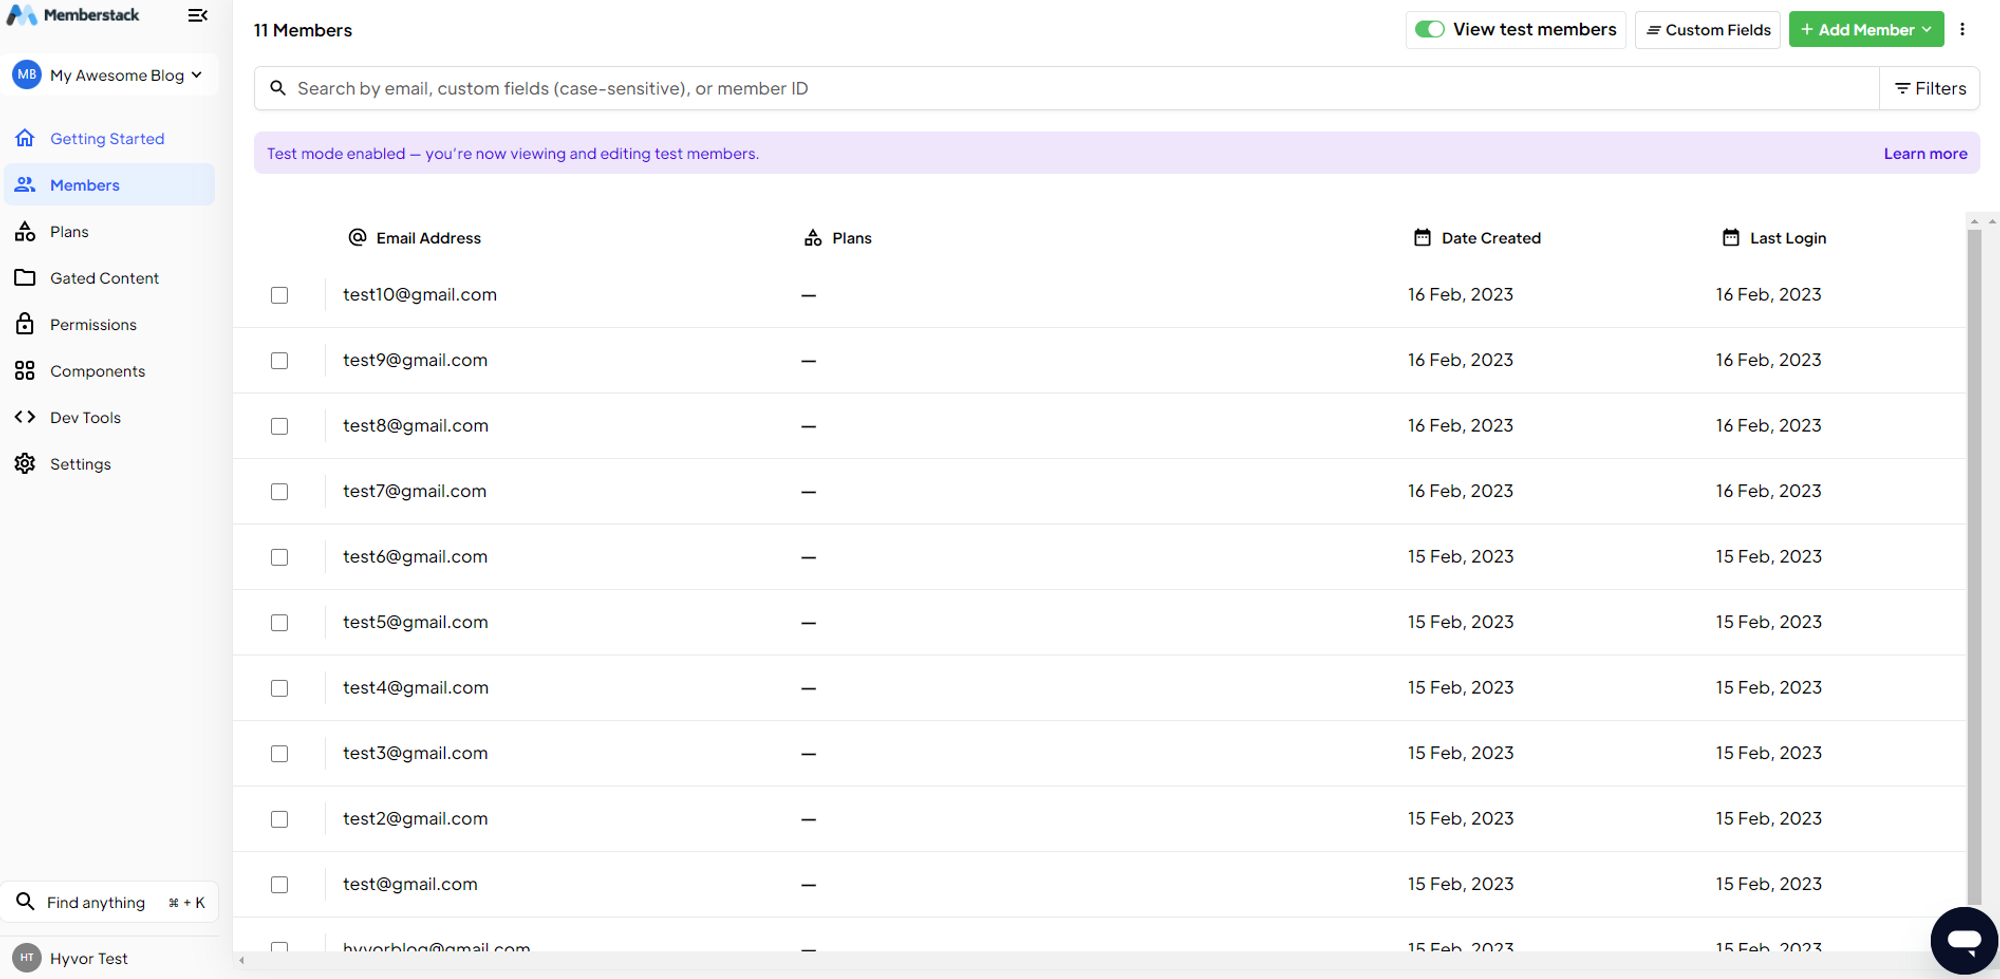
Now that Memberstack is installed into your blog, you can have a view of your members in the Members section of the console.
In summary, installing Memberstack onto your blog is a simple process that involves signing up for an account, installing the code onto the website, and customizing the membership plans and features. This tutorial presents the implementation of a few features proposed by Memberstack. In fact, Memberstack provides a range of features such as custom sign-up forms, member profiles, and automated email campaigns to help website owners manage and monetize their user base. With this tool, you can provide even more features to your blog users.

Comments