In this tutorial, I will walk you through building a blog using SvelteKit and Hyvor Blogs, a Headless CMS for blogging.
We are big fans of Svelte and use it for development. That is why we started with Svelte in our headless CMS tutorials.
Before starting the tutorial, here is a brief explanation of Headless CMS for beginners. If you aren’t a novice, skip to the tutorial. Note that this tutorial uses Svelte 5: hence this is a Svelte 5 blog.
What is a Headless CMS, and Why Use It?
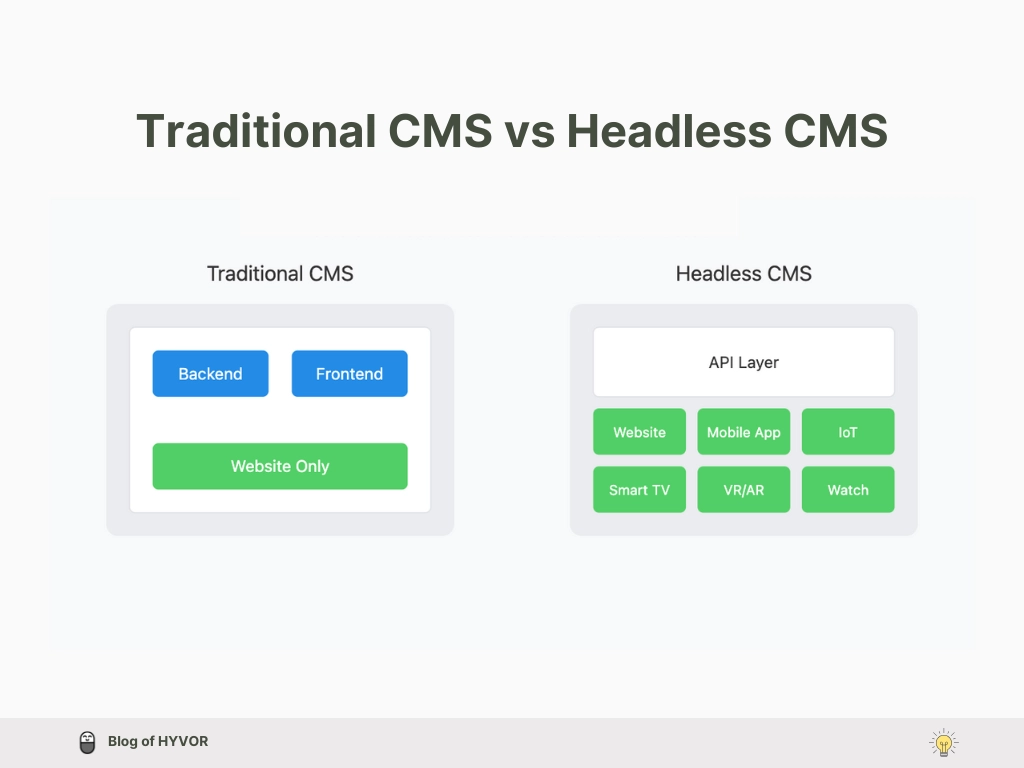
Basically, a headless CMS stores your content and lets you use it anywhere you want. It's called "headless" because it doesn't have a fixed "head" (the front-end part that visitors see) – you can attach any kind of "head" you want! In other words, a headless CMS can send your content anywhere through its API. All you need is to fetch data from the API and present your content to your users as you prefer.
Using a headless CMS, content creators can still use a friendly interface to write and manage content, while developers can build amazing experiences using whatever tools they love. It's perfect for companies or enterprises that want their content to appear in lots of different places without having to copy-paste everything manually. Not only companies, but developers who love hassle-free content creation while building beautiful frontends can try this too.
Here is a simple image infographic to help you understand how a headless CMS differs from a traditional CMS.
Why Hyvor Blogs as your Headless CMS?
Hyvor Blogs is an all-in-one blogging platform that mainly focuses on blogging: no e-commerce, no portfolios, just blogging. As such, we offer bloggers the following features.
Multi-language blogging including RTL language blogging.
User-friendly, team-friendly console with markdown-friendly rich text editor
Data API for headless cms
Hosting privileges: subdomain, custom domain, sub-directory, or anywhere you like.
Developer-friendly: console API, delivery API, webhooks, etc.
Fast blogging and so much more.
Now let’s move to the tutorial!
Step 1: Set Up Your SvelteKit Project
Set up a new SvelteKit project:
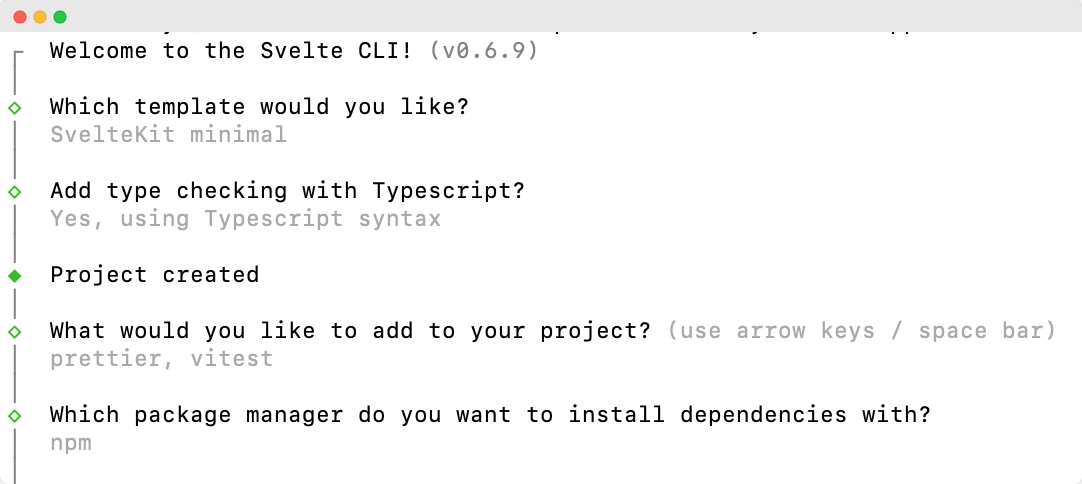
Begin by creating a new SvelteKit app. Run the following command in your terminal:1npx sv create my-appReplace
my-appwith your preferred project name.As you hit “Enter” you will get several questions by svelte CLI for your preferences, the following on the below image were mine. Make sure to change things according to your liking.
Navigate to the project directory:
Move into the newly created project folder:1cd my-appInstall project dependencies:
Once inside the project folder, install the necessary dependencies:1npm installRun the development server:
Start the development server to preview your project:1npm run dev -- --openThis will start a local server, usually available at
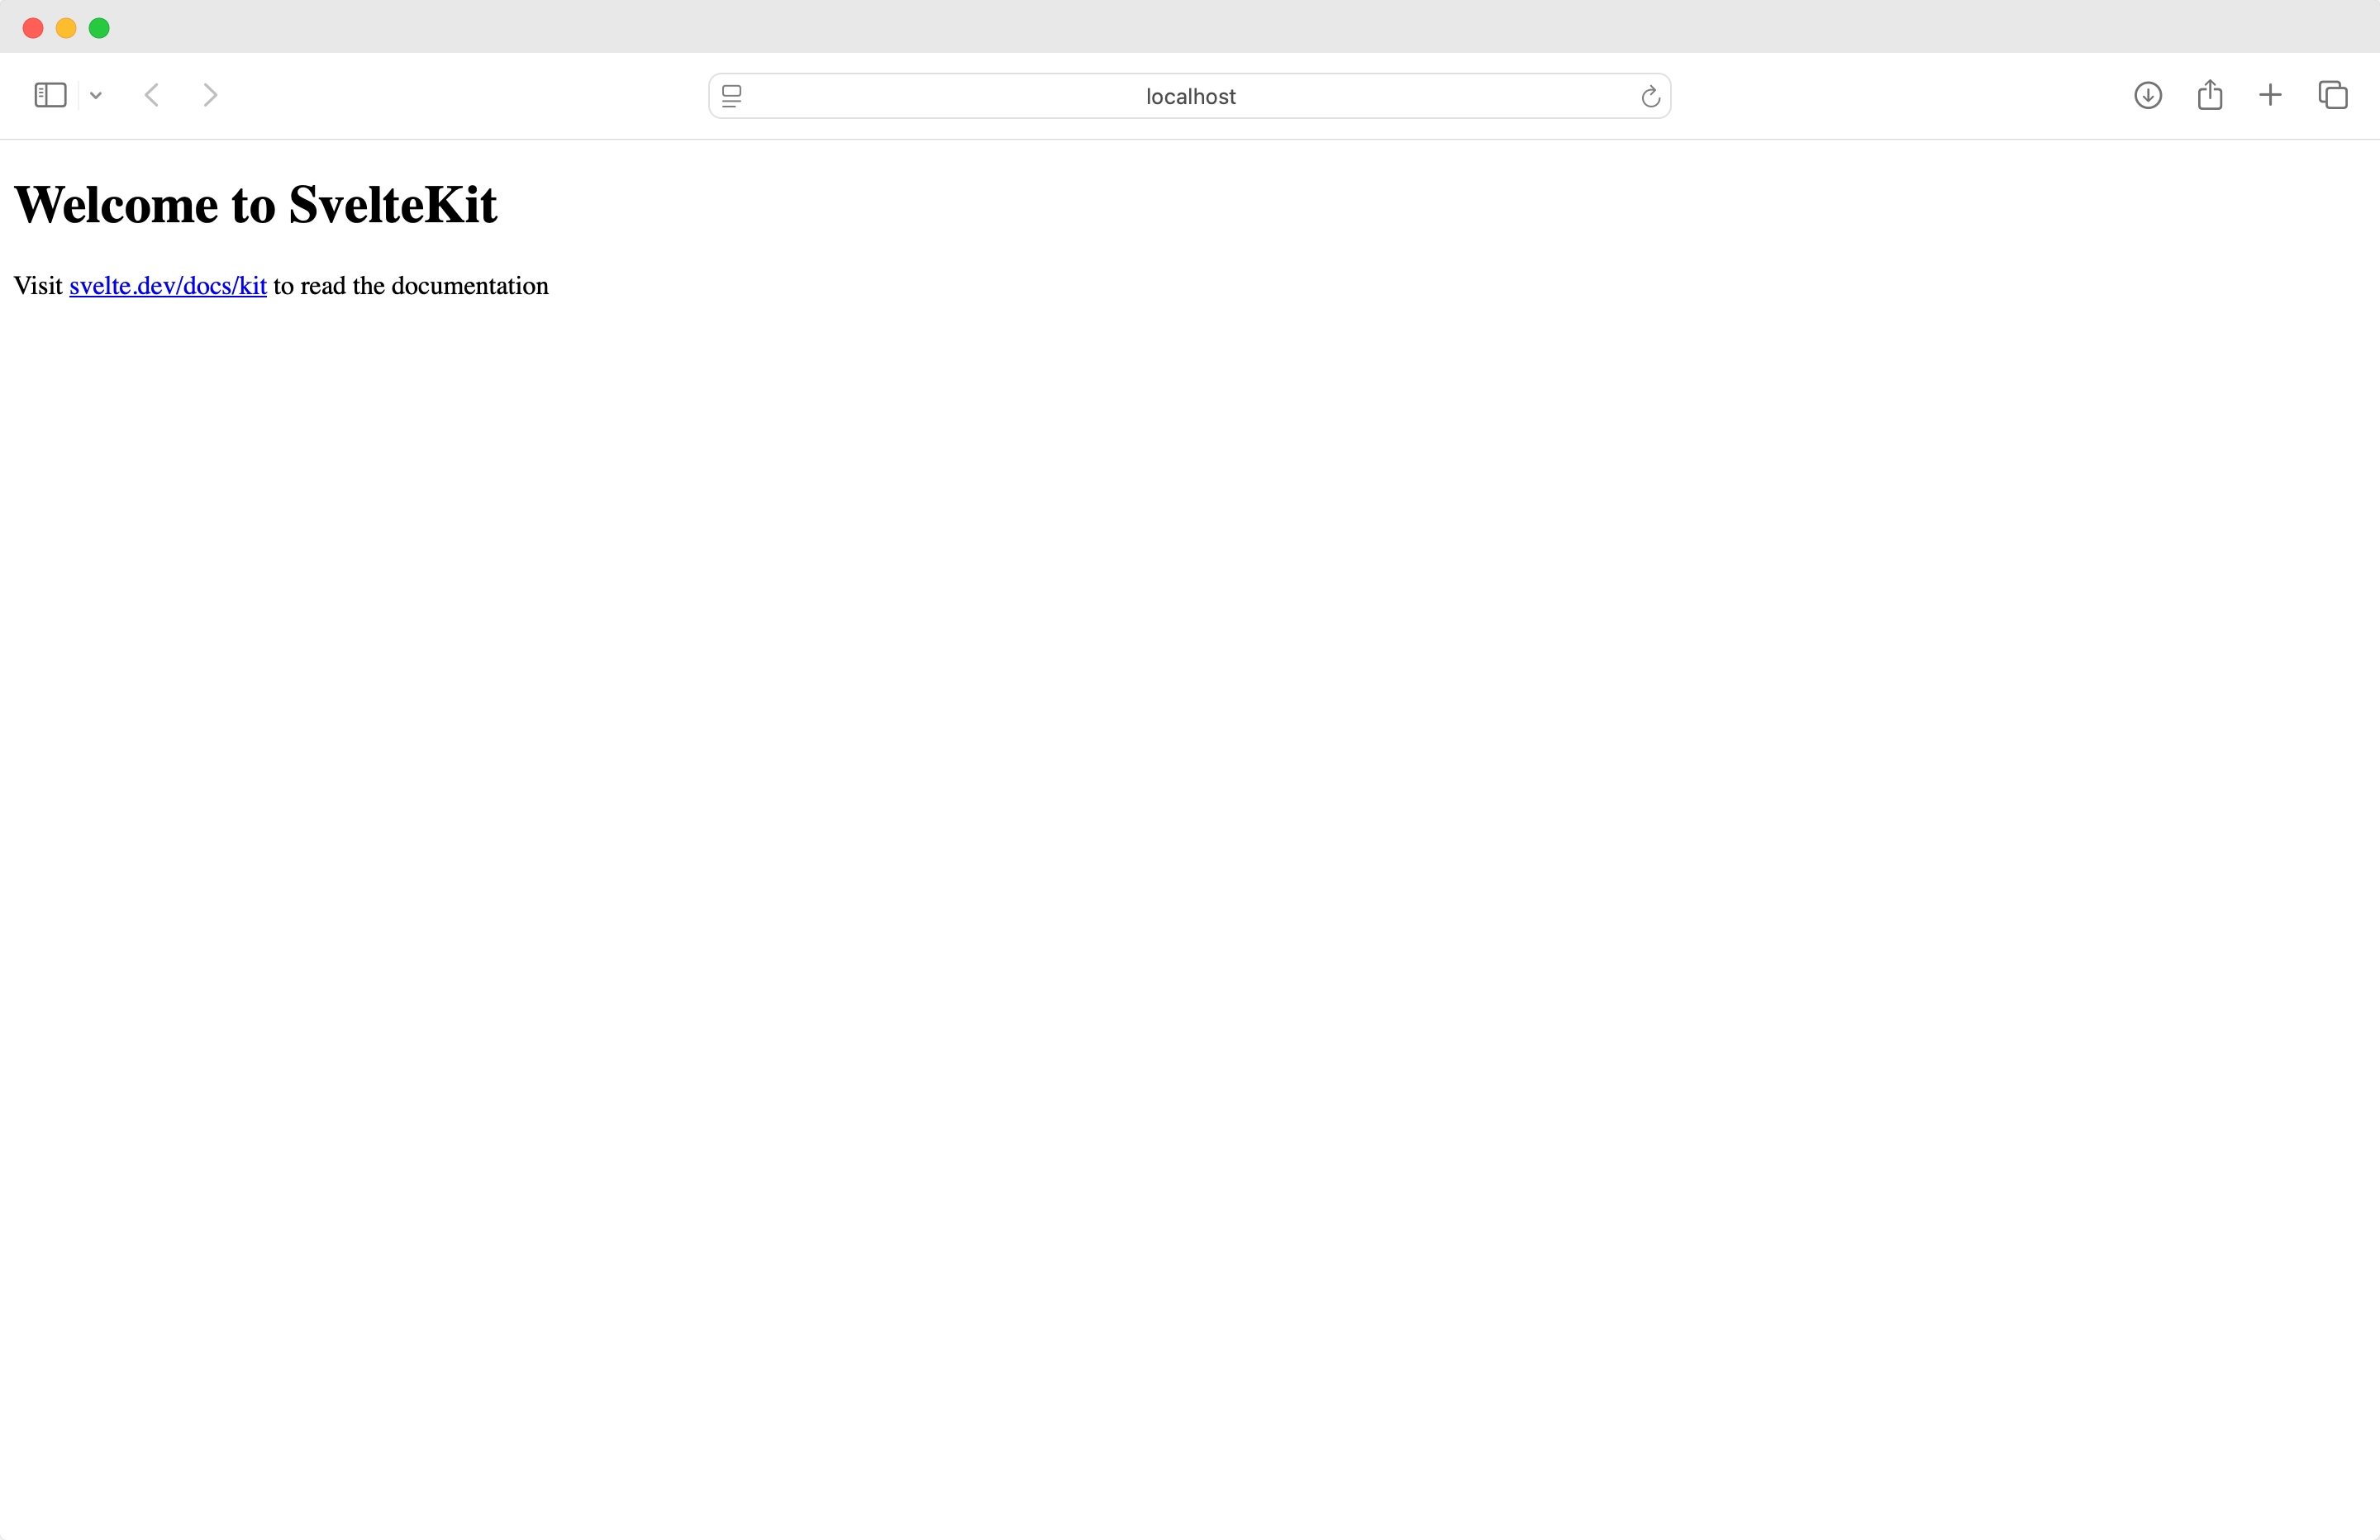
http://localhost:5173. This command will open your project from the browser. Then you will see something like this.
This is the file hierarchy of our project for now.
1my-app/ 2├── src/ 3│ ├── lib/ 4│ ├── routes/ 5│ │ ├── +layout.svelte 6│ │ ├── +page.ts 7│ │ ├── +page.svelte 8│ └── app.css 9├── static/10├── tests/11├── .svelte-kit/12├── node_modules/13├── package.json14├── svelte.config.js15├── tsconfig.json16├── vite.config.js17└── README.mdStep 2: Create your blog at Hyvor Blogs
Go to the Hyvor Blogs console and create your blog. Once you have created your blog in Hyvor Blogs, we need t the subdomain of the blog.
Go to Console -> Settings -> Hosting -> Subdomain.

For this tutorial, I’m using headless-cms as my subdomain.
To work on building this Svelte blog with Hyvor Blogs as a headless CMS, we use Hyvor Blogs Data API. Here is the Data API documentation of Hyvor Blogs. Here are some things you need to know before start using HB data API.
All the responses are in the JSON format
All the endpoints use the HTTP
GETmethodThe base path
https://blogs.hyvor.com/api/data/v0/{subdomain}For example in this case,
https://blogs.hyvor.com/api/data/v0/headless-cms
Let’s continue.
Step 3: Index Page
In this step, we are going to create a homepage for the blog: the page where we list all our blog posts.
Create a
/src/routes/+page.tsto fetch data from Hyvor Blogs Data API. Using the base path, call Data API’spostsobject to fetch post data.1export async function load({ fetch }) {2 const response = await fetch('https://blogs.hyvor.com/api/data/v0/headless-cms/posts');34 const { data } = await response.json();5 return { posts: data ?? [] };6}Rather than doing this in
+page.svelteitself, we used+page.tsbecause using+page.tsin SvelteKit enables server-side rendering (SSR) for fetching data on the server for faster initial data loading. It also preloads data too.Goto
/src/routes/+page.sveltefile which renders the post loop data you called from the Data API. This will load the posts loop of your blog.1<script lang="ts">2 import type { PageData } from './$types';3 let { data }: { data: PageData } = $props();4 const { posts } = data;5</script>67<div class="posts">8 {#each posts as post}9 <article>10 <h2><a href={`/${post.slug}`}>{post.title}</a></h2>11 <p>{post.description}</p>12 </article>13 {/each}14</div>Once completed, it will look something like this. I have added a header and footer and some simple CSS for better visualization.
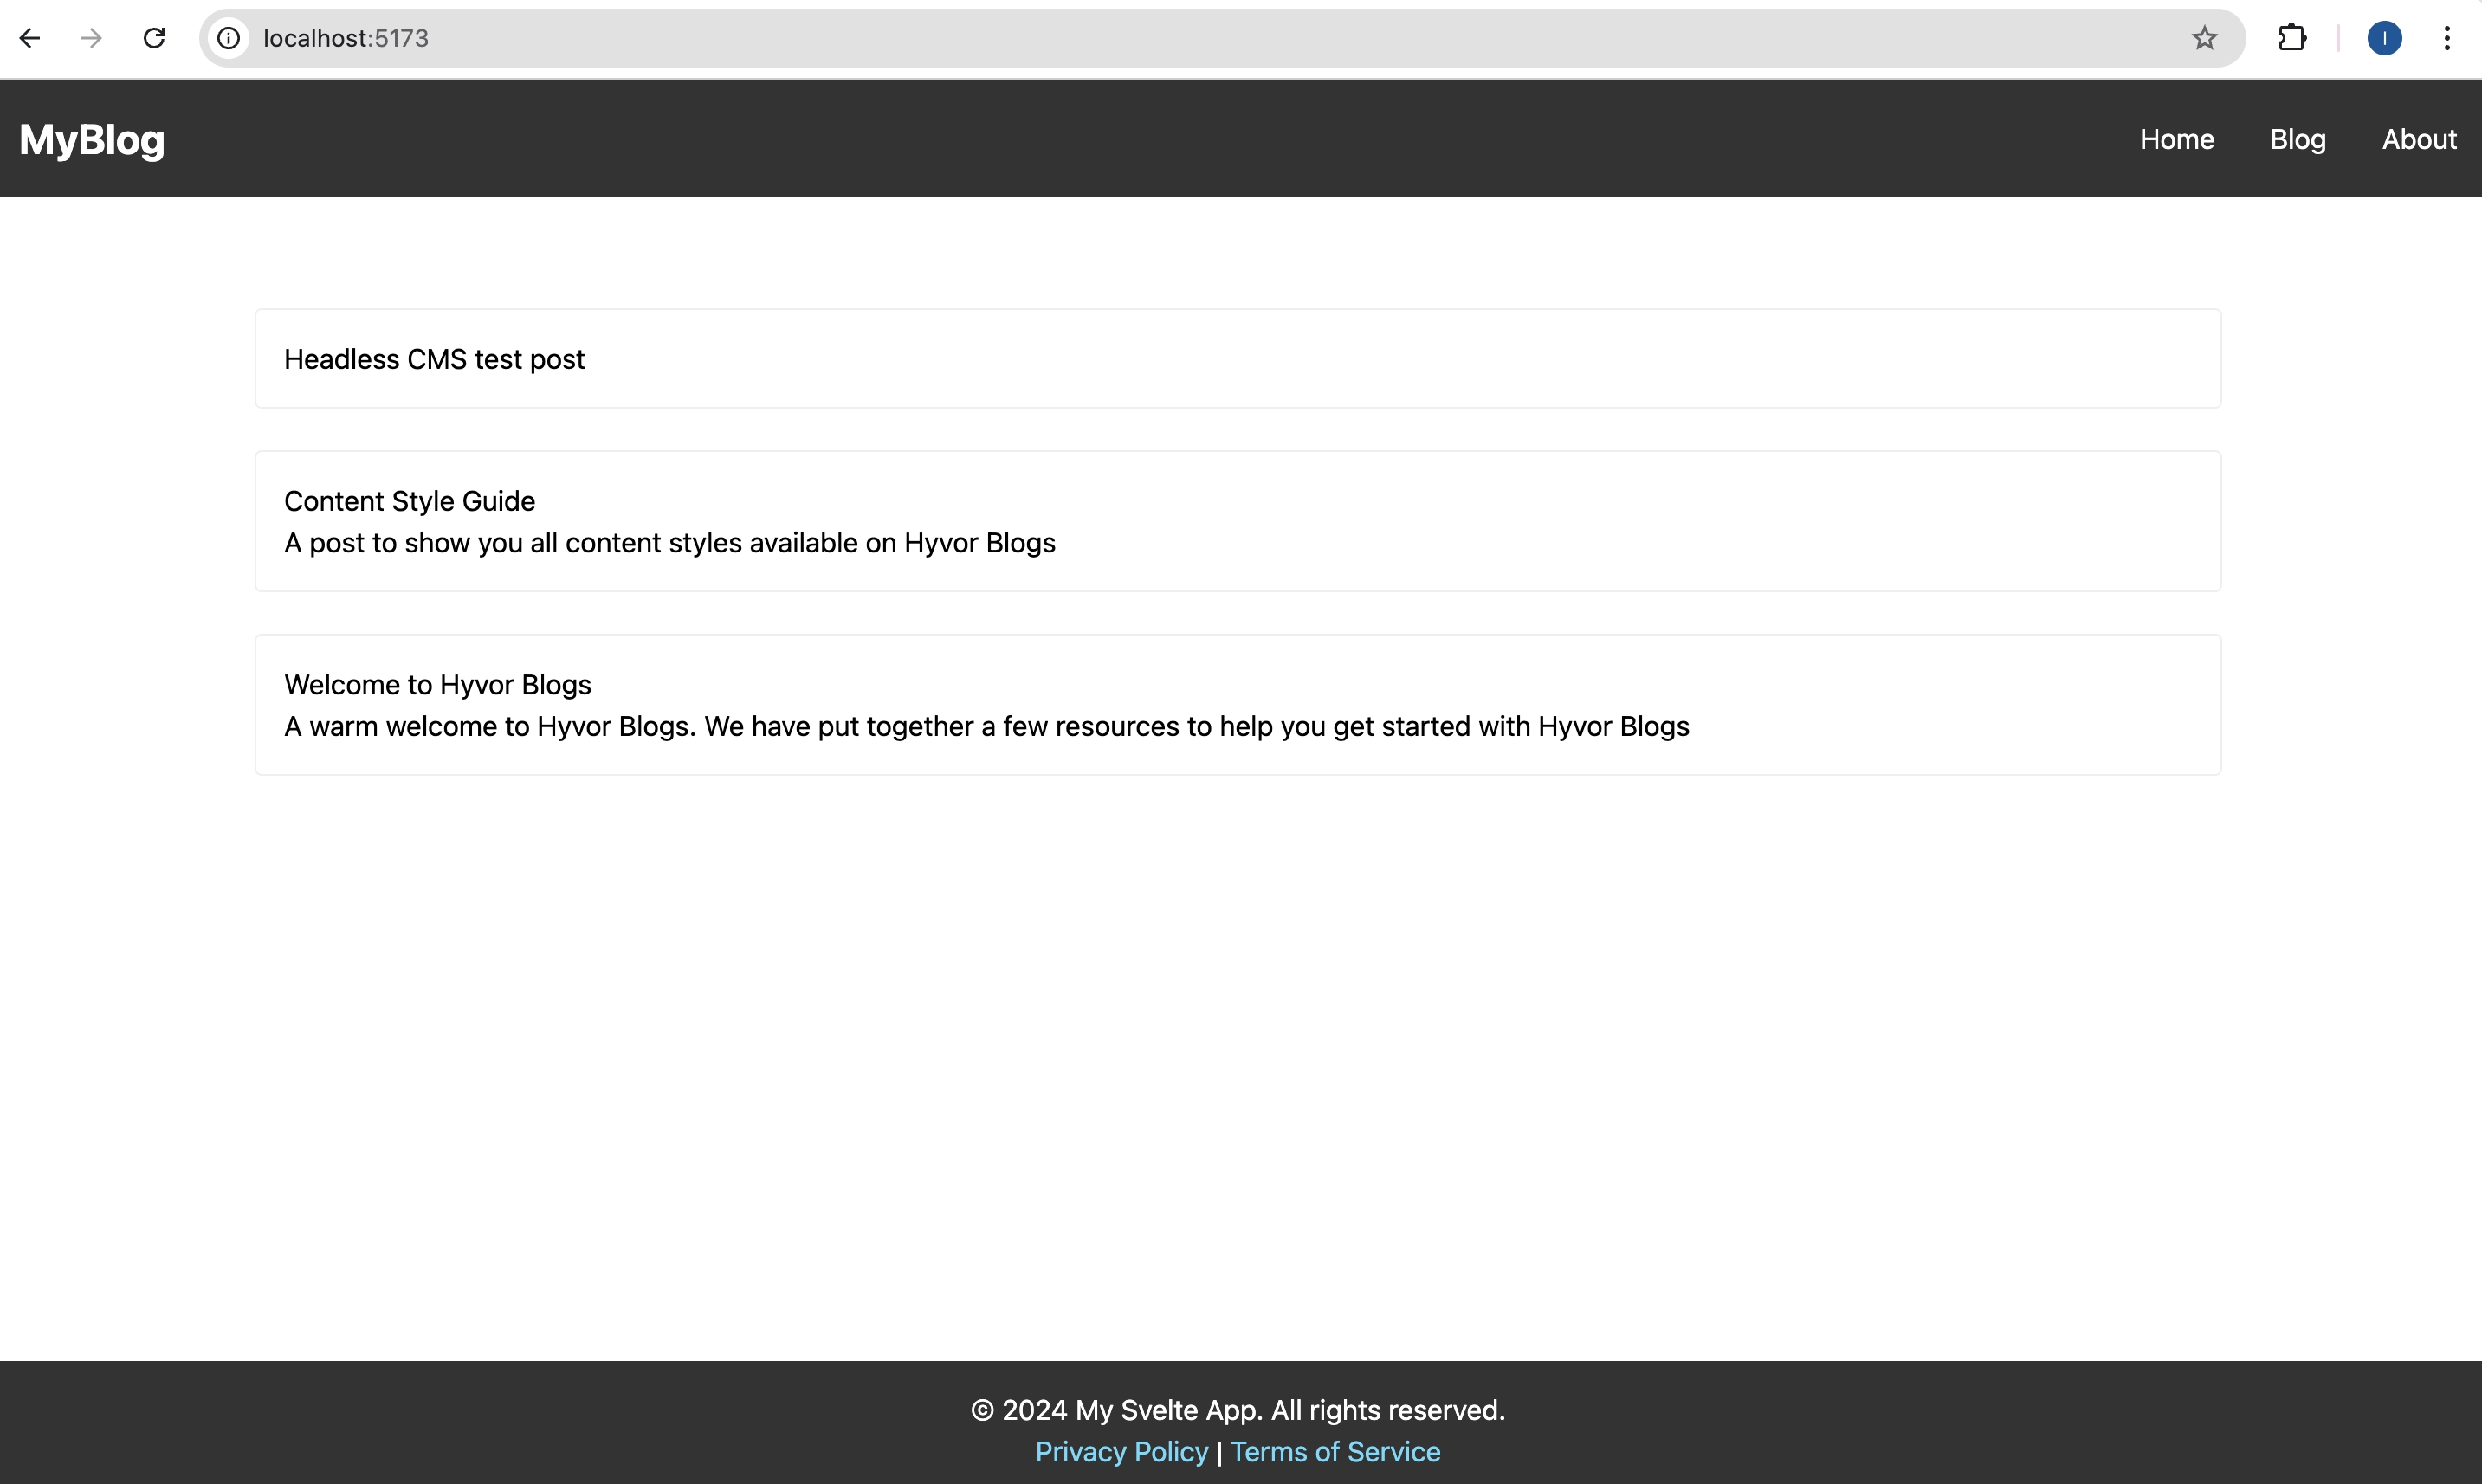
Index/homepage with list of posts There are so many endpoints given by Hyvor Blogs Data API for you to display data on your blog. See more.
Step 4: Post Page
In this step, we are going to show the content of posts using the slug of each post. Thus, a particular post loads with the URL headless-cms/post-slug .
Set Up Routing: Create a new route for displaying posts. Create a folder
[slug]in theroutesfolder:/routes/[slug].Then create
+page.tsand+page.sveltein it.Fetch post data of each post using
+page.ts.1import type { PageLoad } from './$types';23export const load: PageLoad = async ({ fetch, params }) => {4 const slug = params.slug;5 const apiUrl = `https://blogs.hyvor.com/api/data/v0/headless-cms/post?slug=${slug}`;67 try {8 const response = await fetch(apiUrl);910 if (!response.ok) {11 throw new Error(`Post not found: ${slug} ${response.status} ${response.statusText}`);12 }1314 const post = await response.json();1516 return { post };17 } catch (error) {18 console.error('Error fetching post:', error);19 return { post: null };20 }21};22Render the fetched post data in
+page.svelte.1<script lang="ts">2 import type { PageData } from './$types';3 let { data }: { data: PageData } = $props();4</script>56<article>7 <h1>{data.post.title}</h1>8 <p>{data.post.description}</p>9 <div class="content">10 {@html data.post.content}11 </div>12</article>That’s all for showing post content. Here is a snap of our example blog.

Step 5: Pagination
To set up the pagination of your blog, we use the Pagination Object of Hyvor Blogs data API. To limit the number of posts we show on each page, we will be using limit and page params.
We are going to create pagination pages on routes like /page/1
Go to
/routes/+page.ts. We have to make some changes to our previous code to integrate pagination.
1export async function load({ fetch }: { fetch: any; params: Record<string, string> }) { 2 const limit = 2; // Number of posts per page 3 const response = await fetch( 4 `https://blogs.hyvor.com/api/data/v0/headless-cms/posts?limit=${limit}&page=1` 5 ); 6As you can see, I have used limit param to limit the posts per page and page param. And we are getting data from the pagination object.
Go to
/routes/+page.svelte. Let’s add pagination buttons for navigation. You can simply create pagination buttons as follows in+page.svelte.
1//............. +page.svelte2<div class="pagination">3 {#if data.pagination.page > 1}4 <a href="/page/{data.pagination.page - 1}">Previous</a>5 {/if}6 {#if data.pagination.page < data.pagination.pages}7 <a href="/page/{data.pagination.page + 1}">Next</a>8 {/if}9</div>But, to avoid repetition and as a best practice: abstraction, let’s create a component for Pagination.
Go to
/lib/componentsand create a filePagination.sveltefor our pagination component.
1<script lang="ts"> 2 import type { PageData } from '../../routes/$types'; 3 let { data }: { data: PageData } = $props(); 4</script> 5Now you can use this component anywhere you want.
Go to
/routes/+page.svelteand add our pagination component as follows.
1<script lang="ts"> 2 import Pagination from '$lib/components/Pagination.svelte'; 3 import type { PageData } from './$types'; 4 let { data }: { data: PageData } = $props(); 5</script> 6Now, we are going to create dynamic routes for pagination pages. SvelteKit's dynamic routing will allow us to create a route that can handle /page/{n} URLs. We need to add a [page]folder inside /routes/ to handle the pagination logic.
Create your folder structure as follows and create the files as shown below.
1/src/routes/page/[page]/2 ├── +page.svelte3 └── +page.tsGo to
/routes/page/[page]/+page.ts. This file is similar to/routes/+page.ts, but it handles pagination for/page/{n}URLs.
1export async function load({ fetch, params }) { 2 const page = parseInt(params.page ?? '1'); // Default to page 1 if no page param 3 const limit = 2; // Number of posts per page 4 const response = await fetch( 5 `https://blogs.hyvor.com/api/data/v0/headless-cms/posts?limit=${limit}&page=${page}` 6 ); 7Go to
/routes/page/[page]/+page.svelteThis is the same as the code above we added in/routes/+page.svelte, but it will handle/page/{n}dynamically.
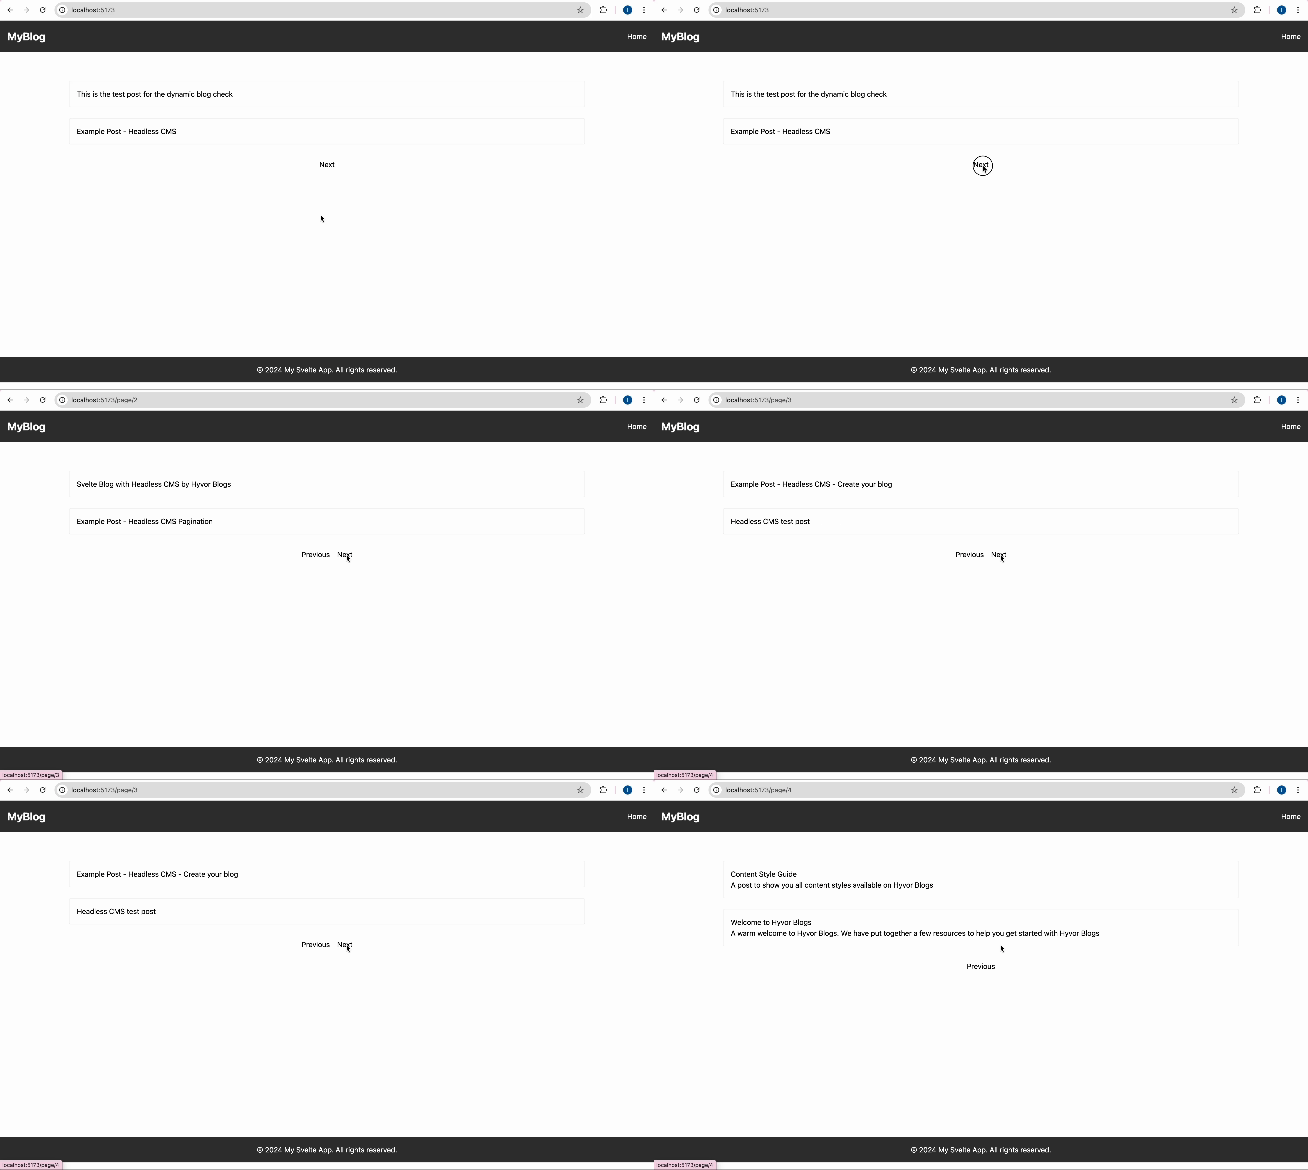
1<script lang="ts"> 2 import Pagination from '$lib/components/Pagination.svelte'; 3 import type { PageData } from './$types'; 4 let { data }: { data: PageData } = $props(); 5</script> 6Et voila! We have completed adding pagination to our Svelte blog.
Step 6: Build your Blog
Building your blog can be done in 2 ways. Each approach has its pros and is suited according to your needs.
1. Static Blog
In a static blog, all content is pre-generated at its build time. Pages are static HTML files, making this method fast, secure, and easy to deploy. This is ideal for blogs with rarely changing content, limited user interaction, and a focus on performance.
If you want to build this blog as a static blog, we have to install the Sveltekit static adapter. Run the following command in a different terminal.
1npm i -D @sveltejs/adapter-staticThis installs the static adapter as a development dependency. This static adapter enables you to generate a fully static version of your site for deployment to platforms like Netlify, Vercel, GitHub Pages, or any static file server.
Then, update svelte.config.js: After installation, configure the adapter in your svelte.config.js file:
1import adapter from '@sveltejs/adapter-static'; 2After that, we are going to add the prerender option to our root layout. To do that, go to routes folder and create a +layout.ts file
1export const prerender = true;Now we can build our static blog. Run the build command to generate the static site:
1npm run buildNow, you can use the preview command to serve the static files locally:
1npm run previewTo deploy, upload the build/ folder to your chosen static hosting provider.
2. Dynamic Blog
A dynamic blog fetches and renders content at runtime. Using server-side rendering (SSR) or client-side rendering (CSR), it can serve up-to-date content by fetching data from APIs or databases. So this is an ideal option if your blog is with frequent updates.
If you choose to have a dynamic Svelte blog, here is how you can build and deploy your blog.
We need an adapter that supports server-side rendering (SSR). So make sure to choose the one that you want. For this tutorial, I'm using Node.js. To install it,
1npm i -D @sveltejs/adapter-nodeThen you have to update your configuration file which is svelte.config.js to use the server-side adapter.
1import adapter from '@sveltejs/adapter-node';2After all that, you can simply run the following command to build your blog. This will create the production server in the output directory specified in the adapter options, defaulting to build.
1npm run buildTo preview your blog, run the following command.
1npm run previewThat’s it. Now you can deploy your site to a runtime environment as you prefer.
Tips
To add an author’s page, you can use the authors object.
To add a tags page, you can use the tags object.
To do multi-language blogging, you can use
languageparam and language object.
Yay! You've built a SvelteKit blog using a Headless CMS Hyvor Blogs.
Feel free to expand this project using our Data API endpoints and objects.

Comments