If you have a website with Docker and are thinking about adding a blog, you are on the right track. A blog is a great way to share updates, write about what you are building, and give your SEO a nice little boost.
When it comes to hosting a blog, you've got a few choices. Out of many options, hosting it under a subdirectory like yourwebsite.com/blog, appears to be a good solution instead of spinning up a whole new subdomain.
Why? Because it keeps everything under one roof. Your branding stays tight, search engines love the shared domain, and you avoid the hassle of managing cookies and sessions across different subdomains.
In this article, I will walk you through how to host a Hyvor Blogs blog on a subdirectory while keeping your website running inside Docker. It is simpler than it sounds. By the end of this article, you will have a clean, containerized setup that serves both your website and your blog like a pro.
Set up Hyvor Blogs
First, you must create a blog and configure the basic settings for self-hosting.
Create a blog at the Hyvor Blogs Console. You will get a subdomain, which you need in a later step.
Configure hosting settings
Go to Settings → Hosting
Select the Self-hosting option for Hosting at
Set the Self-hosting URL to the absolute URL of the subdirectory where you plan to host your blog. For example,
https://yourwebsite.com/blog. You can customize the subdirectory part (/blog) if needed.Click Save

Hosting Configuration in Hyvor Blogs Console
Create a Delivery API key
Go to Settings → API Keys
Click Create API Key
Select Delivery API as the API
Set a name (ex: “Docker App”)
Click on Create
You will need the API key in a later step
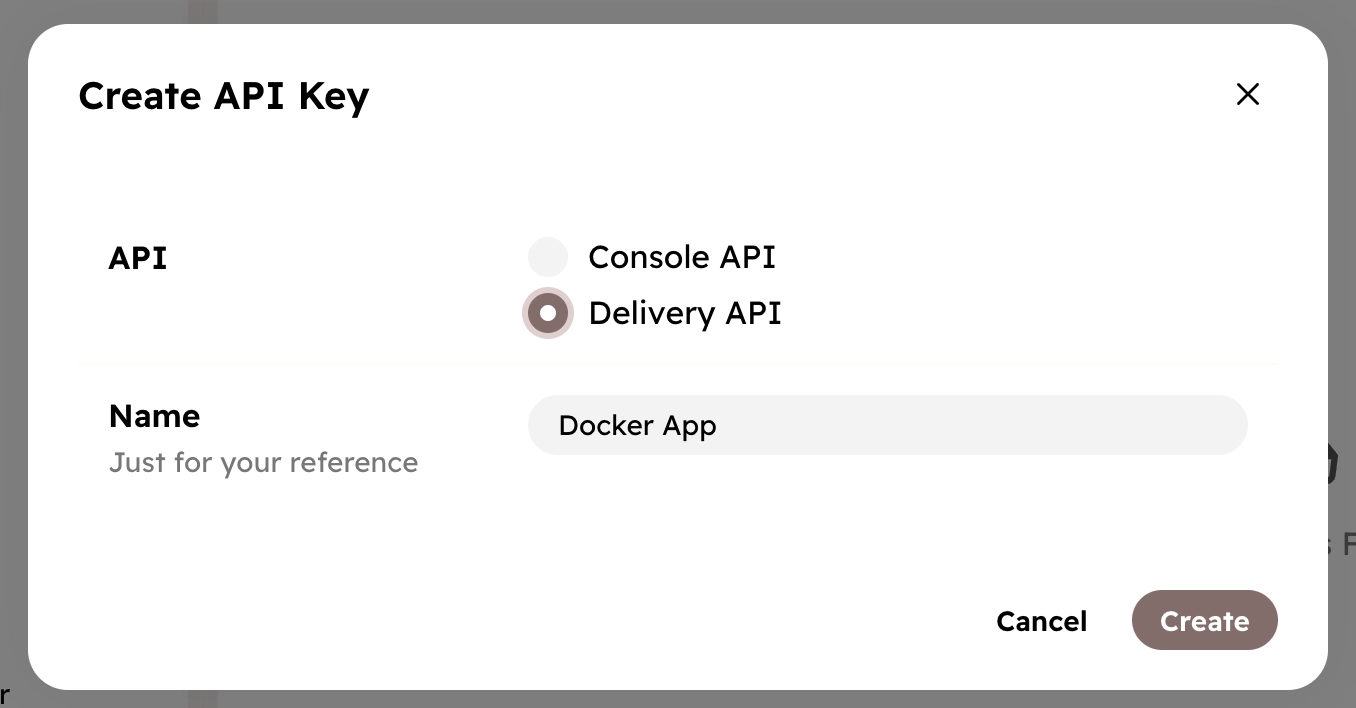
Creating a Delivery API key
Set up a webhook
Go to Settings → Webhooks
Create a webhook with the following values
URL: “your website URL + /hyvorblogs/webhook”
Ex:
https://yourwebsite.com/hyvorblogs/webhook
Select the following events
cache.singlecache.templatescache.all
You will need the Webhook Secret in a later step
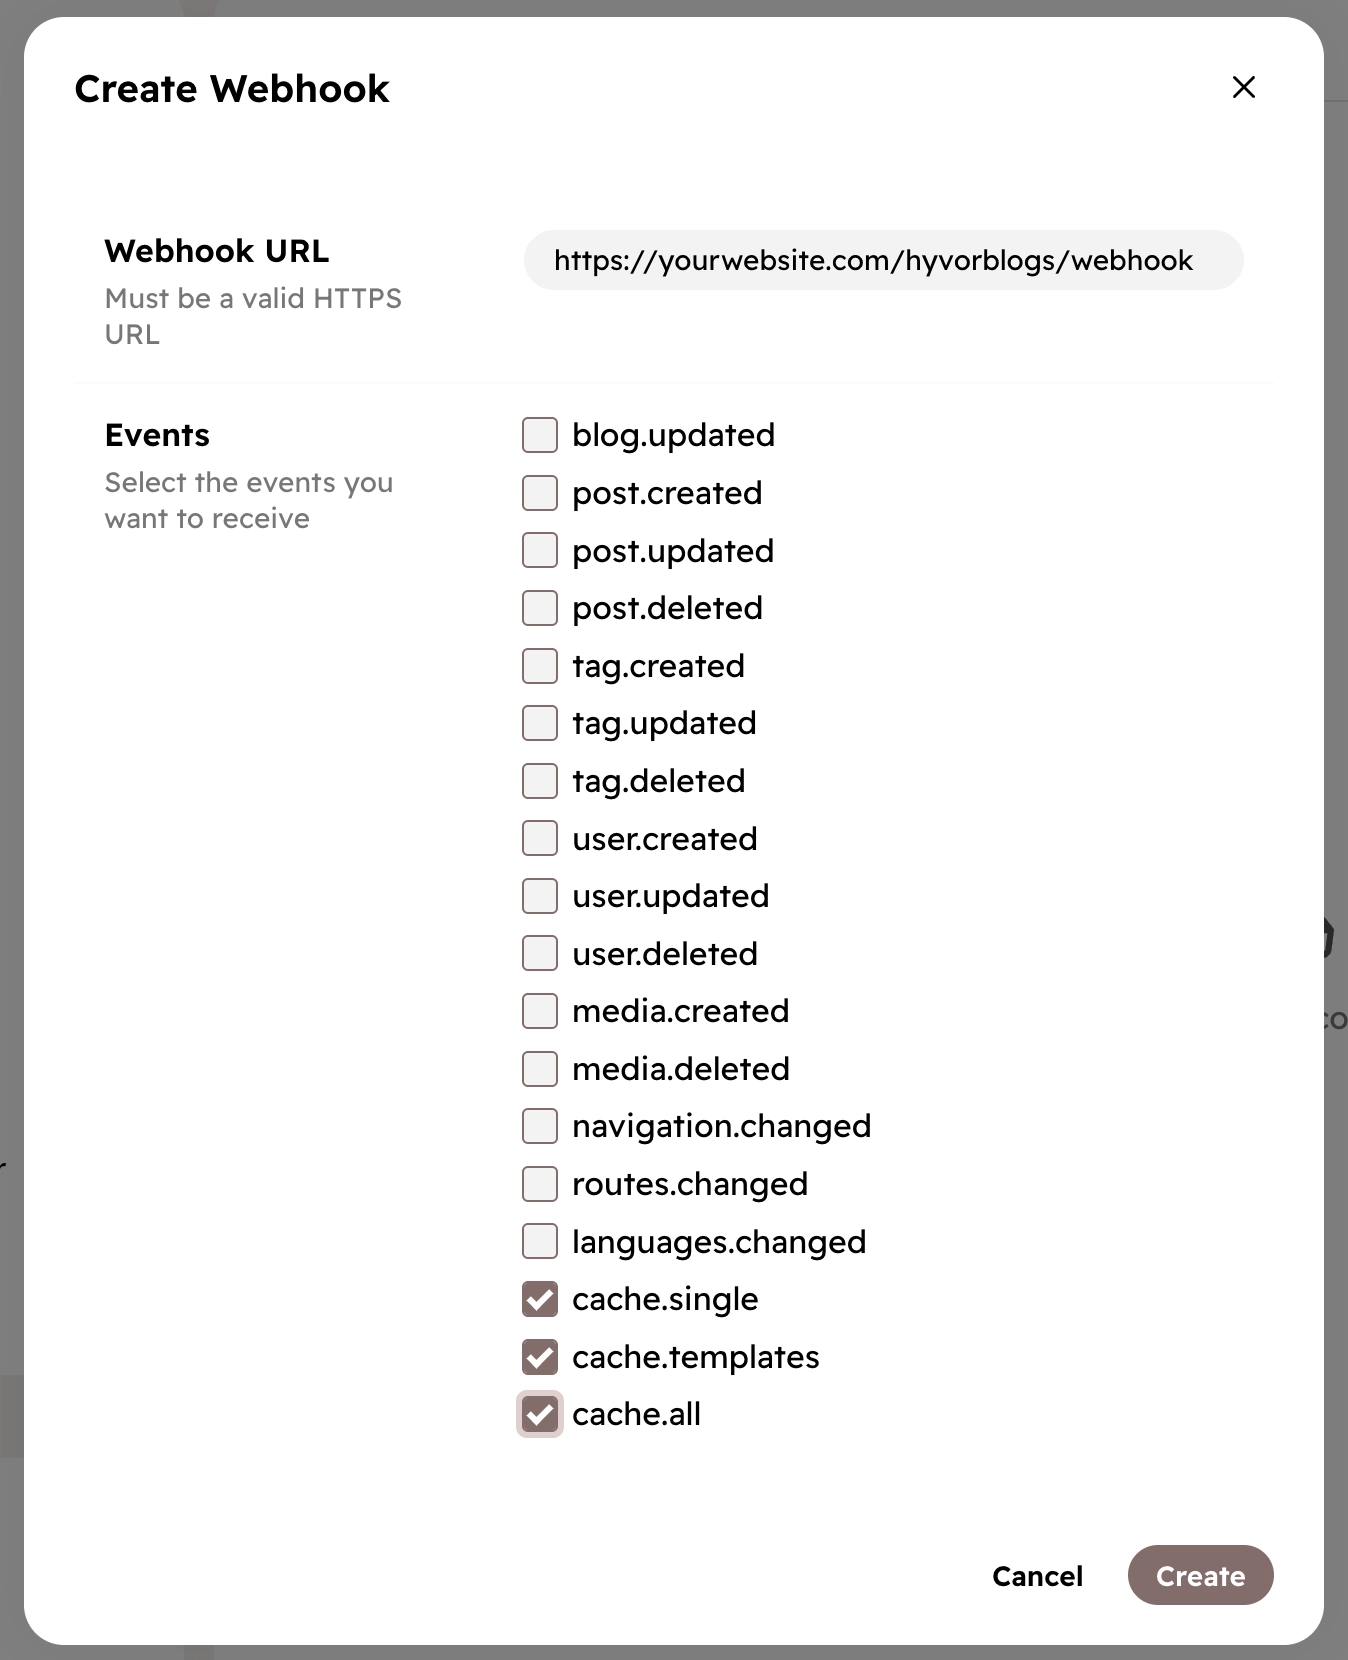
Create a webhook
Deliver the blog within a Docker container
Let’s dig deep into the technical part!
Hyvor Blogs has made it easy by providing an official Docker image that you can directly run right out of the box. This image is designed to serve your blog as a standalone service, while keeping your blog in a subdirectory with a simple reverse proxy setup.
Under the hood, this Docker image uses Hyvor Blogs Delivery API to fetch your blog content. When a page is requested for the first time, the content is retrieved from the API and cached. Subsequent requests to the same endpoint are served directly from the cache, delivering a much faster experience for your users.
First, you need to include the Hyvor Blogs Docker image as another service in your docker-compose.yaml.
1services: 2 hyvor-blogs: 3 image: hyvor/hyvor-blogs-docker 4 container_name: hyvor-blogs 5 environment: 6 - BLOG_SUBDOMAIN=your-blog 7 - BLOG_HOSTING_PATH=/blog 8 - BLOG_DELIVERY_API_KEY=your-api-key 9 - BLOG_WEBHOOK_SECRET=your-webhook-secret10 ports:11 - 8080:80The next step would be to set up a reverse proxy that routes requests from /blog on your main domain to the Hyvor Blogs container. Here are example configurations for three popular reverse proxies: Caddy, Nginx and Traefik.
Caddy
If you're using Caddy, this simple config handles /blog/* and proxies it to the Hyvor Blogs container:
1yourdomain.com {2 handle /blog/* {3 reverse_proxy localhost:80804 }5}Nginx
For Nginx, this basic setup forwards all /blog/* traffic to the container:
1server {2 listen 80;3 server_name yourdomain.com;4Traefik
With Traefik, you can configure routing using Docker labels like this:
1services:2 hyvor-blogs:3 labels:4 - "traefik.enable=true"5 - "traefik.http.routers.hyvor-blogs.rule=PathPrefix(`/blog`)"6 - "traefik.http.routers.hyvor-blogs.entrypoints=web"7 - "traefik.http.services.hyvor-blogs.loadbalancer.server.port=80"If you are running your app on a Kubernetes cluster, you can also deploy the Hyvor Blogs container just like any other service.
1apiVersion: v1 2kind: Service 3metadata: 4 name: hyvor-blogs 5spec: 6 selector: 7 app: hyvor-blogs 8 ports: 9 - protocol: TCP10 port: 8011 targetPort: 8012And that’s it! Whether you’re running a simple Docker setup, using a reverse proxy, or managing a Kubernetes cluster, integrating a Hyvor Blog into your app under a subdirectory is super easy. With the official Docker image, solid caching, and flexible hosting options, you get the power of a fast, beautiful blog without the hassle of building one from scratch.
Hope this helped you get your blog up and running! Feel free to share if you run into any snags. Happy blogging!

Comments