Are you a blogger looking to monetize your content and earn some extra income? If so, adding Google AdSense to your blog can be a great way to start earning money. Note that adding Google AdSense to your blog is a free process. Google is in charge of handling the advertisers and selecting the appropriate ads based on your blog's content. You can continue to put your main focus on the content of your blog.
This article provides a step-by-step guide to adding Google AdSense to your blog and best practices for maximizing your earnings.
Best practices
There are some best practices to follow to maximize your AdSense earnings and maintain a long-term and profitable relationship with Google. Please make sure to carefully review these points to avoid being rejected from the AdSense program.
Ad Placement: Place ads in visible locations that are likely to be seen by your website visitors, such as above the fold or within the content. Avoid placing ads in locations that may confuse or irritate users, such as pop-ups or interstitial ads.
Content Quality: Make sure your blog posts are well-written, original, and relevant to your target audience. Advertisers are more likely to bid on ads that appear on high-quality content.
Ad Relevancy: Use targeted keywords and content on your blog to ensure that the ads displayed are relevant to your audience. This will help increase click-through rates and ad revenue.
Ad Blocking: Avoid using ad-blocking software or encouraging your users to do so. Doing so can result in your AdSense account being suspended or terminated.
Trafic: AdSense policies demand genuine and organic traffic to your blog. Paid traffic or fraudulent means are prohibited. Clicking on your own ads is considered fraudulent traffic. AdSense may remove you from the program if it detects any fraudulent traffic.
Ad Limit: AdSense policies allow for a maximum of three display ads, three link units, and two search boxes per page. Avoid exceeding these limits as it may lead to lower ad revenue or account suspension.
Step 1 - Setup a custom domain for your blog
By default, Hyvor gives you a subdomain of hyvorblogs.io. However, to be eligible for the Google AdSense program it is required for your blog.
To use a custom domain, you need to register it with a domain registrar and link it to your website or web hosting service. Once you've done that, visitors to your website can access it using your custom domain name.
To procure and register a domain name, you may refer to the comprehensive tutorial offered by Google.
In order to incorporate your personalized domain name with your Hyvor blog, kindly follow the step-by-step instructions provided in Hyvor Blogs’ documentation.
Step 2 - Ensure that your blog meets all requirements
To include Google AdSense in your blog, you need to make sure that your respect all the compliance requirements. Note that Google will review your blog to check its compliance before you can use the AdSense service.
You should ensure that:
Your blog must have high-quality, original content that is relevant to your audience.
Your blog must have a clear navigation system for your visitors so they can click through your pages and find the information they’re looking for.
Your blog must comply with all applicable laws and regulations, including privacy and data protection laws.
Your blog’s content should not violate any of Google's content guidelines, such as promoting violence, hate speech, adult content, shocking content, or illegal activity...
Step 3 - Google AdSense account setup
Signup for a Google AdSense with your Google account at https://adsense.google.com/start/ by clicking on Get Started.
On the AdSense Dashboard, go to Site → New site.
Enter your blog’s URL and click Save.
There are two types of connecting your blog. Using,
Adsense code snippet
Ads.txt snippet
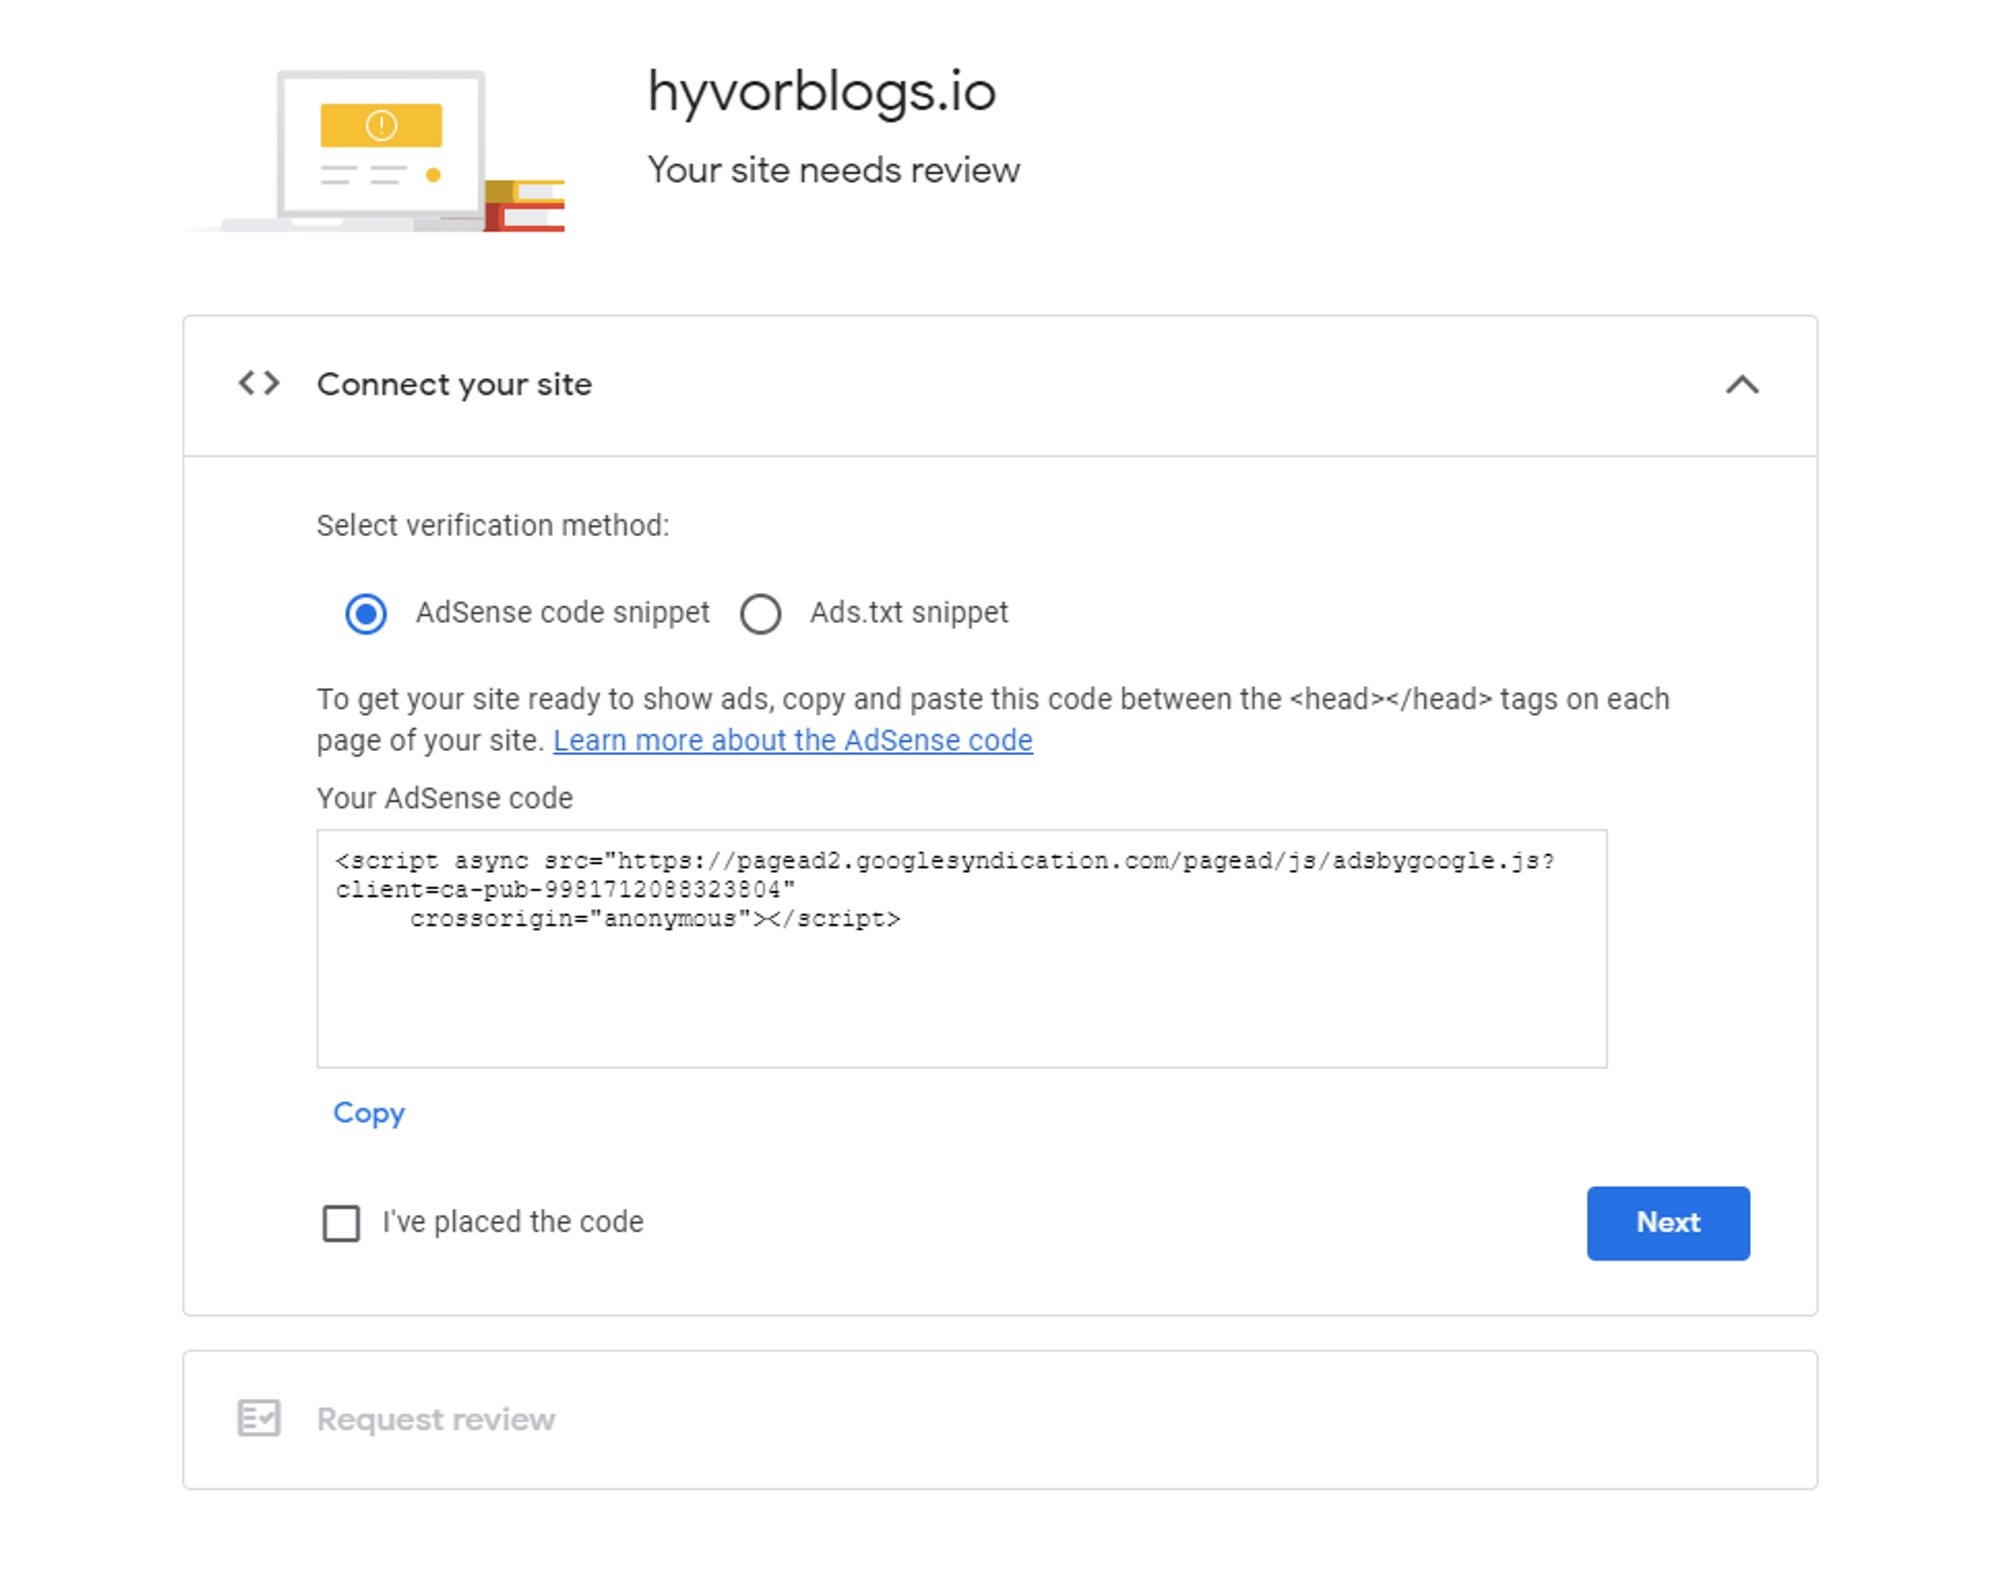
Adsense code snippet
Copy the provided code snippet by clicking Copy. (This way Google can identify that you are the website’s owner).
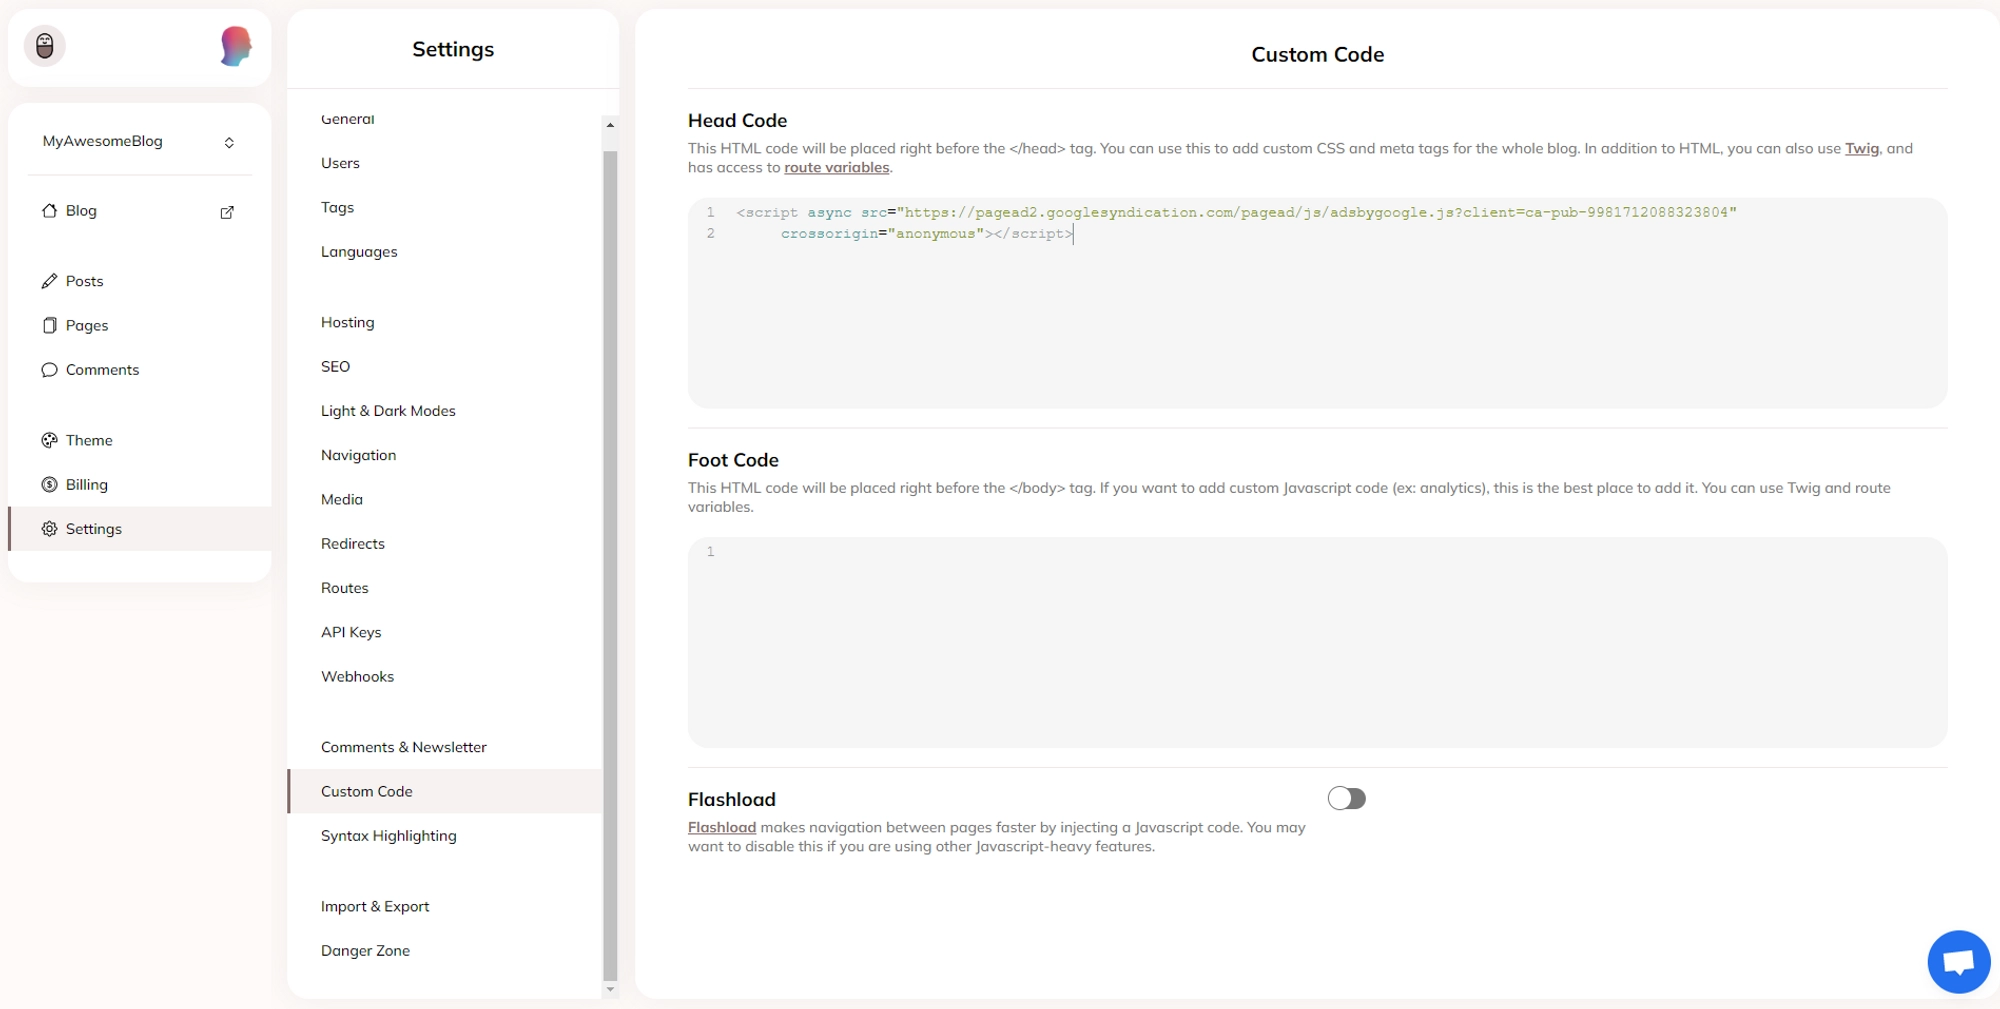
Go to your blog’s Settings → Custom Code.
Paste the previously copied code snippet in the Head Code section.
On the AdSense page, check “I’ve placed the code” and click Next.
Click on Request Review.
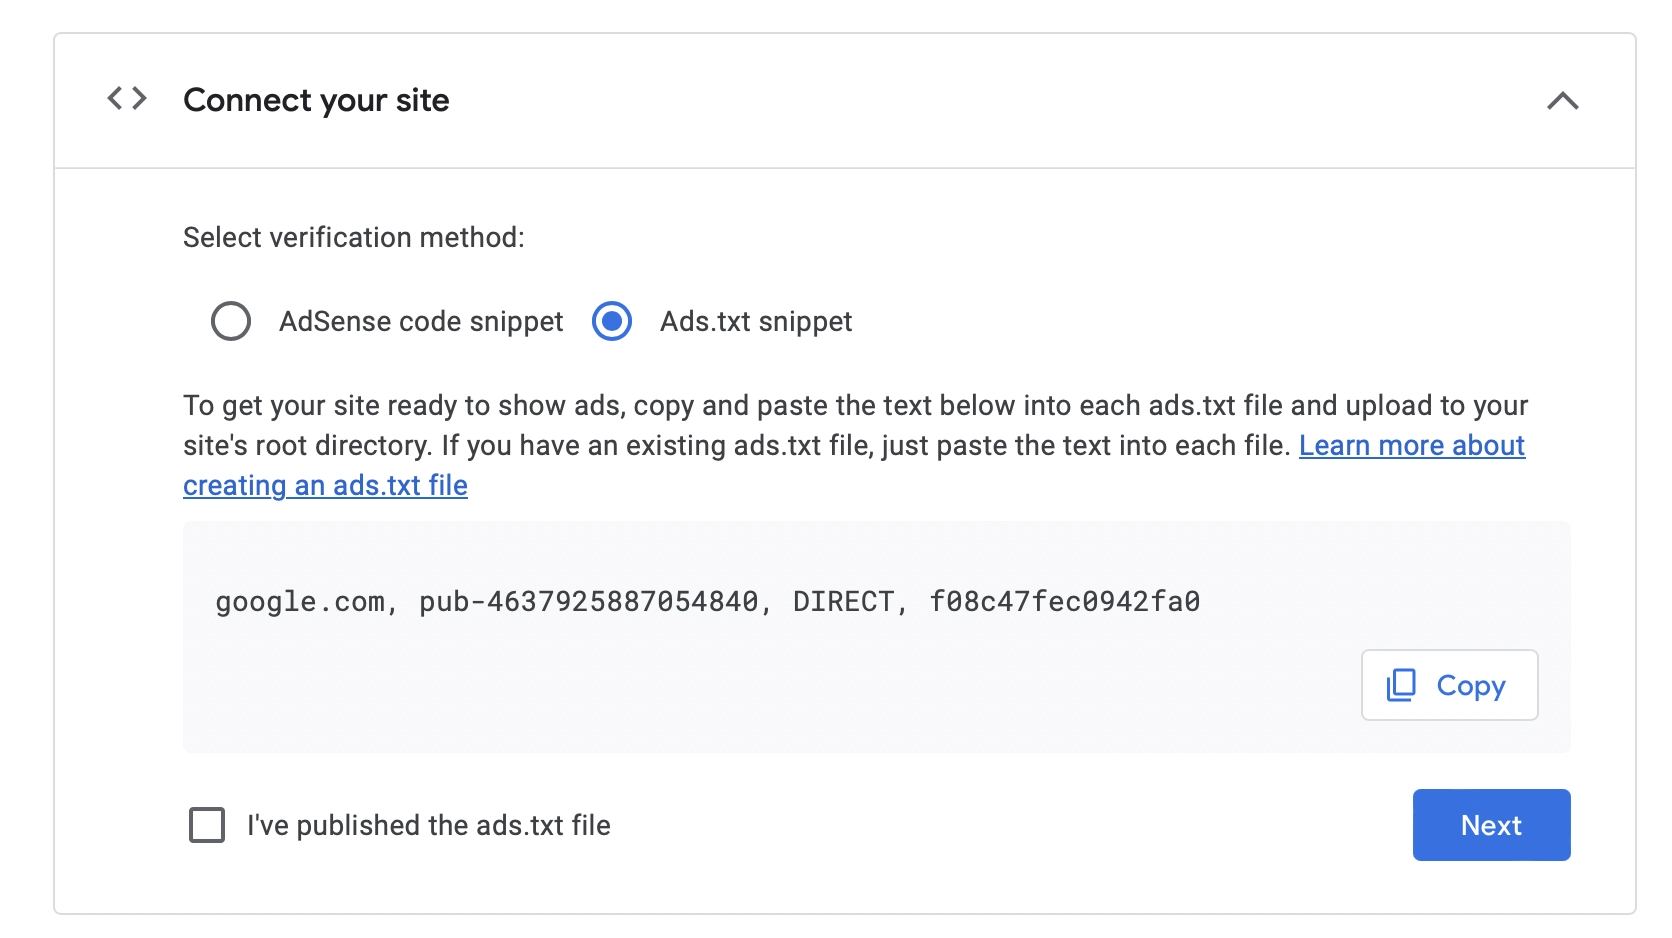
Ads.txt snippet
Copy the provided text by clicking Copy. (This way Google can identify that you are the website’s owner).
Ads.txt snippet To add ads.txt:
Go to Console -> Theme -> templates
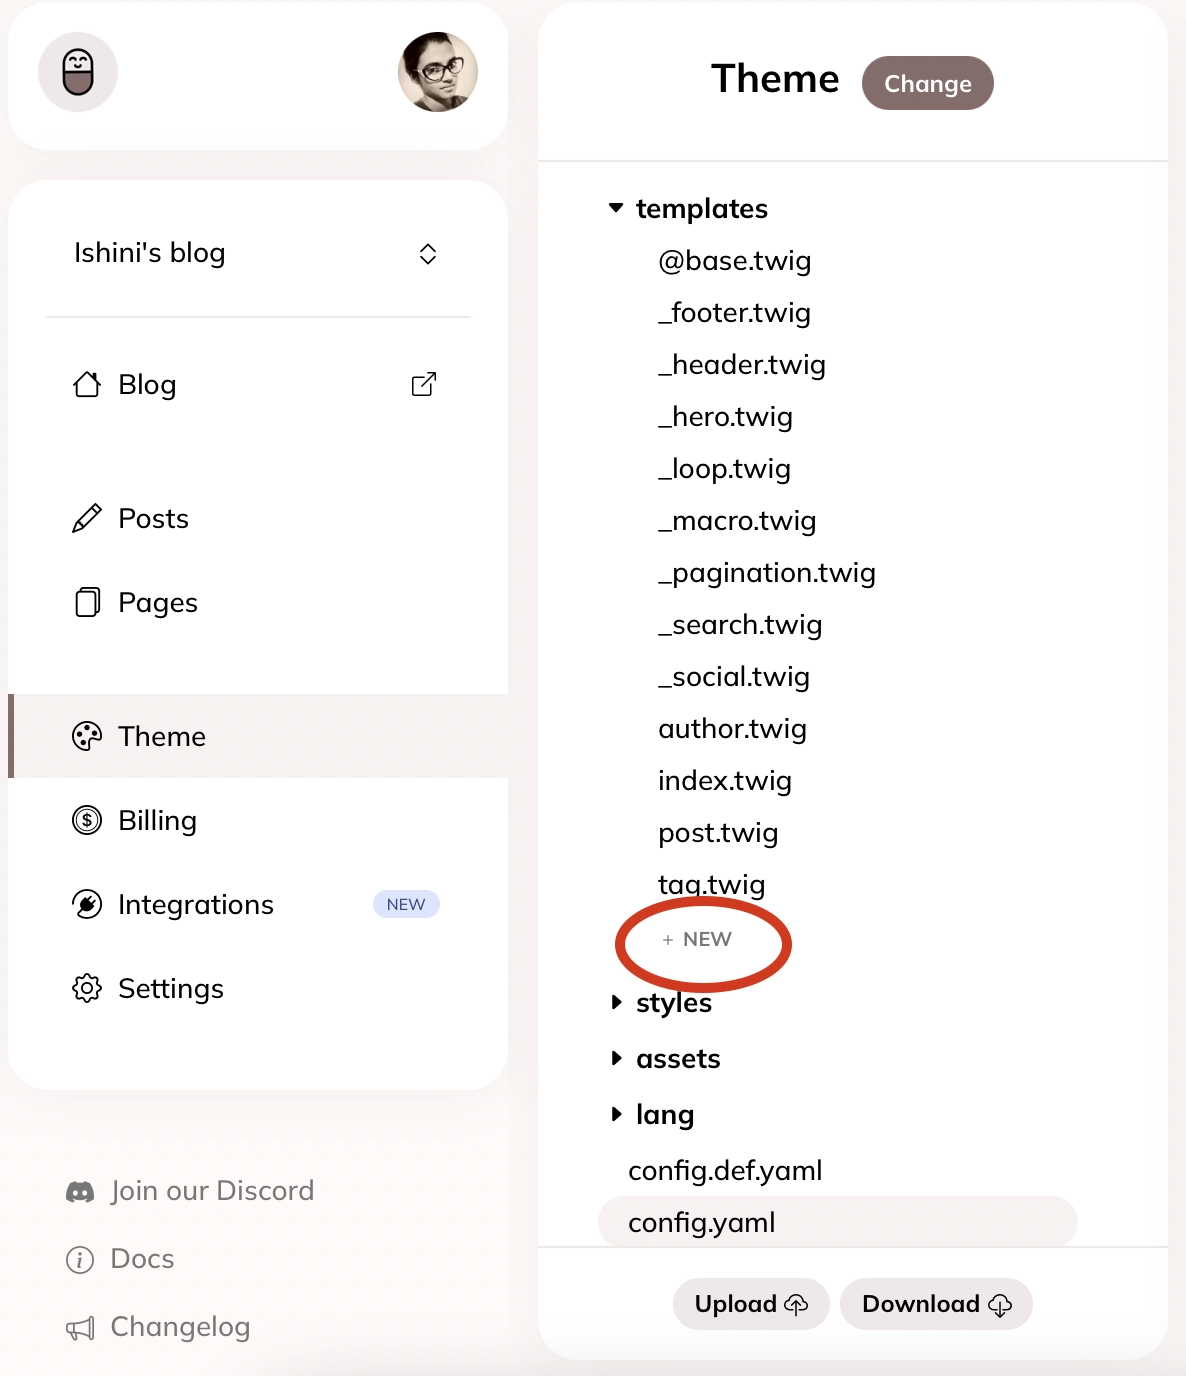
To add ads.txt
2. Add a new file named
route-ads.txt.twig
To add ads.txt 3. Paste the ads.txt content there and hit “Save”.
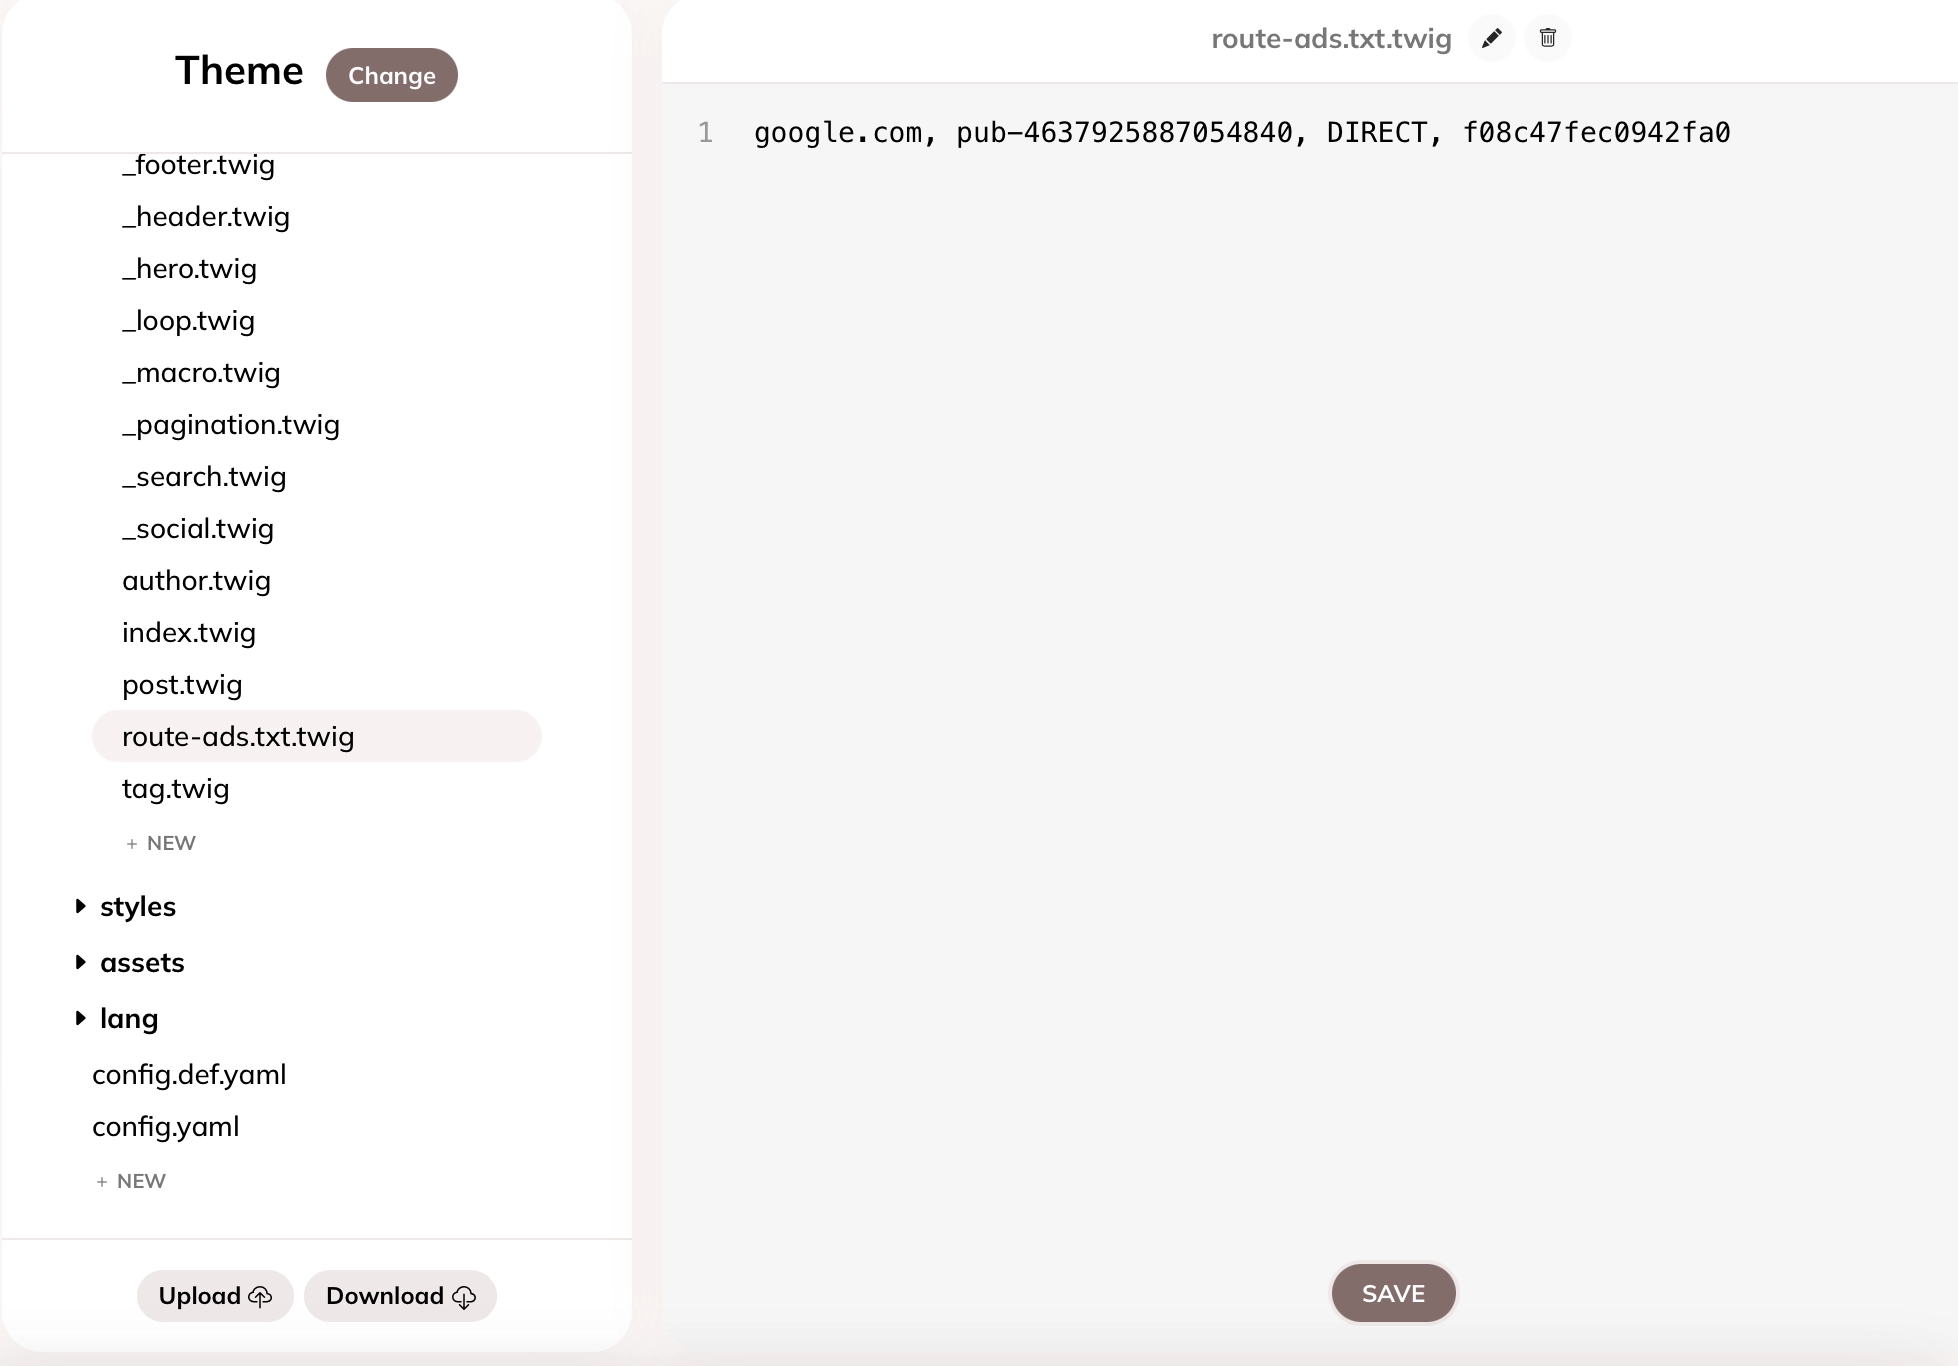
To add ads.txt 4. Ads.txt should appear at
yourwebsite.com/ads.txt
On the AdSense page, check “I’ve placed the code” and click Next.
Click on Request Review.
Your blog is currently being reviewed by the Google AdSense team. The review process combines machine and human verification to ensure that all content complies with Google's policies. This process can take anywhere from a few days to several weeks, depending on the complexity of the review and the volume of content being reviewed. During this time, your blog may not display ads until the review is complete.
Step 4 - Adding ads to your blog
Once your blog has been approved and marked as Ready by the AdSense program, you can start displaying ads to your audience.
Adding automatic ads
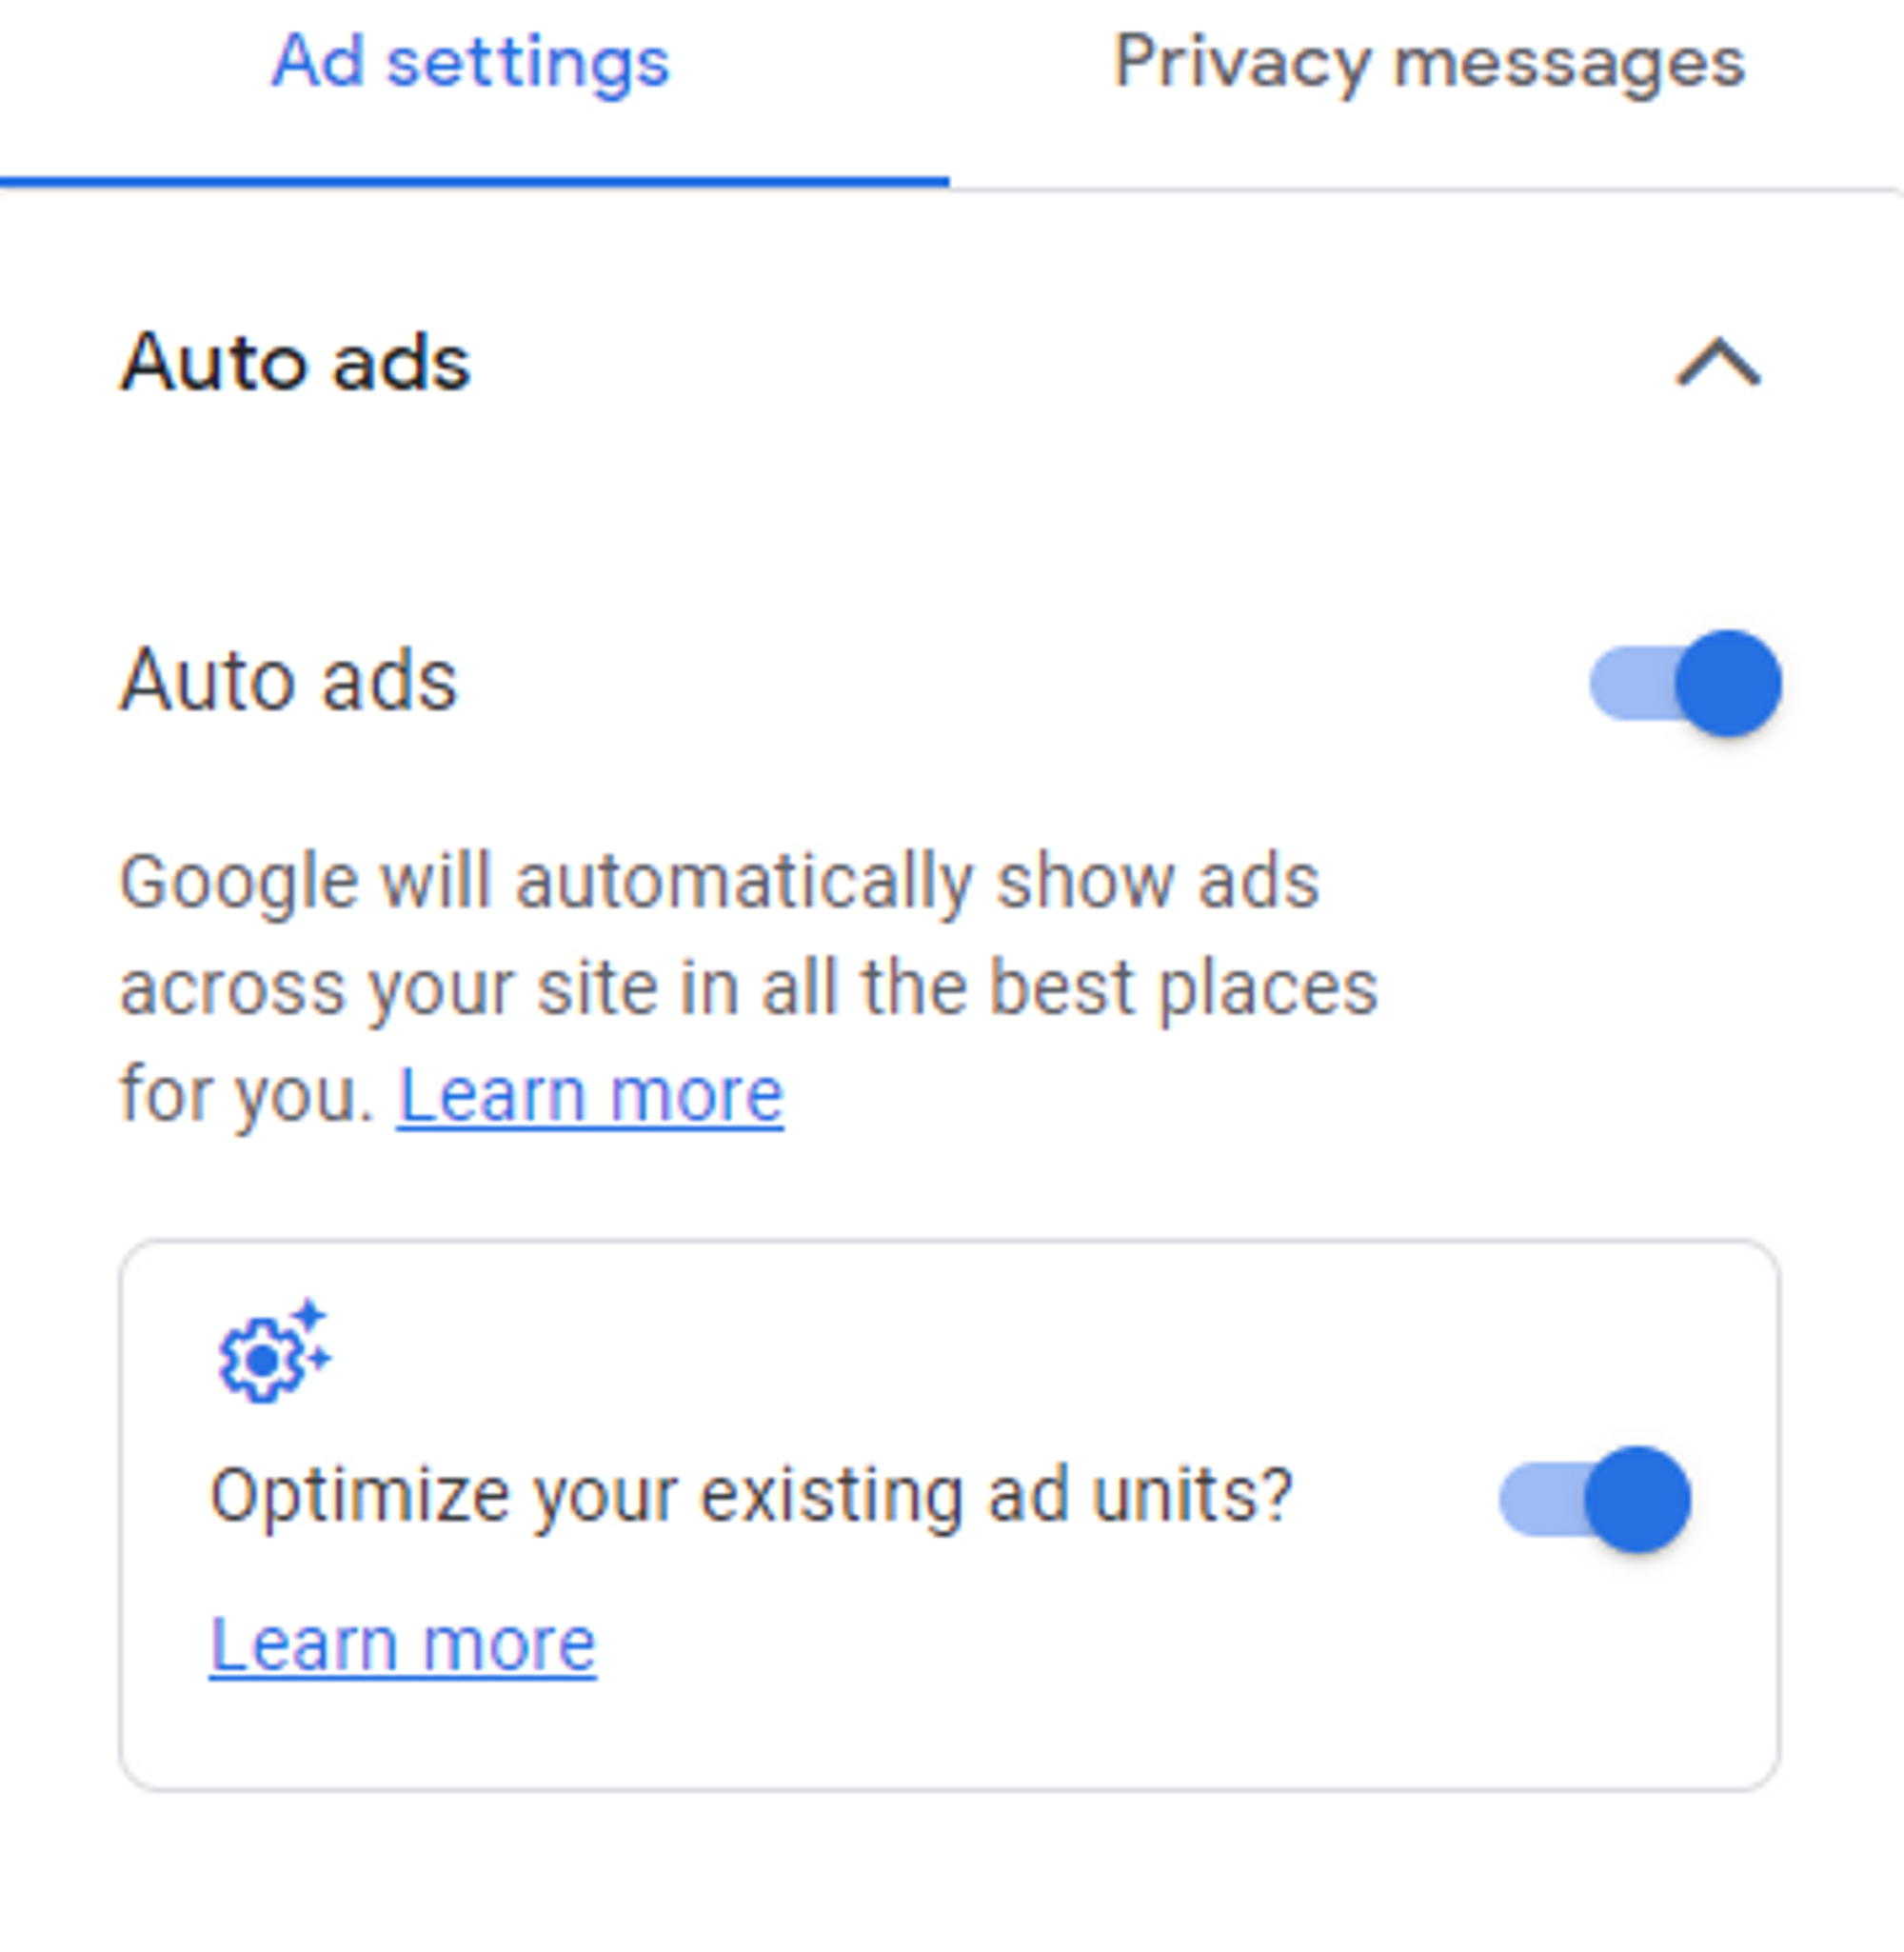
Auto ads is a feature that will let Google choose automatically all the best places to display ads for you.
Go to the Ads → By site section.
Select your blog in the list and click edit.
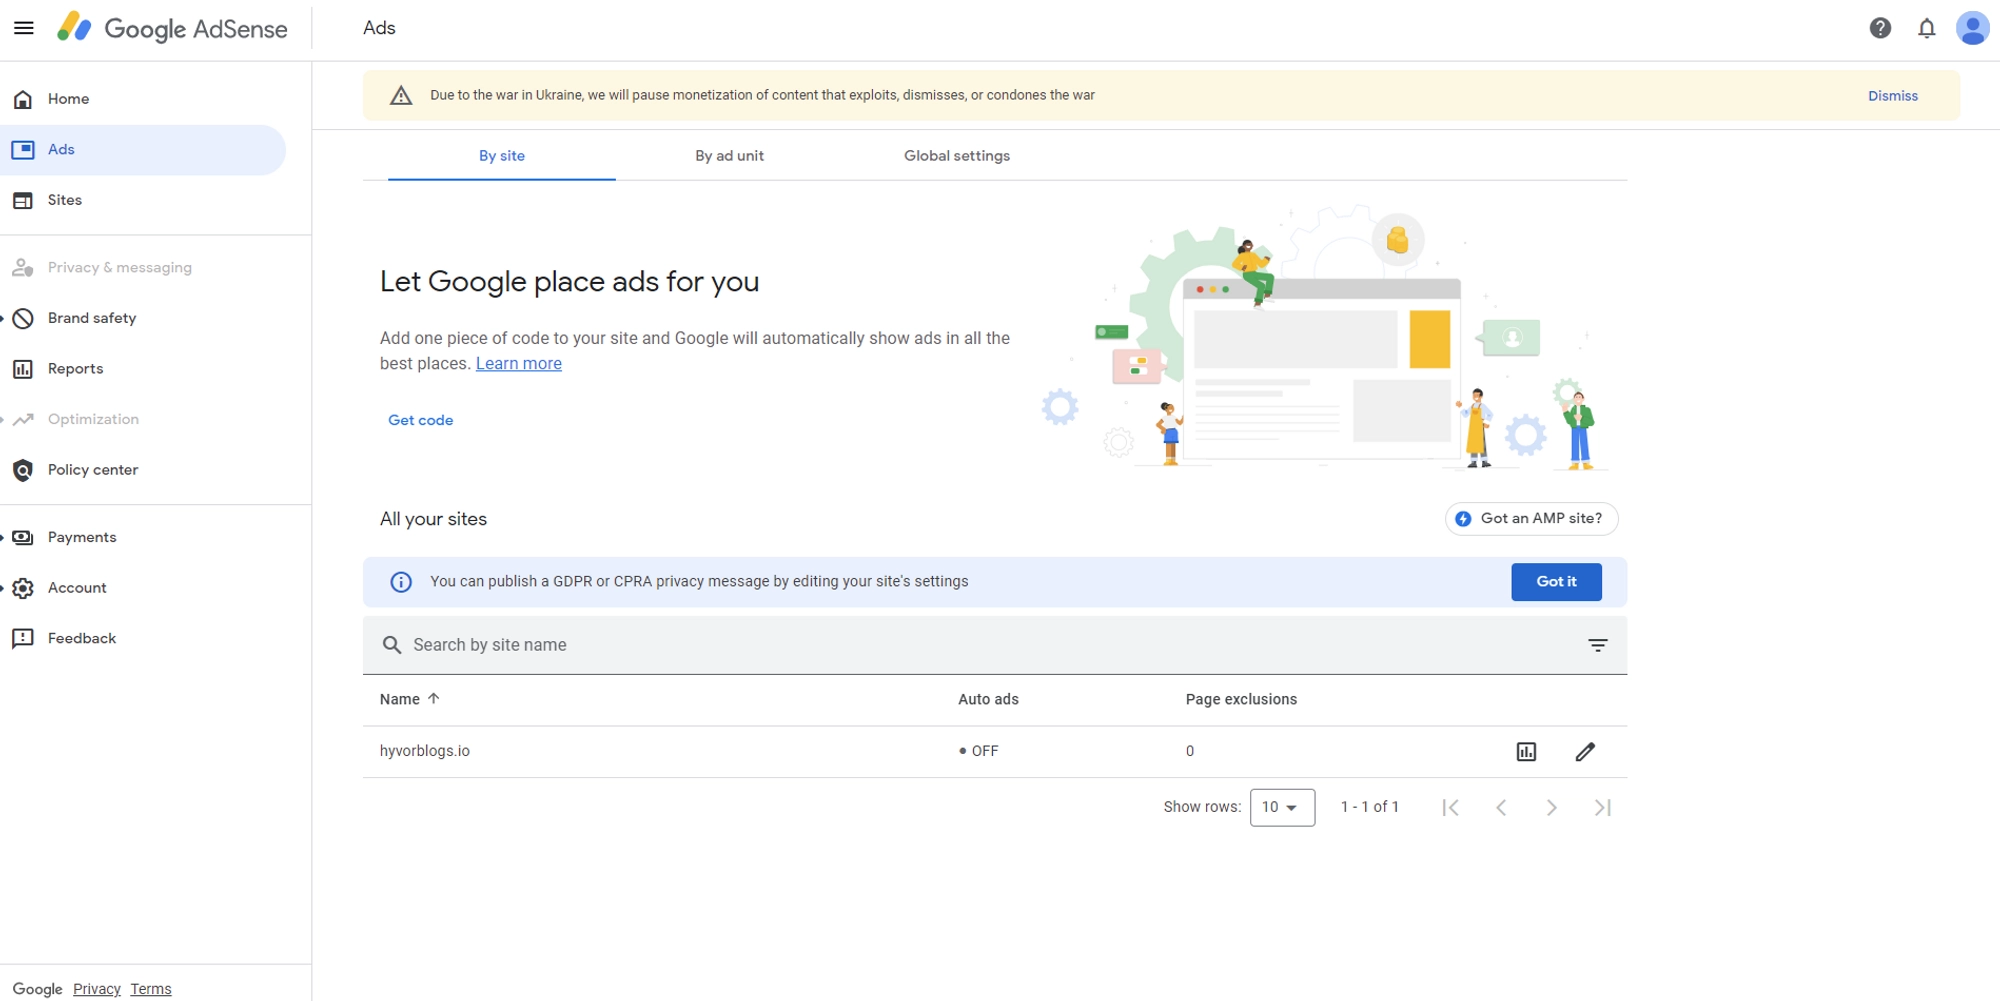
Activate the Auto ads toggle button.
Adding ads to your blog
You can customize the ad format and load (For example only display In-page ads).
Adding customized ad (advanced)
You can also fully customize the location of your ad on your blog.
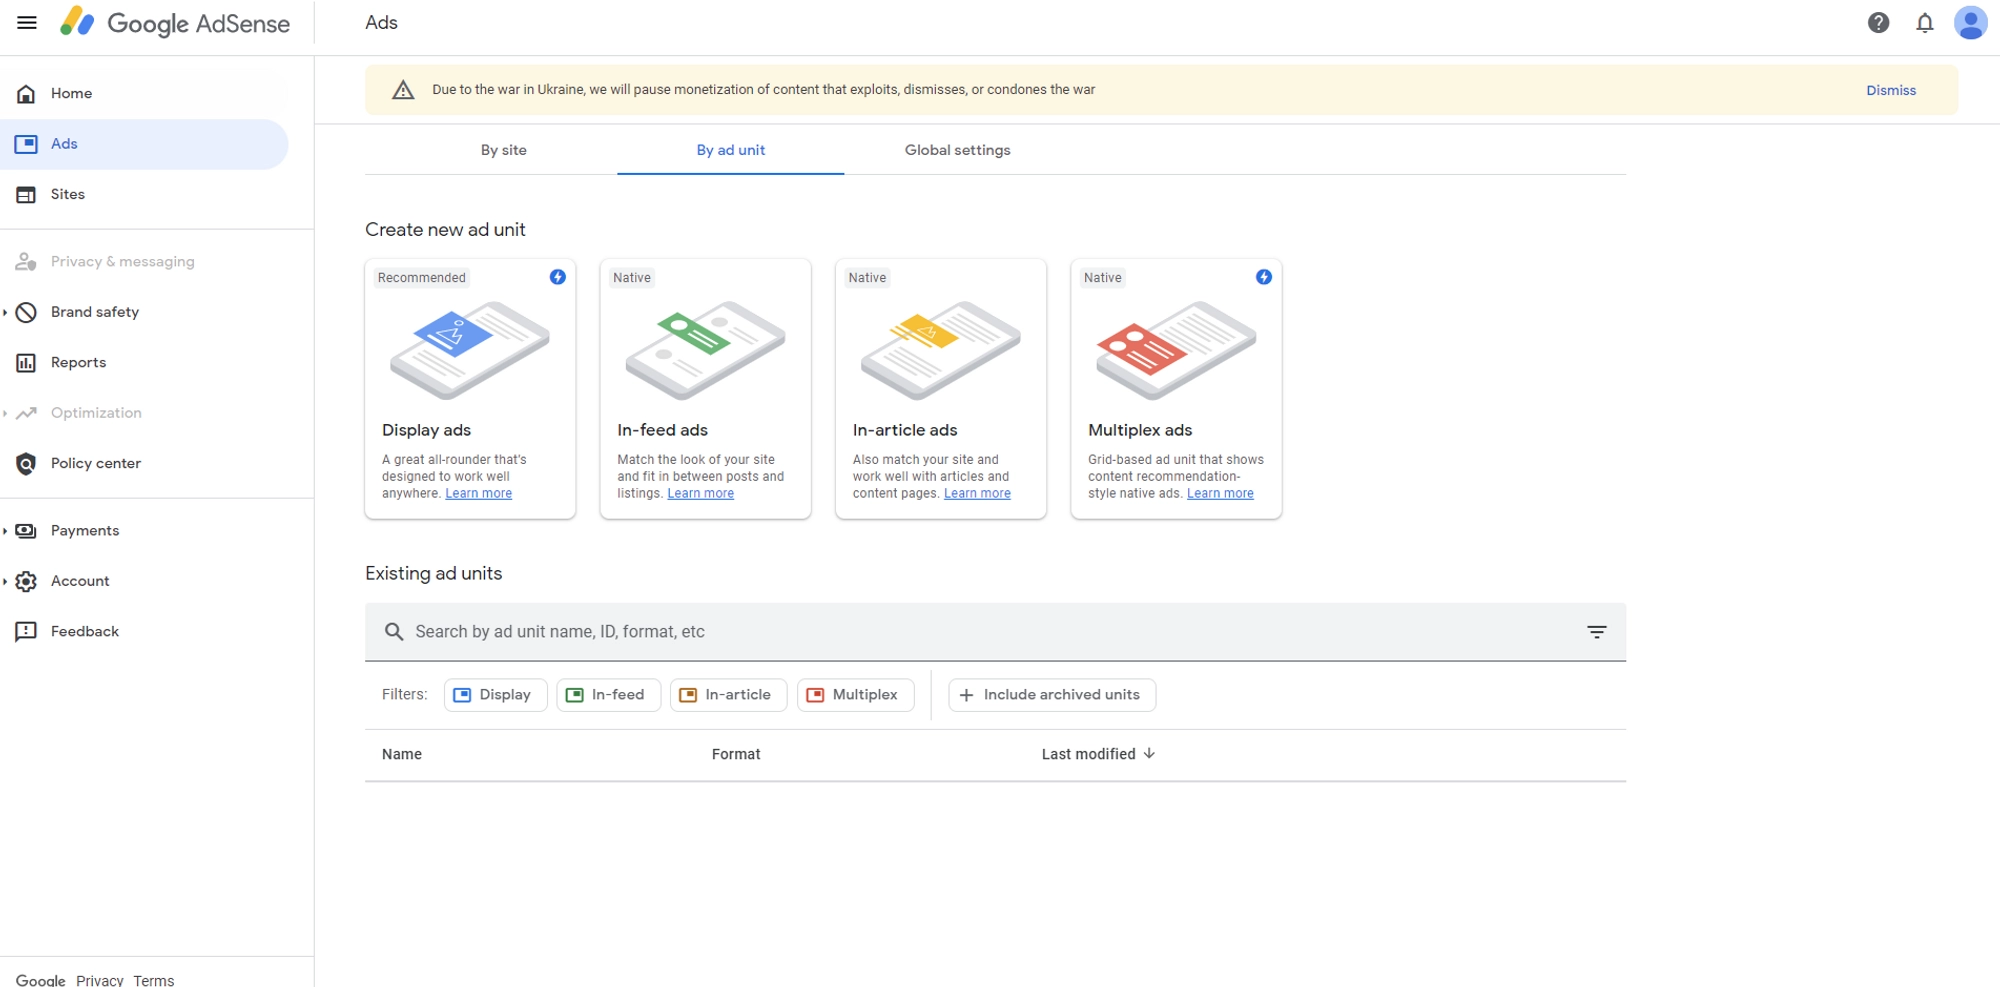
Go to the Ads → By ad unit section.
Select an ad type (for the example, we will use Display ad).
Customize your ad’s shape and responsivity.
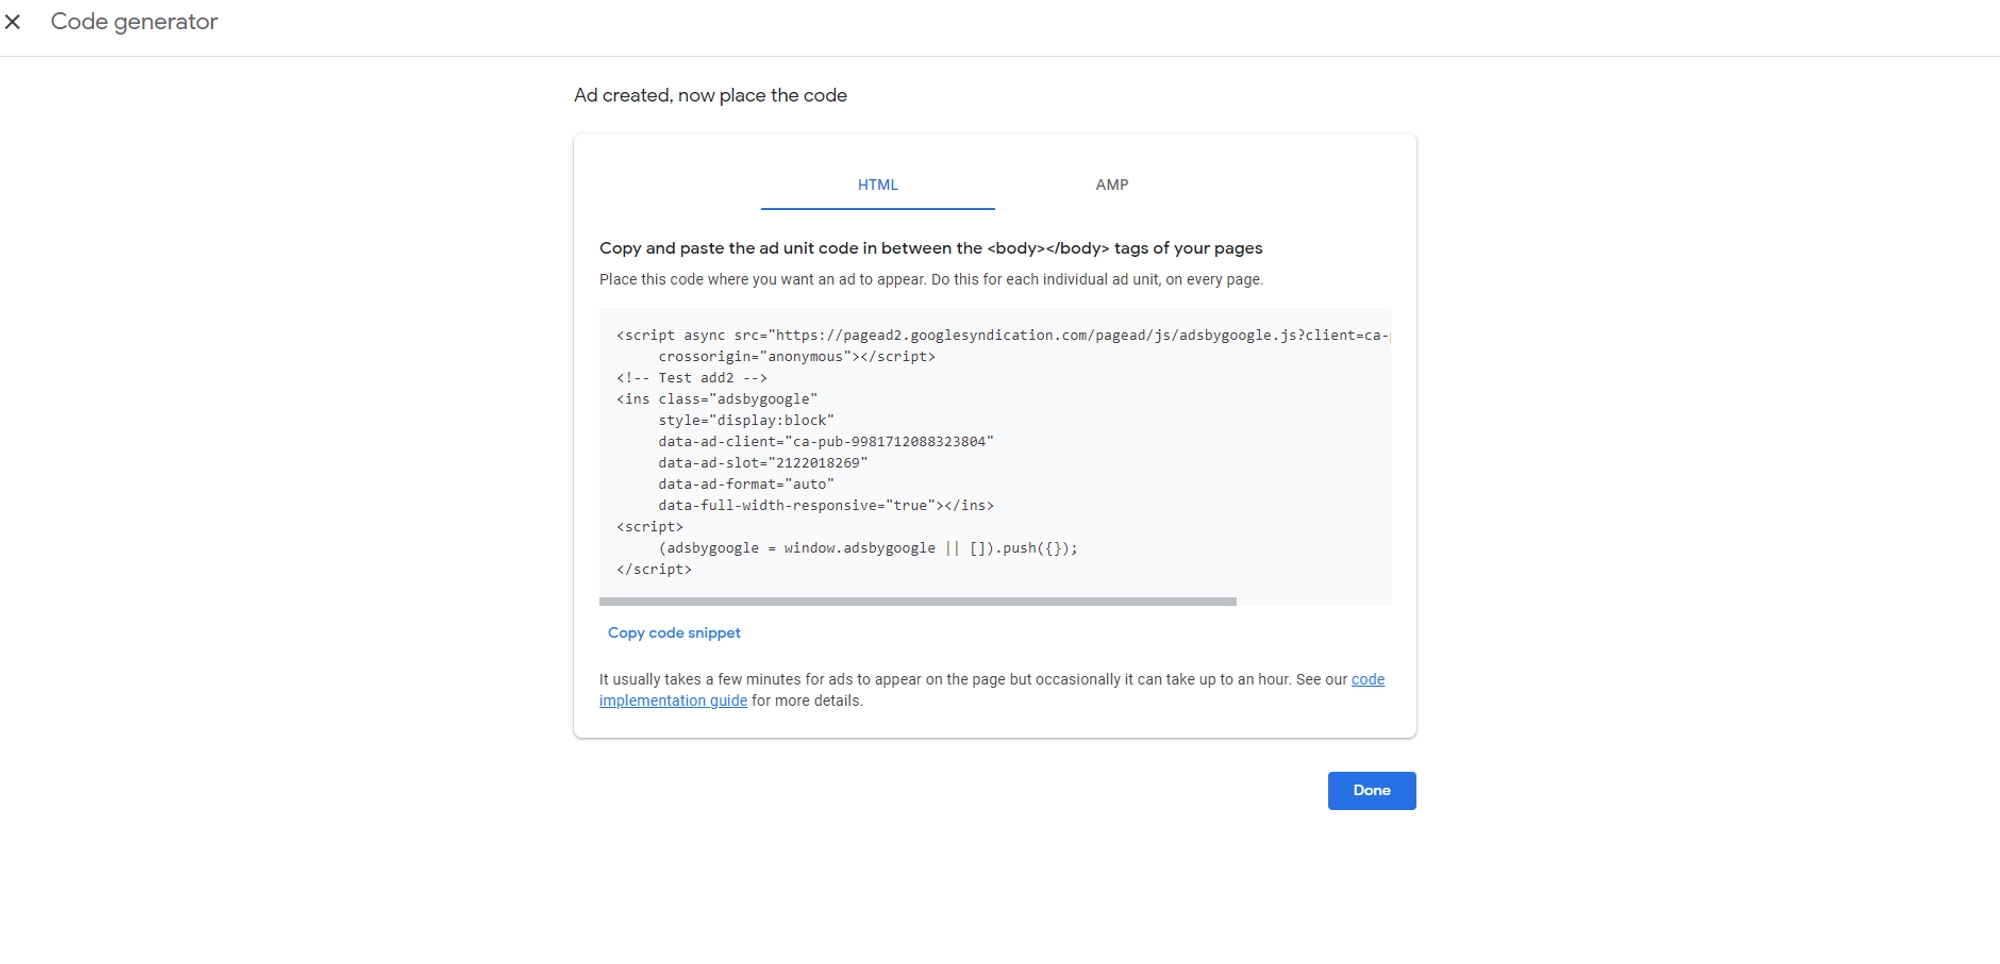
Click Create.
Copy the generated code snippet by clicking on Copy code snippet.
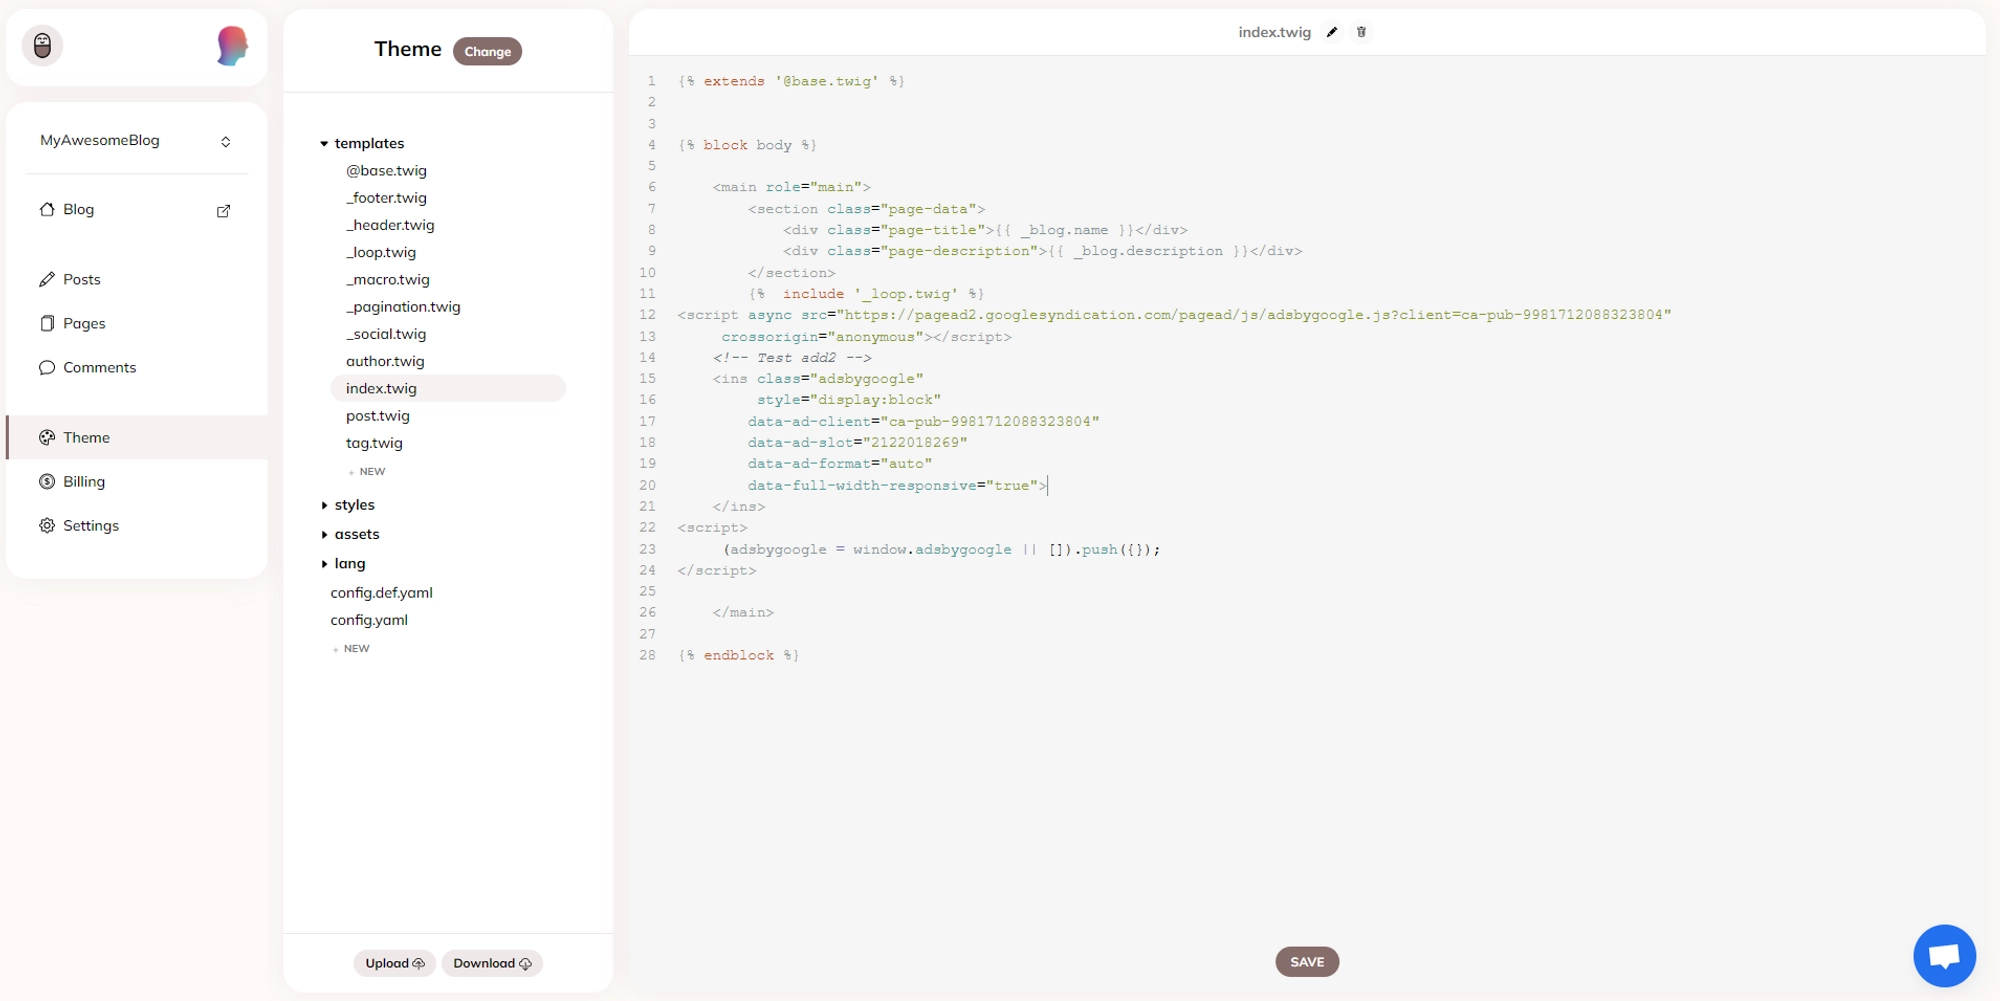
Go to your blog’s theme editor.
Choose the page type you want to add your ads to (for example we use the homepage):
index.twig= homepagepost.twig= post pages…
Paste the previously copied code snippet where you want to display your ad.
Step 5 - Viewing analytics
After your blog has been approved by Google AdSense and you have started displaying ads on it, you have access to analytics.
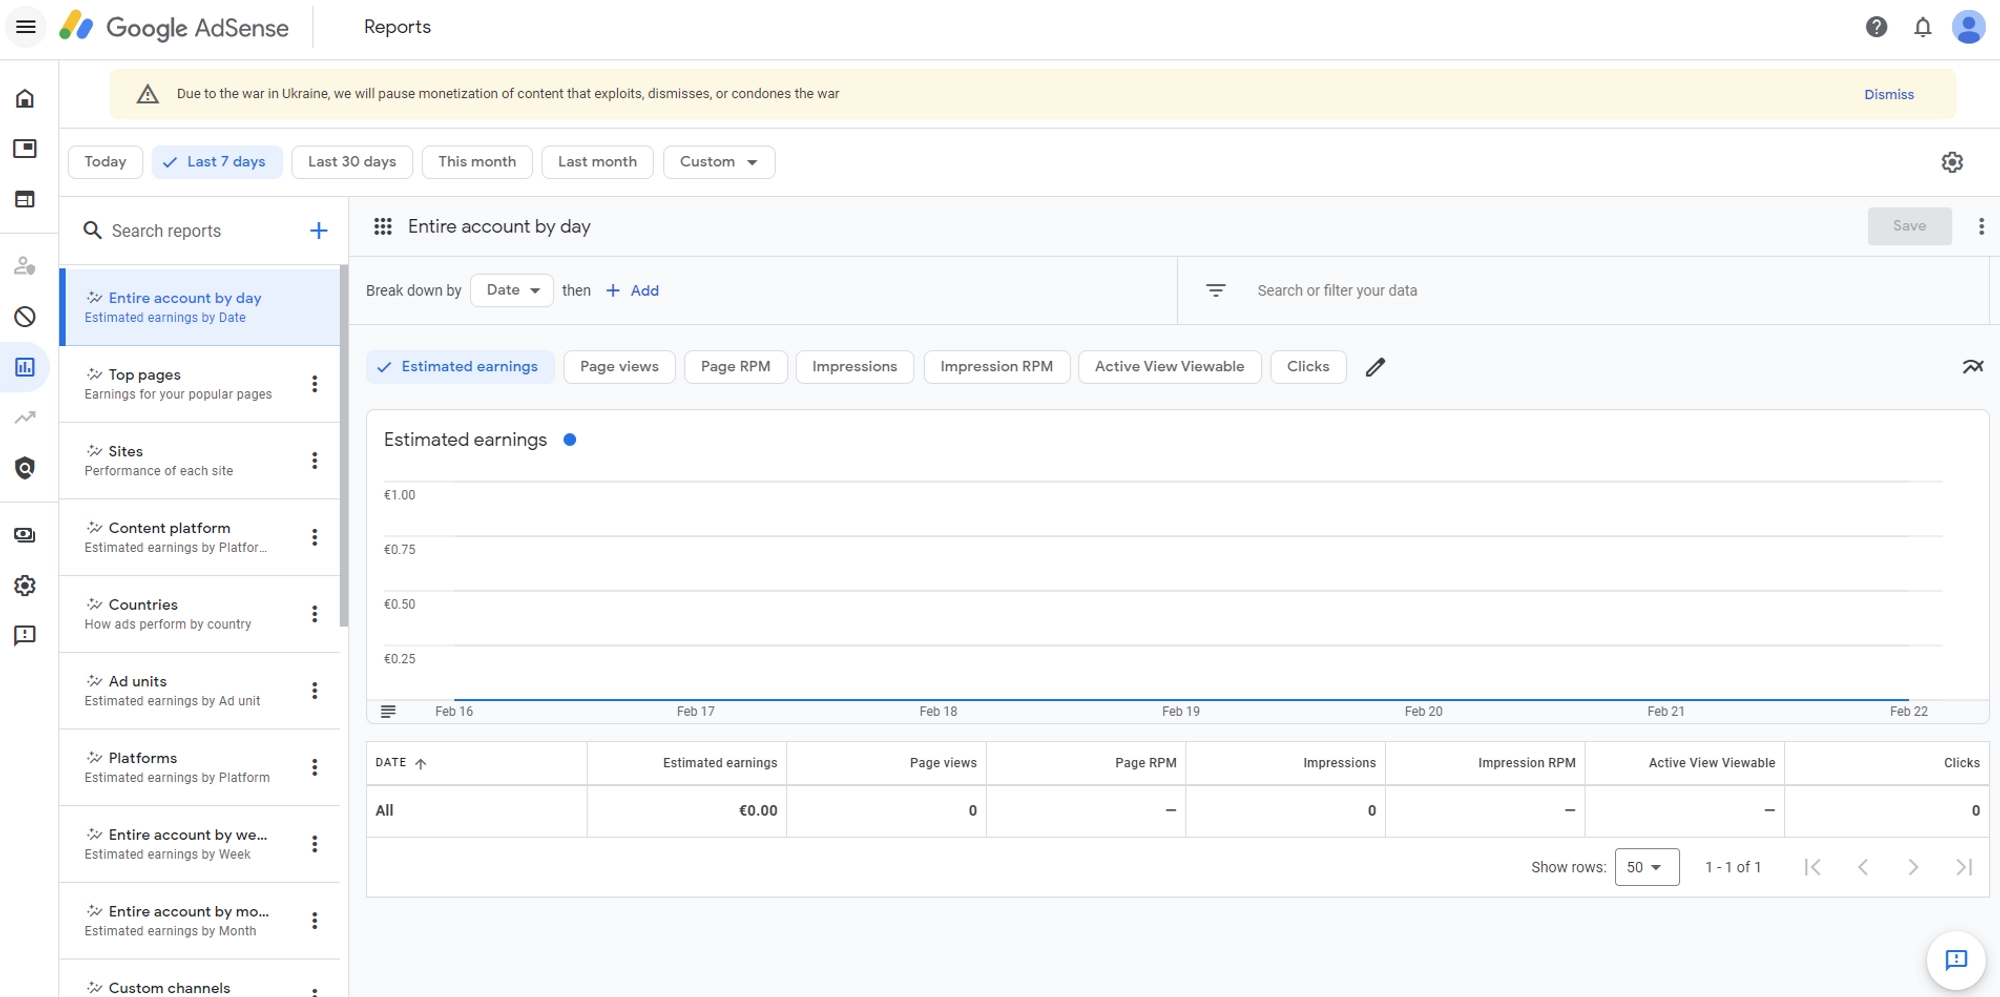
Go to the Reports section.
You can see analytics of your ads performance, revenue…
In conclusion, adding Google AdSense to your blog can be a great way to monetize your content and generate revenue. However, it's important to note that the review process for AdSense approval can take some time, and some requirements must be met to be eligible for the program. By following the steps outlined in this article and ensuring that your blog meets AdSense's policies and guidelines, you can increase your chances of being approved and start earning money through ad revenue on your blog.

Comments