Let’s add subscription-based paid memberships to your WordPress website using Hyvor Talk.
Hyvor Talk is a comment, newsletter, and membership platform. We’ll be using Hyvor Talk’s official WordPress plugin to enable paid memberships and payments on your site.
Jump to each section:
Prerequisites
A WordPress site
Access to WordPress Admin Panel
Access to Stripe (See supported countries)
Costs
Hyvor Talk is a subscription-based product. View our pricing page for more details. The membership feature is available on all plans. To get the most out of Hyvor Talk, consider using its other features as well: comments, newsletters, etc.
Setting up Hyvor Talk & Stripe
First, sign up for Hyvor Talk. You will be asked to create a HYVOR account.
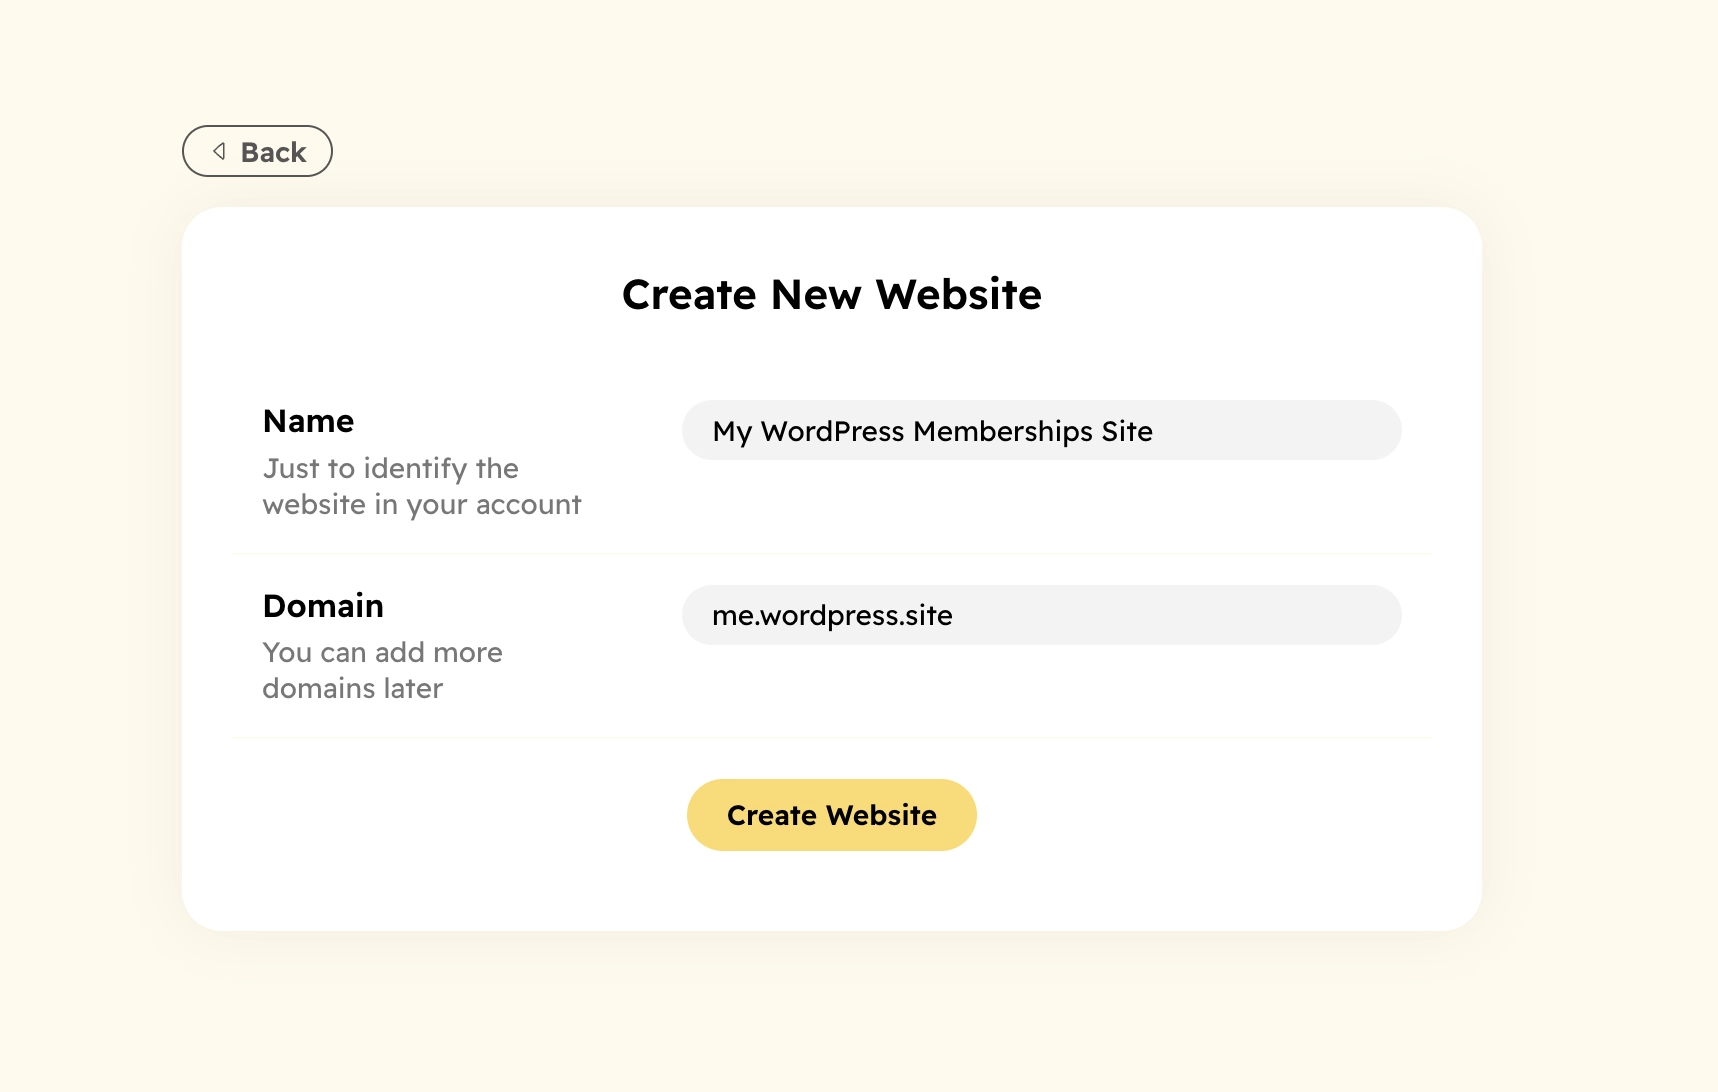
Once it’s done, create a website with your domain name:
Then, visit Settings → Memberships to enable memberships and connect stripe:
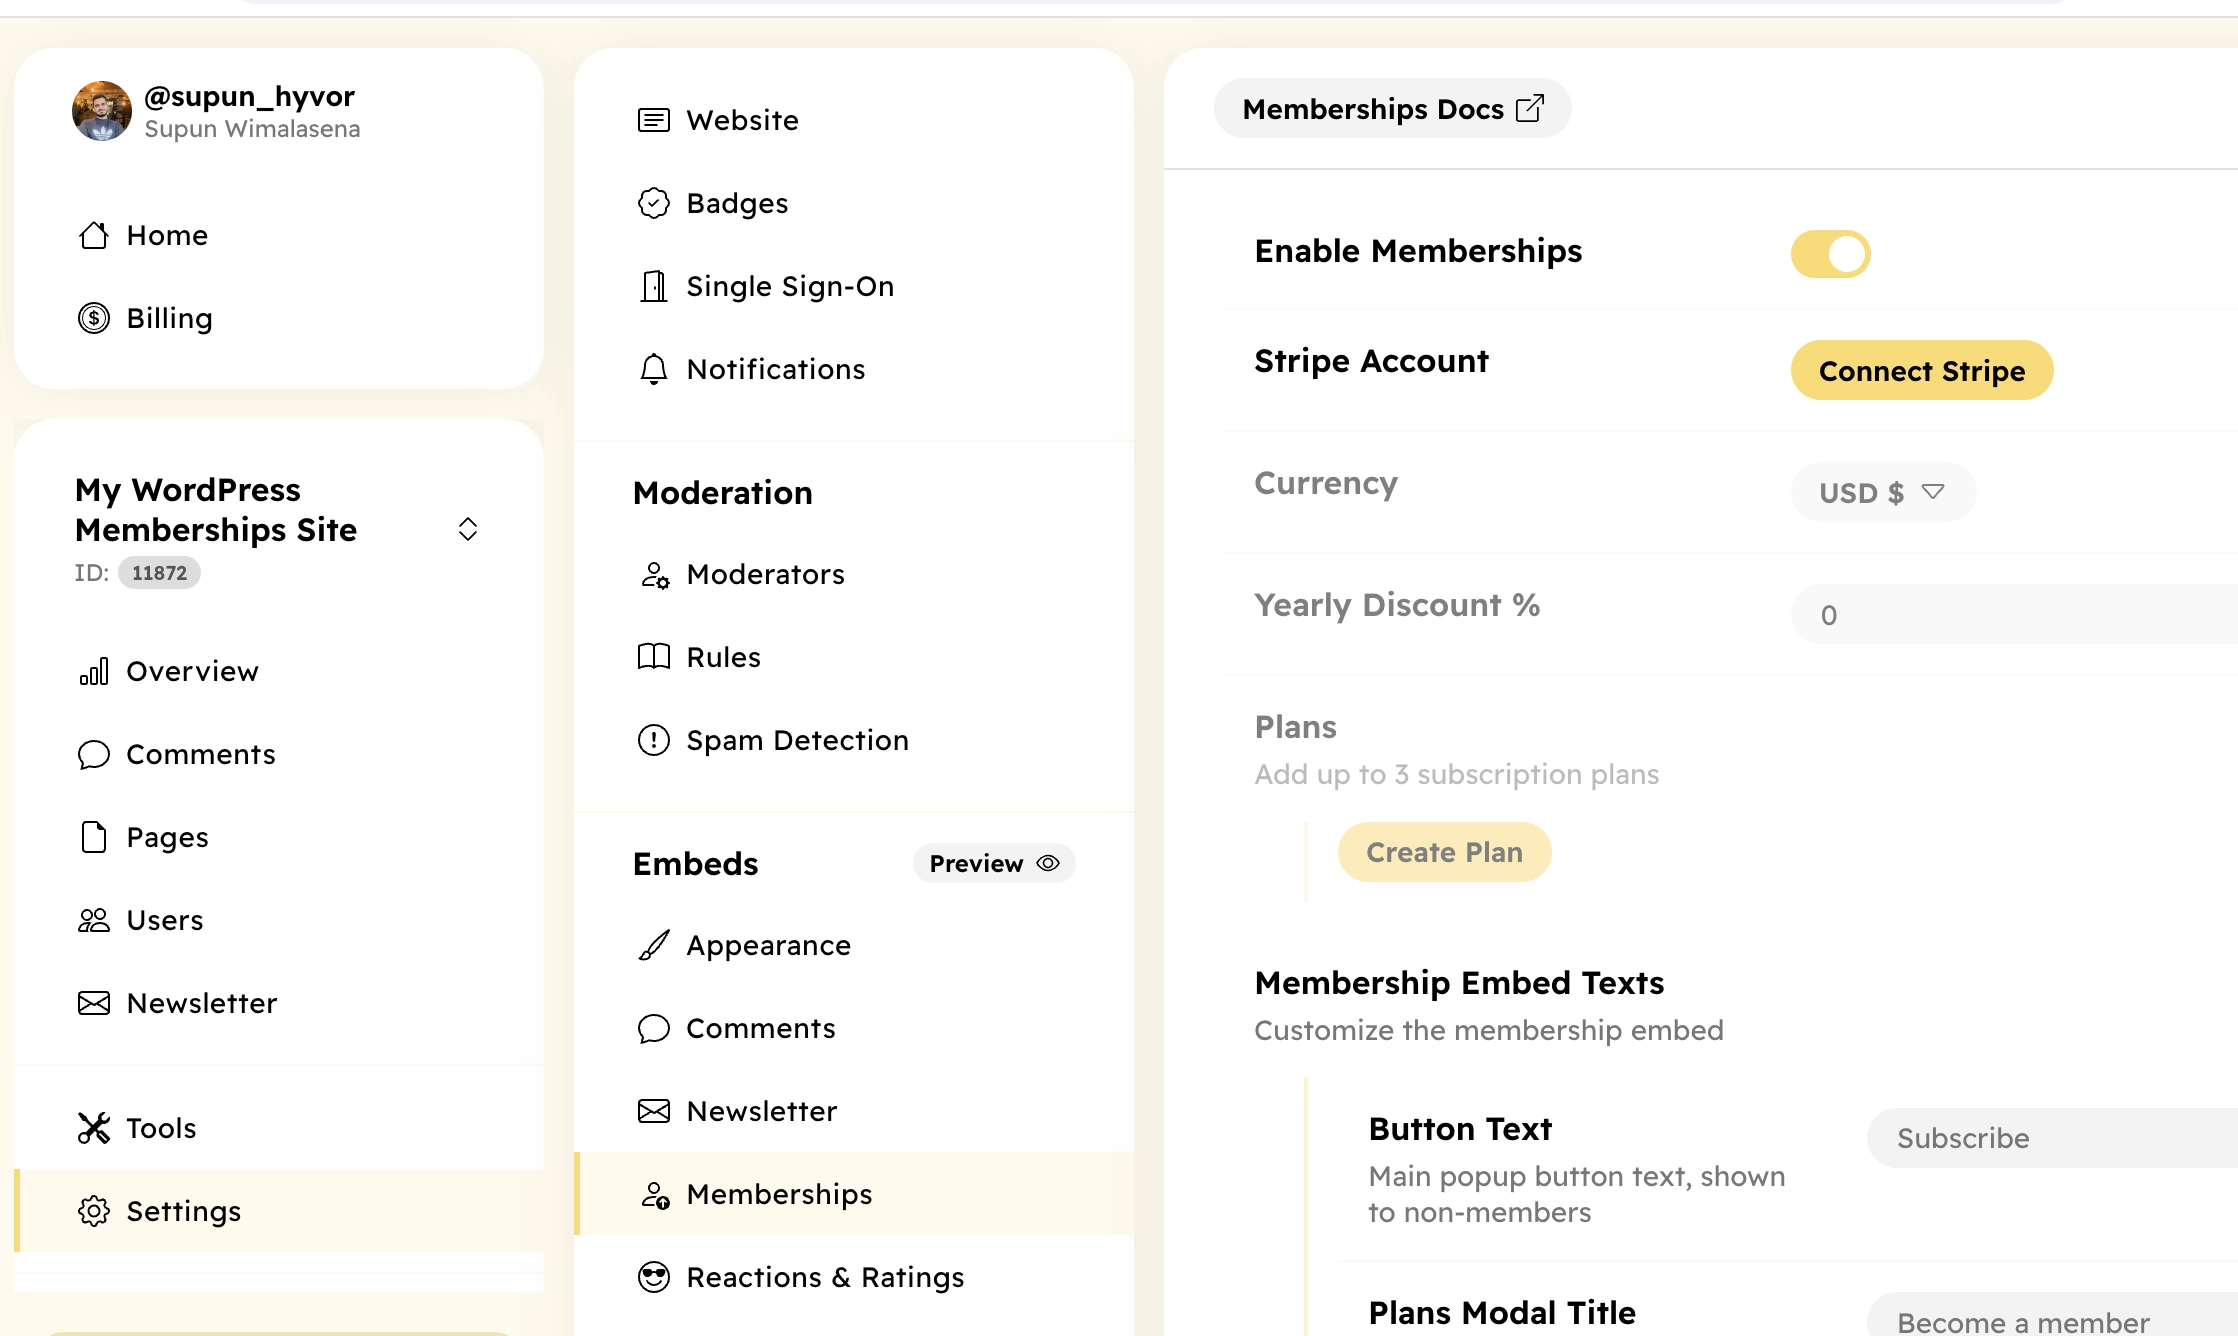
Turn on the Enable Memberships option and Save.
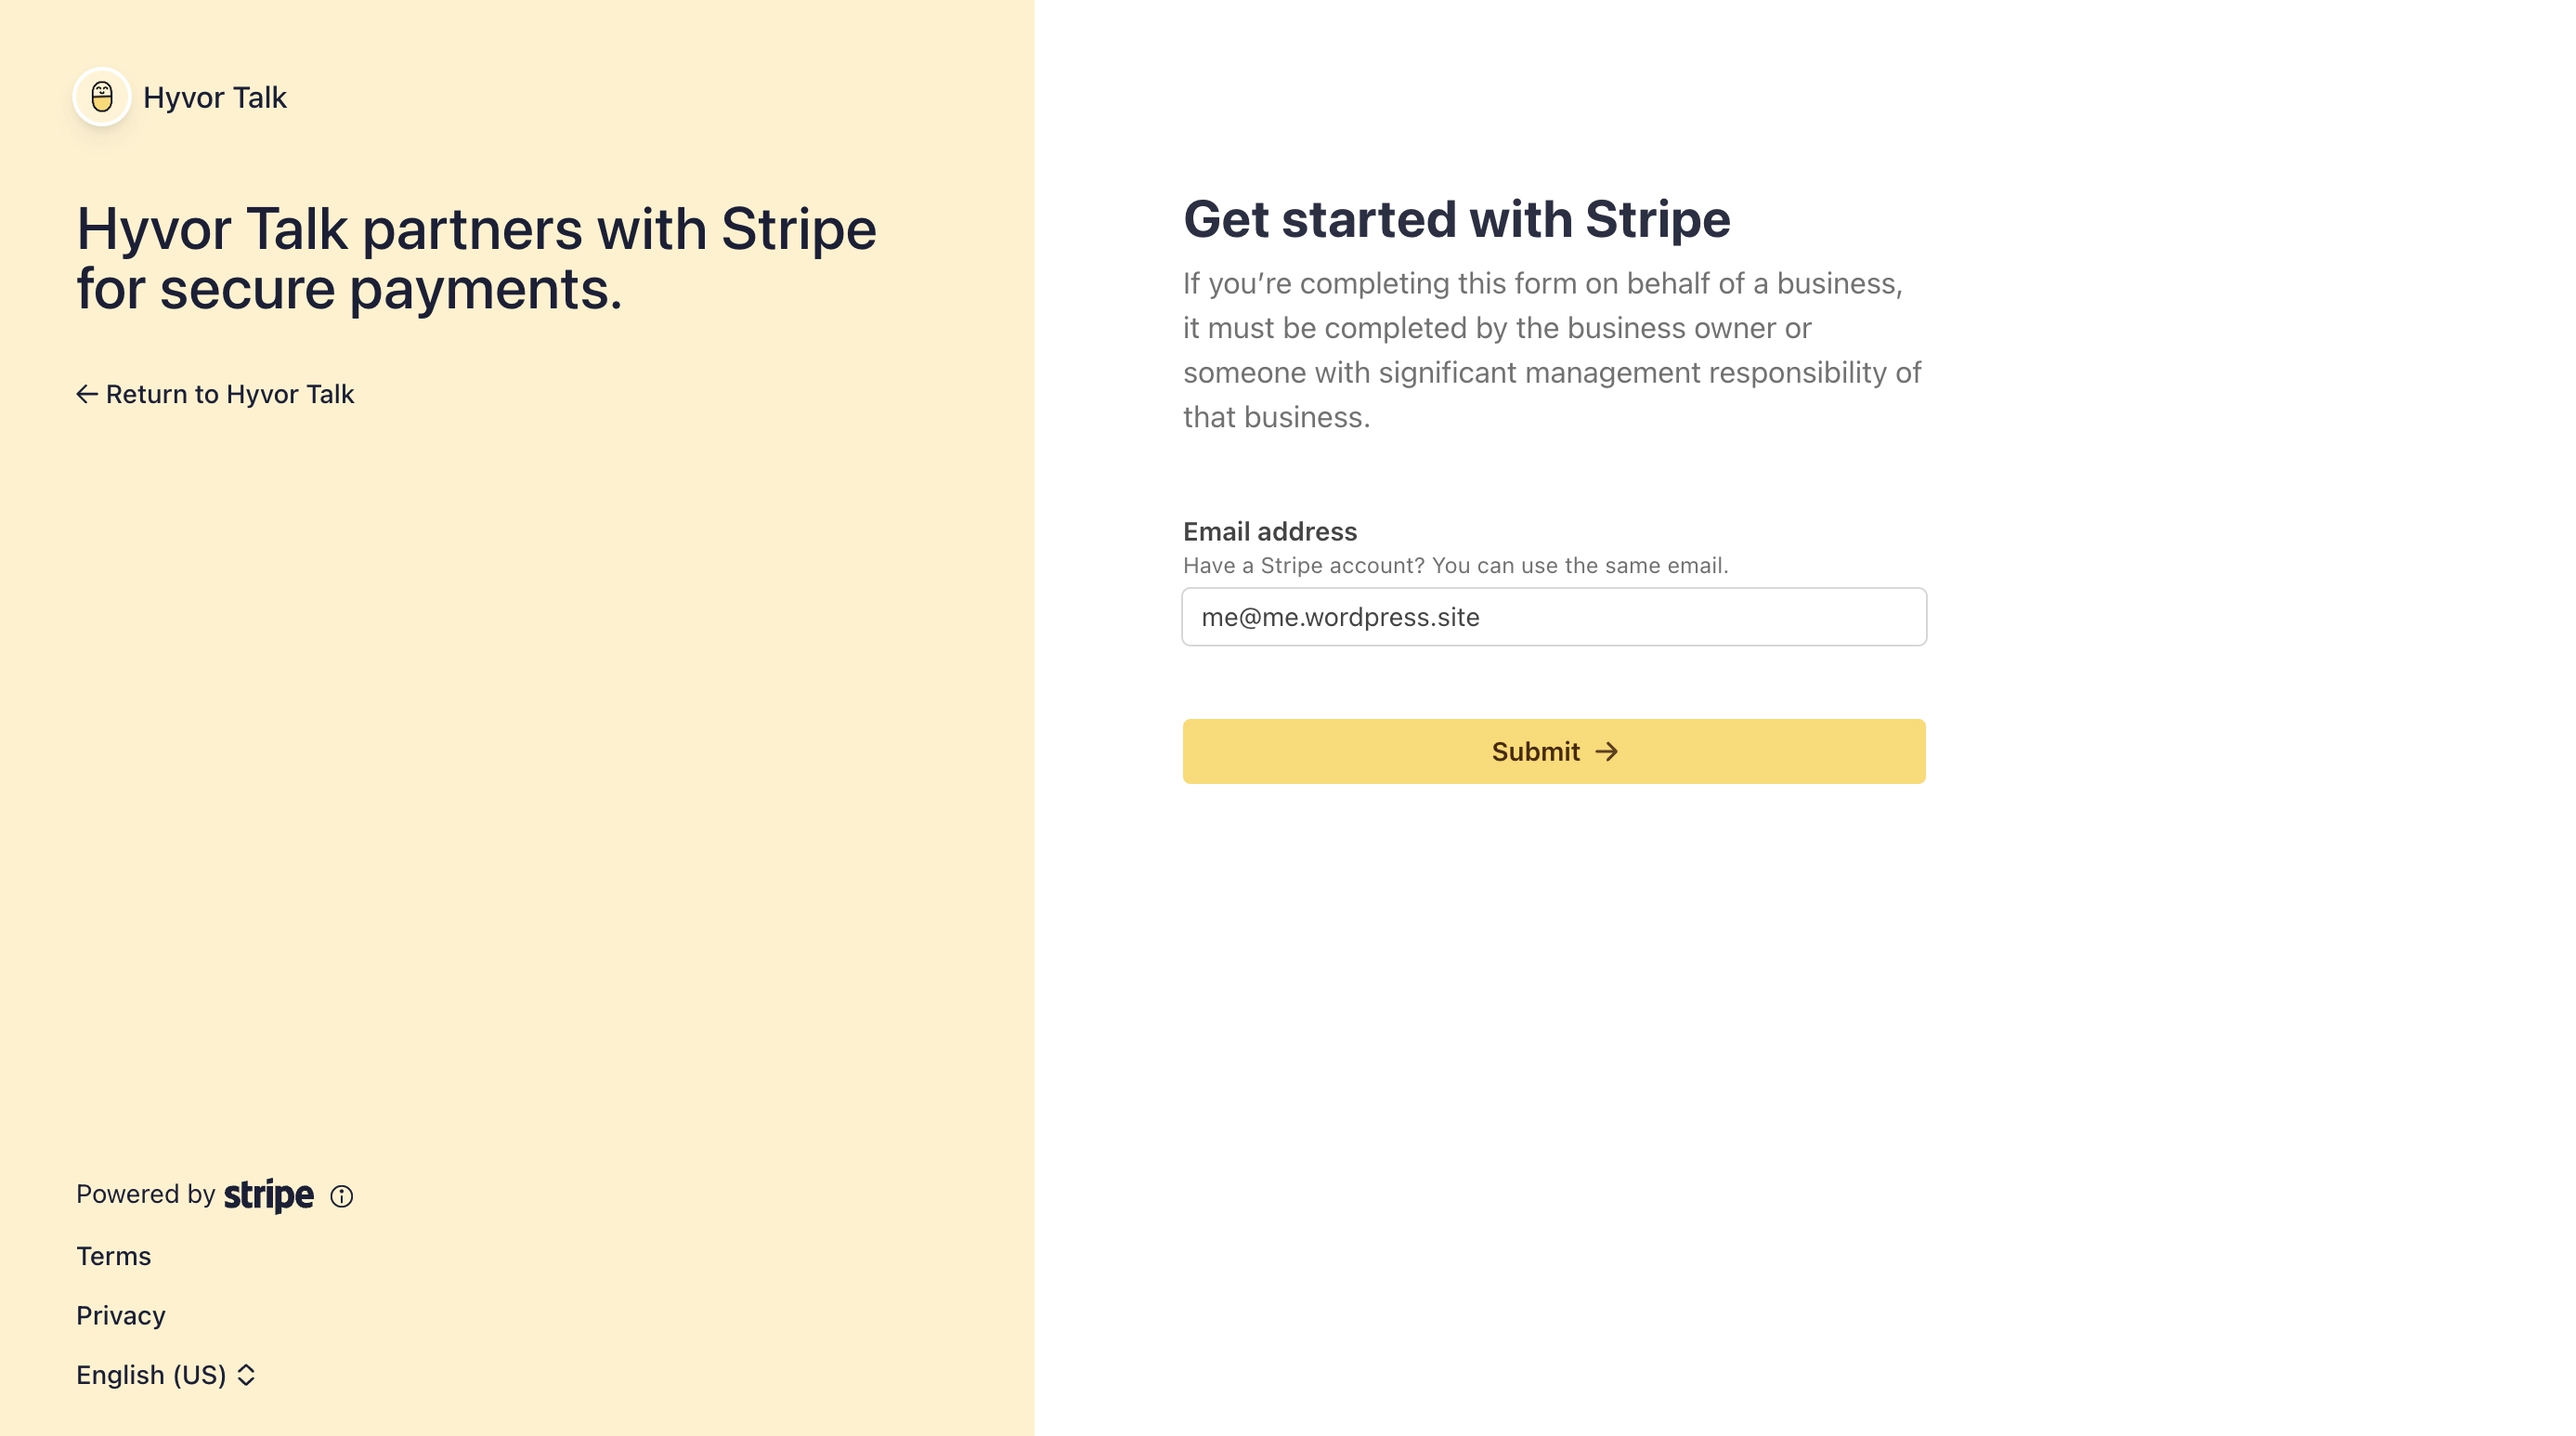
Then, click Connect Stripe to initiate your Stripe account onboarding.
You’ll need to fill in some details about you and your company to comply with Stripe KYC requirements.
Once the onboarding is completed, you will be redirected back to the Hyvor Talk Console, where you see “Connected” as the status.
Currency & Yearly Discount
First, choose a currency. The default is USD.
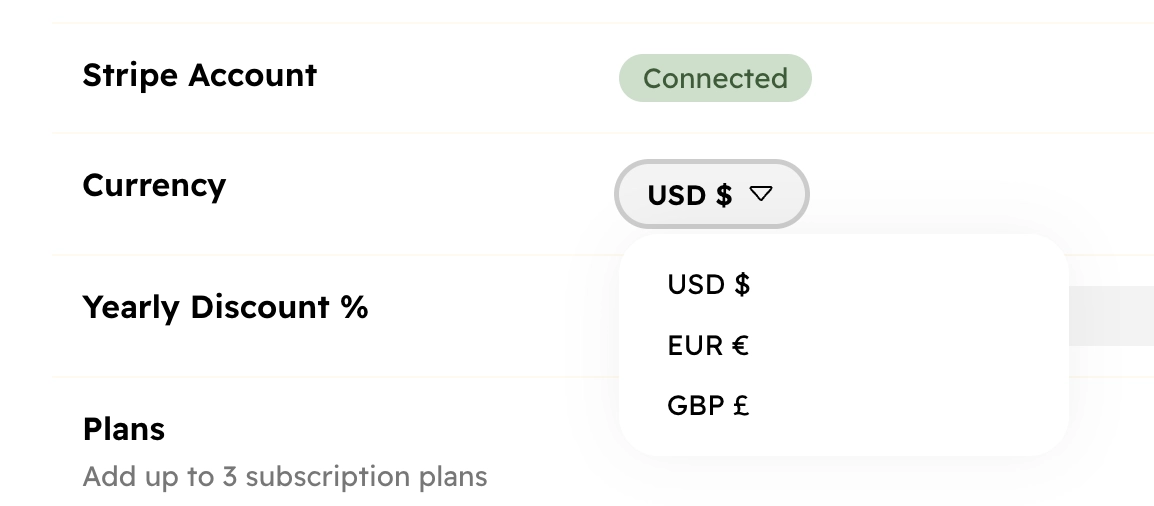
Then, you can optionally set a Yearly Discount to apply to your subscription.

Finally, click “Save”.
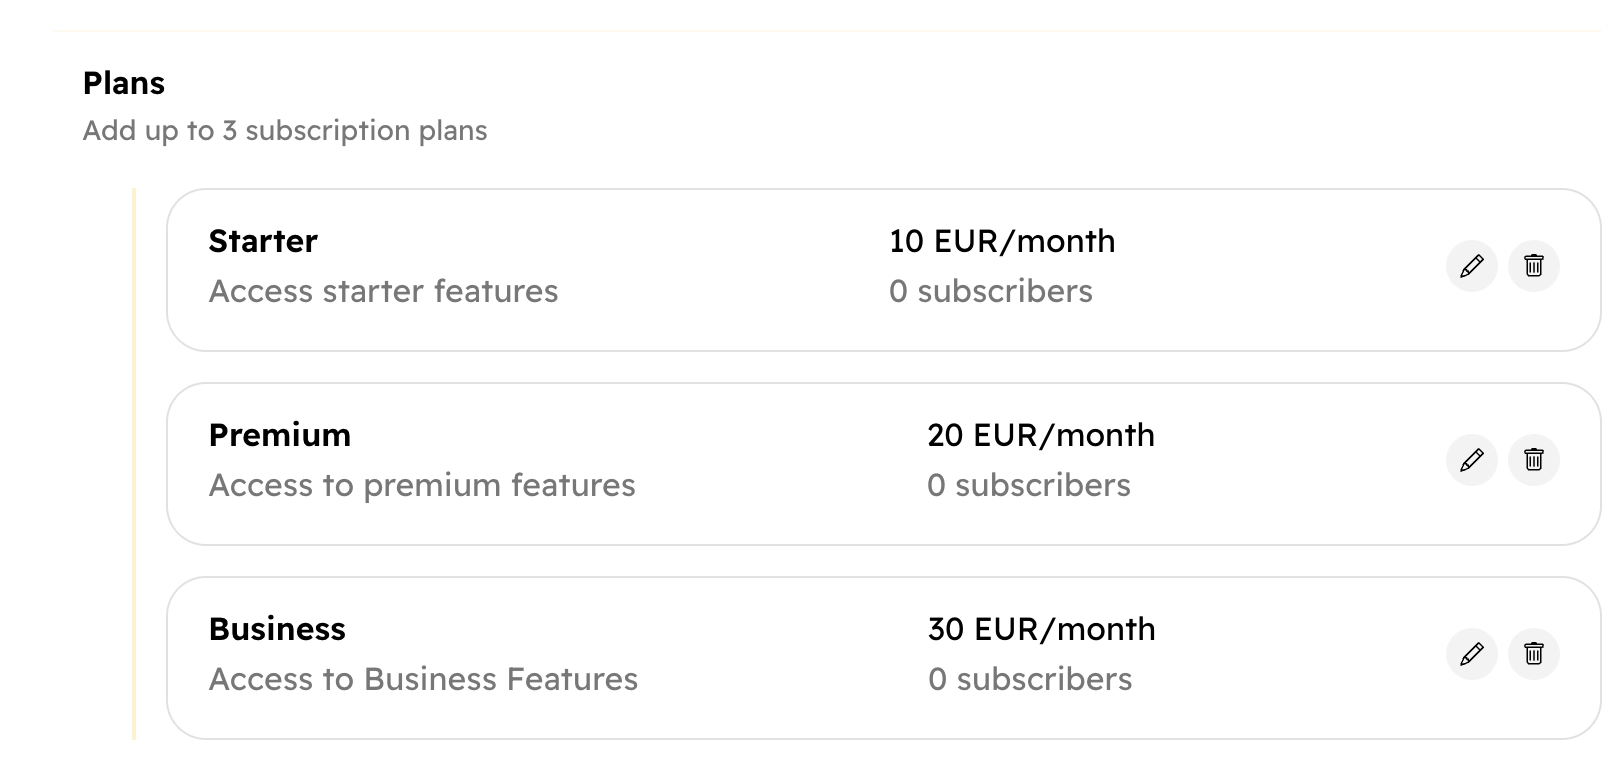
Set up Plans
Now, you are ready to set up subscription plans. Click the “Create Plan” button to get started. Then, fill in the details including Monthly Price.
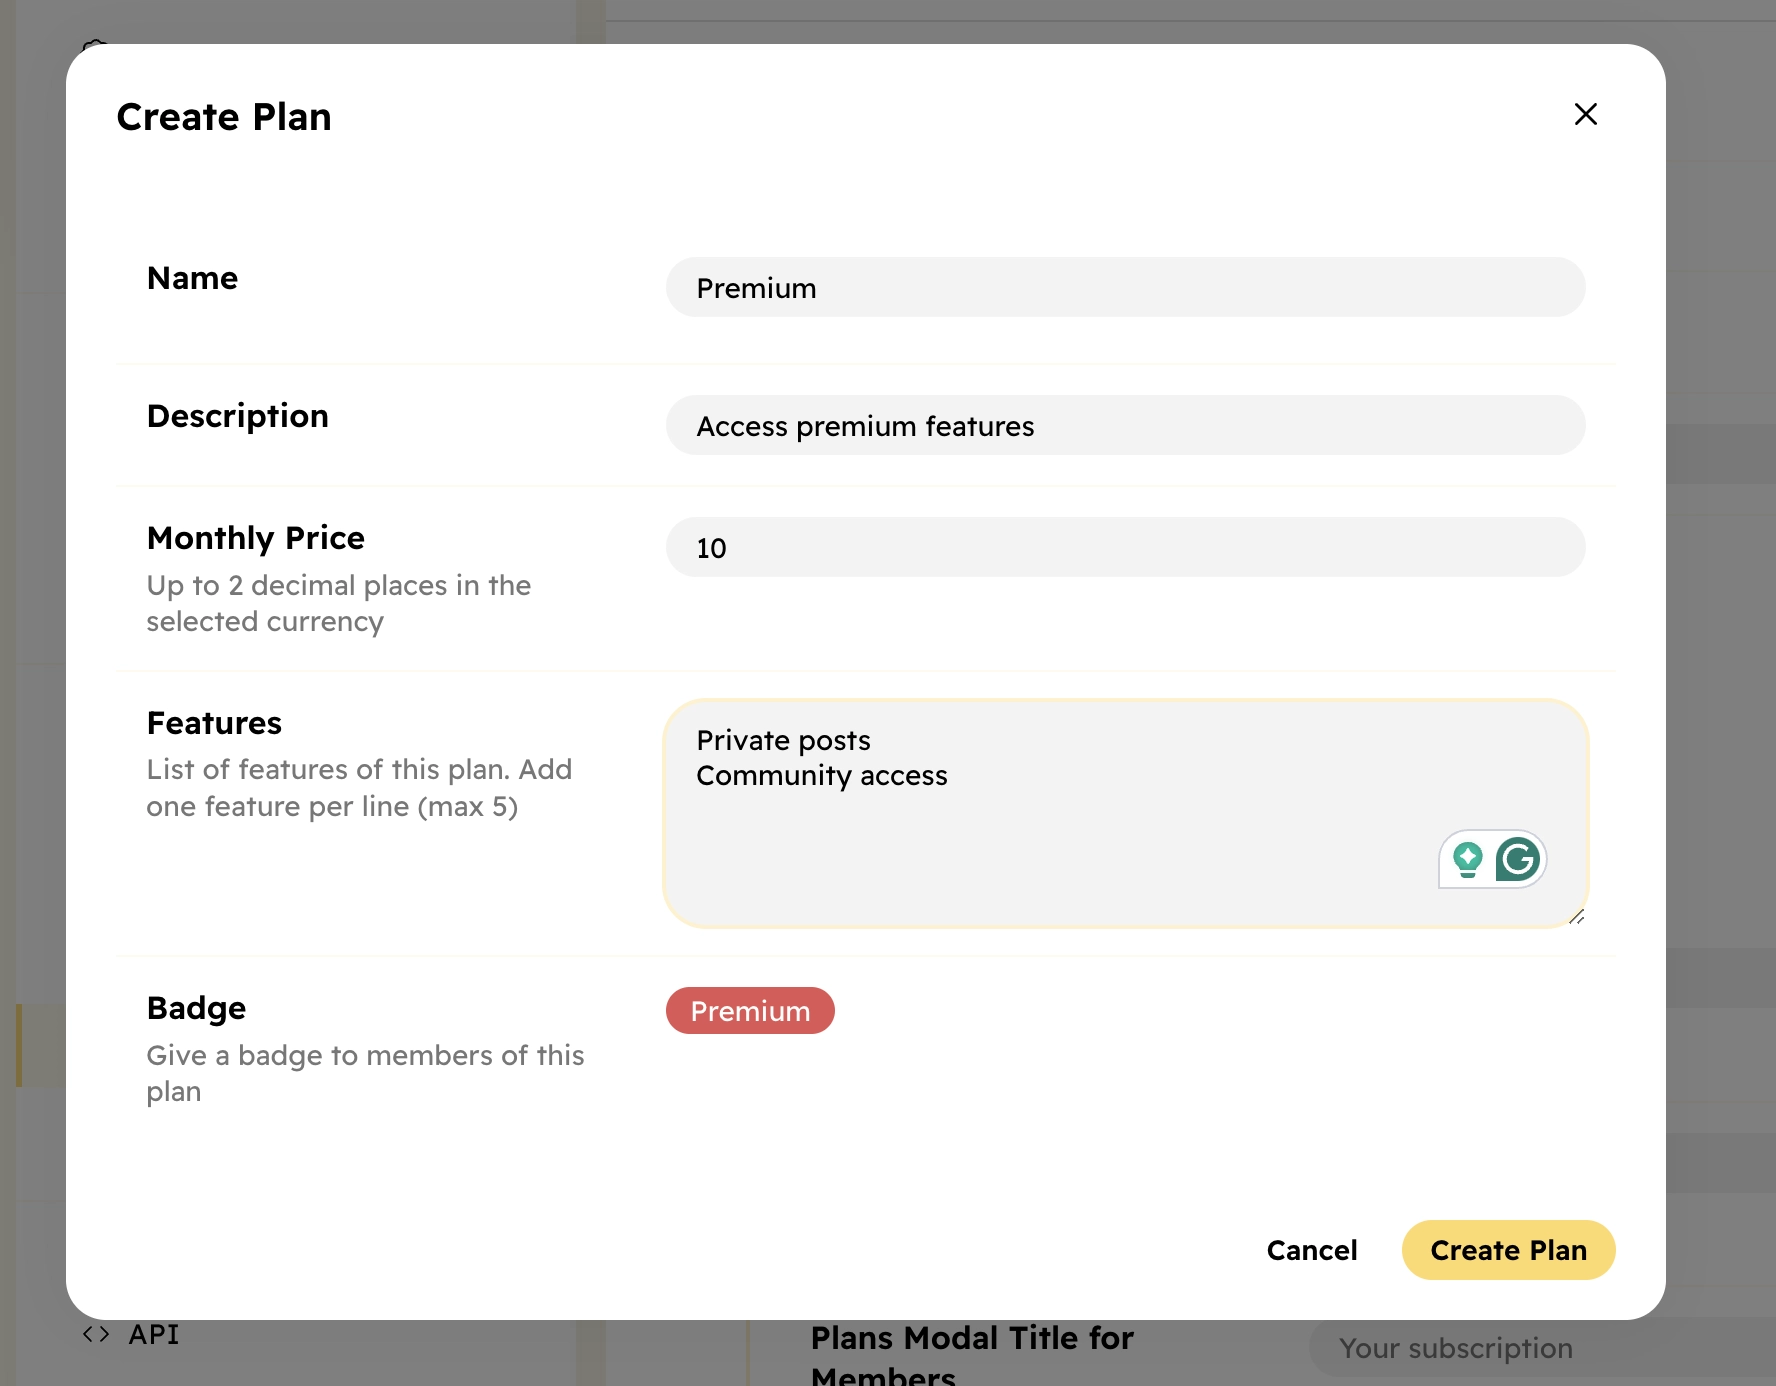
You can create up to 3 plans.
That’s all you have to configure on the Hyvor Talk’s end. Feel free to play around with settings. You can also come back anytime to change them.
WordPress Plugin
Now, let’s install the Hyvor Talk WordPress plugin.
Go to your WordPress admin panel
Then, Plugins → Add New Plugin.
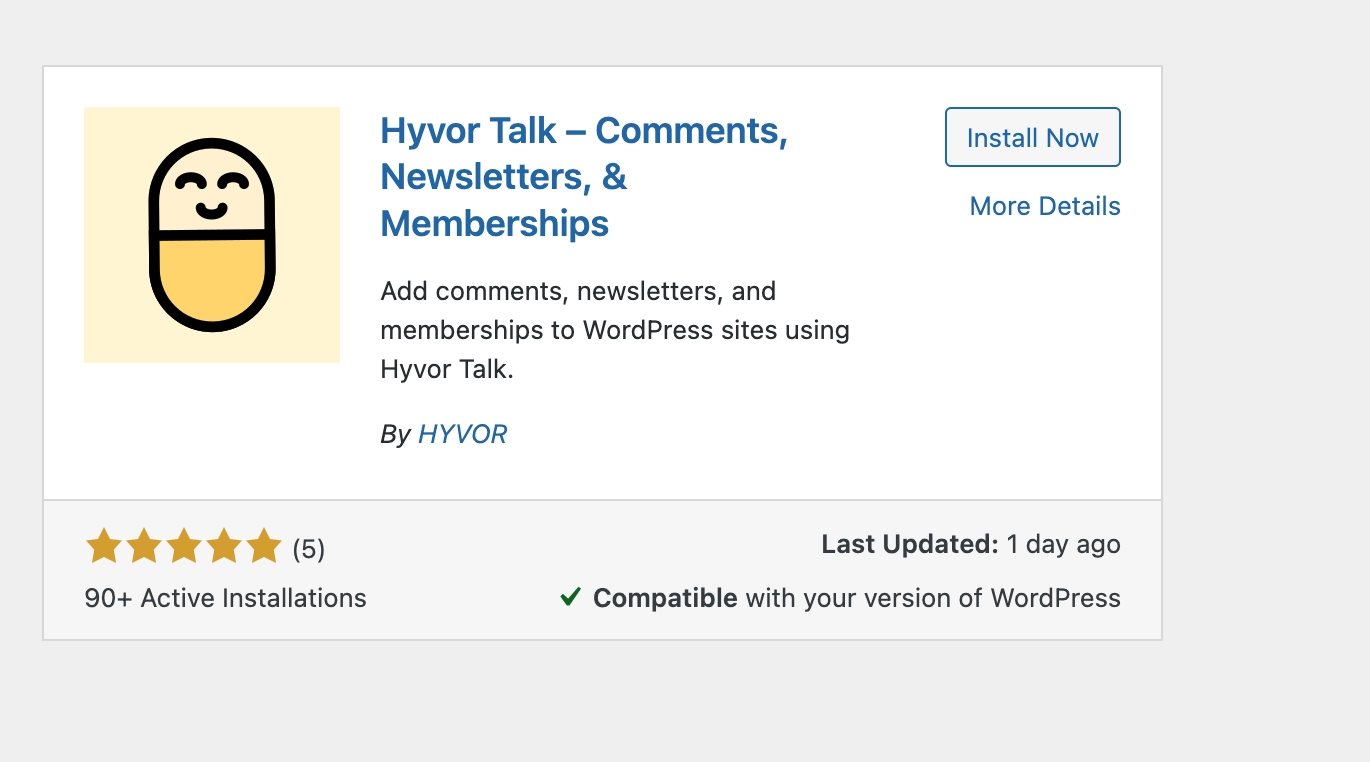
Search for “Hyvor Talk”, then click Install now, and then Activate.
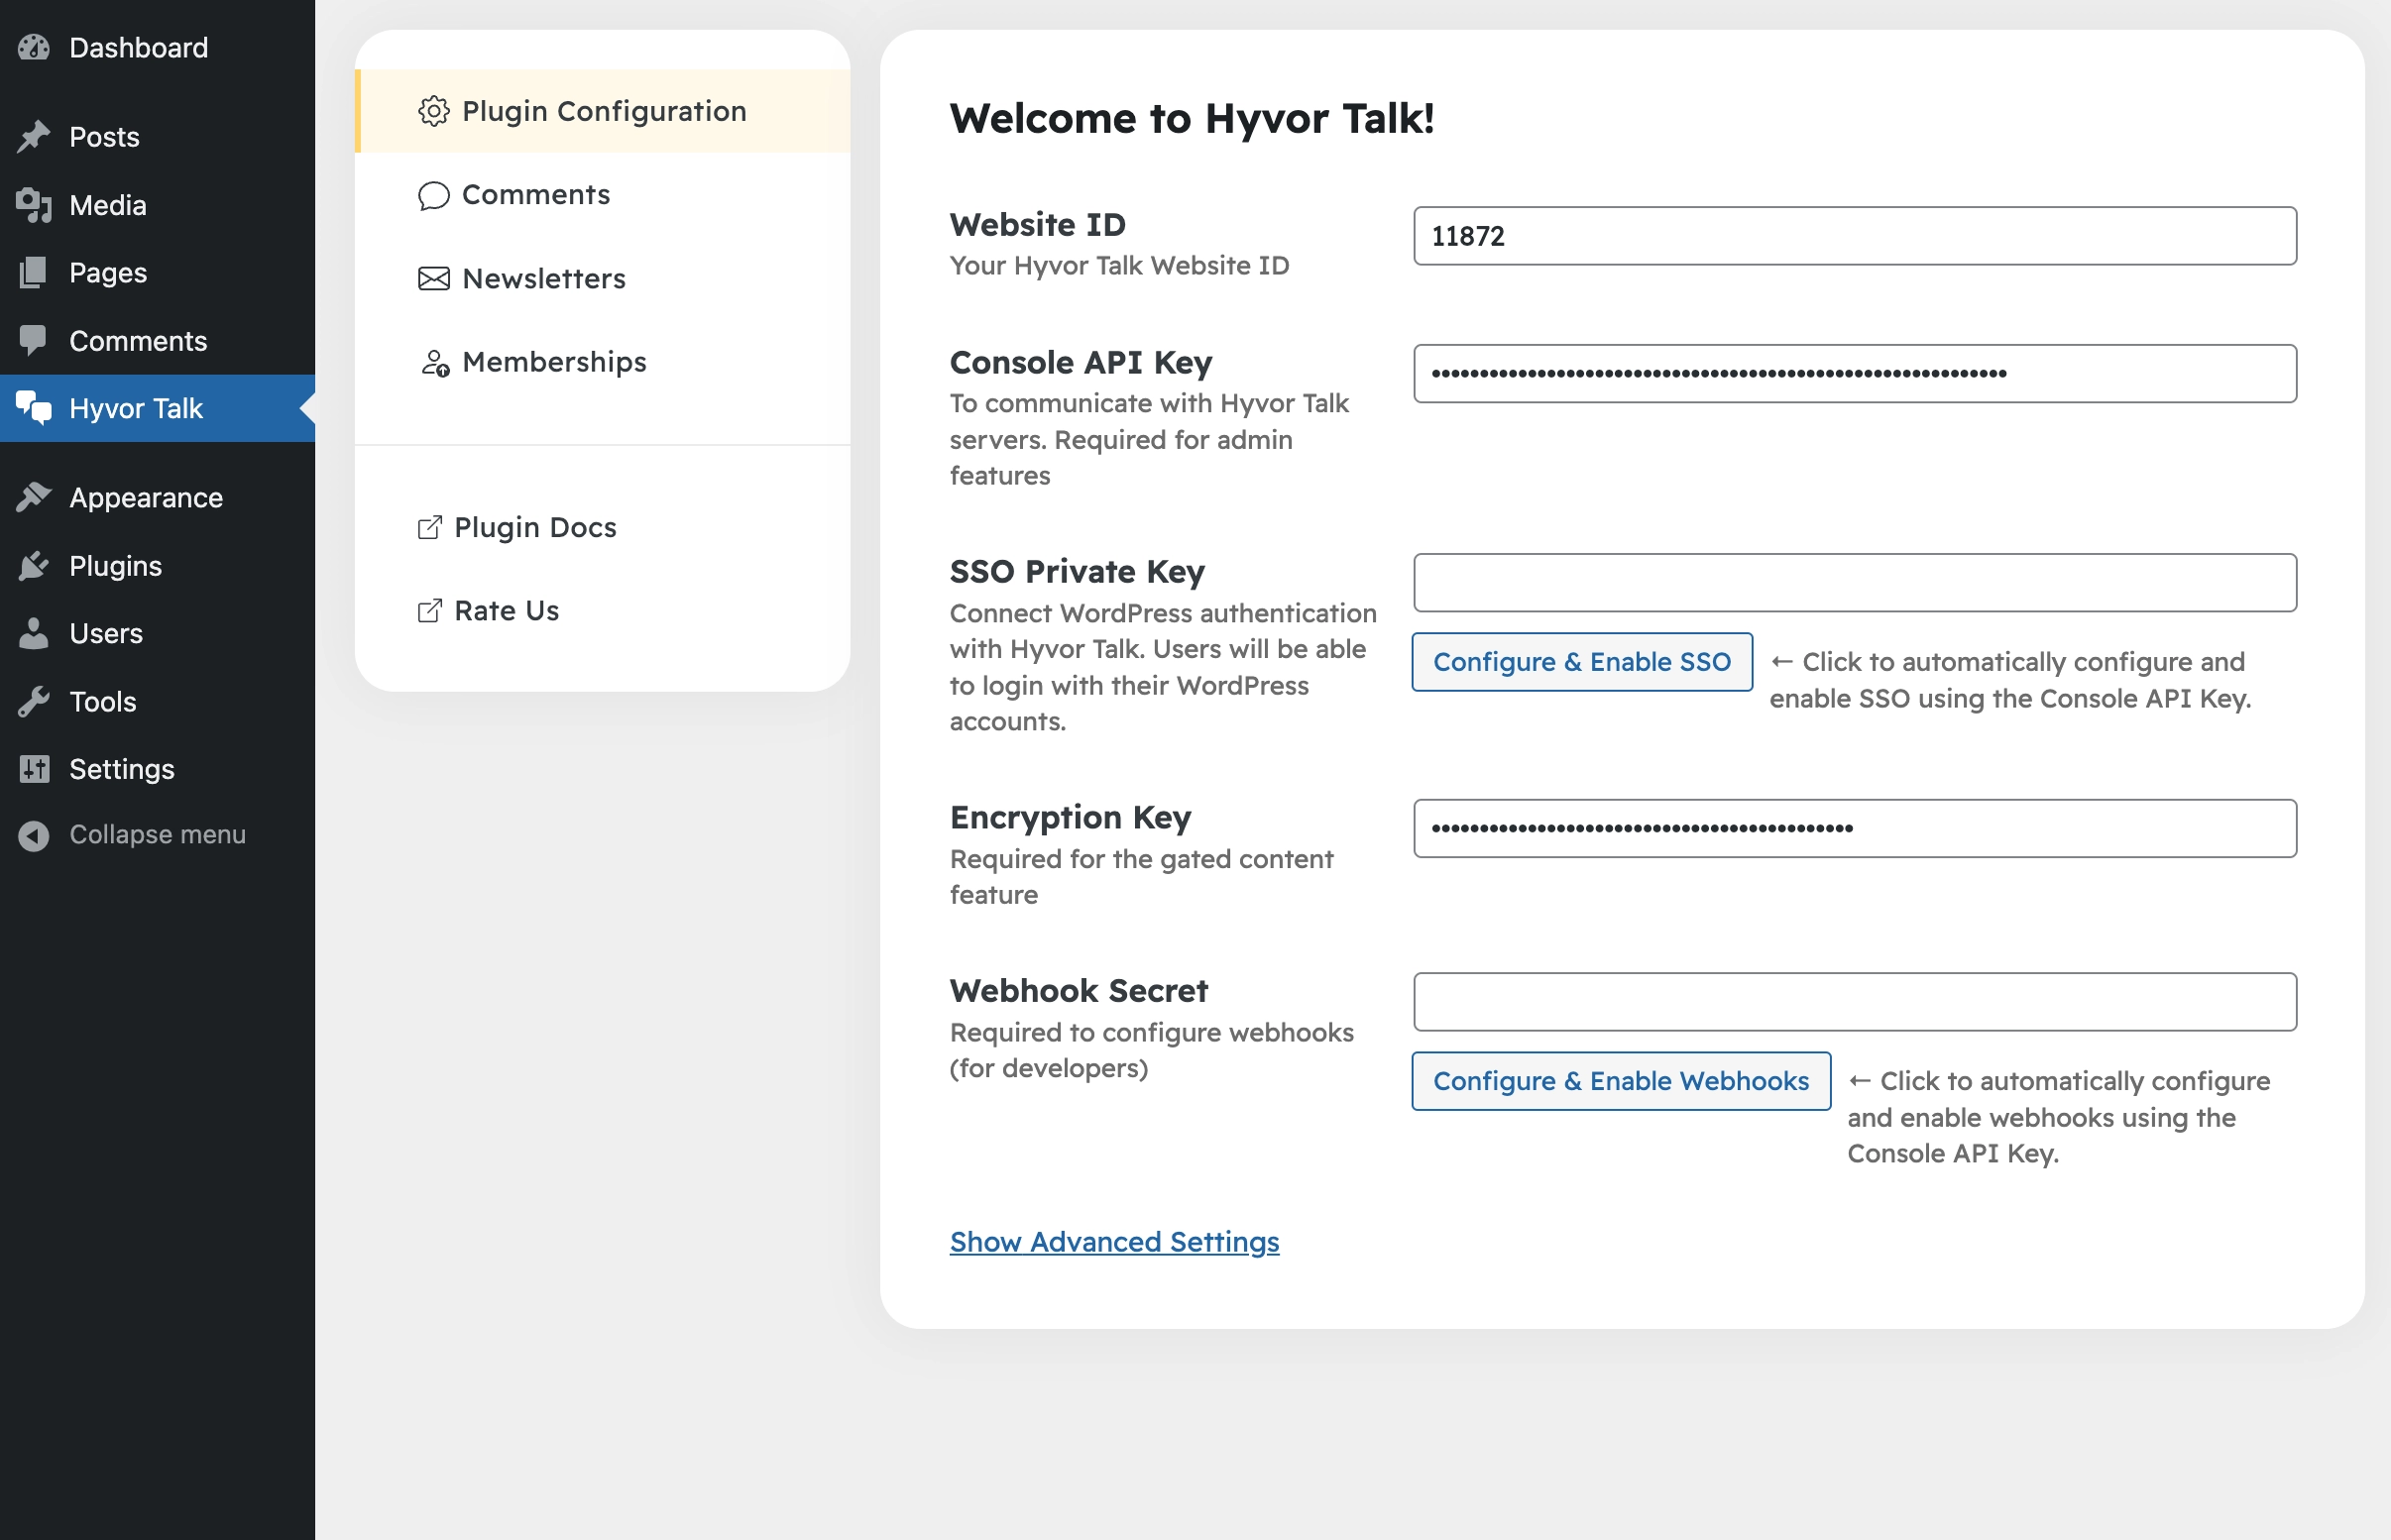
Click “Hyvor Talk” on the left sidebar.
Enter your Website ID. You can find it at Hyvor Talk Console → Settings → Website
Then, add the Console API Key (Console -> Settings -> API -> Console API). This integrates the plugin with Hyvor Talk, automating the rest.
Then, click the Configure Encryption Key button to set up your encryption key. We need this for gated content later.
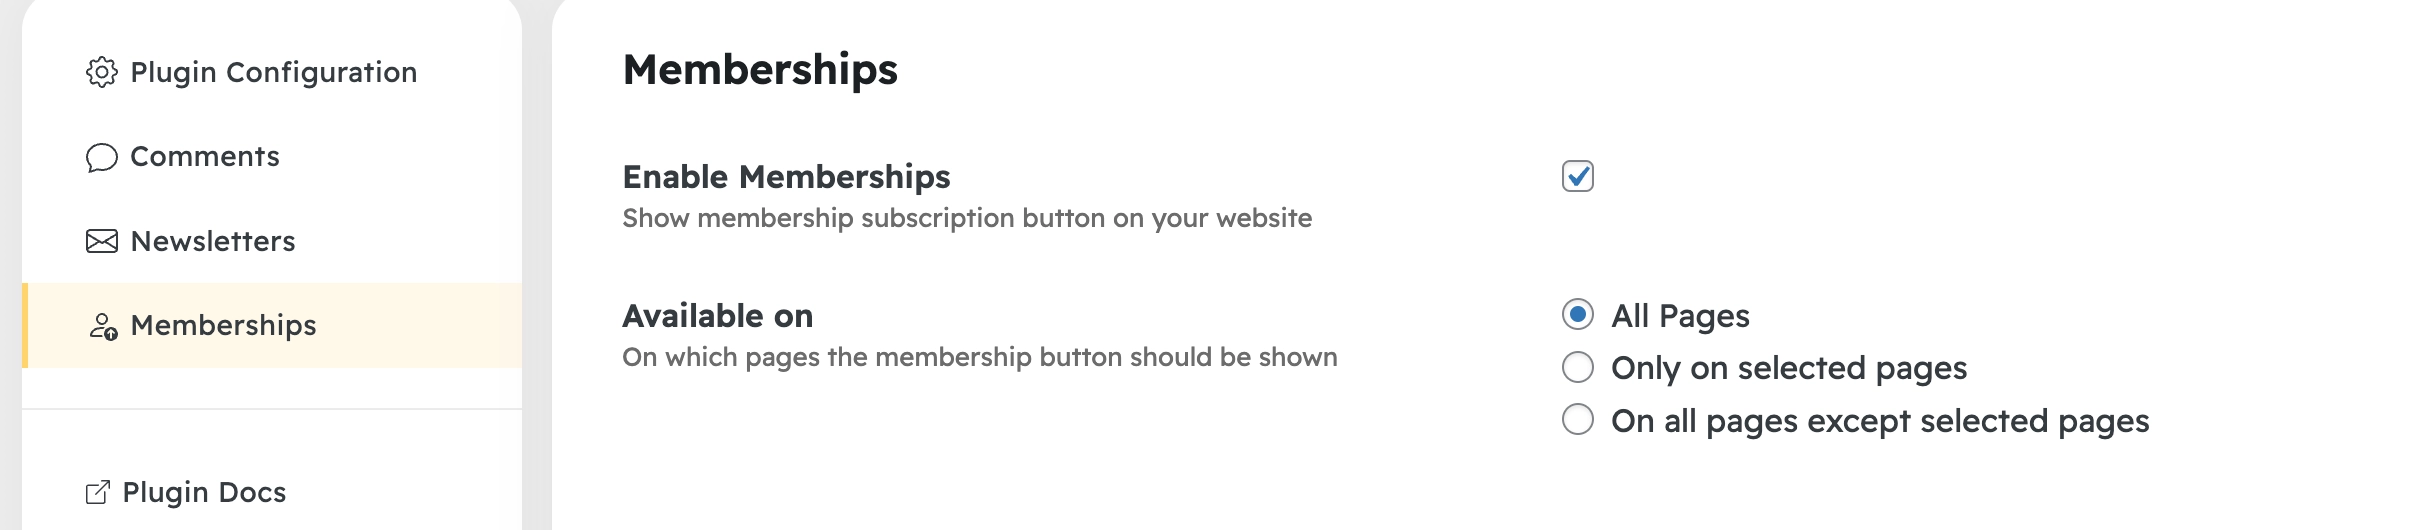
Next, Go to the Memberships section in the plugin and enable it. Optionally you can select on which pages to show the membership button.
Since you won’t be using Hyvor Talk Comments, disable the Enable Comments option in the Comments section.
Now, you should see the “Subscribe” button, which opens the plans modal with the plans you configured.

WordPress User Login
If you click the “Login in to Subscribe” button in the above plans modal, it will take you to HYVOR login. In most cases, you would need your users to log in via your WordPress site. Let’s configure Single Sign-on to do just that.
Go to Hyvor Talk Plugin Configuration
Click Configure and Enable SSO

That’s all! Now, any user who has an account on your WordPress site can sign up for a paid membership!

Gated Content
Gated content, or “members-only content” can be used to restrict some of your posts to paid members only. The easiest way is to use WordPress tags or categories in your posts.
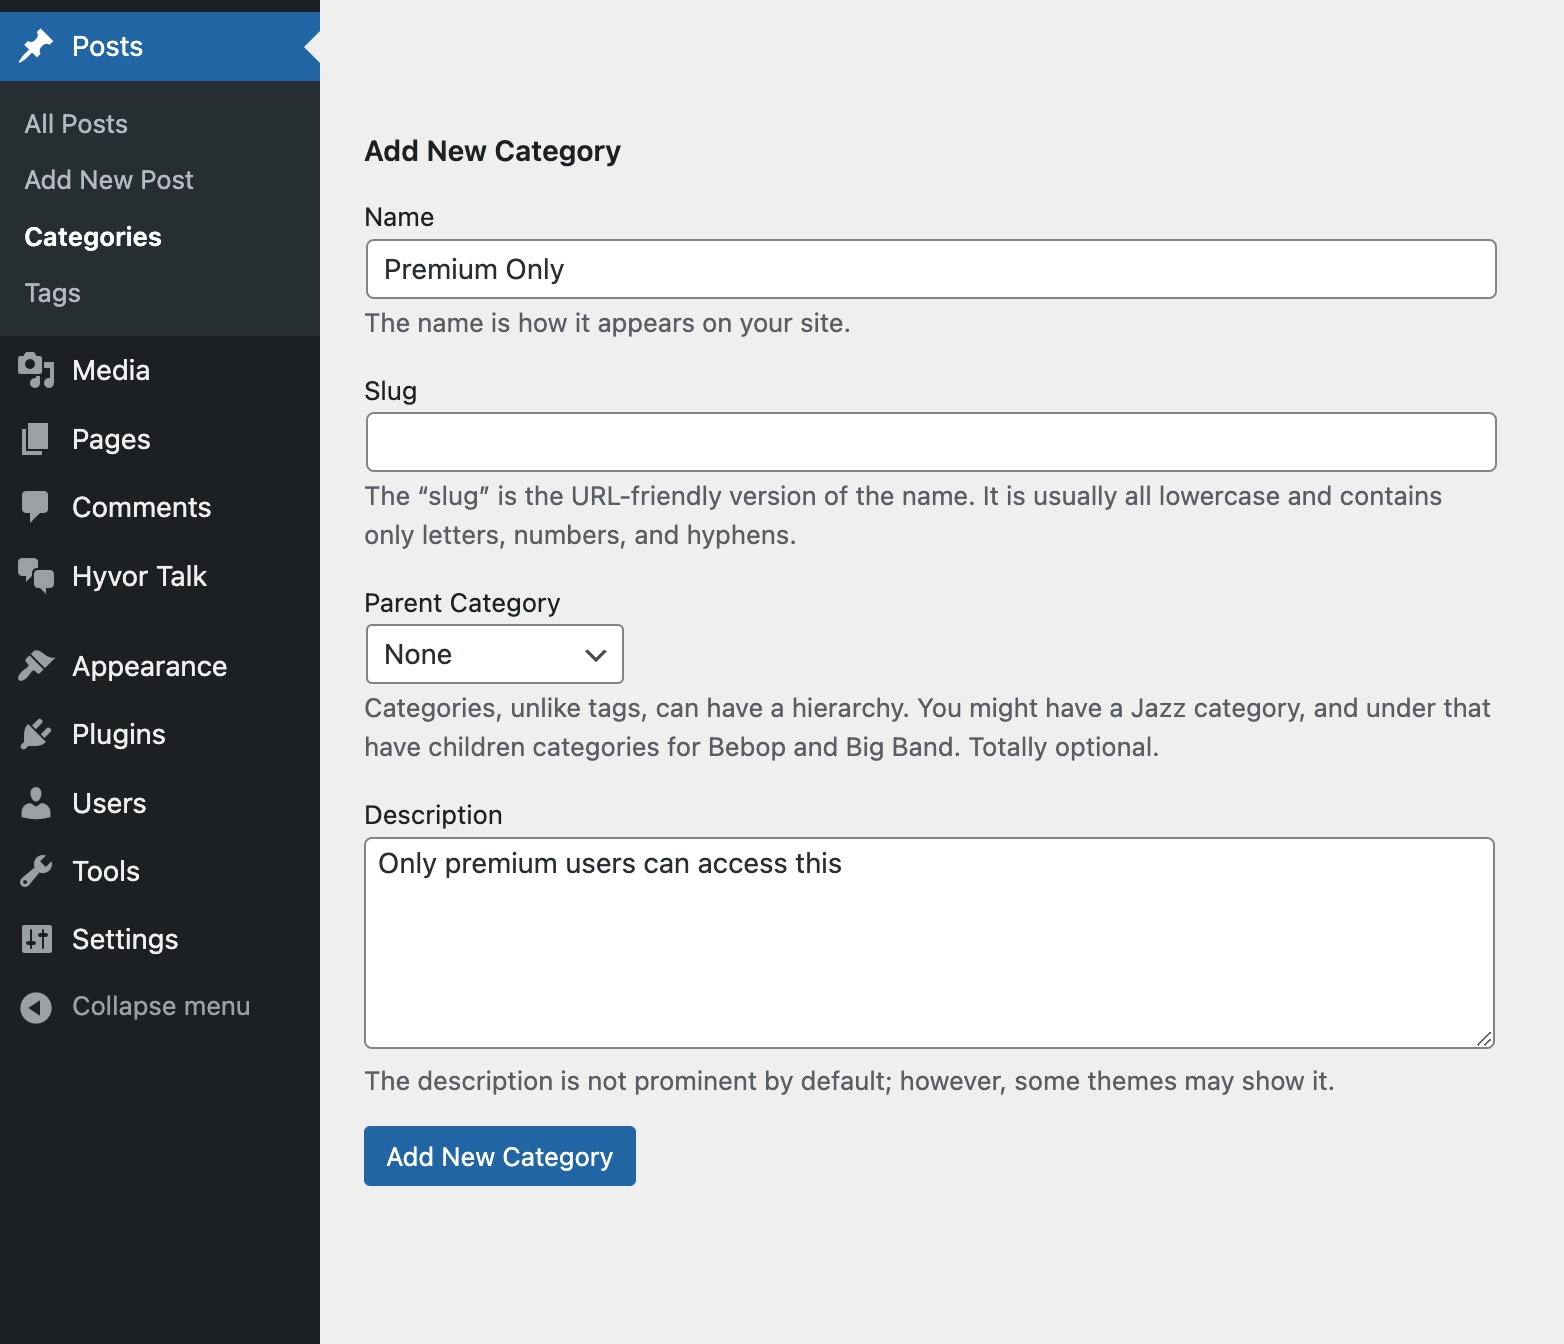
First, create a new Category.
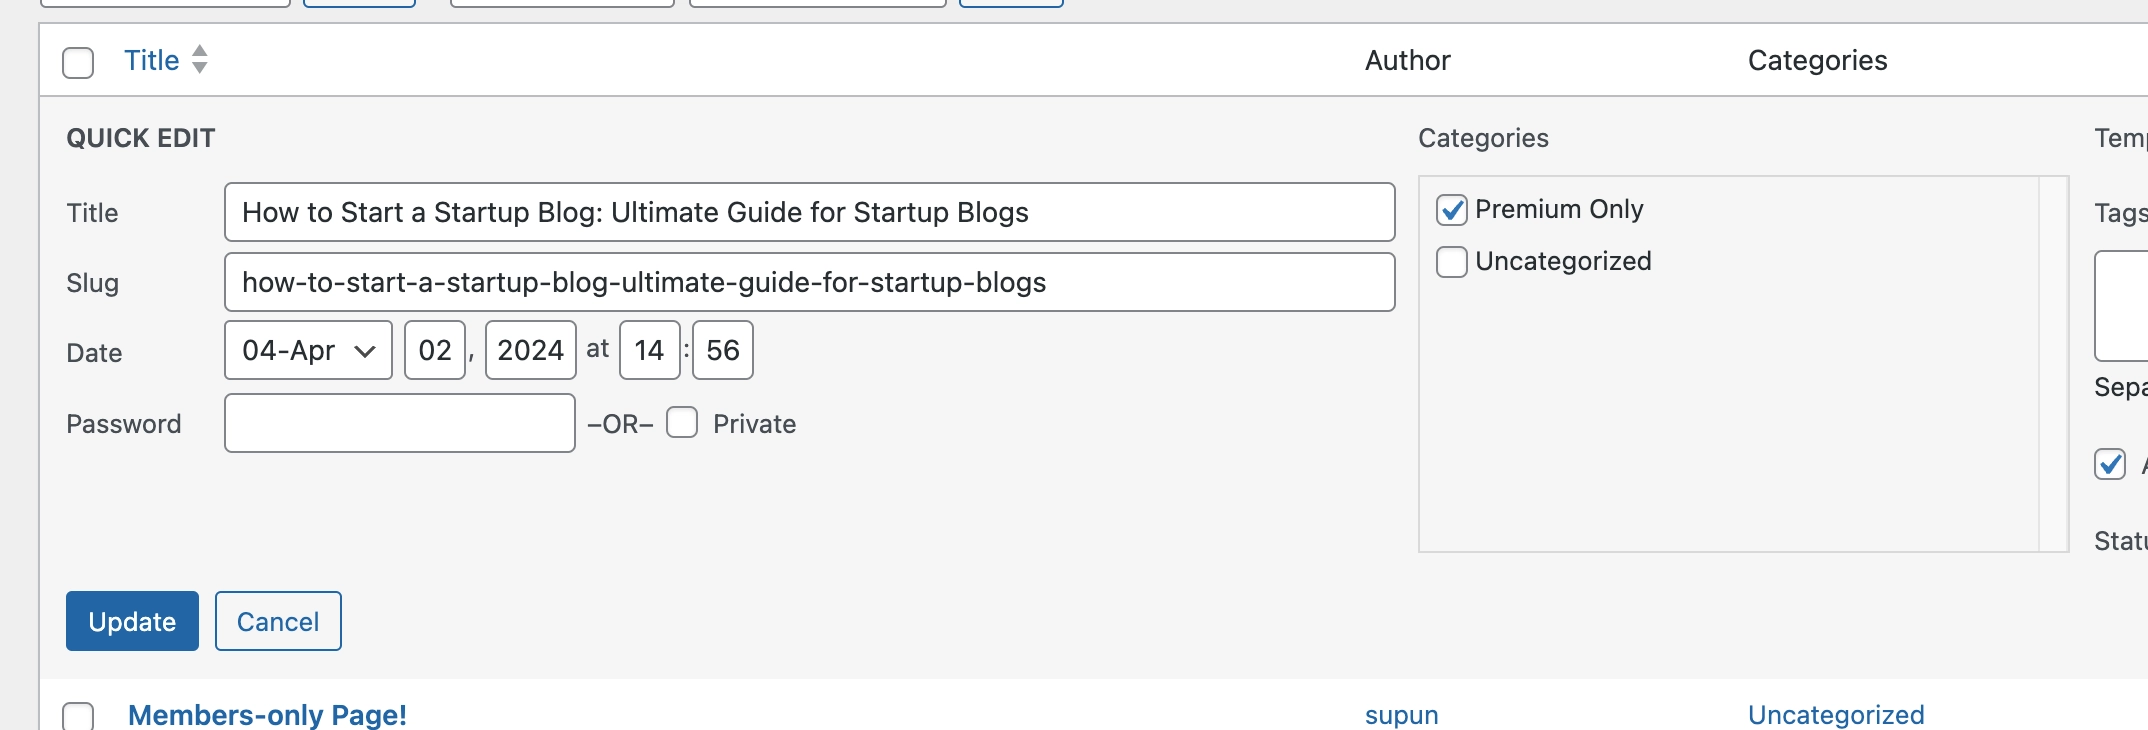
Then, assign this category to posts that you want only Premium members to see.
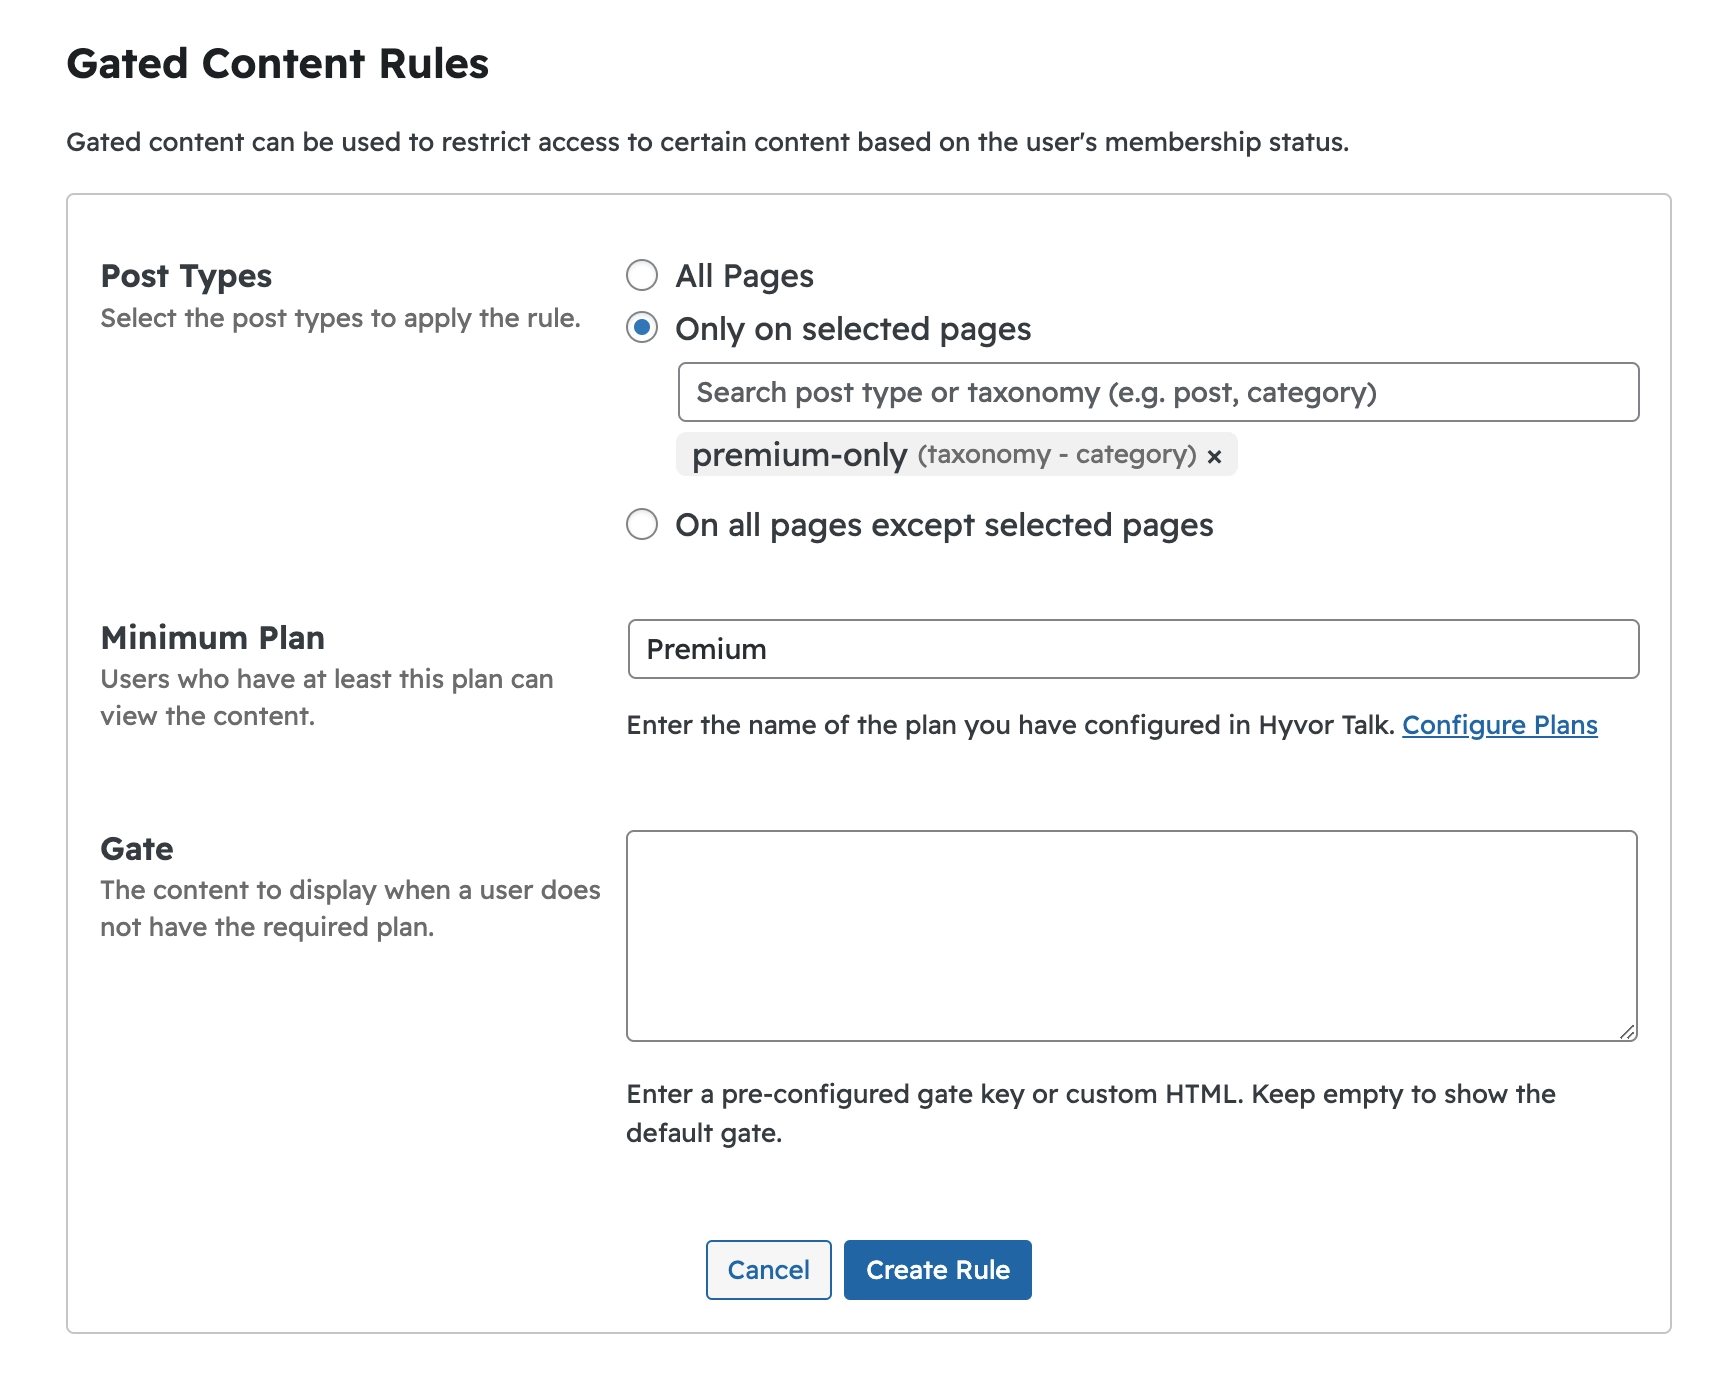
Finally, create a Gated Content Rule at WordPress Admin Panel → Hyvor Talk → Memberships.
Make sure to select the category you created (
premium-onlyin this case)The minimum plan should be set to the name of the plan you previously created.
You can keep the Gate value empty to use the default gate.
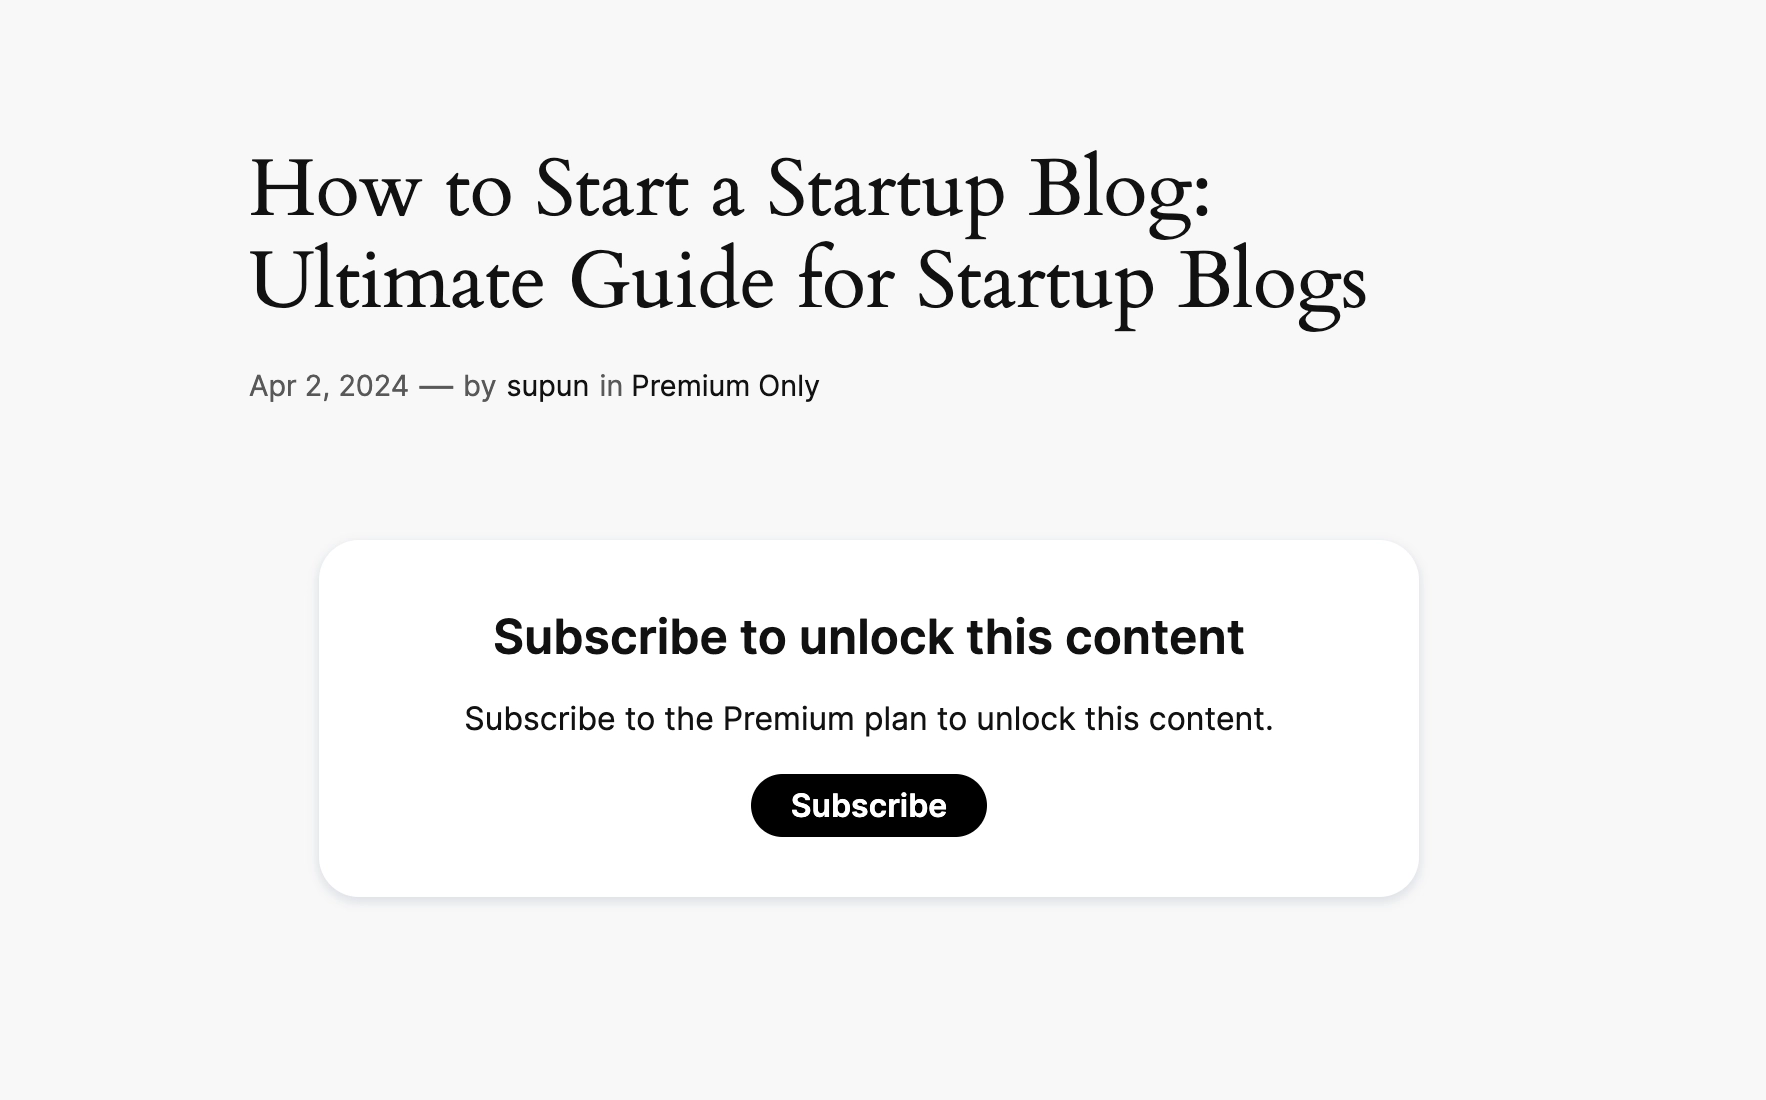
Now, users who don’t have access will see the following message (“gate” as we call it).
Instead of using categories, you can also use a custom post type to filter pages. For example, if you have an LMS plugin installed, you can gate its content by selecting its custom post type.
What’s Next
In this tutorial, we converted your WordPress website into a fully-integrated membership site. So, what’s next? Here are some tips for using Hyvor Talk at its best potential.
Hyvor Talk Console → Settings
Configure colors & branding in Appearance
Change Membership settings (texts, etc.) in Memberships
Visit our documentation to learn all the features we provide.
See our WordPress plugin docs for more details on shortcodes, plugin hooks, webhooks, and more.
If you have any questions, feel free to contact support or comment below.

Comments