Google Forms is a user-friendly, web-based tool by Google for creating surveys and forms. It features an intuitive interface, various question types, and seamless integration with Google Sheets. Users can easily collaborate in real-time, share forms, and collect responses, which are automatically organized for analysis. The platform is versatile, making it suitable for individuals, businesses, and educators looking for a quick and efficient way to gather information. Let’s see how to add Google Forms to your blog.
When it comes to blogging, basically we come up with needs to collect data. Therefore, the easiest and most cost-effective solution is adding a form; Google Forms. Here are the steps to add Google Forms to your blog.
Step 1: Creating a Form
Step 1.1: SignUp/Login to Google Forms
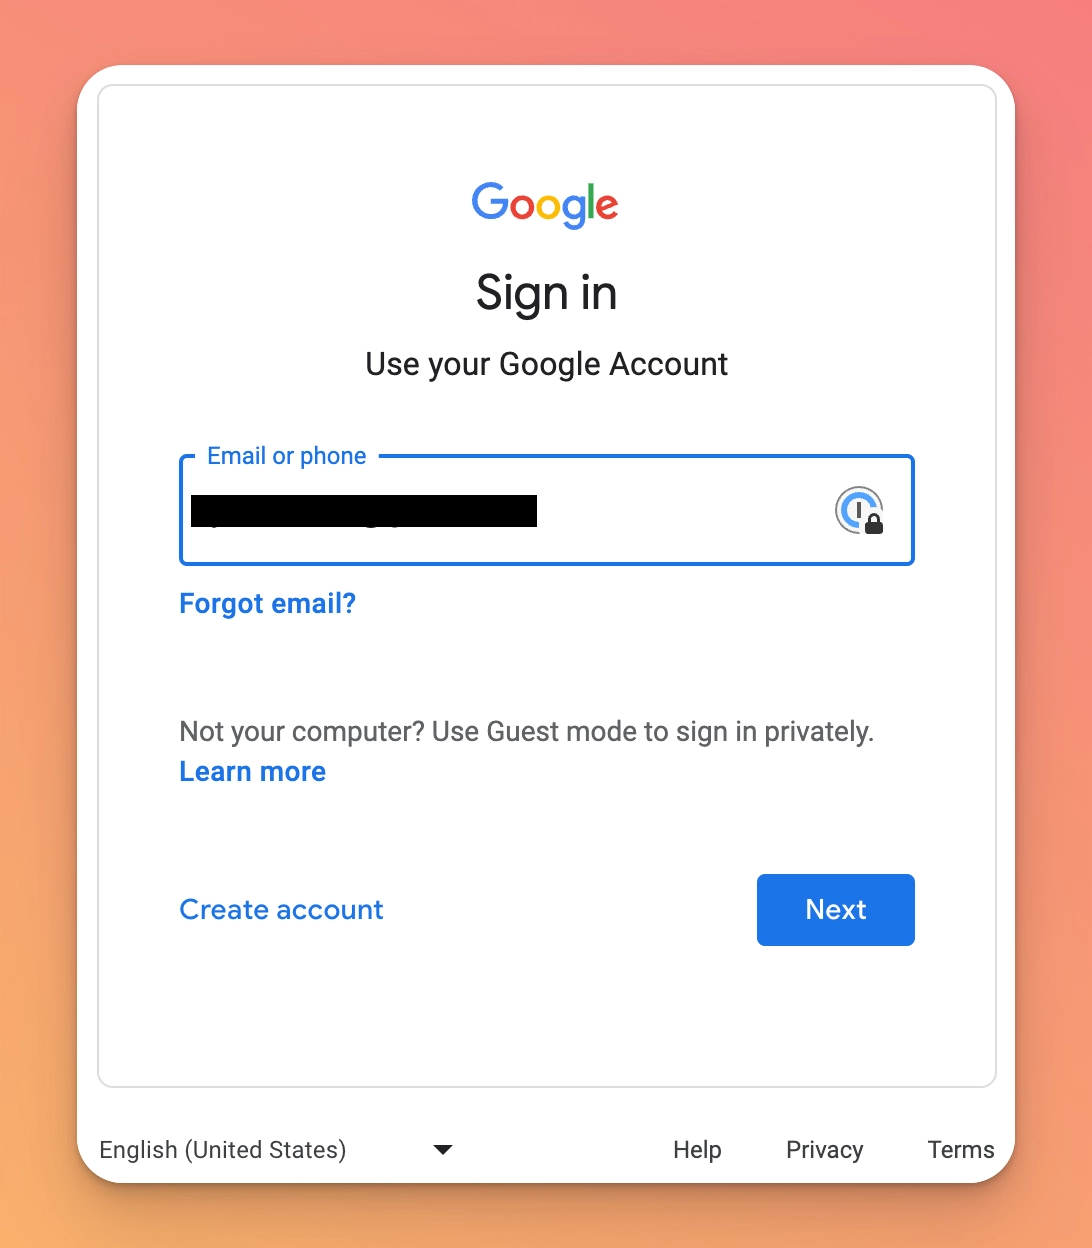
1.1.1. Go to Google and log in to your Google account or sign up if you don’t have one.
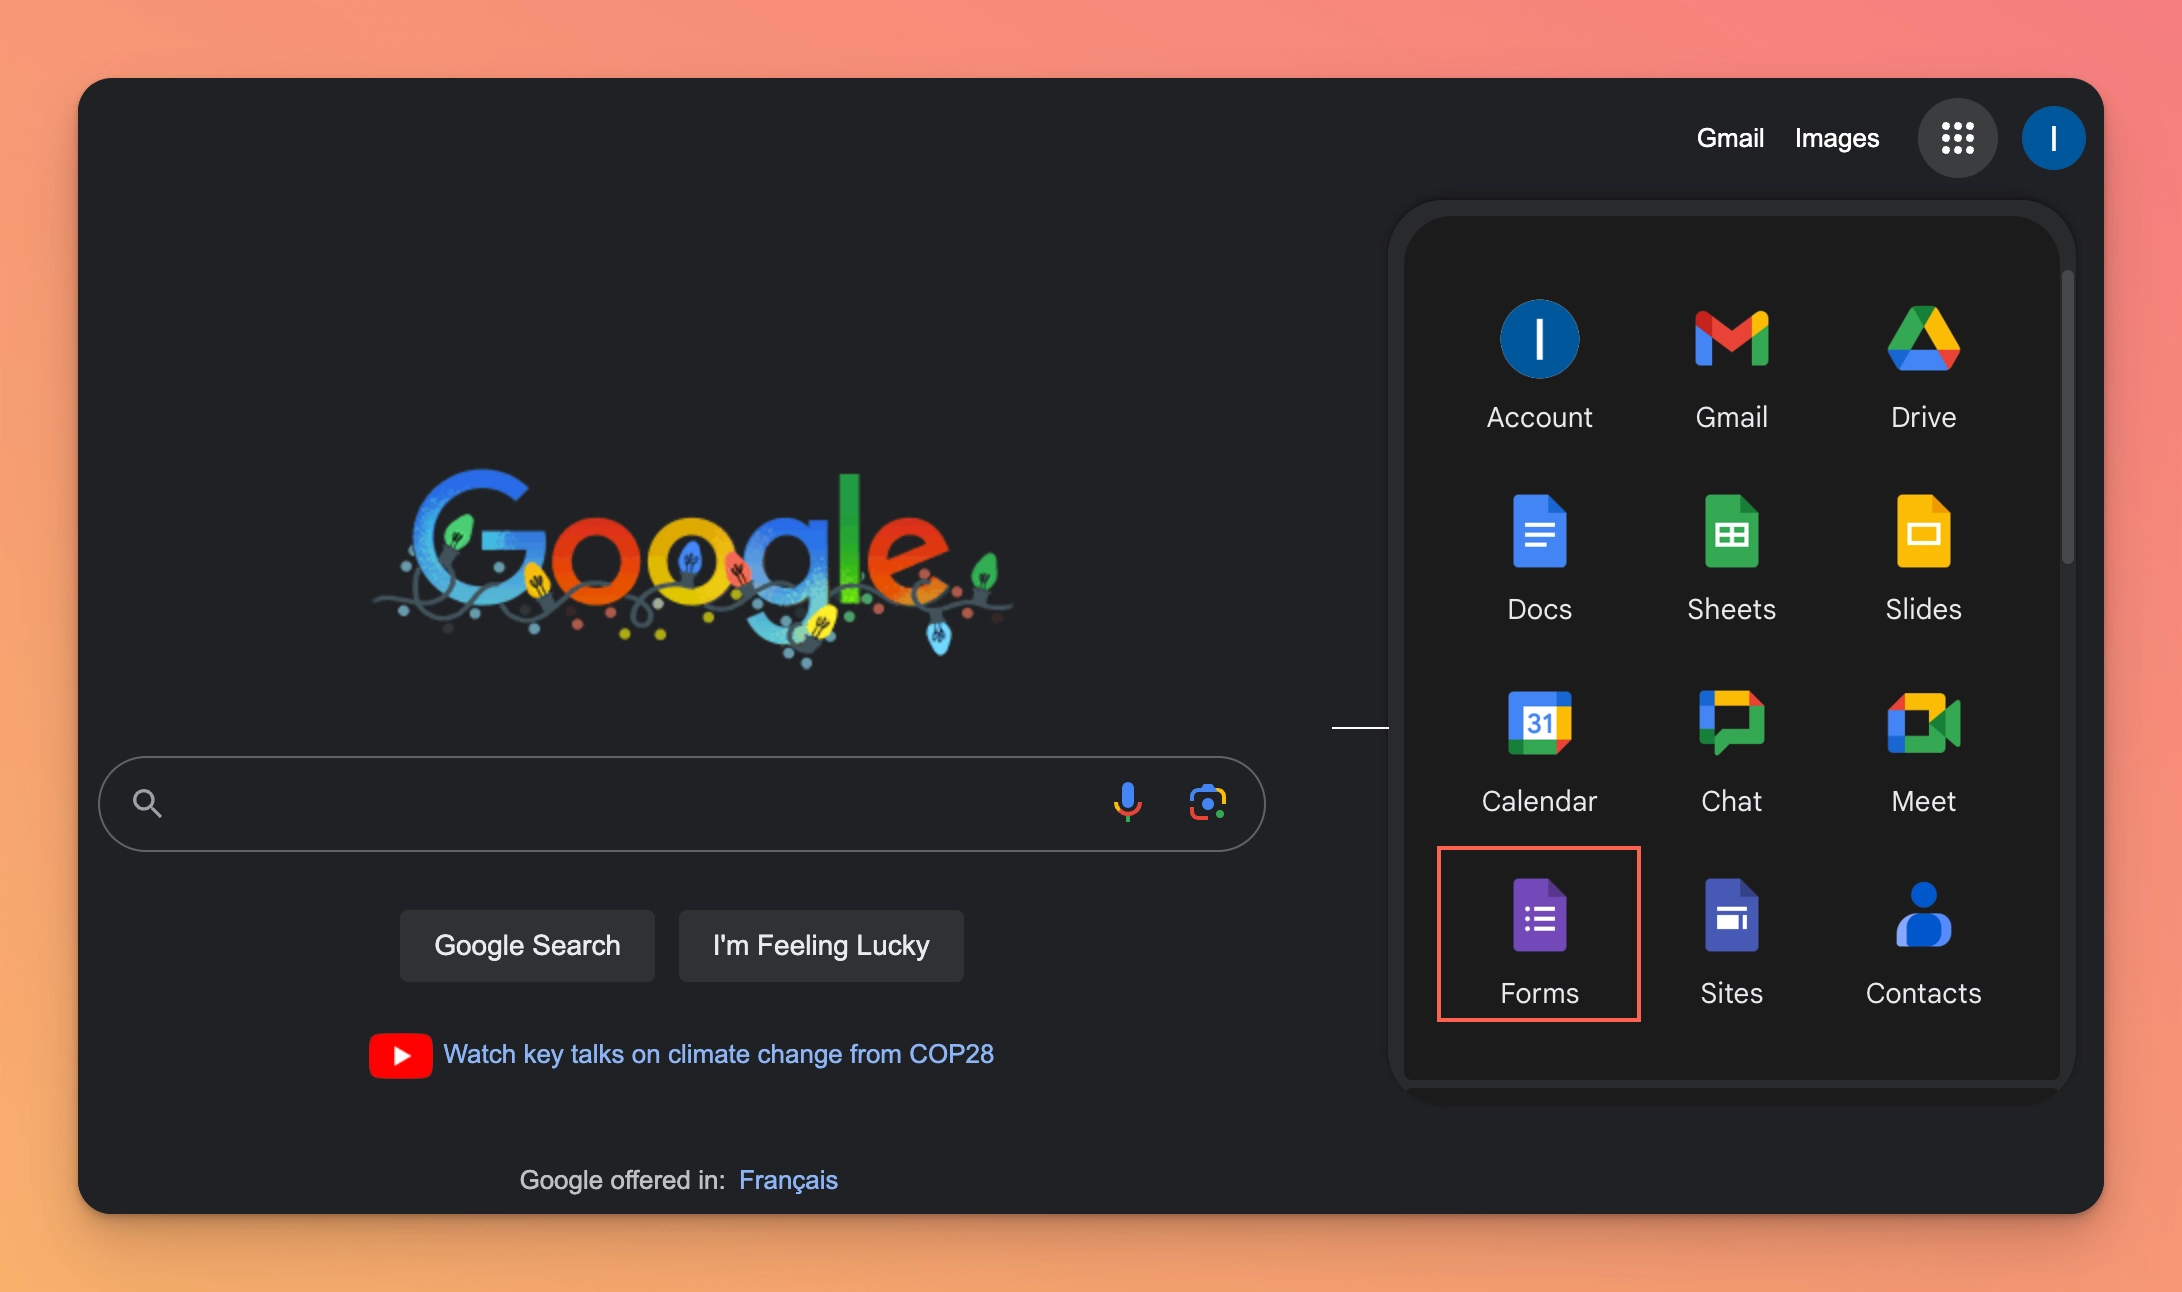
1.1.2. Then click on the “Google Apps” icon and choose “Google Forms” as shown below.
1.1.3. Then, you will see Google Forms Home. Start from a blank form or try using a template.

For demonstration purposes, one of the given templates is used here.
You can create your own form using different input methods available in Google Forms.
Now it’s time to publish your Google Form on your blog.
Step 2: Adding Google Form to Your Blog
Step 2.1: Publish Google Form
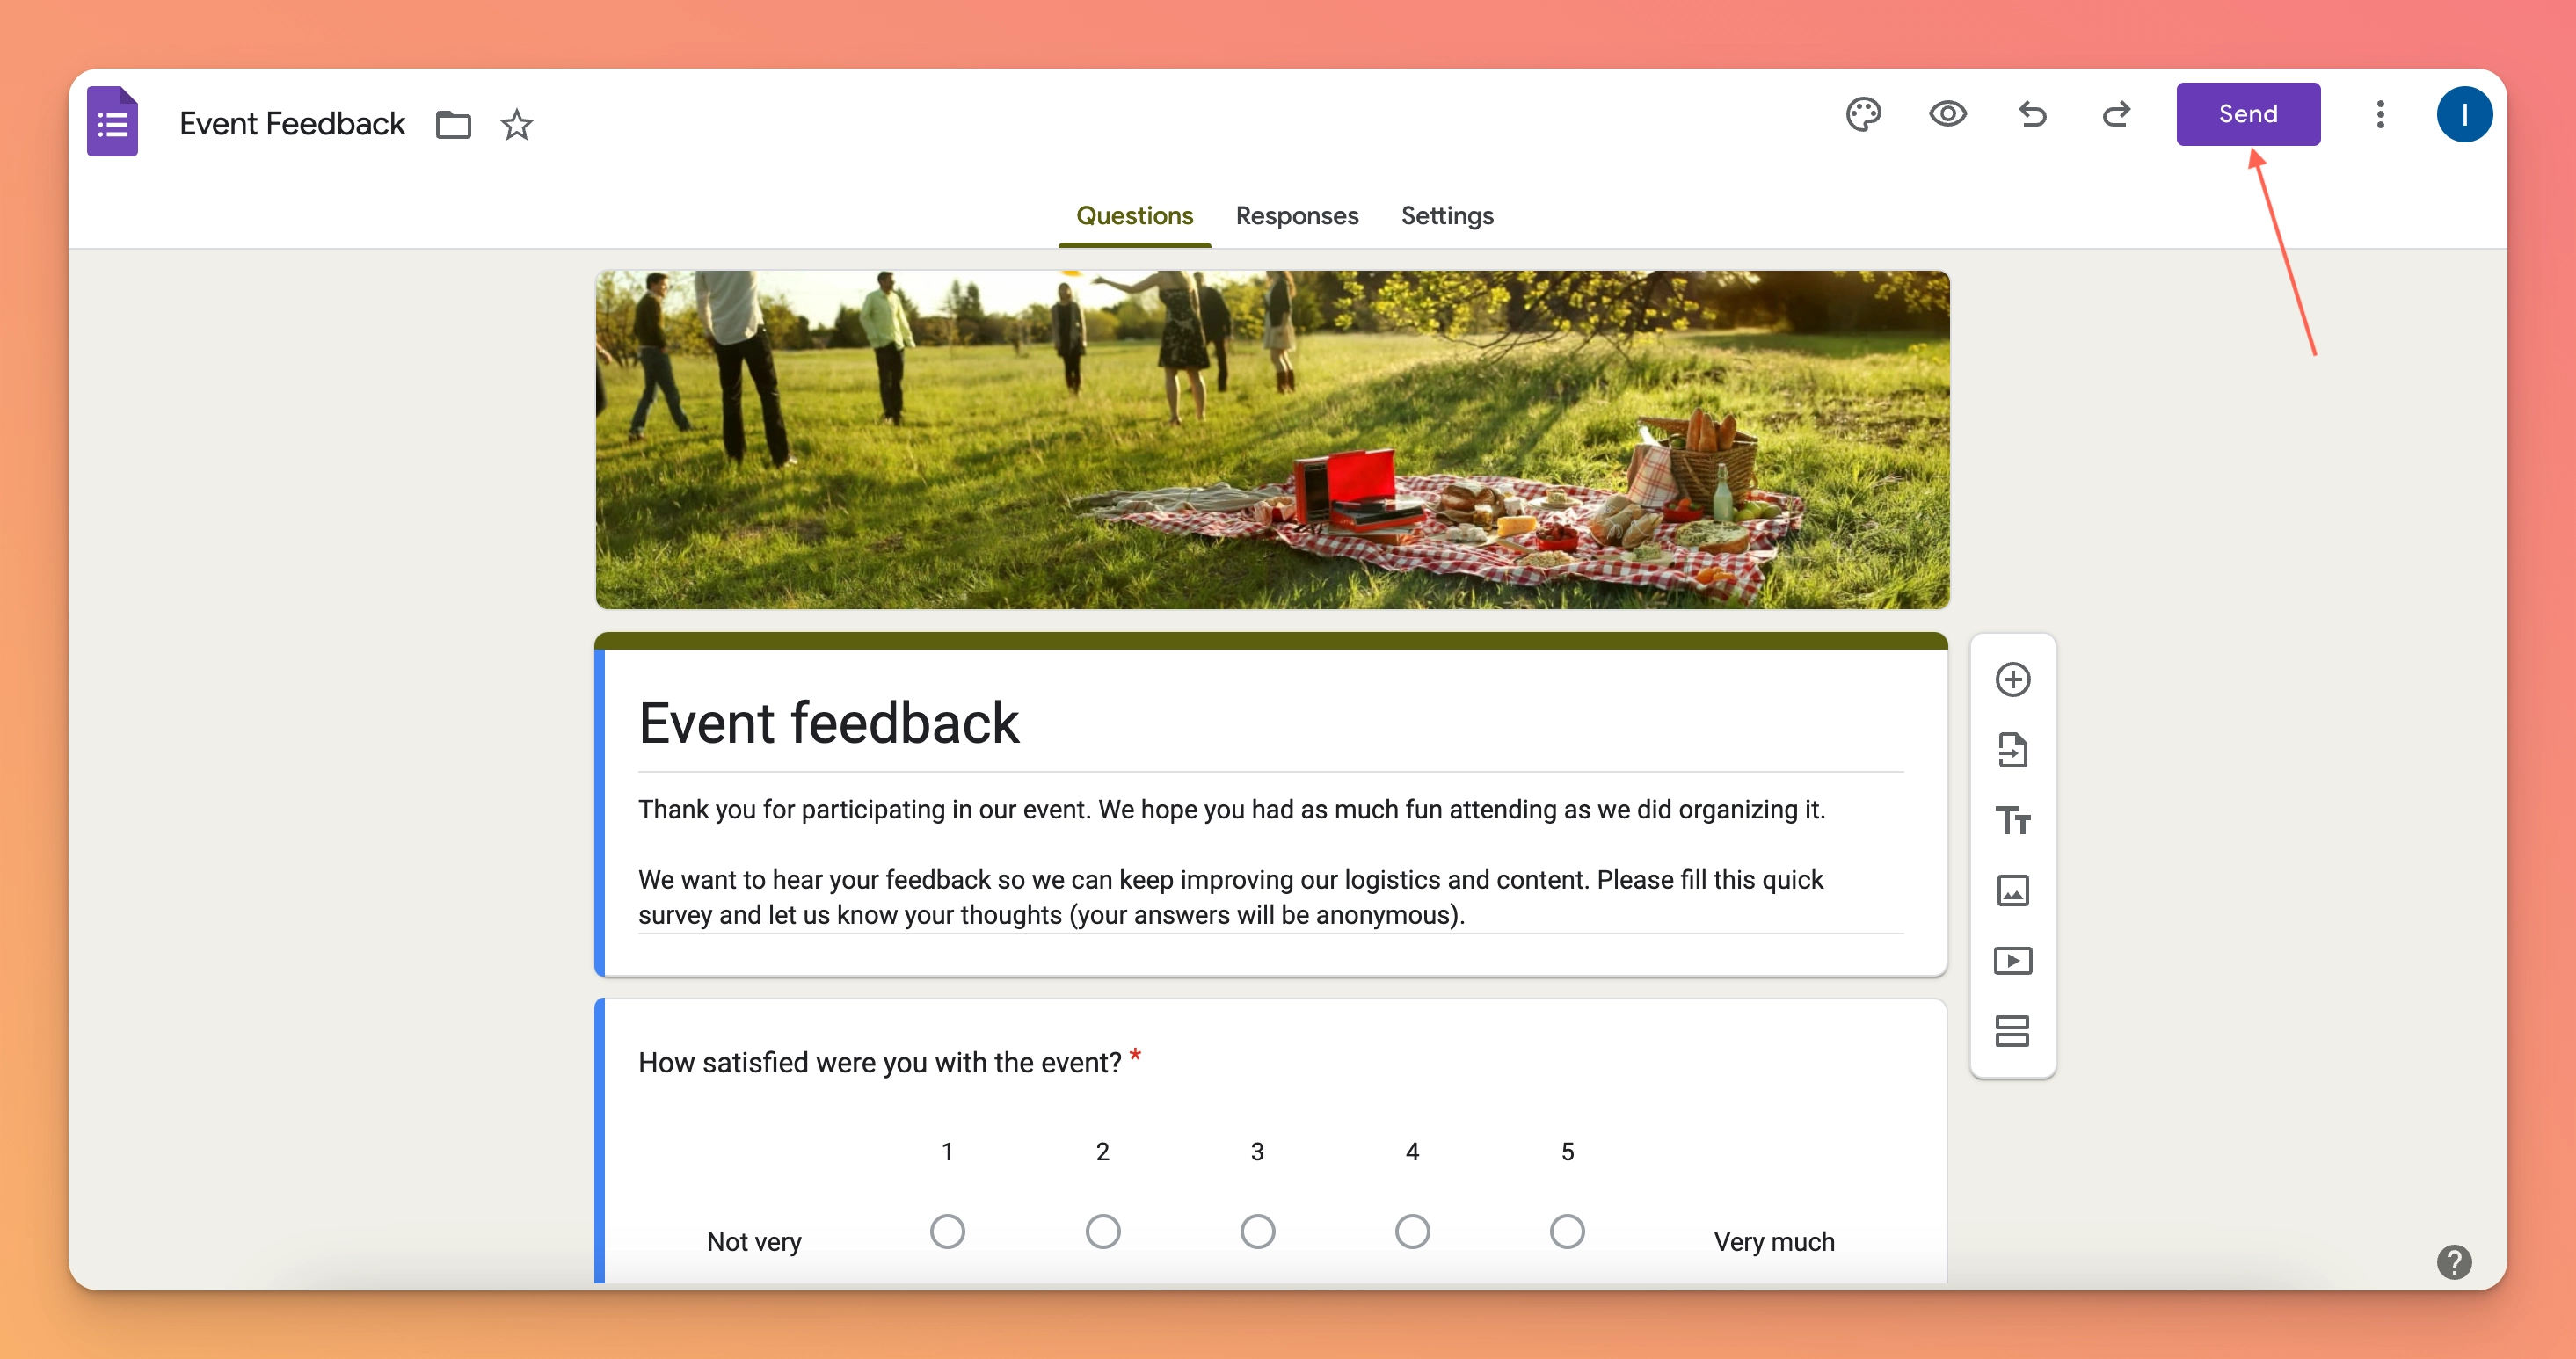
2.1.1. Click the “Send“ button in the upper right corner.
2.1.2. Then you can see a menu as shown below. Click on the code block button as shown below.
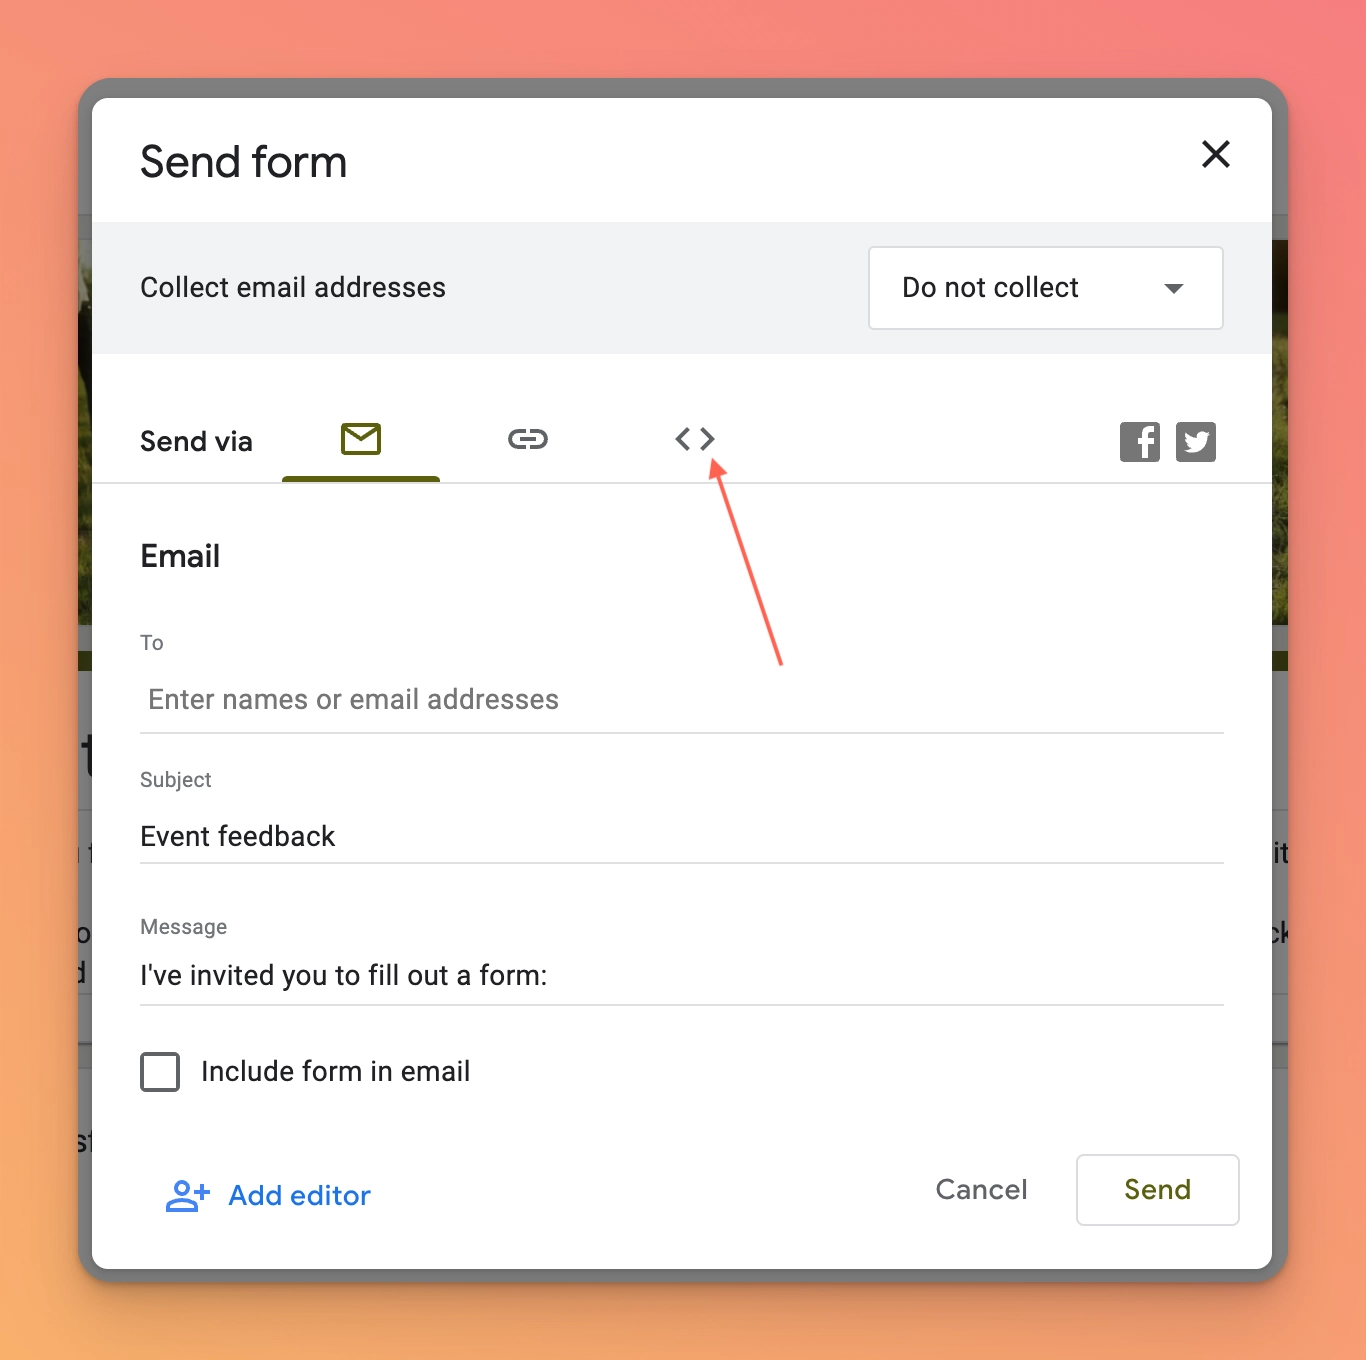
2.1.3. Then copy the HTML code given.
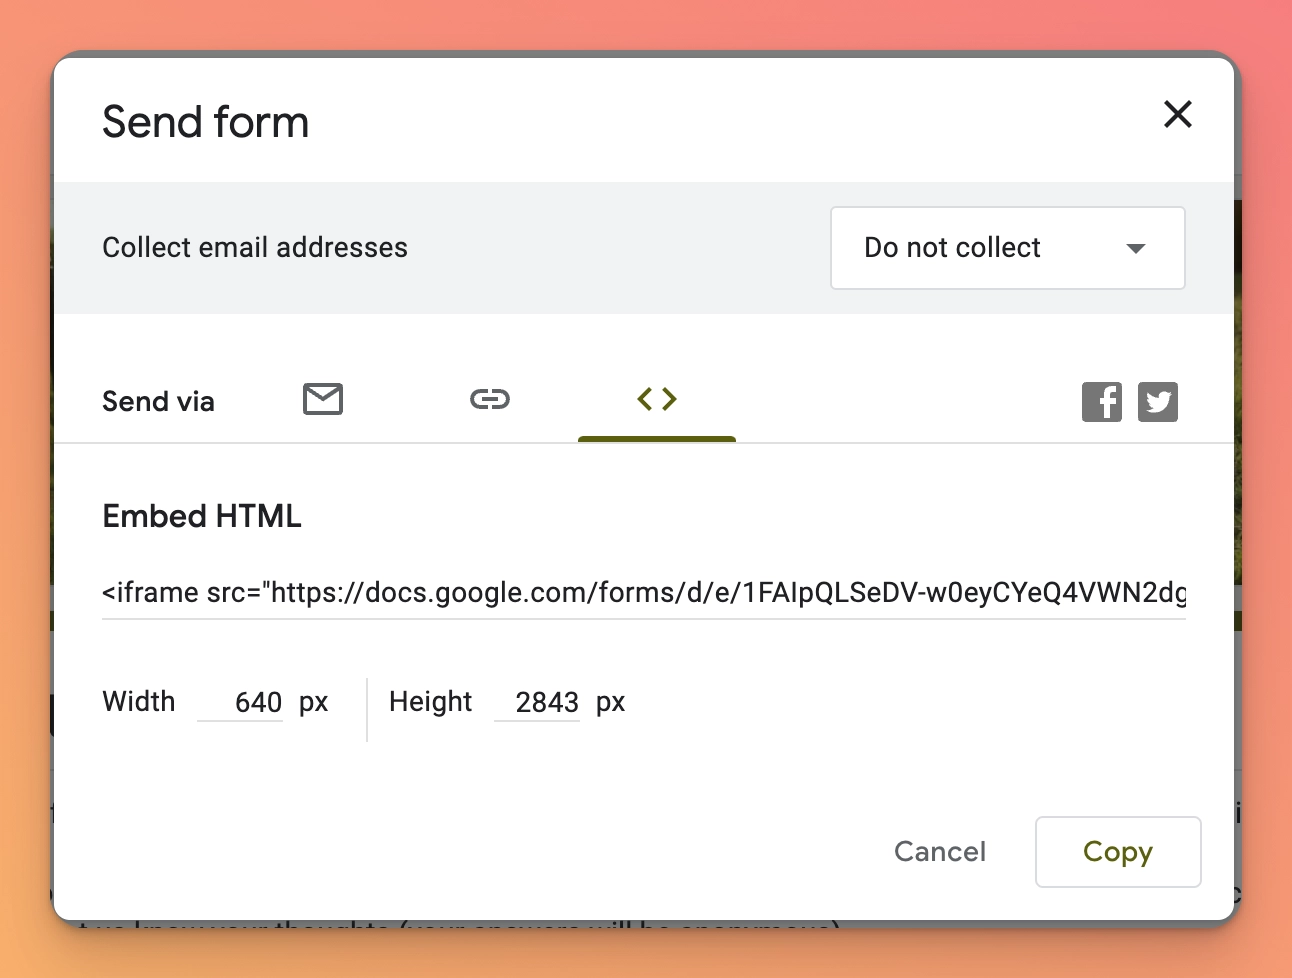
You can set the width and height as you prefer the form to appear on your blog. Make sure to set those values if you want before copying the HTML code.
Step2.2: Publishing the Form on the Blog - Blog Post
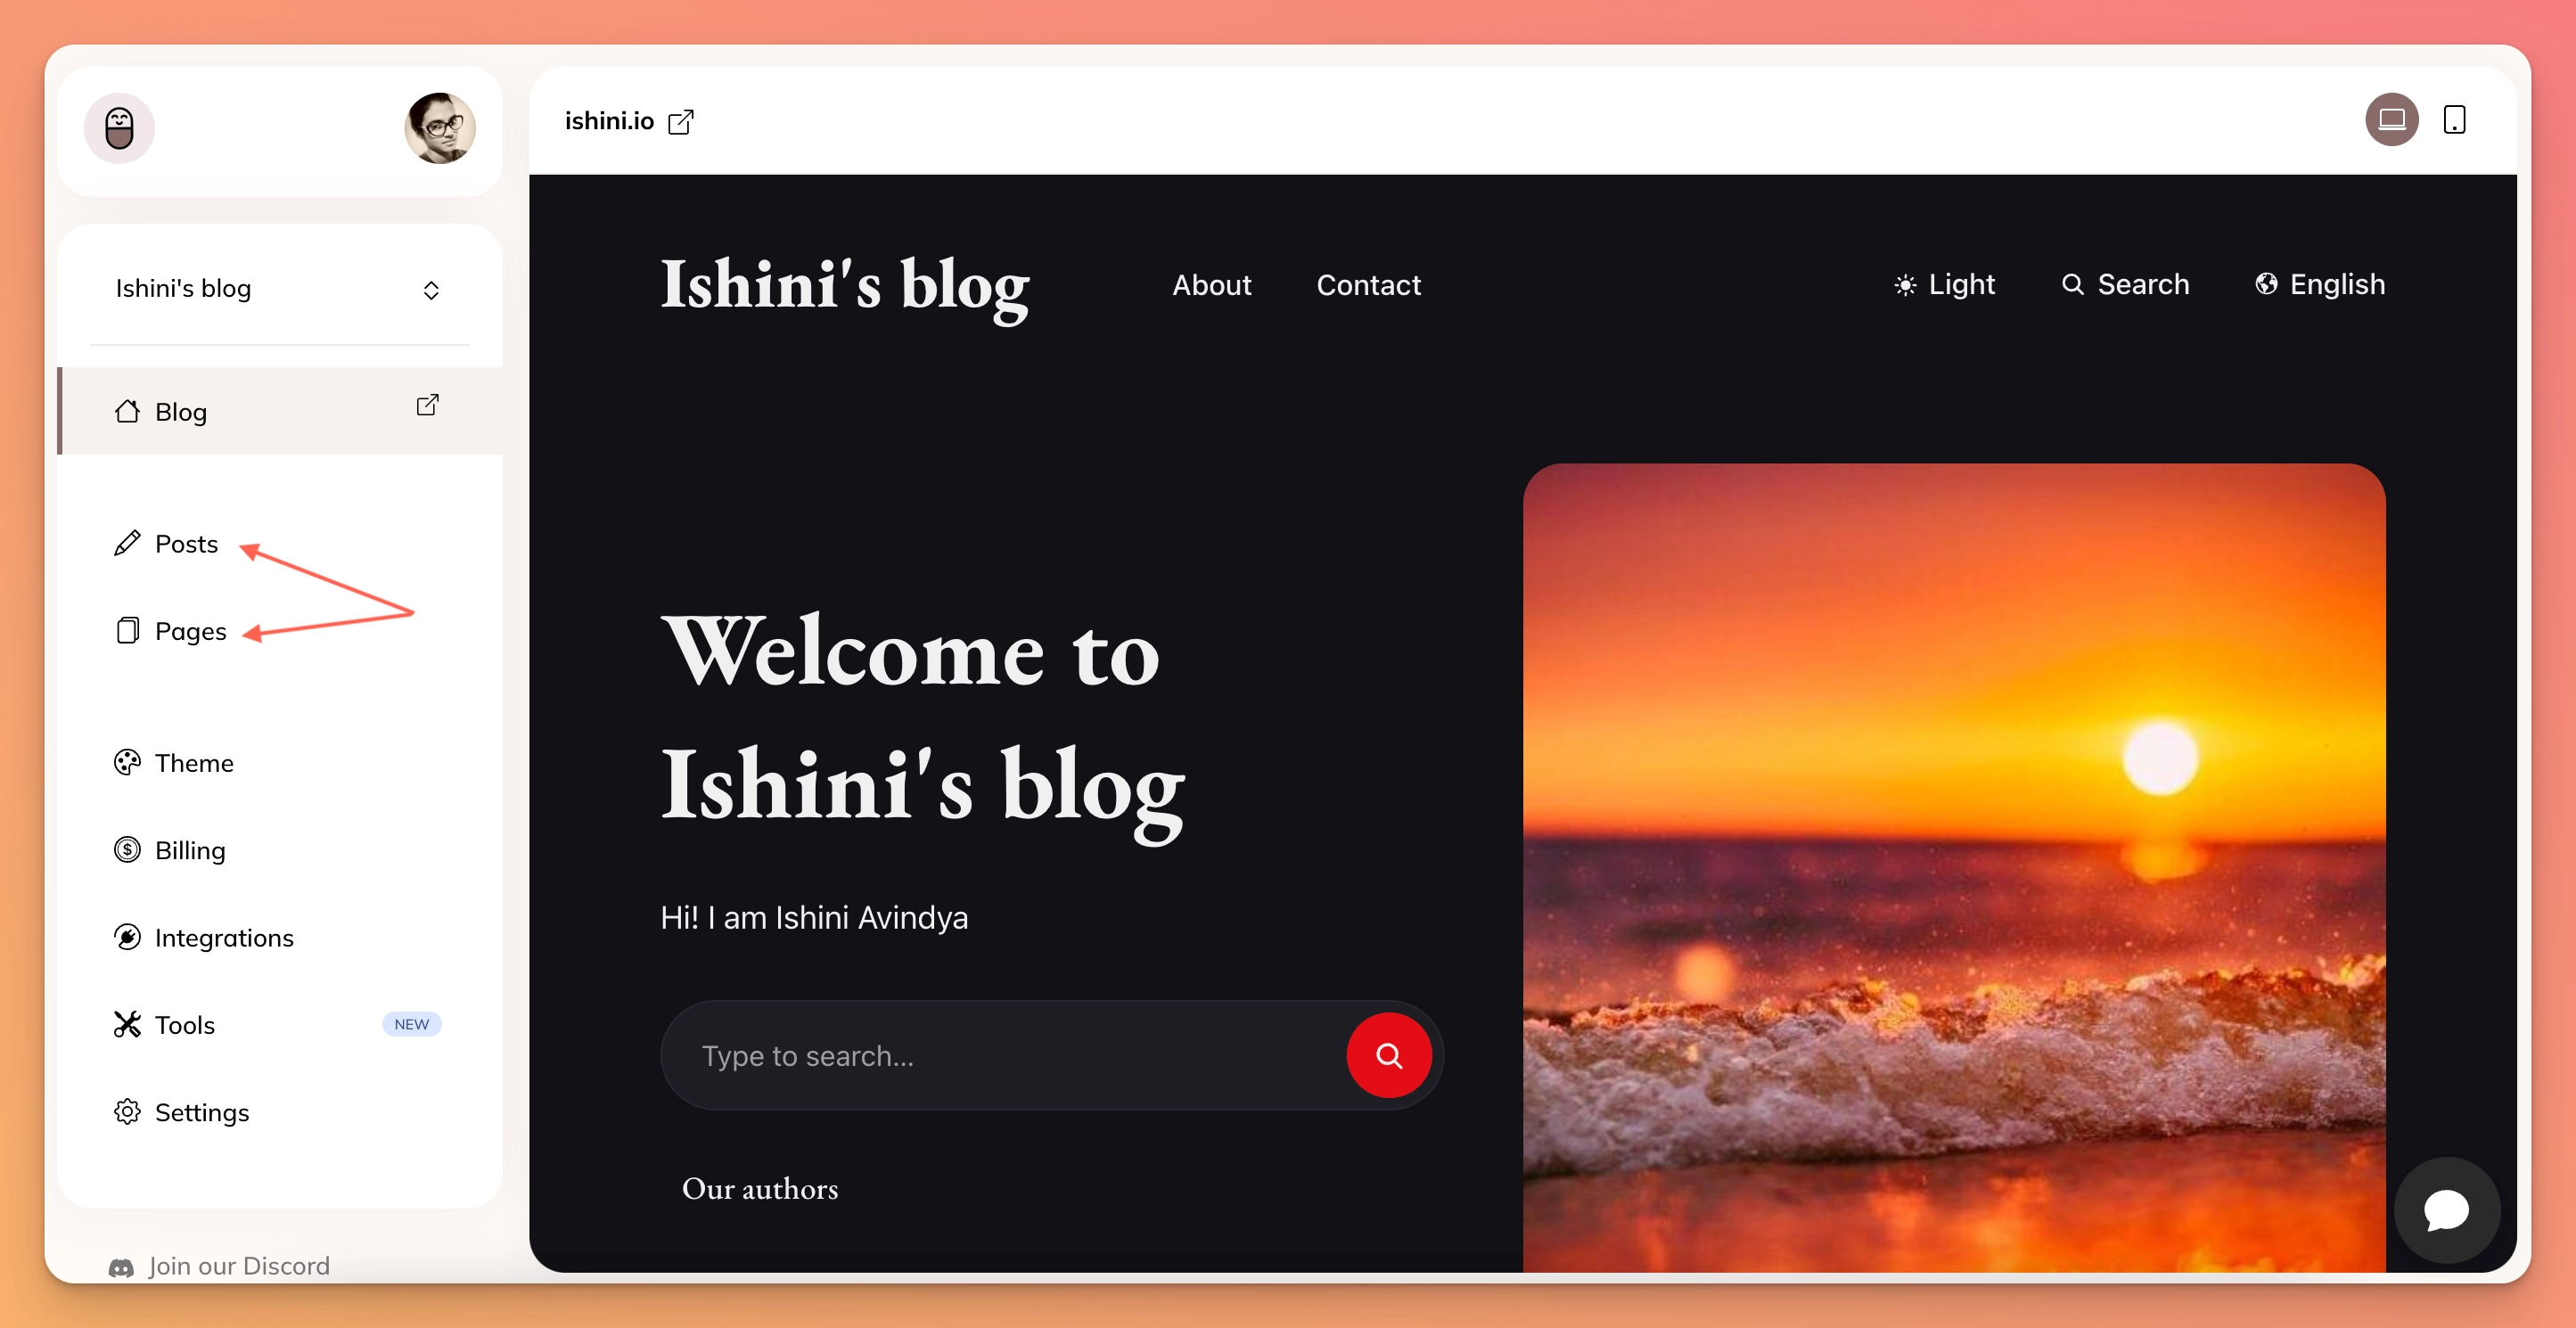
2.2.1. Go to your blog console.
2.2.2. If you want to add the form to a specific blog post, then open the blog post in the post editor. To do that, go to “Posts” and choose the post you want to add to the form. If you want to add this form to a page like the About Us, Contact Us, or Write for Us page, then go to “Pages“ and choose the page on which you want to add the form.
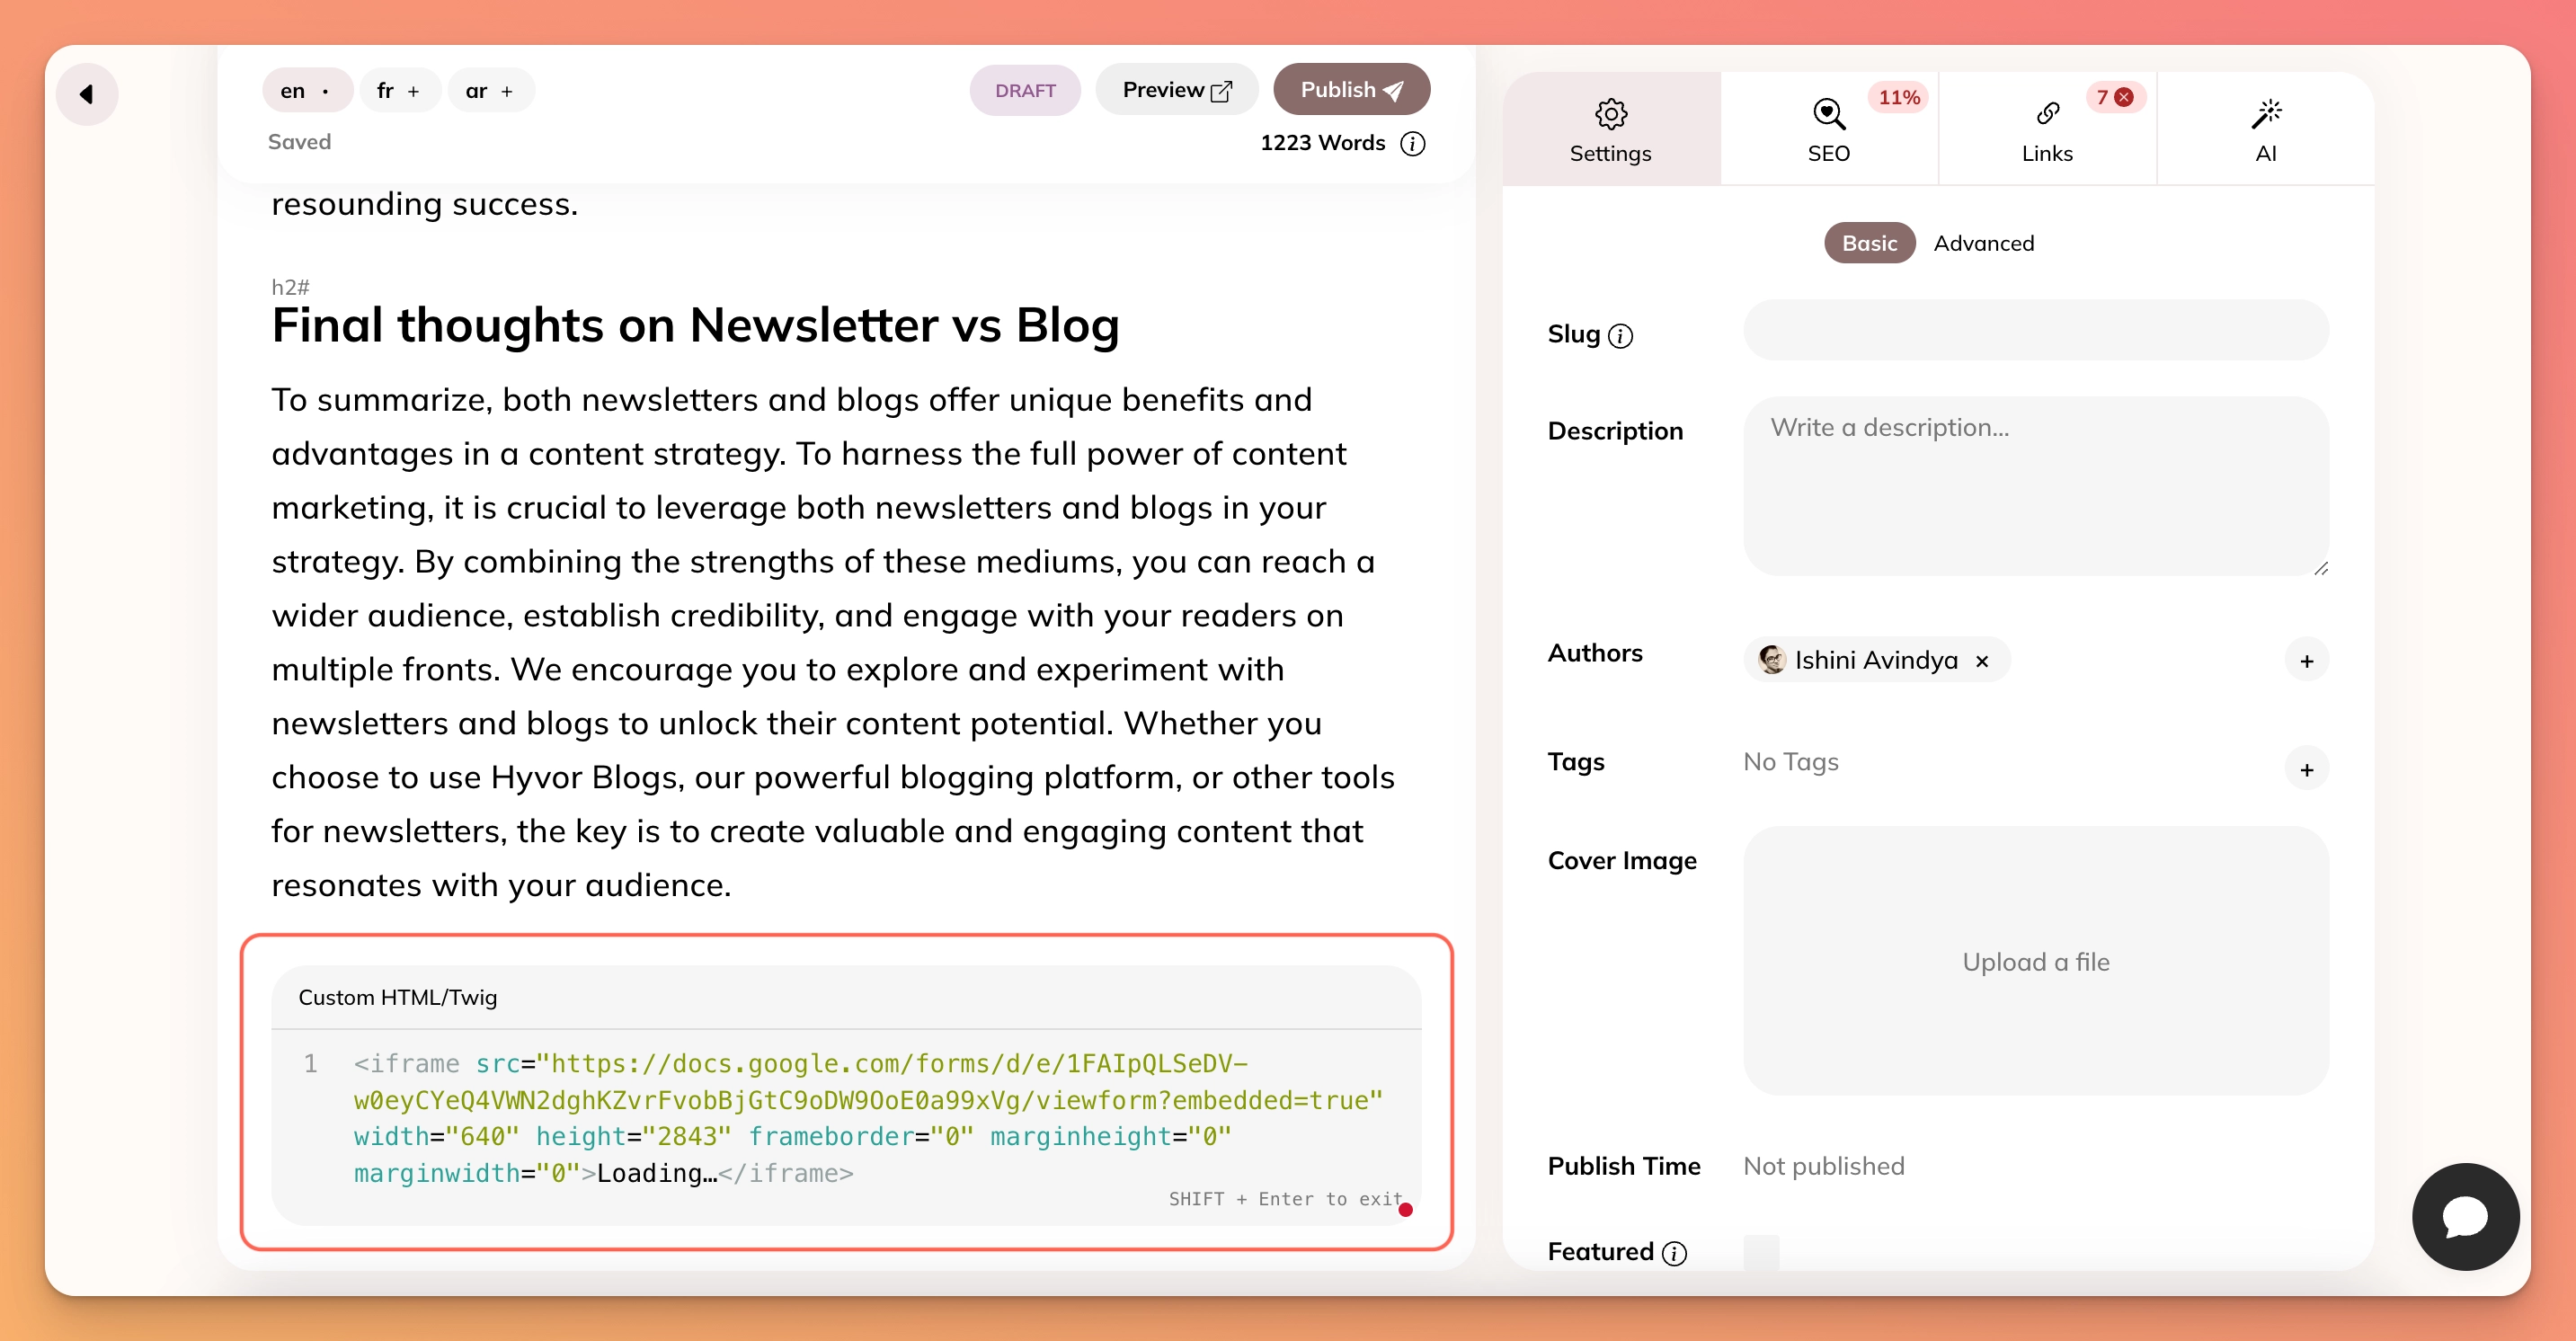
2.2.3. Choose the place you want to add the form and place the cursor on that place. Type / and choose “Custom HTML/Twig”.

/ and choose “Custom HTML/Twig”.2.2.4. Paste the code in the given place and “Save”.
Viola!

Step 2.3: Publishing the Form on the Blog - Blog Page (Ex: Footer)
If you want to add this Google Form to one of your blog pages other than blog posts like home page, footer, etc; follow the following steps.
For this demonstration, the form is added to the footer of the blog’s home page.
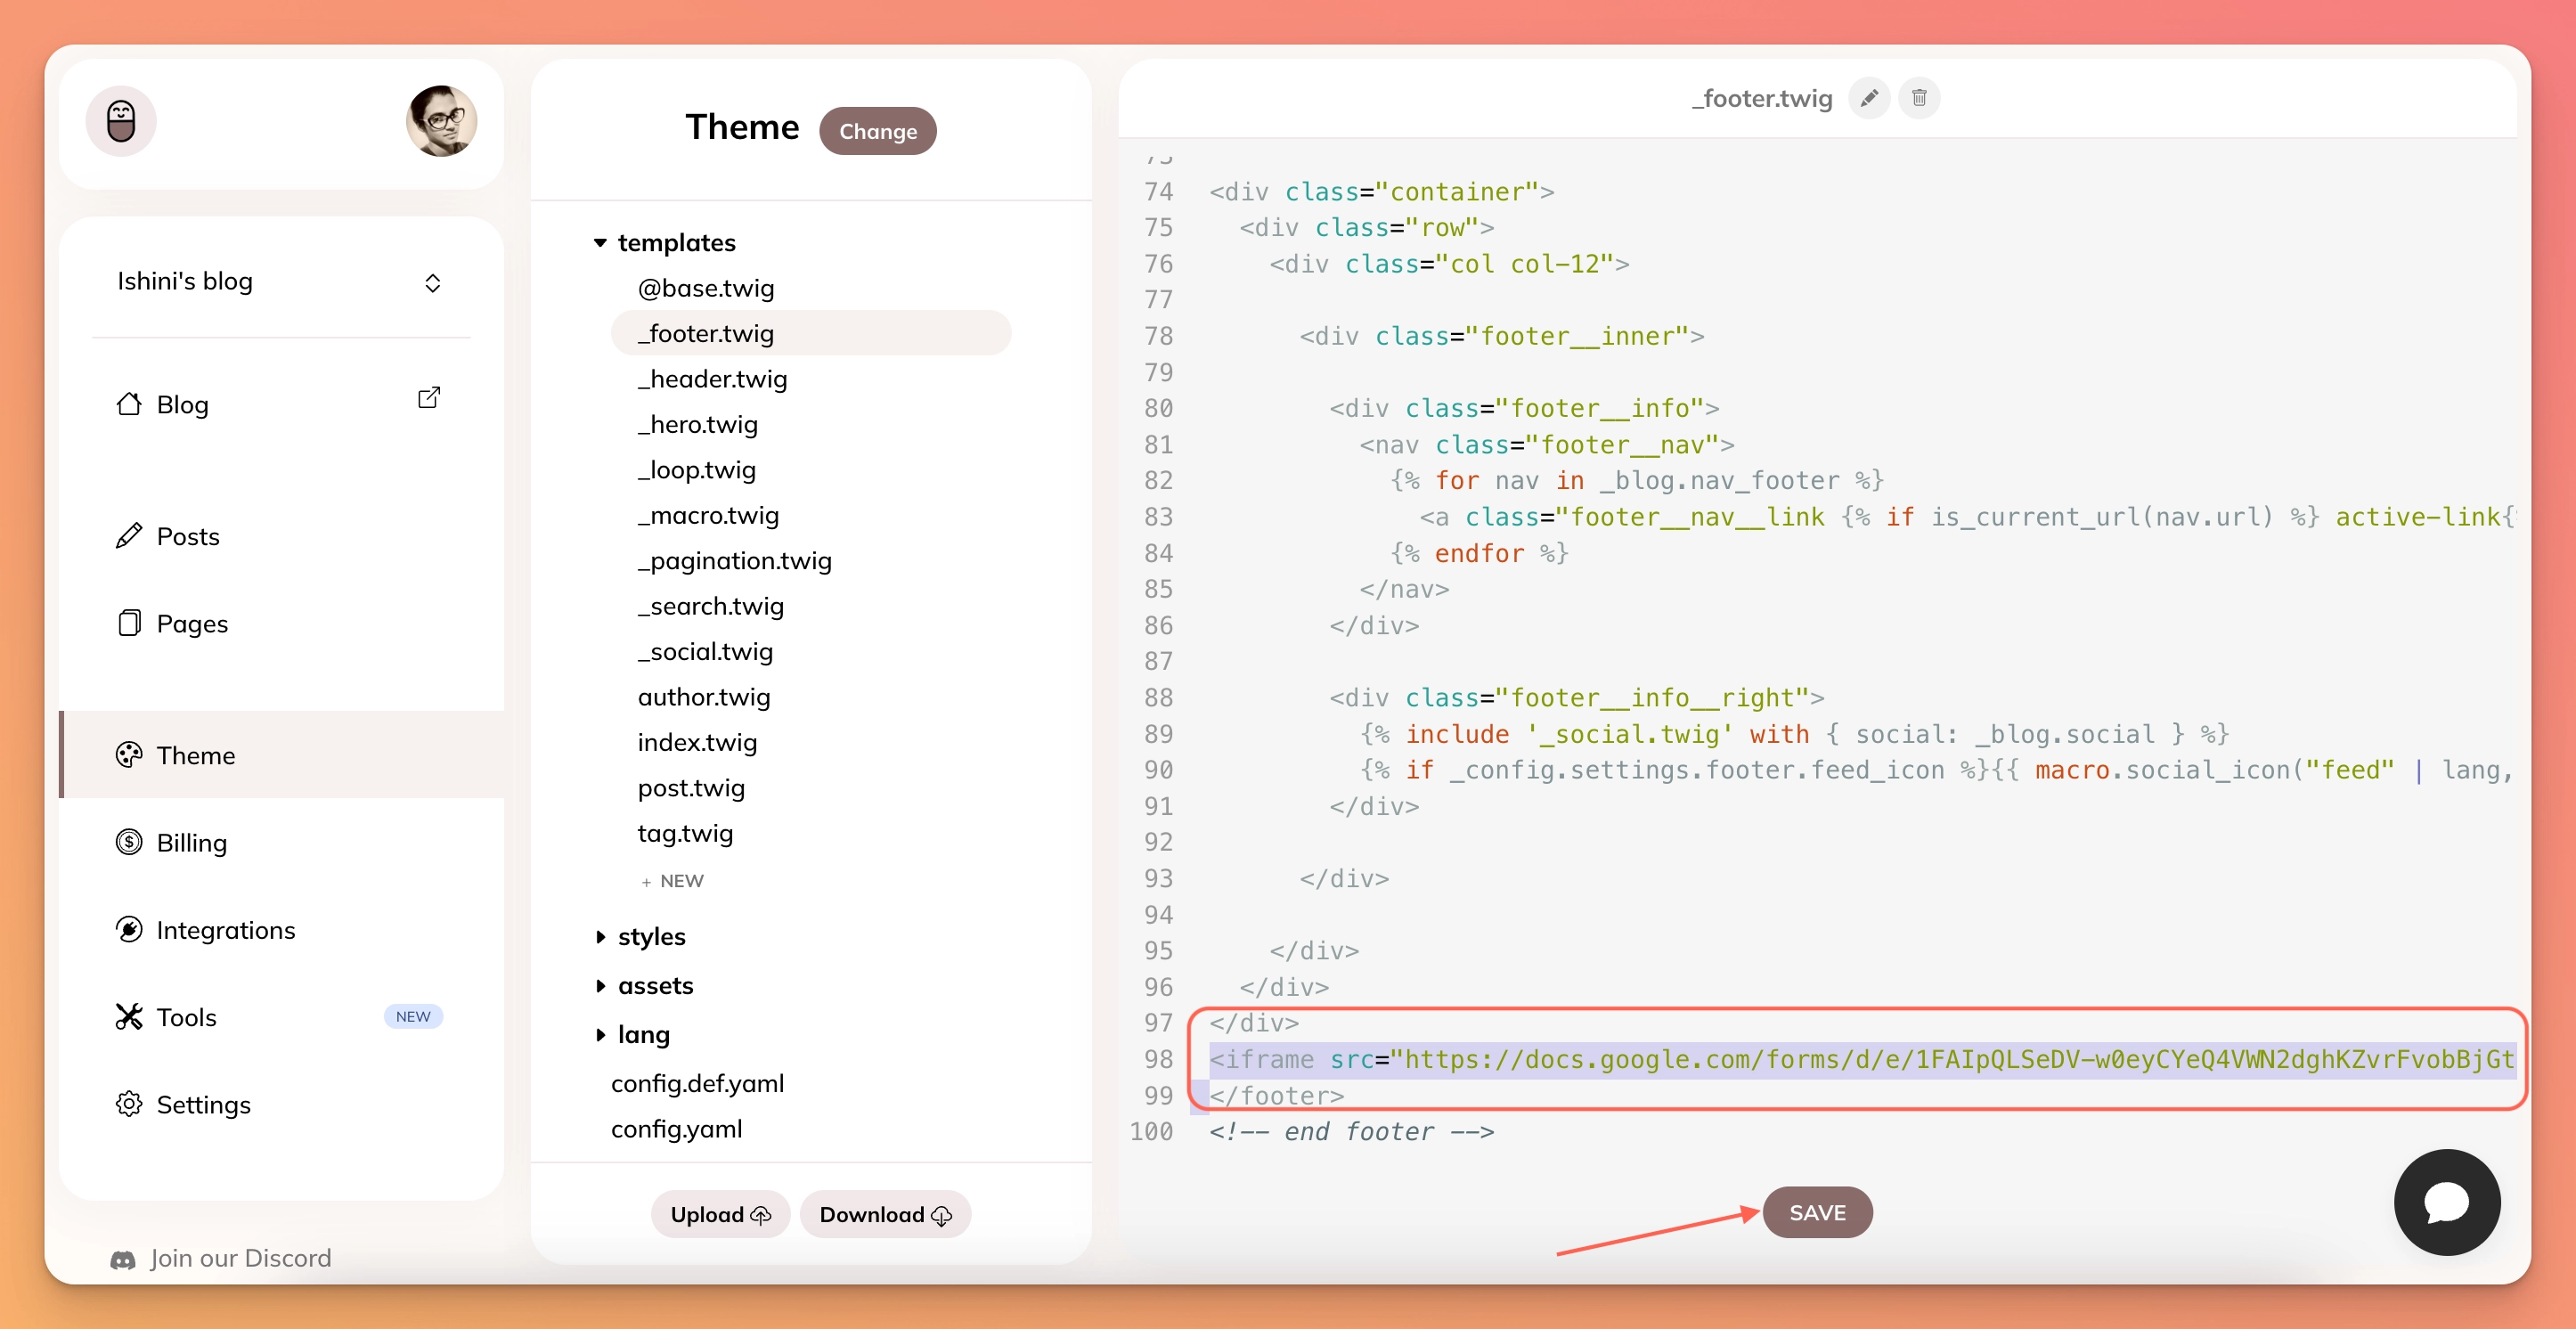
2.3.1. Go to your blog console.

2.3.2. Go to Theme -> Templates.
2.3.3. Click on _footer.twig.

2.3.4. Find the </footer> tag. Paste the copied HTML code of your Google Form anywhere you like above the </footer> tag. Click “Save”. For this demonstration, I’m pasting the copied HTML code just above the </footer> tag.
and Viola!
You can easily add Google Forms to any page of your blog. You can also add other Forms using tools like Microsoft Forms, Typeform, Wufoo Forms etc.
Feel free to comment or contact us with any questions or suggestions. Happy Blogging!

Comments