Adding a blog is a great way to increase traffic and improve sales of your online store. In this article, we are going to see how to add a beautiful blog to your Shopify store using Hyvor Blogs.
Why Hyvor Blogs?
Shopify already comes with a minimal blogging management system. However, if you want a more advanced blogging platform, you will have to look for dedicated blogging platforms, such as Hyvor Blogs.
Compared to Shopify’s in-built blog, Hyvor Blogs comes with these advanced features.
A powerful Console with an easy-to-use Rich Text Editor that will help you publish
Fully-customizable themes with pre-built free themes
Multi-language support, which can help you reach different audiences around the world
Optimized for SEO, so you can focus on just writing
Powerful APIs and Webhooks to integrate with your other platforms
Multiple authors (invite your team to write posts)
Adding A Blog to Your Shopify Online Store
Step 1: Install Hyvor Blogs Shopify App
First, install the Hyvor Blogs Shopify app on your Online Store.
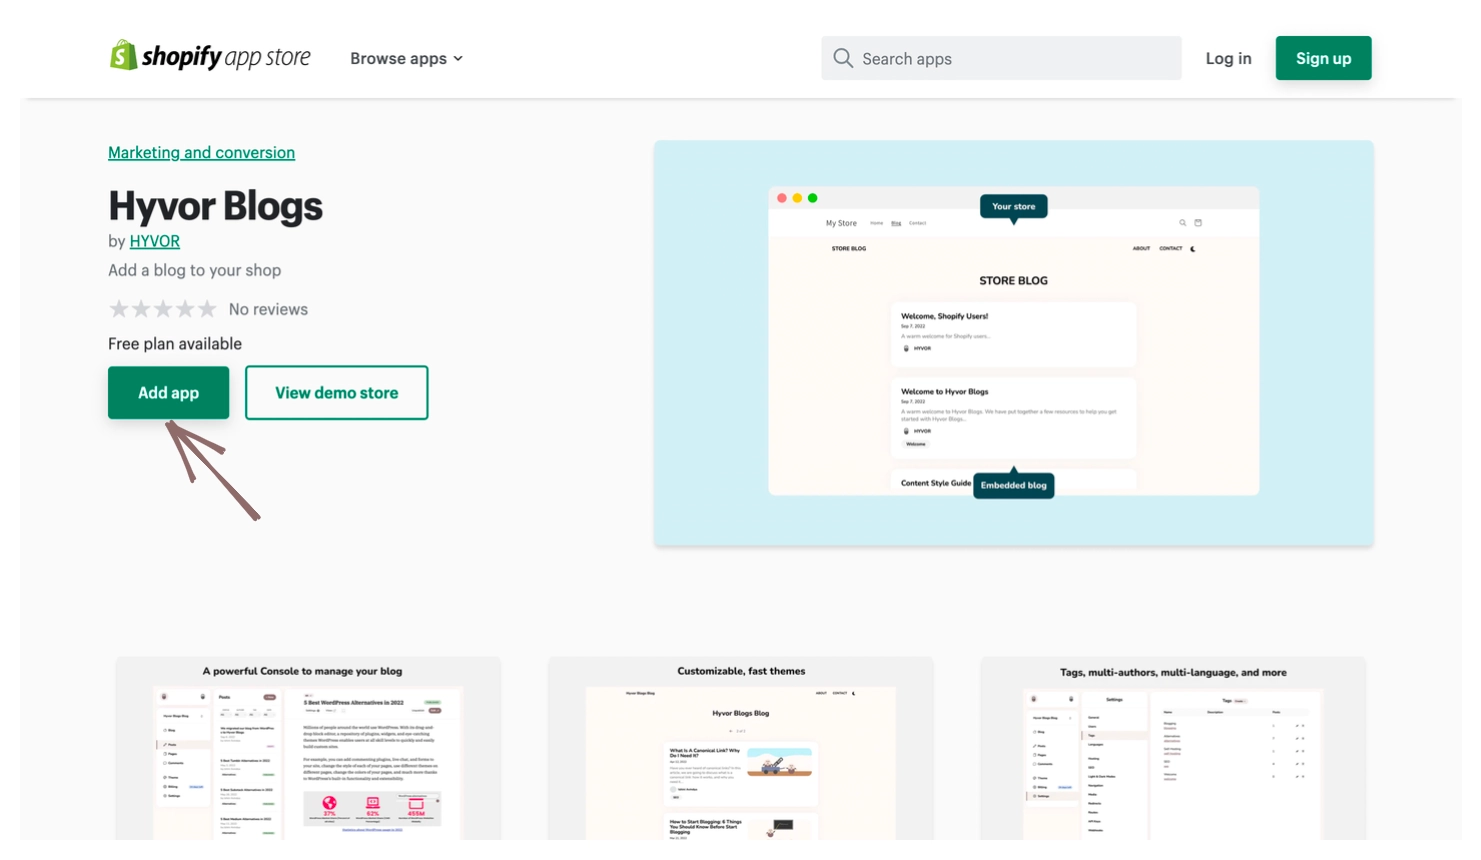
After selecting your Shop, click Install App.
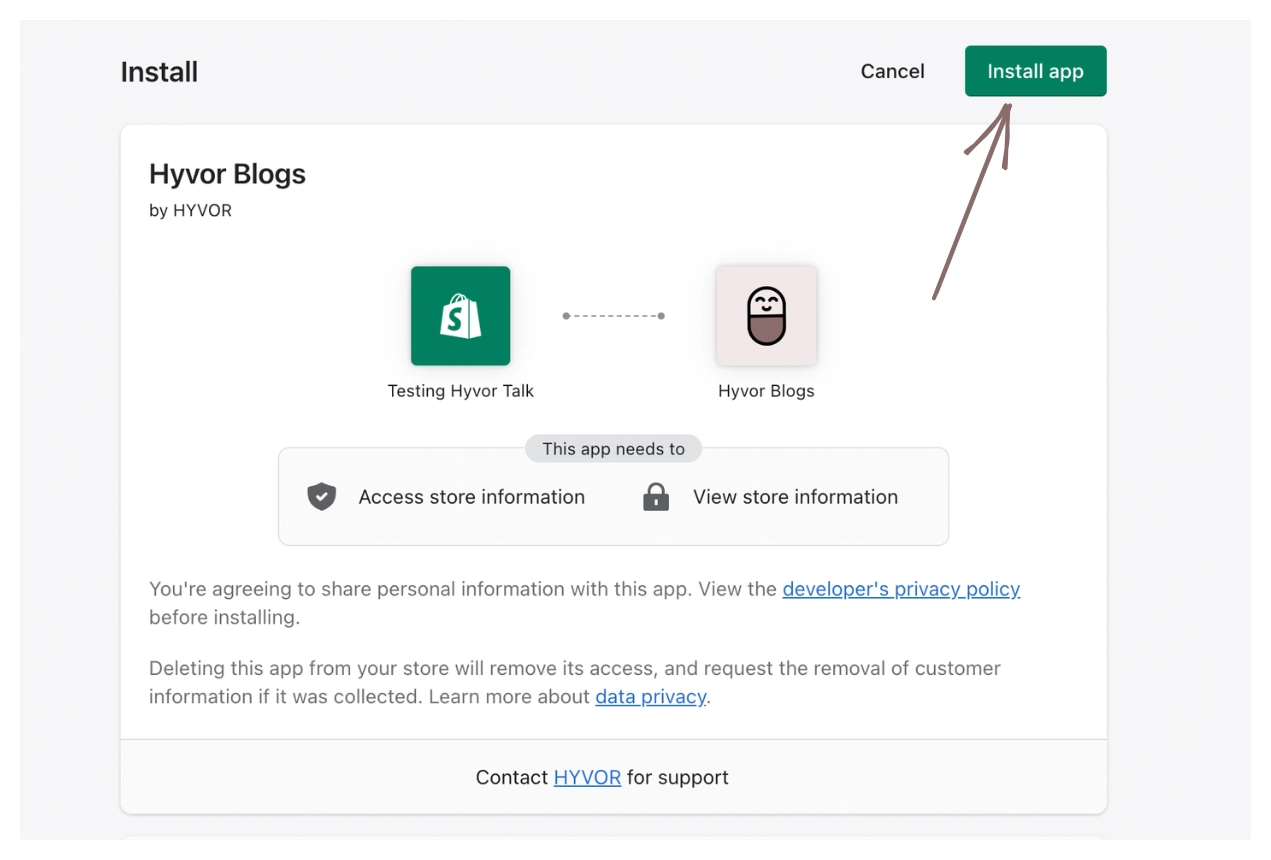
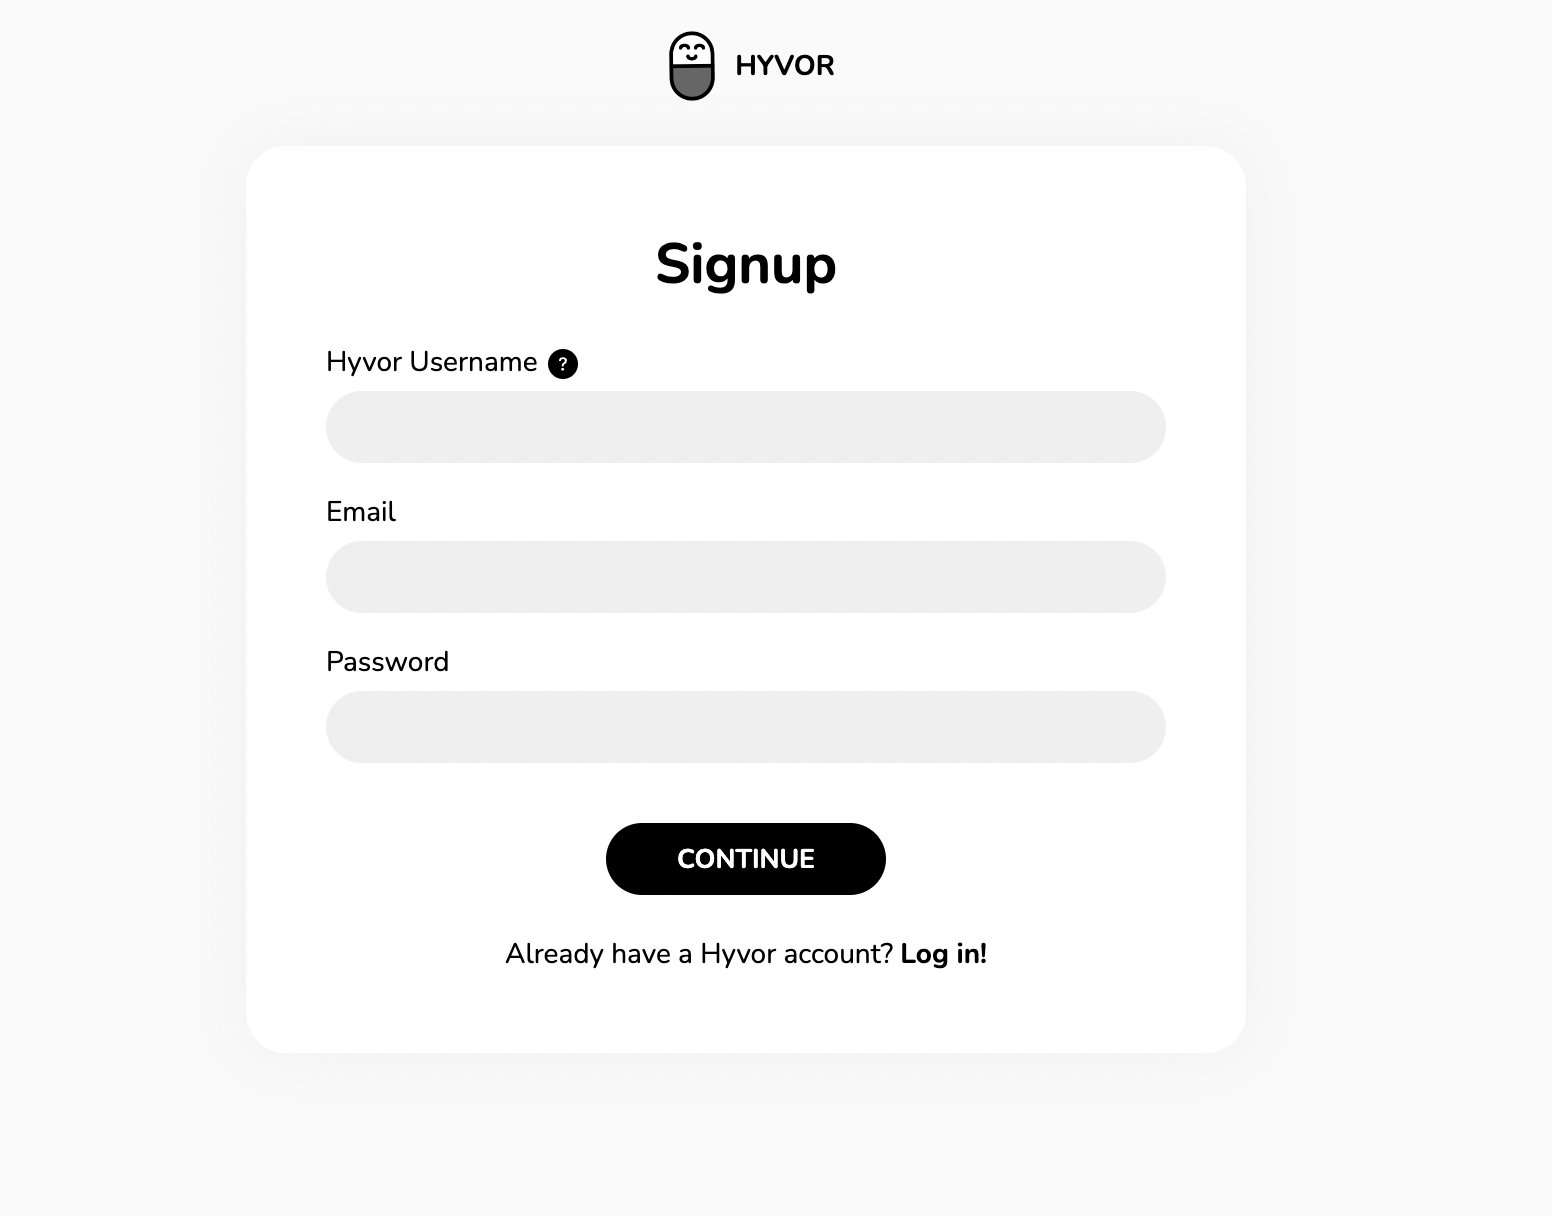
Next, you will be redirected to the Hyvor Login, where you can easily create an account.
Once you have completed that, you will see the Hyvor Blogs Console, the place where you will be managing your whole blog.
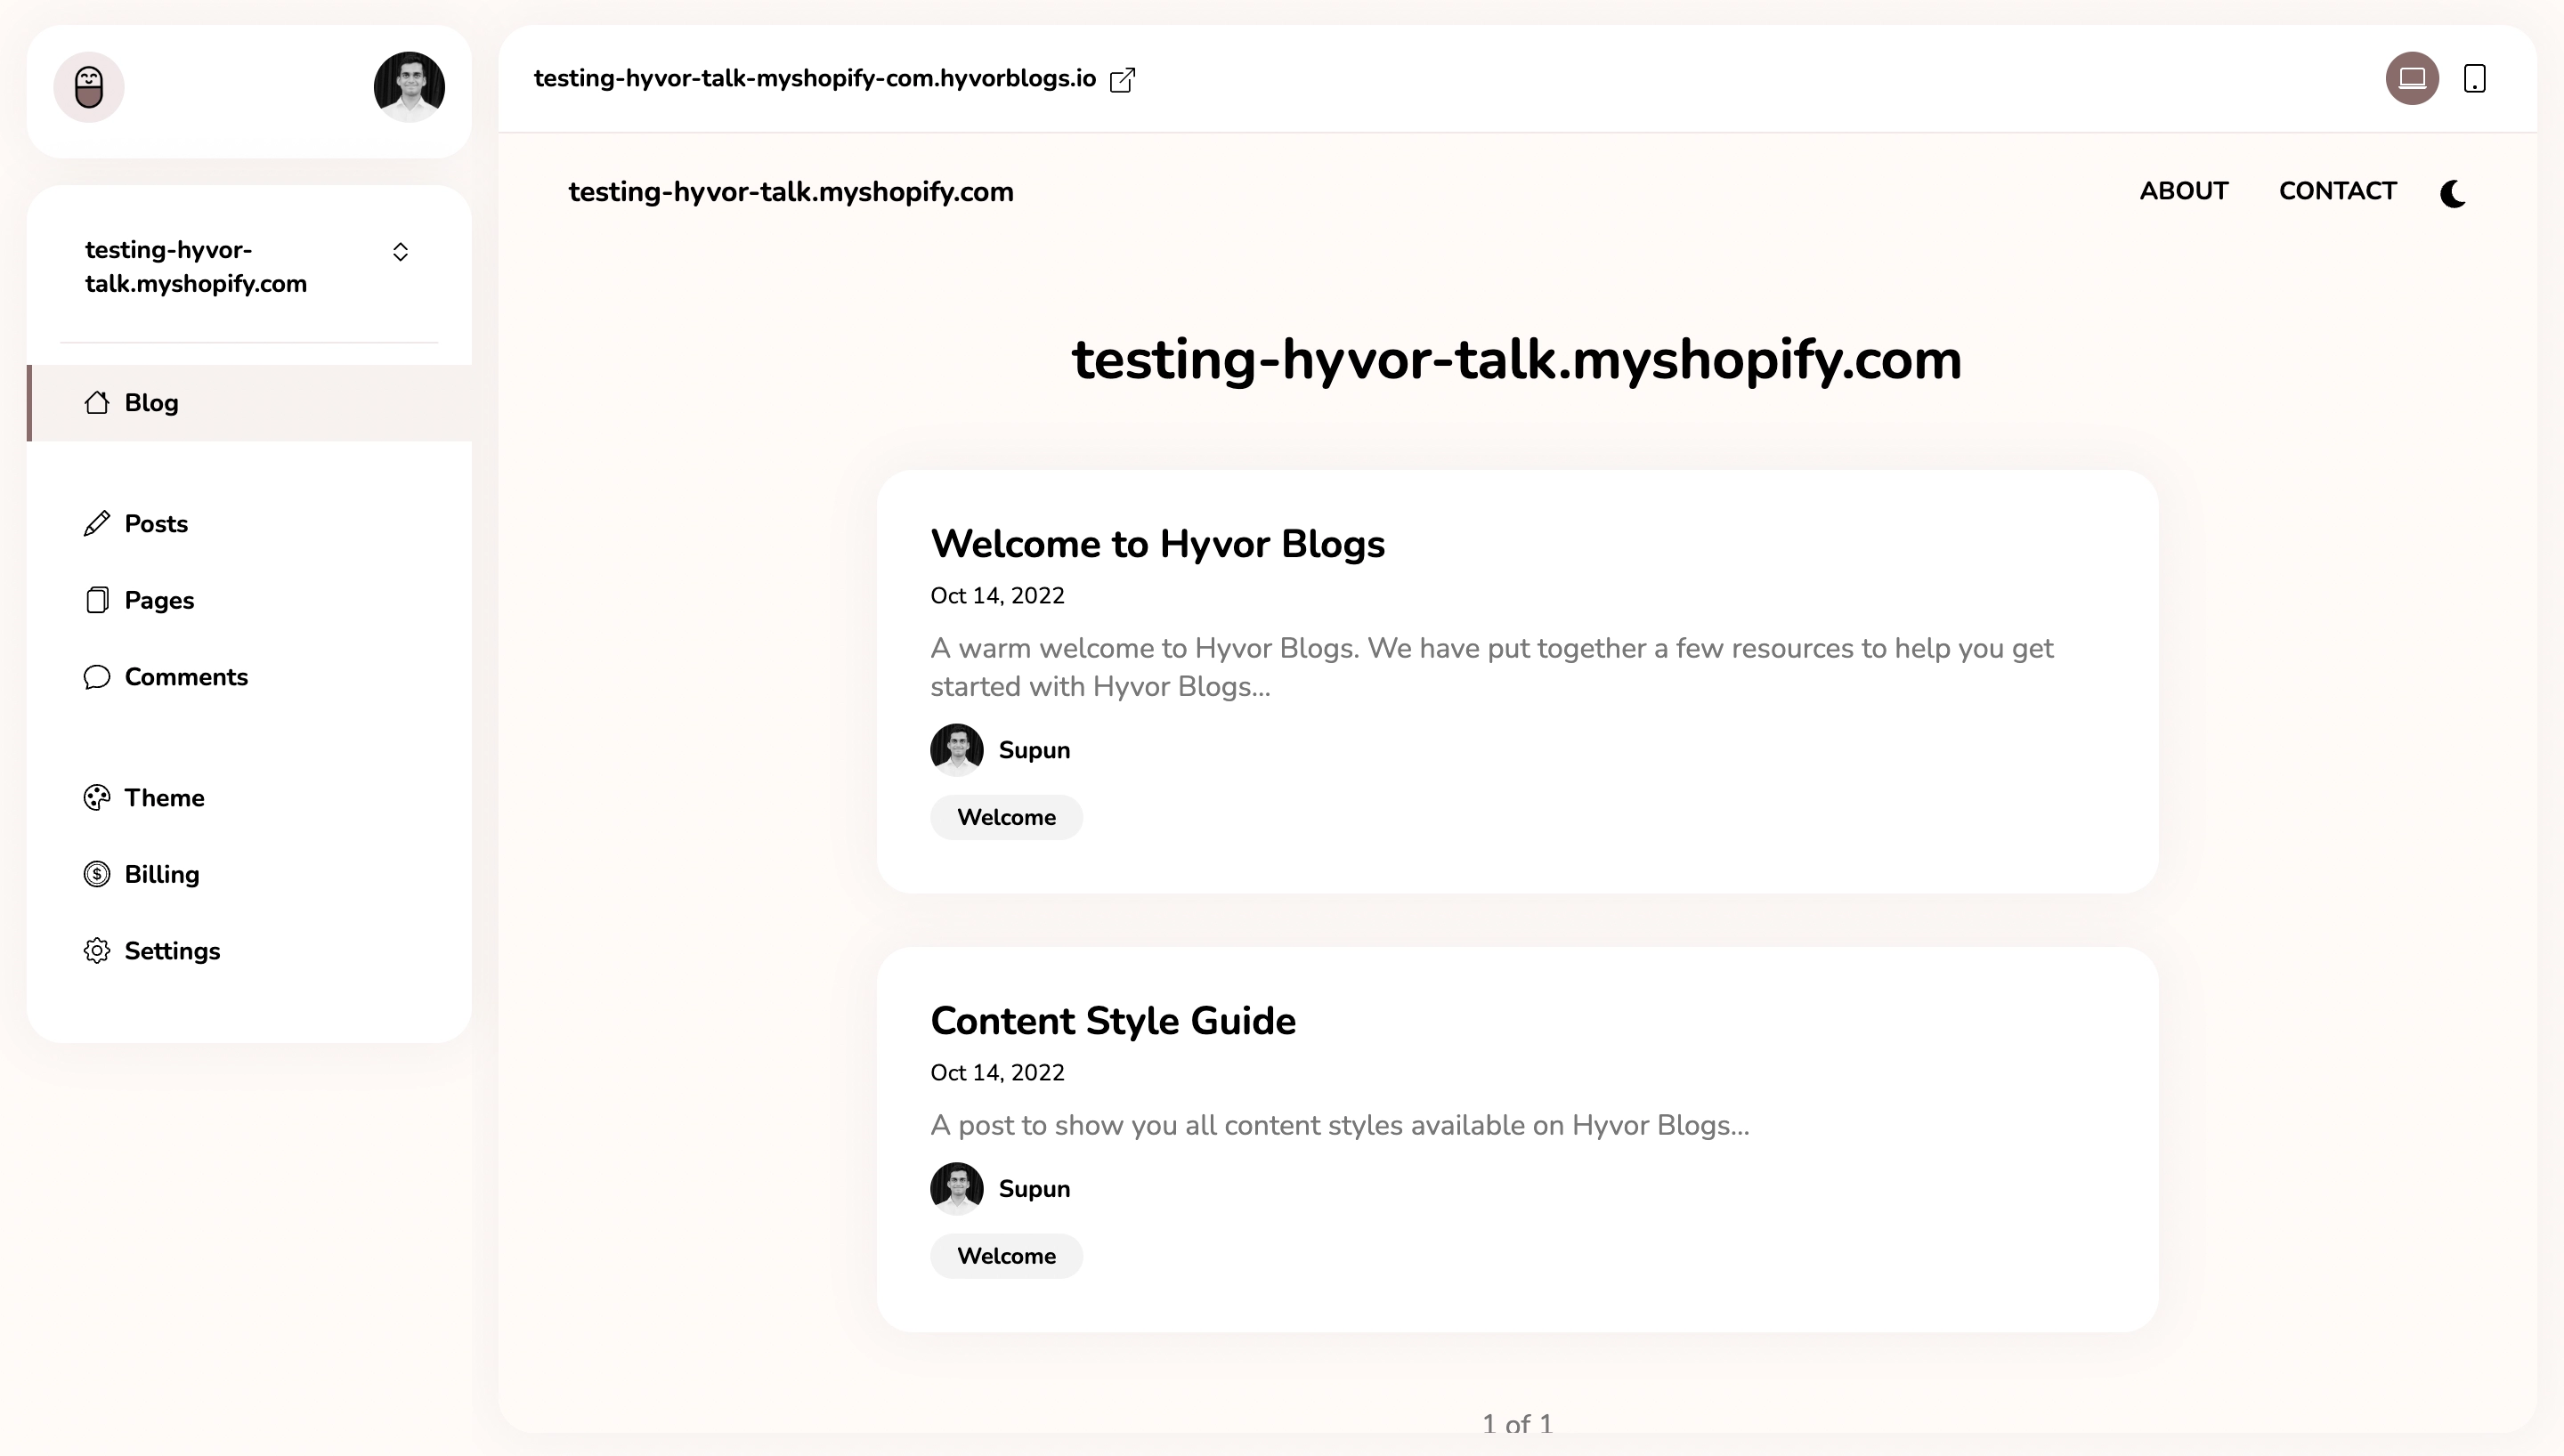
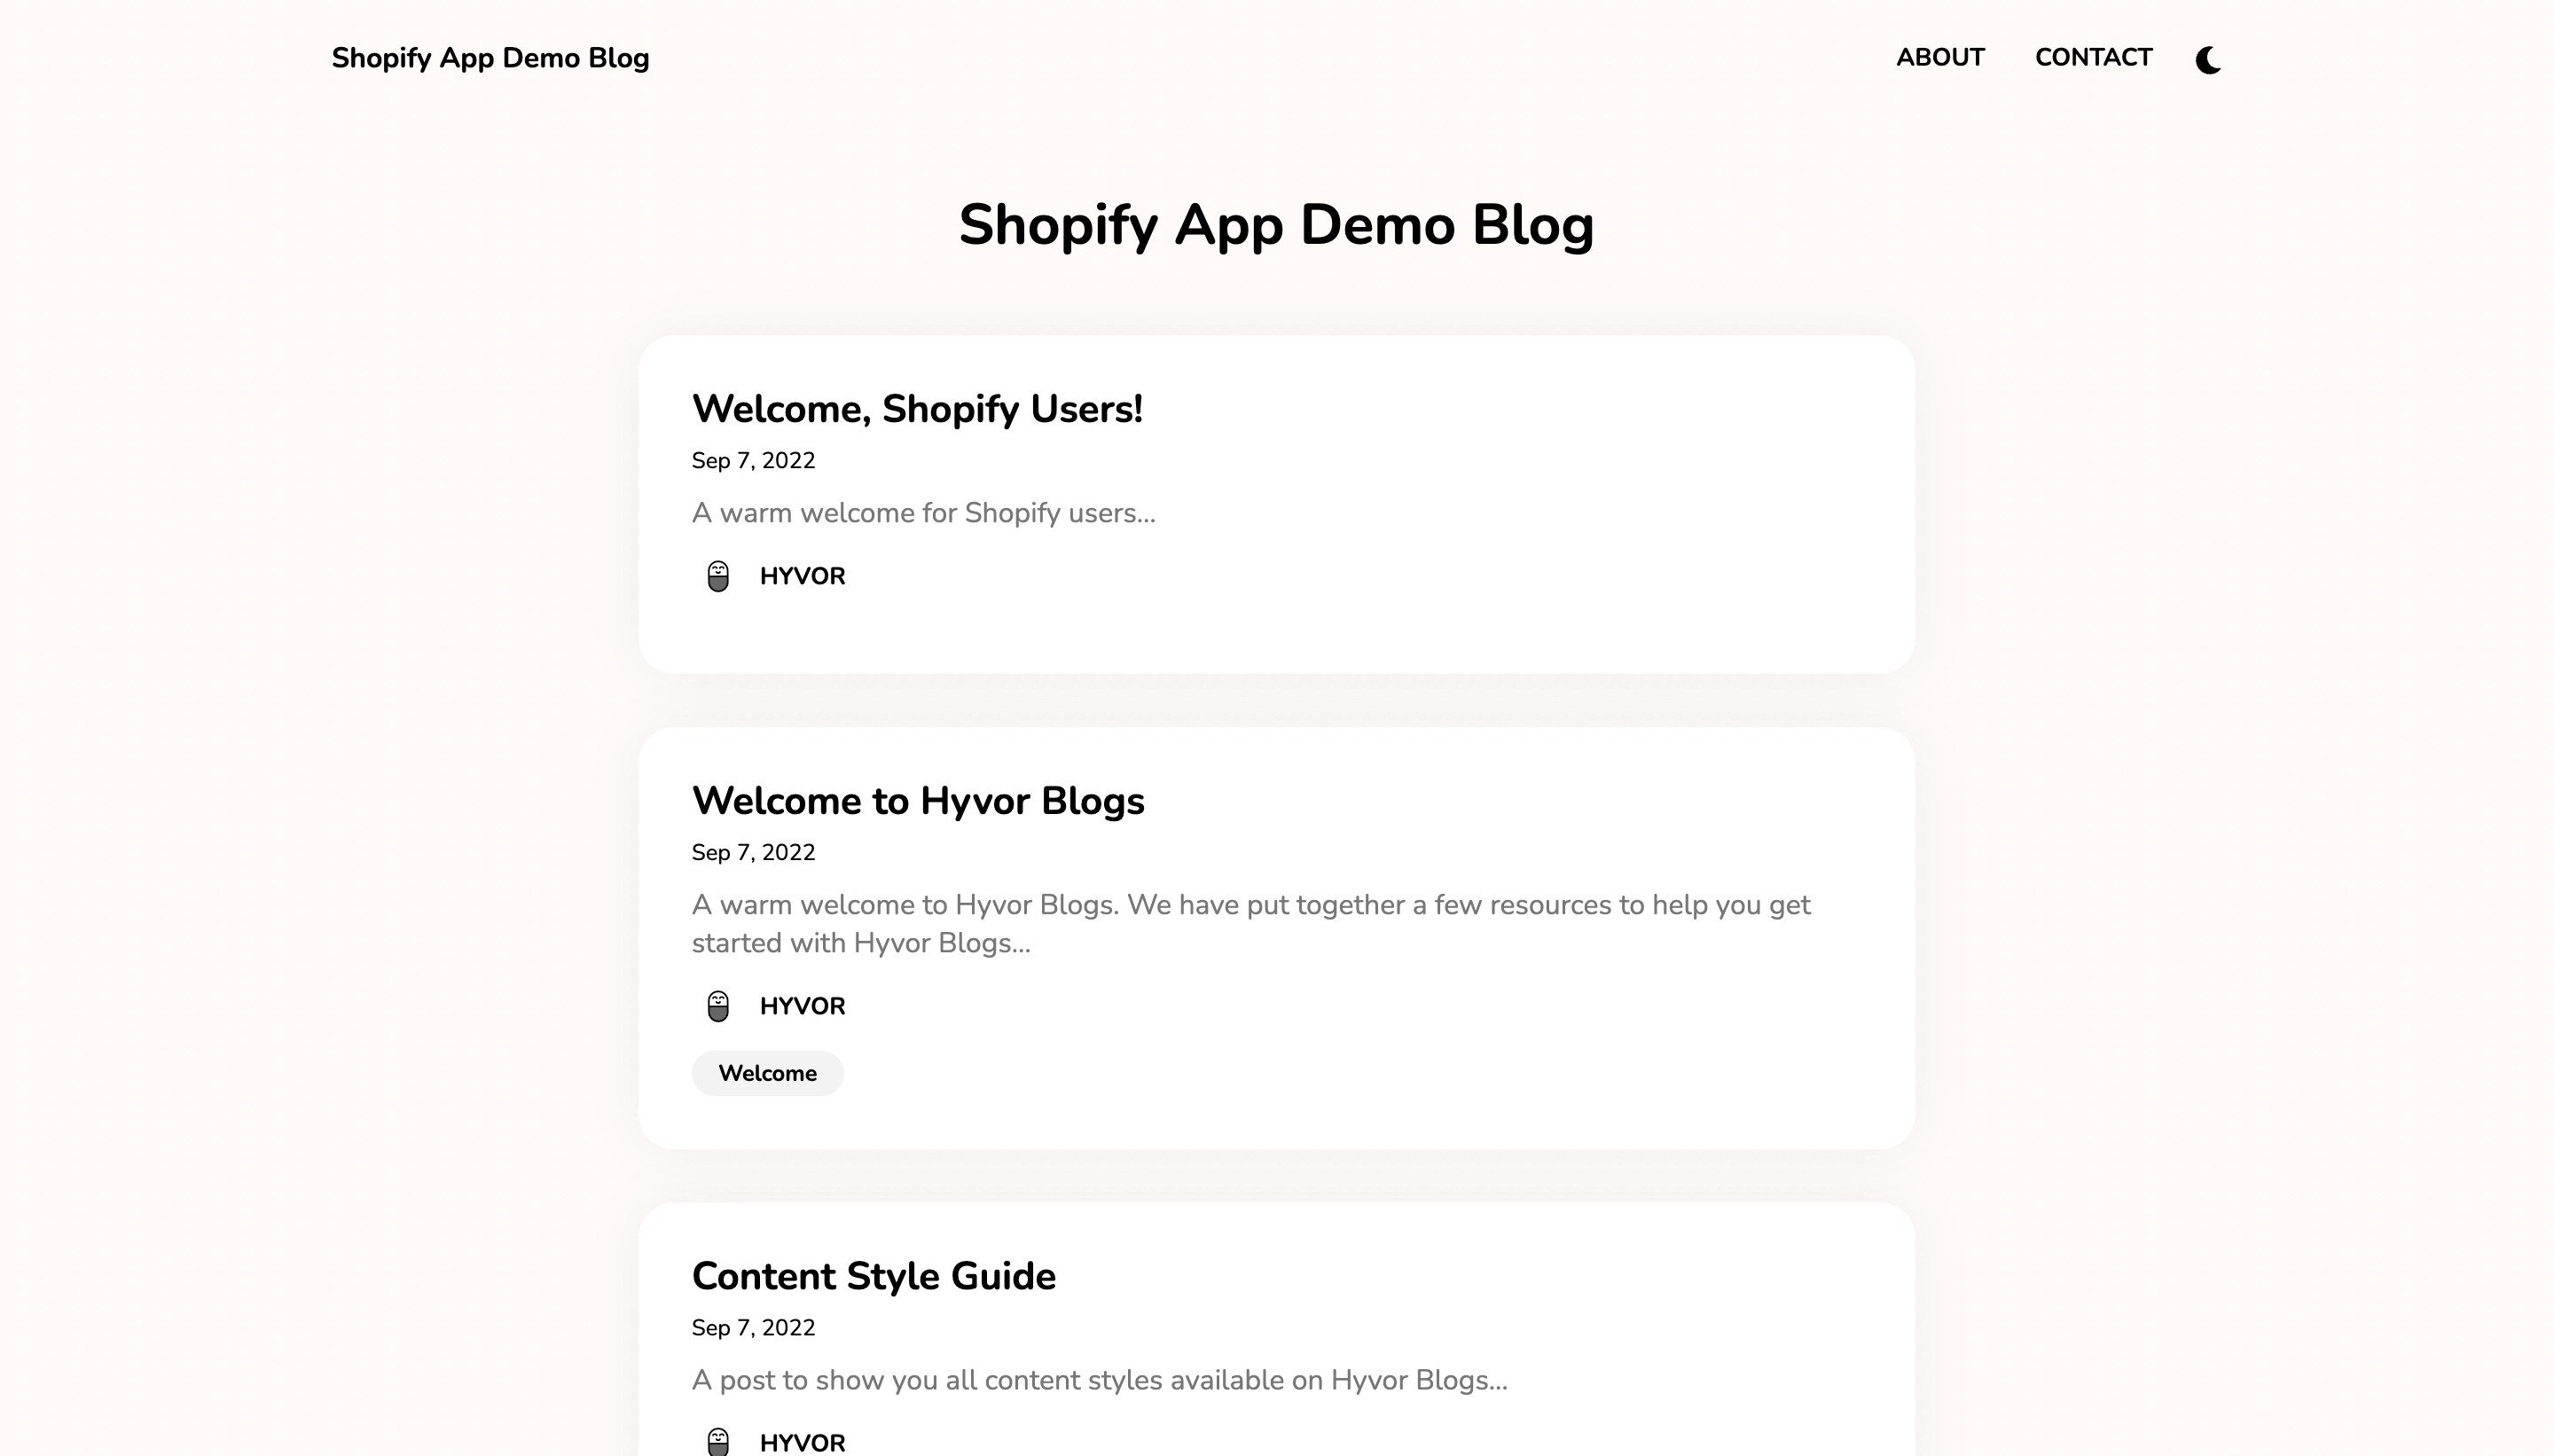
Hyvor Blogs have, behind the scenes, generated a blog for you. You can visit youronlinestore.com/a/blog to preview your blog.
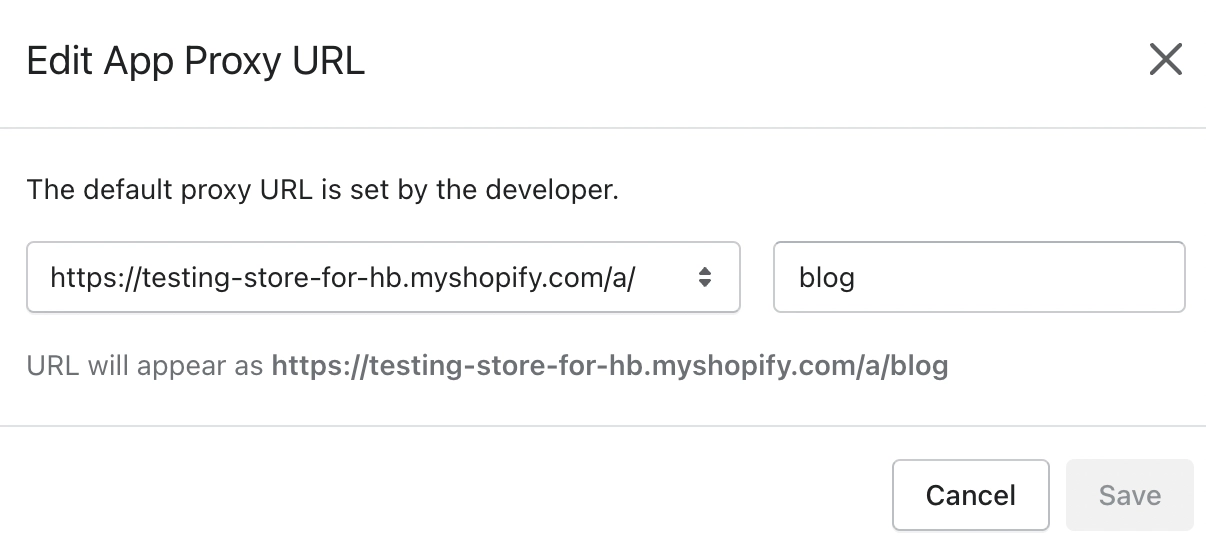
Step 2: Changing the Blog URL [Optional]
By default, your blog will be displayed at /a/blog. In order to change this,
Log into your Shopify store admin panel
Apps → App and sales channel settings → Hyvor Blogs
In App Proxy, click Customize URL and customize as you need, and save changes.
In the Hyvor Talk Console, go to Settings → Hosting → Self-Hosting URL, update the URL, and save changes.
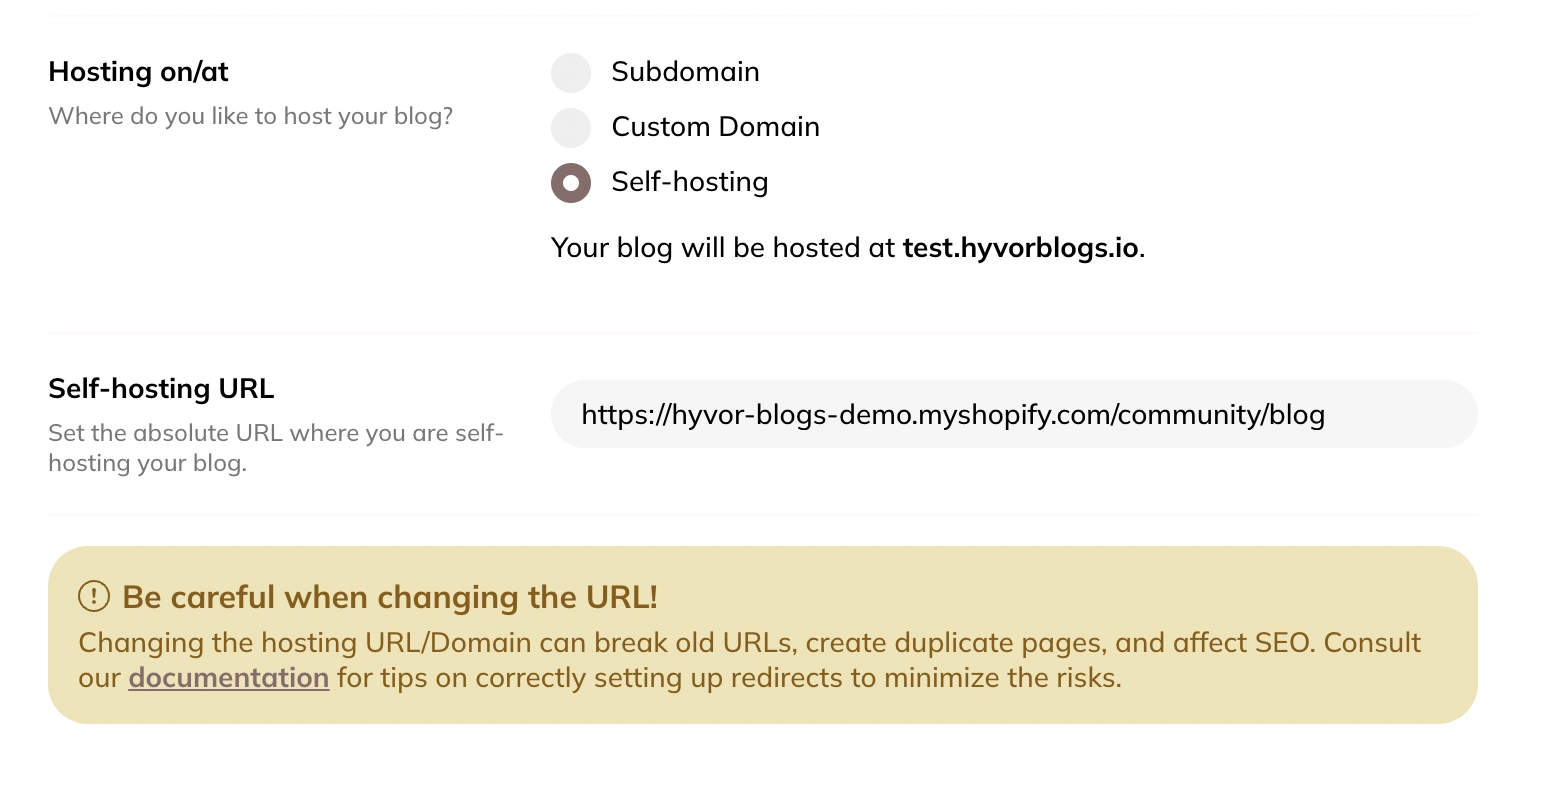
Updating the self-hosting URL Finally, verify the change by visiting the new URL.
Step 3: Adding Blog URL to Navigation [Recommended]
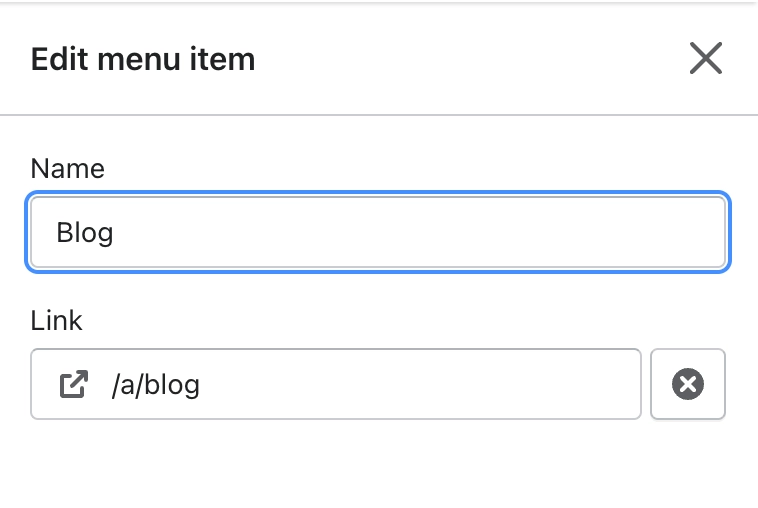
There are two ways your visitors can visit your new blog: through external websites like search engines or through your online store. To allow users to visit your blog through your online store, add a navigation URL to a menu.
First, go to Online Store Navigation.
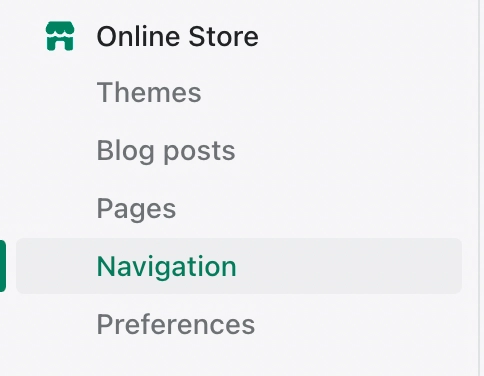
Then, choose a menu to add the link to the blog. Usually, you would add it to either the Main or Footer menu.
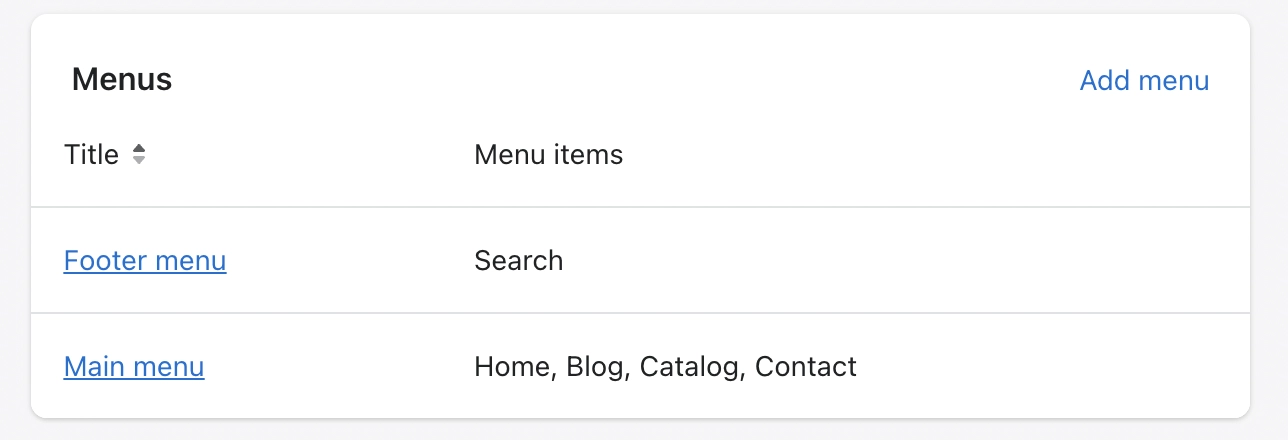
Make sure to set the link to /a/blog.
Yay!!!!! You have just added a blog to your Shopify store.
Now let’s see what is next after adding a blog to a Shopify store. Here are things that we recommend you do as soon as you add your blog with Hyvor Blogs to your Shopify store.
Customize the blog’s theme and configuration.
Writing quality, user-friendly, user-attractive, and SEO-friendly posts to attract users
Customization and configuration of the blog’s theme
Hyvor Blogs themes are fully customizable. If you have some experience with HTML, CSS, and Javascript, you can easily build your own theme from scratch. And also you can customize existing themes as you prefer.
Customizing Hyvor Blogs themes is simple as all you need to do is make necessary changes using HTML and CSS in the Console. There is no need to re-upload any code file or do any version control. To do theme editing, all you need is HTML and CSS/SCSS.
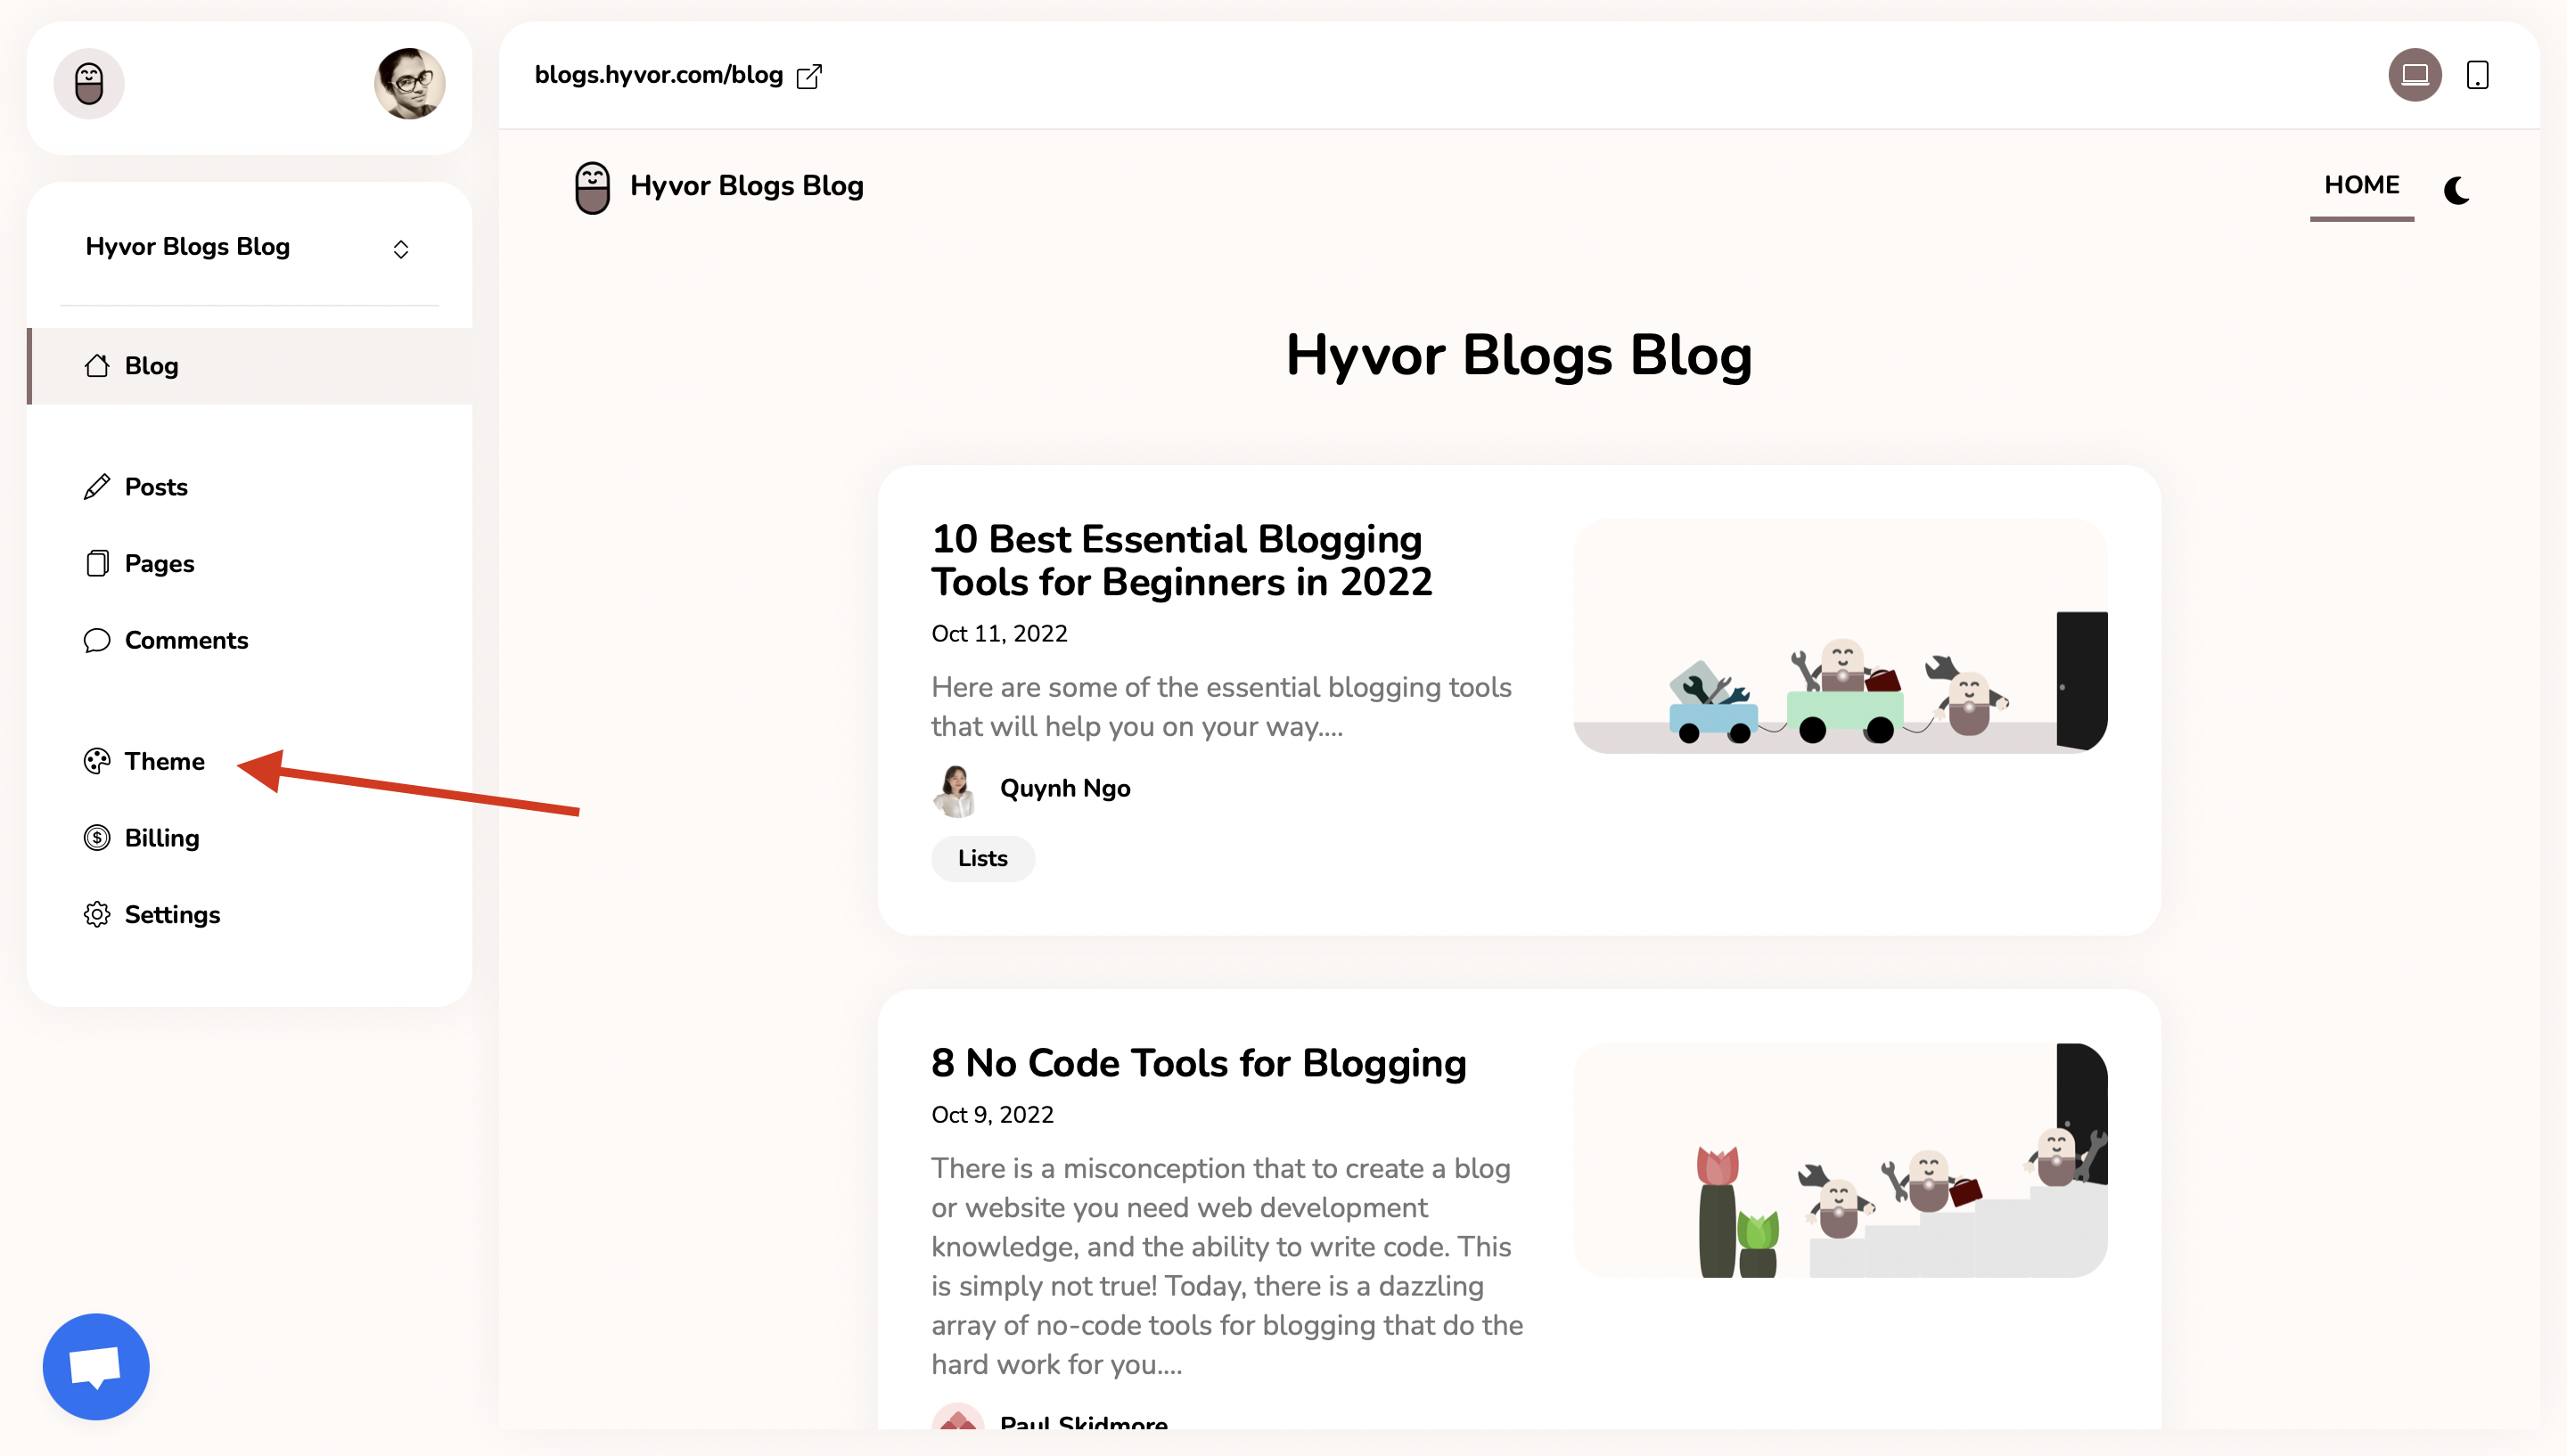
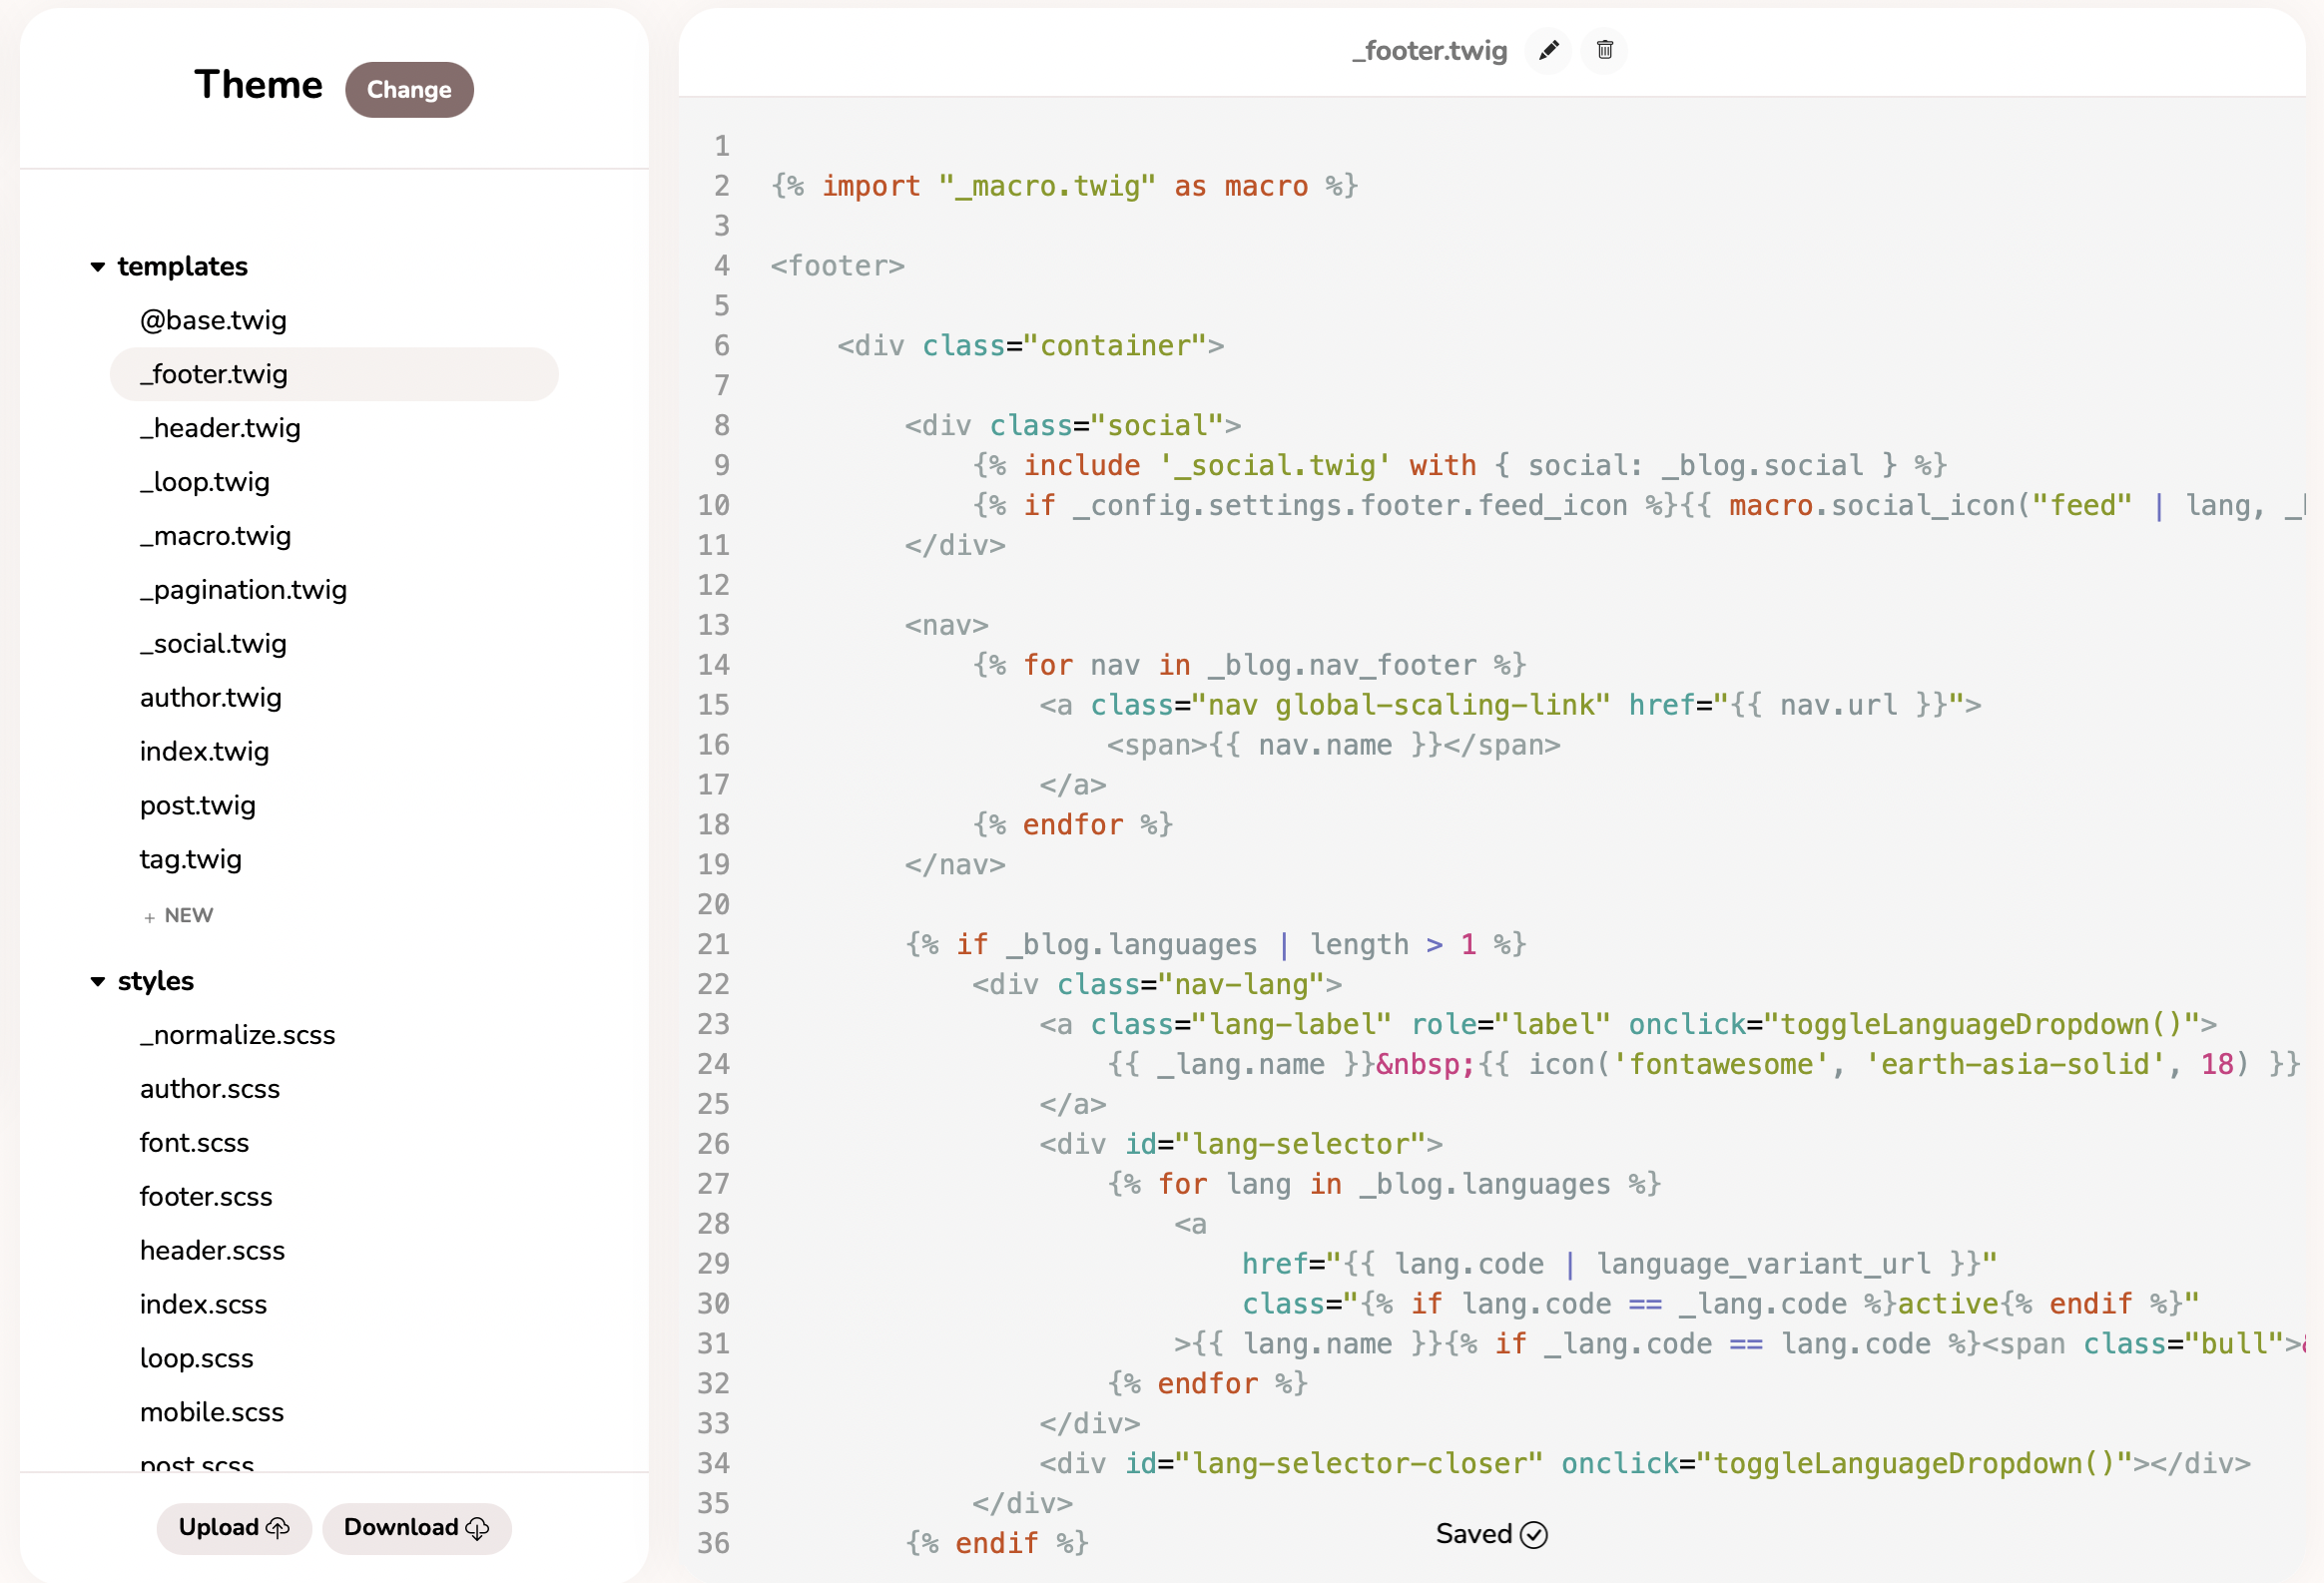
Go to Hyvor Blogs Console and click on “Themes”
If you want to edit the styles in default themes, go to “styles“choose the relevant styling sheet file, and edit them as much as you want. Each and every .css file is named after the relevant sector of the themes which makes it easier for you to identify. Just make sure to save it after editing.
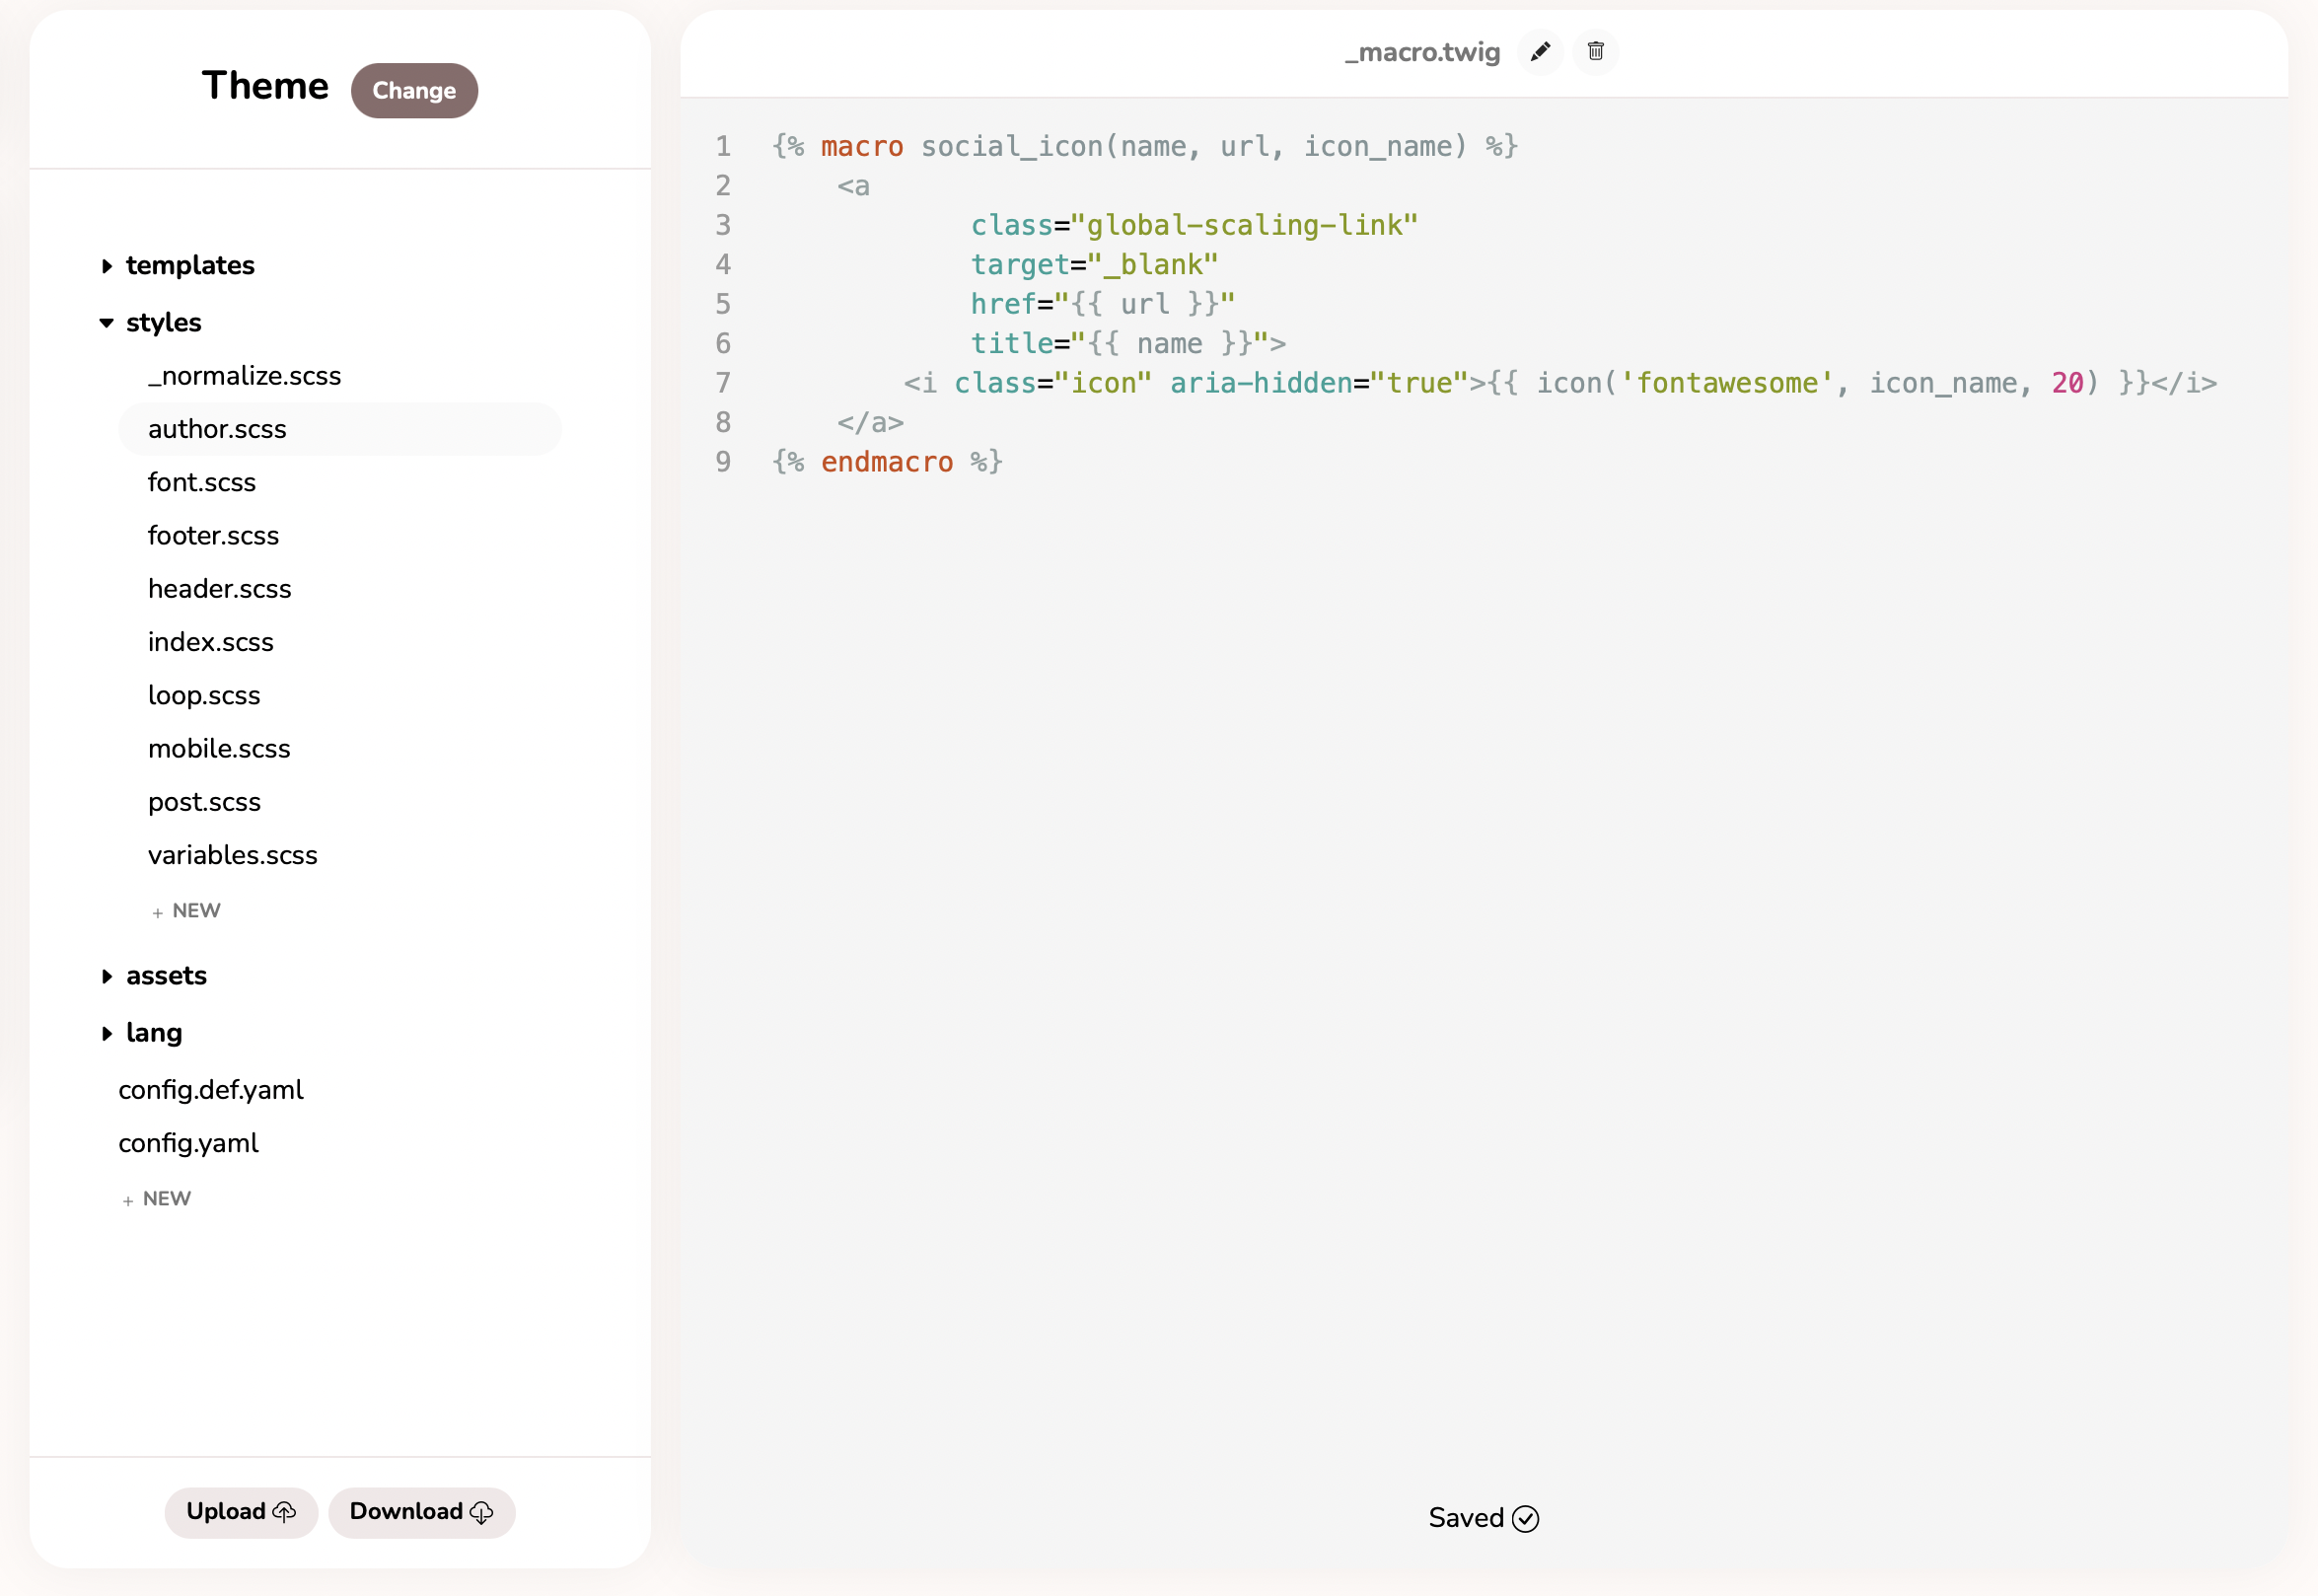
If you want to edit elements of the themes, you can just edit them by selecting “templates“ and making preferred changes in the relevant files. Make sure to save after editing.
Theme configurations - HB is unaware of these configurations. You can use them in templates for dynamic content or styles. Theme configurations (colors, fonts, etc.) should be written in english_lower_snake_case.
For more details about theme configuration, please visit our docs.
Tip: You can create your own theme and just upload and use it in Hyvor Blogs.
Writing quality, SEO- friendly posts that attract more users
You can create your posts simply as follows.
Go to Hyvor Blogs Console
Click “Posts” on the left corner bar of the console
Click on “New” to create your first post. Add your content as prefer
Click “Publish” or you can schedule publishing later
In every blog, quality content is the key factor that drives users to the blog. As you create a blog for your Shopify store, it is crucial to maintain quality. So, what does the word “Quality” mean in this case?
Note: If you simply need a checklist, see our blog post checklist to learn how to make all of your blog posts great.
Quality posts/ quality content means anything that adds value to the reader is quality content. It's industry-focused, not trite and trivial. It increases a reader's understanding of a topic in a way they may not have been aware of. Mostly it can be an article. Whatever it is, all you need to o is address your users’ problems and come up with great useful solutions for them.
Moreover, it is not a good practice to publish posts whenever you want to. It is a good practice to post content at a specific time rather than publishing content at different times. However as you have an online store, it can be quite difficult to publish content in a frequent manner because you do not add new items to the store so often. Yes, we get it.
However, maintaining it is crucial because it can significantly improve the volume of traffic to your website. Having a content schedule is an excellent method to ensure that you are allocating enough time to content creation.
Create a calendar using an Excel sheet, or a tool like Trello, Notion, or MeisterTask - whatever suits you and your group. This will enable you to keep track of your thoughts and set due dates to make sure you're consistently submitting new content to your blog. Just make sure you give yourself attainable objectives. Bring it back to one post each week if you're having trouble writing more than one every week.
Creating a calendar is not enough when you do not have content ideas to write. So we recommend you create a topic list using a tool like Excel or Google Sheets regarding all your products such as solutions-to-issues articles, how-to articles, list articles, etc. All these topics should cover all possible keywords with good search volumes. To identify potential keywords, you should do keyword research beforehand. You can use tools such as SE Ranking, Moz, etc. Keyword research is a crucial part of content creation. As long as you create your content with these potential keywords, your content is most likely to be found by users all over the internet because keywords make your articles rank higher in search results.
As you have finished writing posts, make sure to add the link to your blog post to Google Search Console as soon as you publish them. With that step, you make a request to index your article to Google. Plus, you can get an overview (performance) of your blog.
One more thing that you need to note is creating outbound and internal links with focused keywords. As you follow these tips and strategies when you publish your articles, they automatically become SEO-friendly.
As you create SEO-friendly articles, it is important to maintain SEO and improve it. In order to overcome that task, you can continuously check and edit your articles and keep them up-to-date. And as soon as you make any changes and update your articles, make sure to re-request page indexing using GSC.
You can also use other apps in the Shopify store in order to make your blog content more delightful and colorful: readers love those. For example, there are Shopify video apps, Shopify commenting plugins, etc.
At Last
You have just added a blog to your Shopify store. Hyvor Blogs comes with many features in-built. For example, if you like to reach a global audience through your website, you can write set up multiple languages in your blog and translate your posts into different languages.
You can go through our documentation to learn more. Feel free to comment down below if you have any questions or suggestions.

Translations: Français
Comments