This complete guide shows you how to translate blog posts using Hyvor Blogs. Learn step-by-step how to set up languages, use AI-powered auto-translation, manage multilingual content, and optimize for SEO. With Hyvor Blogs, you can grow your blog globally, streamline publishing, and connect with readers in their native languages, without extra complexity.
Struggling to translate your blog posts easily?
You’re not alone. Many bloggers and content teams want to grow their audience beyond English-speaking readers, but translating blog posts often feels like a time-consuming, technical nightmare.
Maybe you’ve tried free translation tools only to end up with clunky results. Or you’ve avoided it altogether because hiring a translator for every post just isn’t practical. Either way, valuable content ends up locked in one language, missing out on global reach.
In this Hyvor article, we’re going to explain exactly how to translate your blog the right way, quickly, affordably, and with SEO in mind.
But first…
Why listen to us?
At Hyvor Blogs, we help bloggers and businesses build fast, multilingual blogs that scale. Since 2020, our platform, Hyvor Blogs, has powered blogs in over 30 languages, giving us deep insight into what it takes to translate blog content effectively. From AI-enhanced auto-translation to SEO-friendly language handling, we’ve built tools that simplify the entire process. This guide brings all that expertise to you.
Check out our Trustpilot and G2 reviews.
What does it mean to translate a blog post?
Translating a blog post means making its content accessible in another language so non-native readers can fully understand it. But it’s more than just swapping words; it’s about preserving meaning, tone, and clarity across cultures.
This often includes translating titles, headings, body text, image alt tags, metadata, and calls-to-action so the content feels natural to the reader. When done right, it reads like it was written for that audience from the start, not just converted by a machine.
Why translating a blog post is important
Expand your global reach: A translated blog instantly becomes accessible to millions of new readers who prefer content in their native language.
Improve SEO performance: Multilingual content helps you rank in local search engines, driving organic traffic from multiple regions. Hyvor Blogs handles SEO essentials like hreflang and language tags automatically, so each translation is search-friendly out of the box.
Build trust and loyalty: Readers are more likely to engage with content that feels personal and culturally relevant.
Increase conversions: Localized messaging resonates better, making it easier to convert readers into customers or subscribers.
Stay competitive in global markets: As more websites offer content in multiple languages, translation helps you stay relevant and visible in international spaces, especially if your competitors are already doing it.
How to translate blog posts using Hyvor Blogs (step-by-step)
We built Hyvor Blogs to be the easiest all-in-one platform for managing a multilingual blog. It also offers the ideal middle ground for translation, an AI-enhanced auto-translate feature that instantly generates translated content, while giving you full control to review and edit before publishing.
To get started, follow the steps below:
Step 1: Create a Hyvor Blogs account
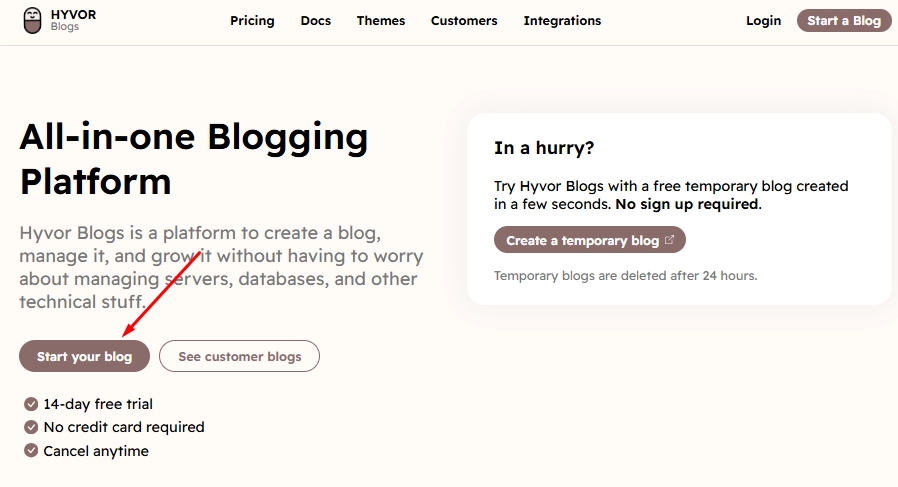
First things first, head over to Hyvor Blogs and click “Start your blog”.
Complete the sign-up form with your name, email, and password.
You’ll automatically start with a 14-day free trial, no credit card required. This gives you full access to explore and test out all the features before making a commitment.
Once registered, you’re ready to create your first blog.
Step 2: Start a new blog
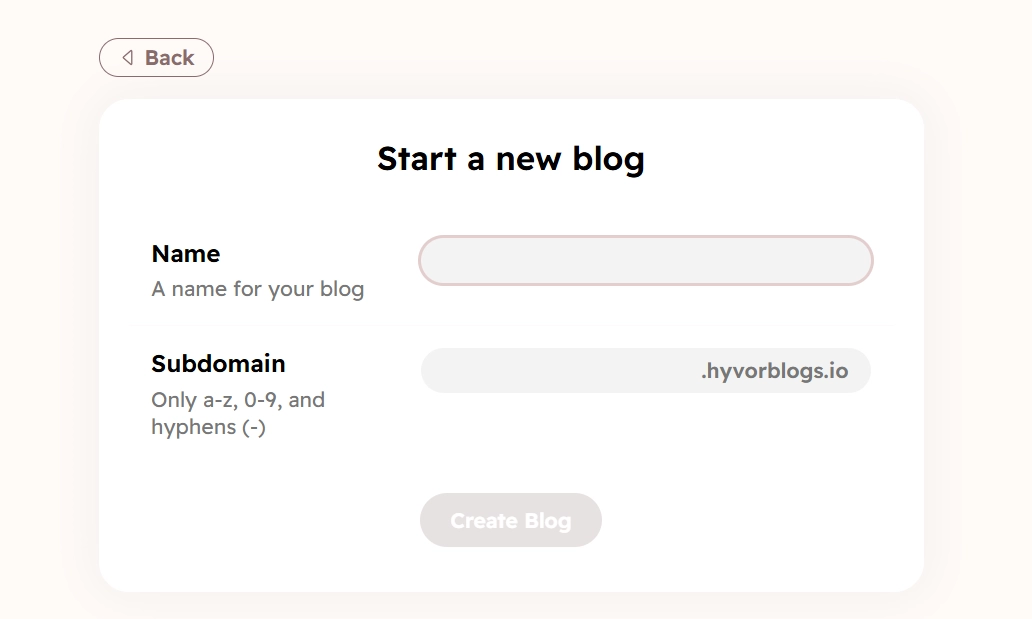
After signing in, Hyvor Blogs will prompt you to name your blog and choose a subdomain.
Name your blog: Choose a name that reflects your content’s purpose or audience. This can always be changed later, but it’s good to start strong.
Set your subdomain: This will be used as the URL of your blog on Hyvor Blogs’s platform (e.g.,
yourblogname.hyvorblogs.io). Only letters, numbers, and hyphens are allowed.
Pro tip: Make sure your blog name and subdomain are easy to remember and aligned with your brand.
Once everything looks good, click “Create Blog.” Hyvor Blogs will take a few seconds to set everything up for you.
See our full guide on how to add a blog to your website.
Step 3: Add languages for translation
Once your blog is created, you’ll land in the Hyvor Blogs dashboard. From the left-hand sidebar, navigate to: Settings -> Languages.
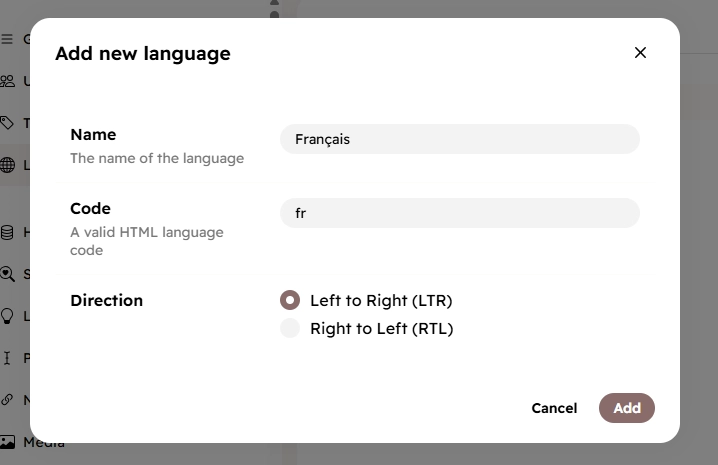
Click the “Add Language” button to add a new language. You’ll be asked to enter the language name and its corresponding HTML code.
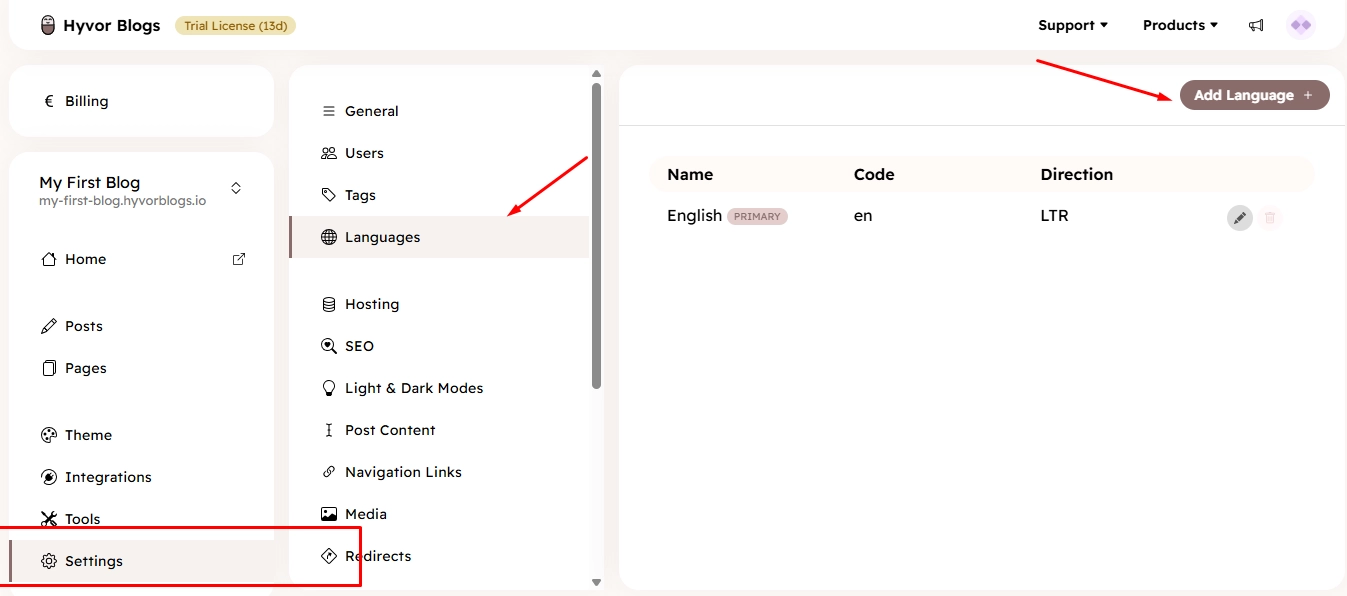
Name: Enter the native name of the language. For example, use français instead of French.
Code: This is the HTML language code (e.g., fr, es, ar). It helps browsers and search engines identify the language of each blog variant.
Direction: Choose the correct text direction for the language, either Left-to-Right (LTR) or Right-to-Left (RTL). Languages like Arabic, Hebrew, and Persian use RTL, and setting this correctly ensures proper formatting and readability across your blog.
Tip: Using accurate language codes ensures that your multilingual blog is properly indexed by search engines, which is critical for multilingual SEO.
Repeat this process for every language you plan to support. Once added, Hyvor Blogs will automatically create structured subdirectories for each language (e.g., yourblog.hyvorblogs.io/fr for French), which is great for both users and SEO.
Step 4: Translate and publish blog posts
After you’ve added your languages, it’s time to translate your content. In the post editor, you’ll notice a language dropdown for each one you’ve enabled.

You have two options when adding translations:
A. Manual translation
You can write or paste translated content for each language manually. This is ideal if you’re working with a human translator or creating localized versions from scratch.
B. Auto-translation with AI (recommended)
Hyvor Blogs makes translating your posts simple with its built-in AI-powered auto-translate feature. Here's how it works:
First, write and publish your post in the default language, usually English. Then:
In the post editor, switch the language dropdown to your target language (e.g., French).
Click the “Auto-translate” button to open the translation settings.
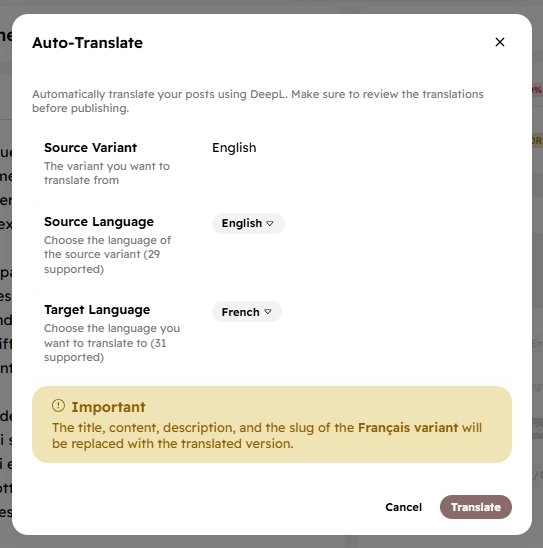
Select the following:
Source Variant: The original post you want to translate.
Source Language: Language of the original post
Target Language: Language to translate into
Click “Translate.”
Hyvor Blogs will automatically translate the title, content, description, and slug for the selected language. You can then review and edit the translation before publishing to ensure clarity and accuracy.
Note:
Since each language version of a blog post is treated as its own page, you can choose to publish in one or multiple languages independently.
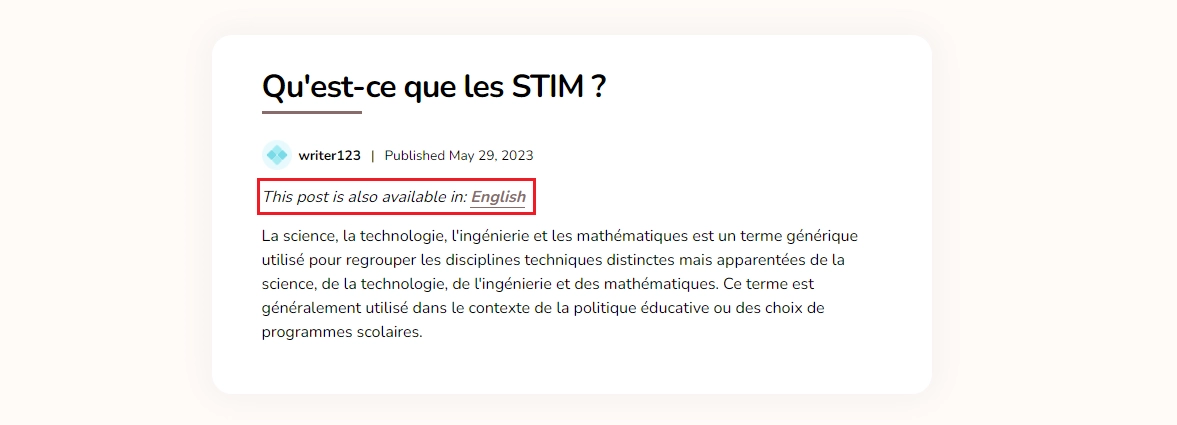
Blog posts available in multiple languages will display the list of all languages in which they are available.
Step 5: Hyvor Blogs handles multilingual SEO for you
Translating content is only half the job; ensuring it’s discoverable by search engines is the other. Hyvor Blogs automatically takes care of the technical SEO setup for every translated page.
Here’s what’s done for you:
langattributes on HTML to signal the content languagehreflangtags to indicate language alternatives to search enginesAutomatic sitemap updates to include every new translated post
As long as you set up the correct language names and codes, Hyvor Blogs handles the rest behind the scenes. No plugins, no developer input needed.
See our full guide to multi-language SEO.
How to manage a multilingual blog
Running a multi-language blog involves more than just translating content; it requires thoughtful organization and consistent content management across languages.
Organize language variants with subdirectories
Structure your blog so that each language has its own subdirectory (e.g., /fr, /es). This improves clarity for both readers and search engines, making your site easier to navigate and index.
Create a publishing workflow for each language
Establish clear processes for editing, scheduling, and publishing content in different languages. Not every post needs to exist in every language, so prioritize based on audience needs and available resources.
Use a centralized content editor
Hyvor Blogs simplifies multilingual publishing with a built-in editor that supports up to 32 languages. Each language version of a post has its own tab, so you can manage and publish content independently without overlap or confusion.
Allow asynchronous publishing across languages
Hyvor Blogs gives you the flexibility to publish blog posts in one language before others. For instance, you might publish a French version of a post before the English one, perfect for region-specific campaigns or timelines.
Optimize every language variant for SEO
Ensure each translated page has proper language attributes (lang, hreflang) and metadata. This helps search engines crawl and rank your content correctly in each language market.
Translate your blog effortlessly using Hyvor Blogs
Reaching new audiences shouldn't mean doubling your workload. Translating your blog posts opens up global visibility, boosts SEO, and helps you connect more deeply with international readers, all without reinventing your content from scratch.
With Hyvor Blogs, you can manage everything in one place. Its AI-enhanced auto-translation, clean subdirectory structure, and built-in multilingual SEO make running a multi-language blog simple and scalable. Whether you're publishing in 2 or 20 languages, Hyvor Blogs gives you full control with minimal effort.
Ready to grow your audience across borders? Start your free 14-day trial on Hyvor Blogs, no credit card required.
Related Readings
Corporate Blogging: The Ultimate Guide for Corporate Blogs A to Z
End-to-end Marketing and end-to-end content marketing and strategy
Best Blogging Platform: Guide to Choose the Best Blogging Platform
The Ultimate Blog Post Checklist: Ensure Success with Every Blog Post
Headless Blogging: Astro, Next.js, Svelte/Sveltekit, Nuxt

Comments