Are you looking to build an Astro blog with a headless CMS? In this Astro blog tutorial, I’m going to walk you through all the steps of building an Astro blog using Hyvor Blogs as the headless CMS.
First of all, let’s talk a little bit about headless CMSs.
What is a Headless CMS, and why is it used?
A headless CMS is a content management system that focuses on content management and data delivery through API. In a headless CMS, the "head" (the "head" refers to the front-end or presentation layer of a website or app) is decoupled, meaning you can use any front end to present your content, giving you maximum flexibility.
Here is a simple infographic of how headless CMS works.
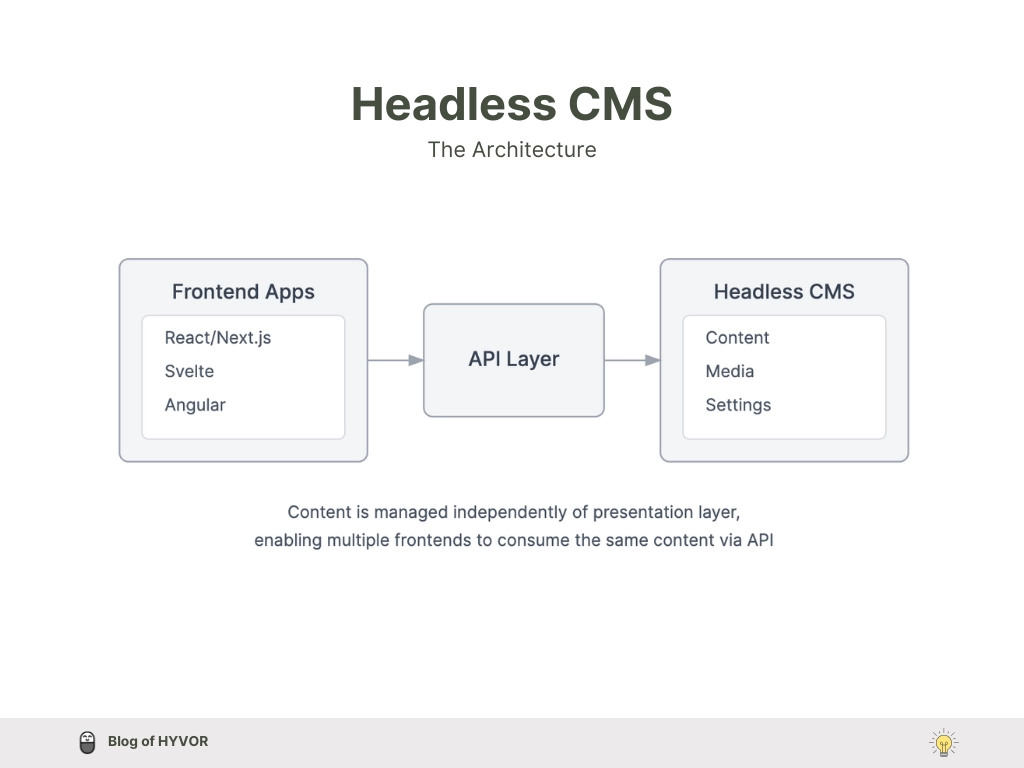
Here are the major reasons why you should use a headless CMS.
Flexibility: Can be built with any frontend technology.
Scalability: Easy to handle on multiple platforms (web, mobile, AR/VR, etc.).
Future-Proof: Frontend and backend are independent, making updates easier.
Performance: Optimized delivery through APIs.
Custom Workflows: Developers have full control over design and functionality.
Why Hyvor Blogs?
Hyvor Blogs is an all-in-one headless CMS tailored for blogging. It provides you the perfect space to write, and manage your blog posts, including features like memberships, comments, and newsletters with Hyvor Talk, and offers an easy API approach to integrate your blog with any front-end framework or platform.
As a Hyvor Blogs user, you get to experience the following features, especially from Hyvor Blogs. For example,
Multi-language blogging including RTL language blogging.
User-friendly, team-friendly console with markdown-friendly rich text editor
Data API for headless cms
Hosting privileges: subdomain, custom domain, sub-directory, or anywhere you like.
Developer-friendly: console API, delivery API, webhooks, etc.
Fast blogging and so much more.
This is the Hyvor Blogs console. This is where you will write, edit, collaborate with your team, and manage all your blog content.
Astro by itself is a light, fast static site generator. On the other hand, Hyvor Blogs is fast and easy to use. Together, Astro and Hyvor Blogs enable you to create a high-performing, static/dynamic astro blog where content management and front-end customization work seamlessly. This duo will be a perfect integration for your headless CMS.
Now, let’s move to our Astro-react headless blog tutorial.
Step 1: Create an Astro Blog Project
There are several methods to create an Astro blog project according to Astro documentation. The create astro CLI command is the fastest way to start a new Astro project from scratch. It will walk you through every step of setting up your new Astro project and allow you to choose from a few different official starter templates. There is manual installation too. We are using create astro CLI command which can be run anywhere.
Create your new Astro blog project
1npm create astro@latestProceed with “y” to install the necessary dependencies. Then, answer the prompts appearing. Here are my answers to those prompts.
Although I have chosen “A basic, minimal starter” as the start of my Astro blog project, you can choose any other option, such as using an Astro blog template.
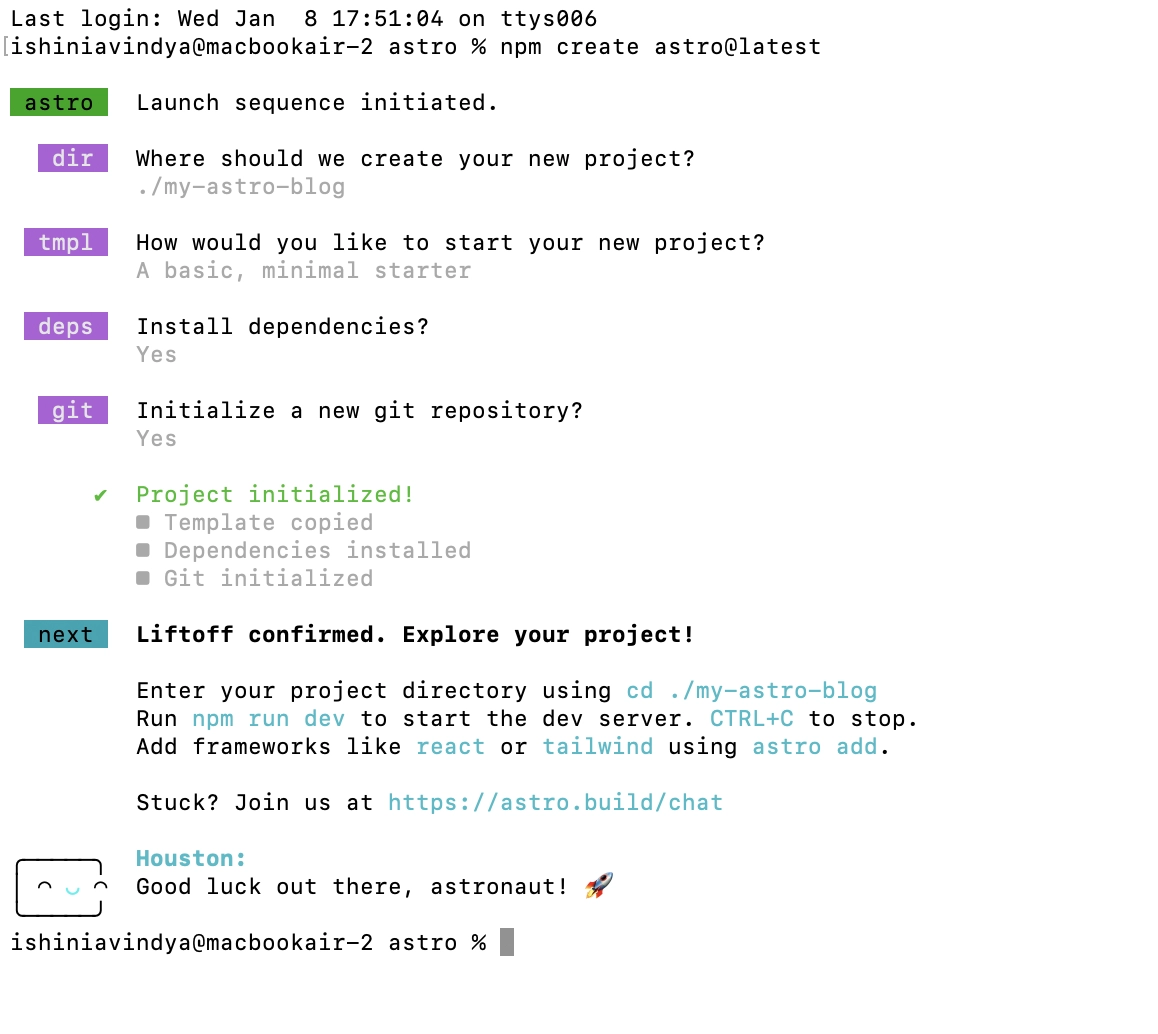
Start the dev server: This is to run the blog in development mode.
1npm run devIt will run your blog locally at http://localhost:4321 . It will be something like this.
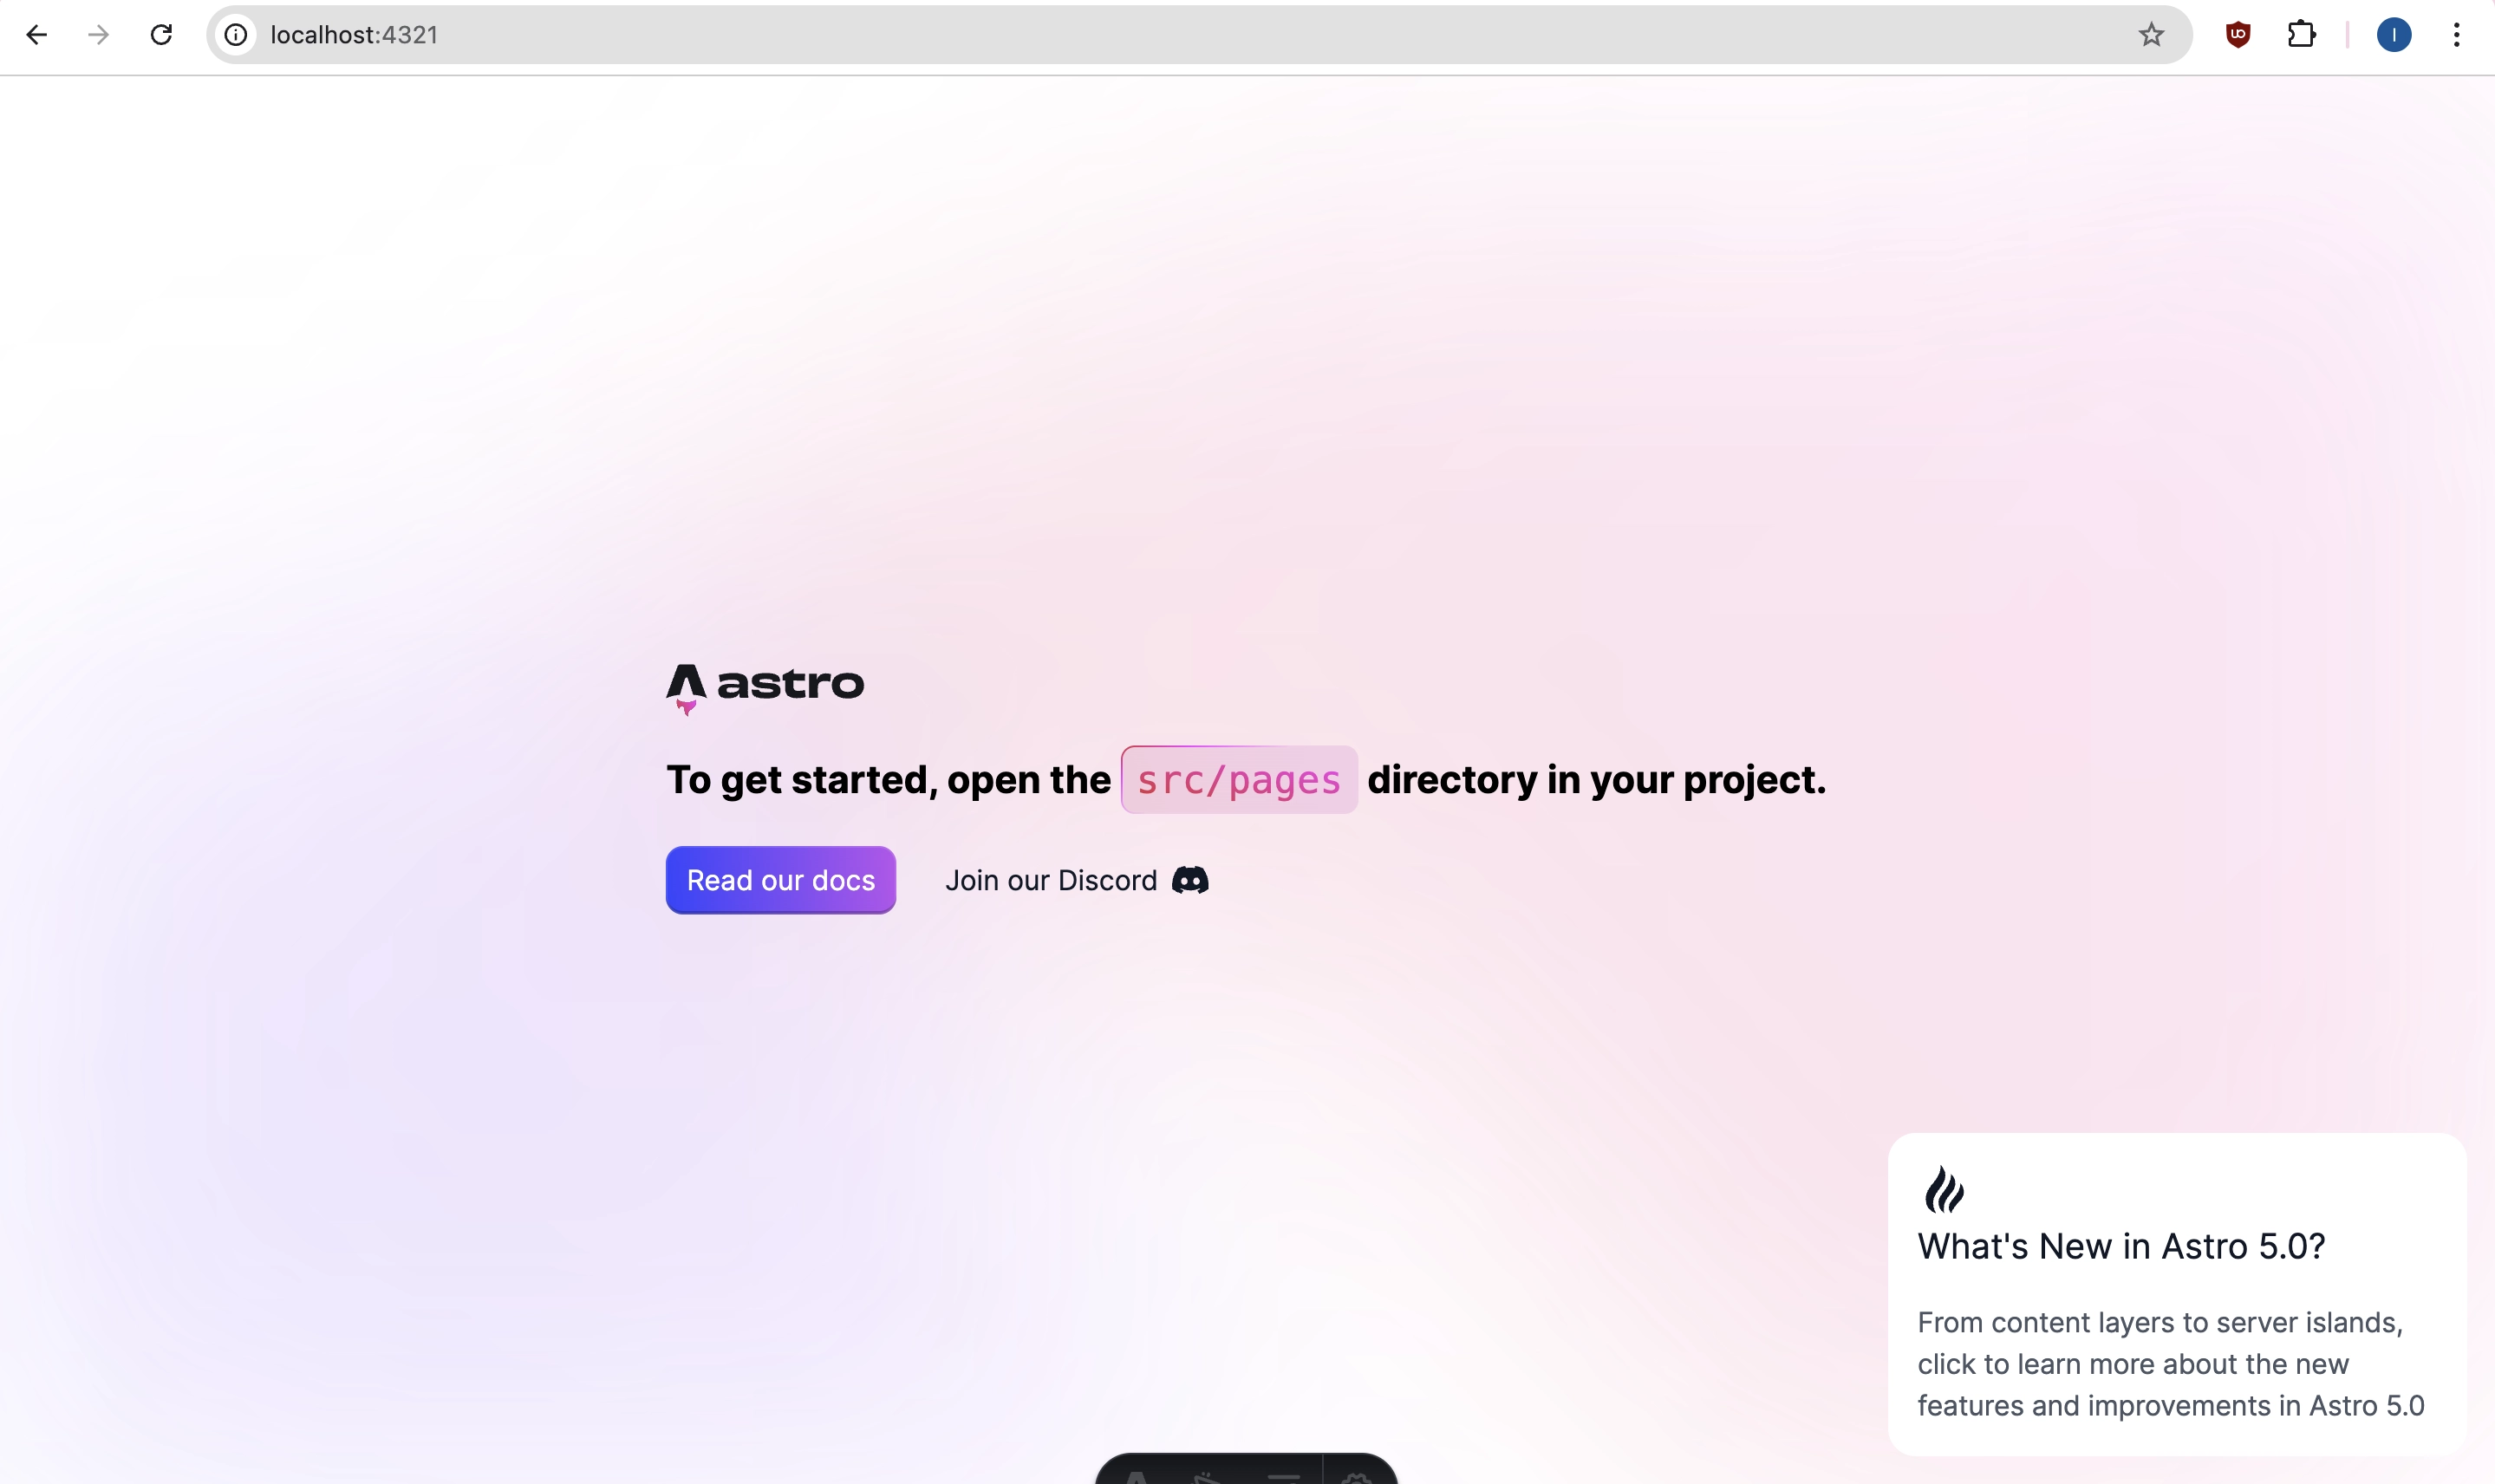
We’ve completed the first step of building an Astro blog using headless CMS.
This will be the project file hierarchy initially.
1├── README.md 2├── astro.config.mjs 3├── node_modules 4├── package-lock.json 5├── package.json 6├── public 7│ └── favicon.svg 8├── src 9│ ├── assets10│ ├── components11│ │ └── Welcome.astro12│ ├── layouts13│ │ └── Layout.astro14│ └── pages15│ └── index.astro16└── tsconfig.jsonStep 2: Create your Blog at Hyvor Blogs
We have to create a blog space to start content writing and content management for our blog. To do that, go to the Hyvor Blogs console and create your blog.

Once completed Go to Console -> Settings -> Hosting -> Subdomain. Copy your blog’s subdomain.
For this tutorial, my blog subdomain is headless-cms .
For our next steps, we are going to use Hyvor Blogs Data API to fetch and render blog data. Here is the Data API documentation of Hyvor Blogs for your reference.
The Hyvor Blogs Data API provides responses in JSON format, with all endpoints using the HTTP GET method. The base path for the API is https://blogs.hyvor.com/api/data/v0/{subdomain}, in this case, https://blogs.hyvor.com/api/data/v0/headless-cms.
Let’s continue.
Step 3: Index page/homepage
This is the step in which we create the blog's homepage/index page, where you showcase all its posts, including featured posts, pinned posts, etc.
Remove all the dummy codes that initially existed right after you set up the project. You can remove the Welcome.astro file in the components folder.
First, let’s write a function to fetch post data from the Hyvor Blogs Data API.
Create a folder named
utilsunder thesrcfolder and create a file namedfetchPosts.tsinside theutilsfolder.
1const BASE_URL = "https://blogs.hyvor.com/api/data/v0"; 2const SUBDOMAIN = "headless-cms"; 3Next, create an Astro component to show post data.
Create a file named
PostList.astroin thecomponentsfolder.
1--- 2export interface Post { 3 id: number; 4 slug: string; 5 title: string; 6 description: string; 7} 8Now go to
index.astrofile and import the PostList component we’ve just created.
1--- 2import PostList from '../components/PostList.astro'; 3import Layout from '../layouts/Layout.astro'; 4import { fetchPosts } from '../utils/fetchPosts'; 5const posts = await fetchPosts(); 6--- 7Save the changes and this is what we’ll see in our development environment.
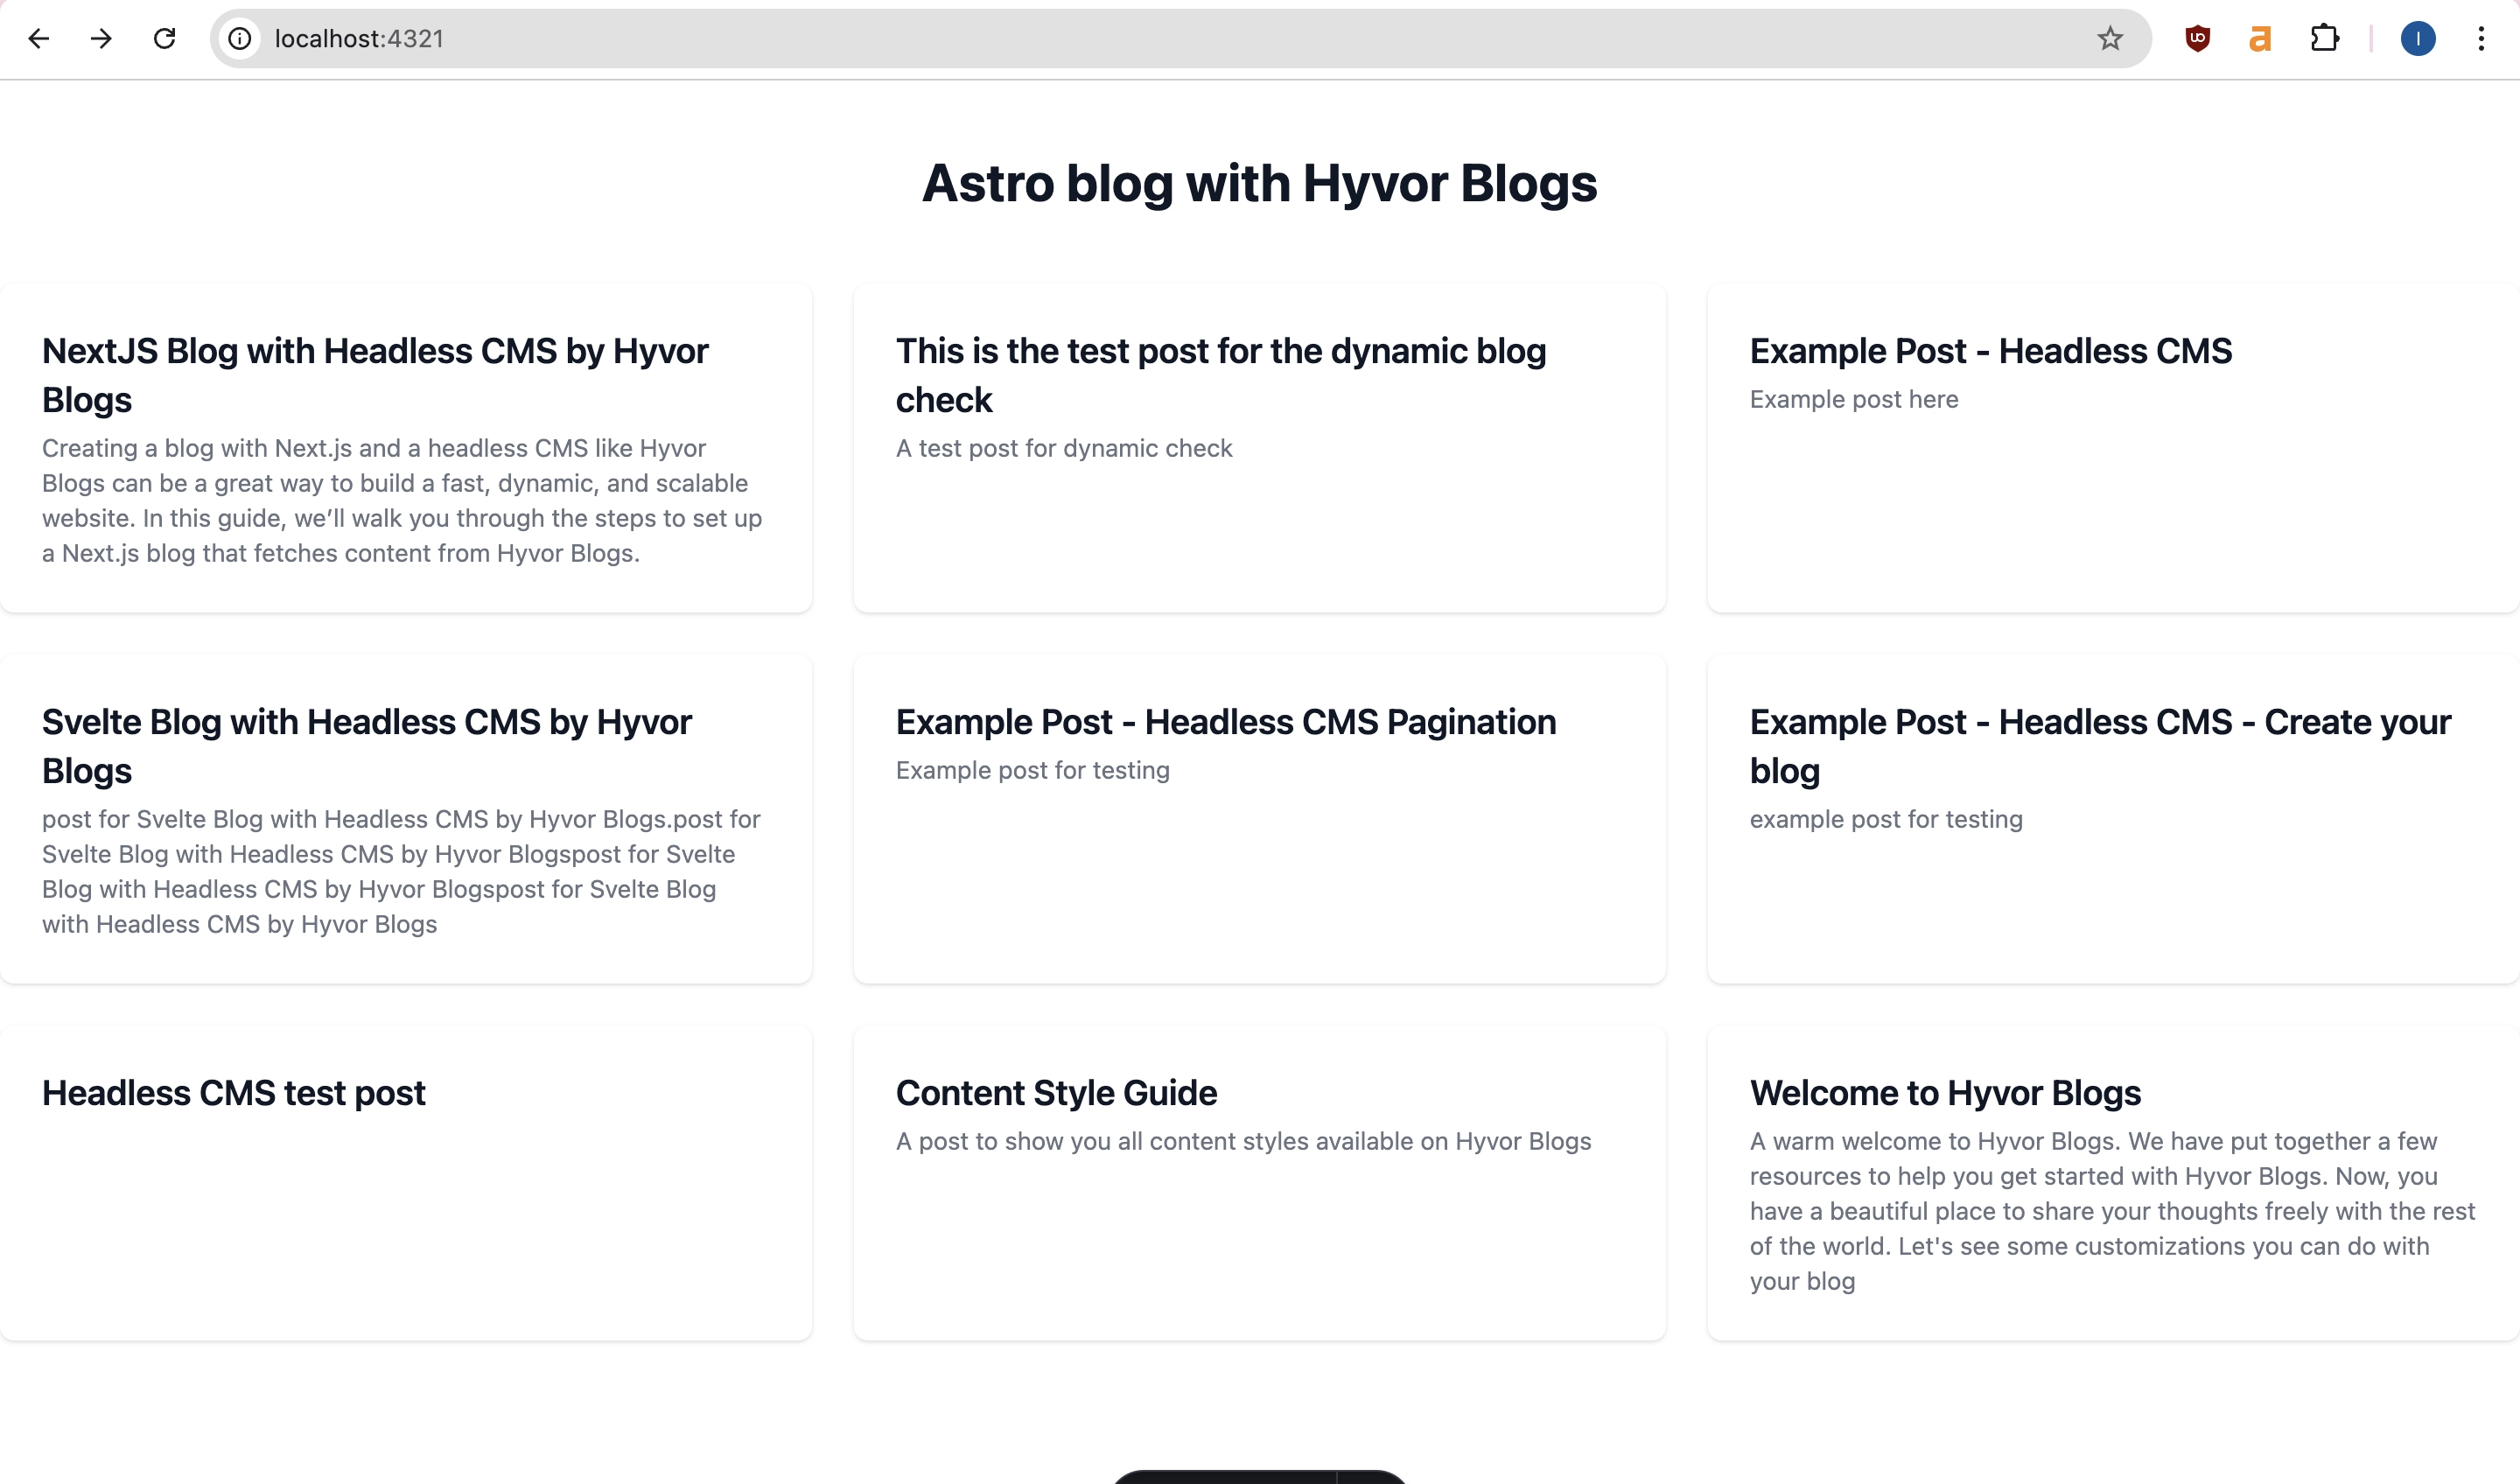
Step 4: Post Page
In this step, we are going to display post data when clicking on a particular post on the index page we created. For example, the post content will be shown under the URL /post-slug .
This is where we use Astro routing.
Create a file called
[slug].astrofor dynamic routes in ourpagefolder.Go to
fetchPosts.tsand let’s write a new function (fetchPost) to fetch post data byslug, using the single endpoint post.
In Astro, getStaticPaths is a special function that enables Static Site Generation (sSSG) for dynamic routes, like blog posts. I suggest you give it a reference about getStaticPaths on Astro docs.
1// function to fetch a single post 2export const fetchPost = async (slug: string) => { 3 const API_URL = `${BASE_URL}/${SUBDOMAIN}/post?slug=${slug}`; 4Now we are going to create a component to display posts.
Create a file named
Post.astroin thecomponentsfolder.
1--- 2import Layout from '../layouts/Layout.astro'; 3import { fetchPost } from '../utils/fetchPosts'; 4Go back to
[slug].astroand import the component we created above.
1--- 2// Import the Post component 3import Post from '../components/Post.astro'; 4import Layout from '../layouts/Layout.astro'; 5That’s it. Here is how it looks in the development environment.
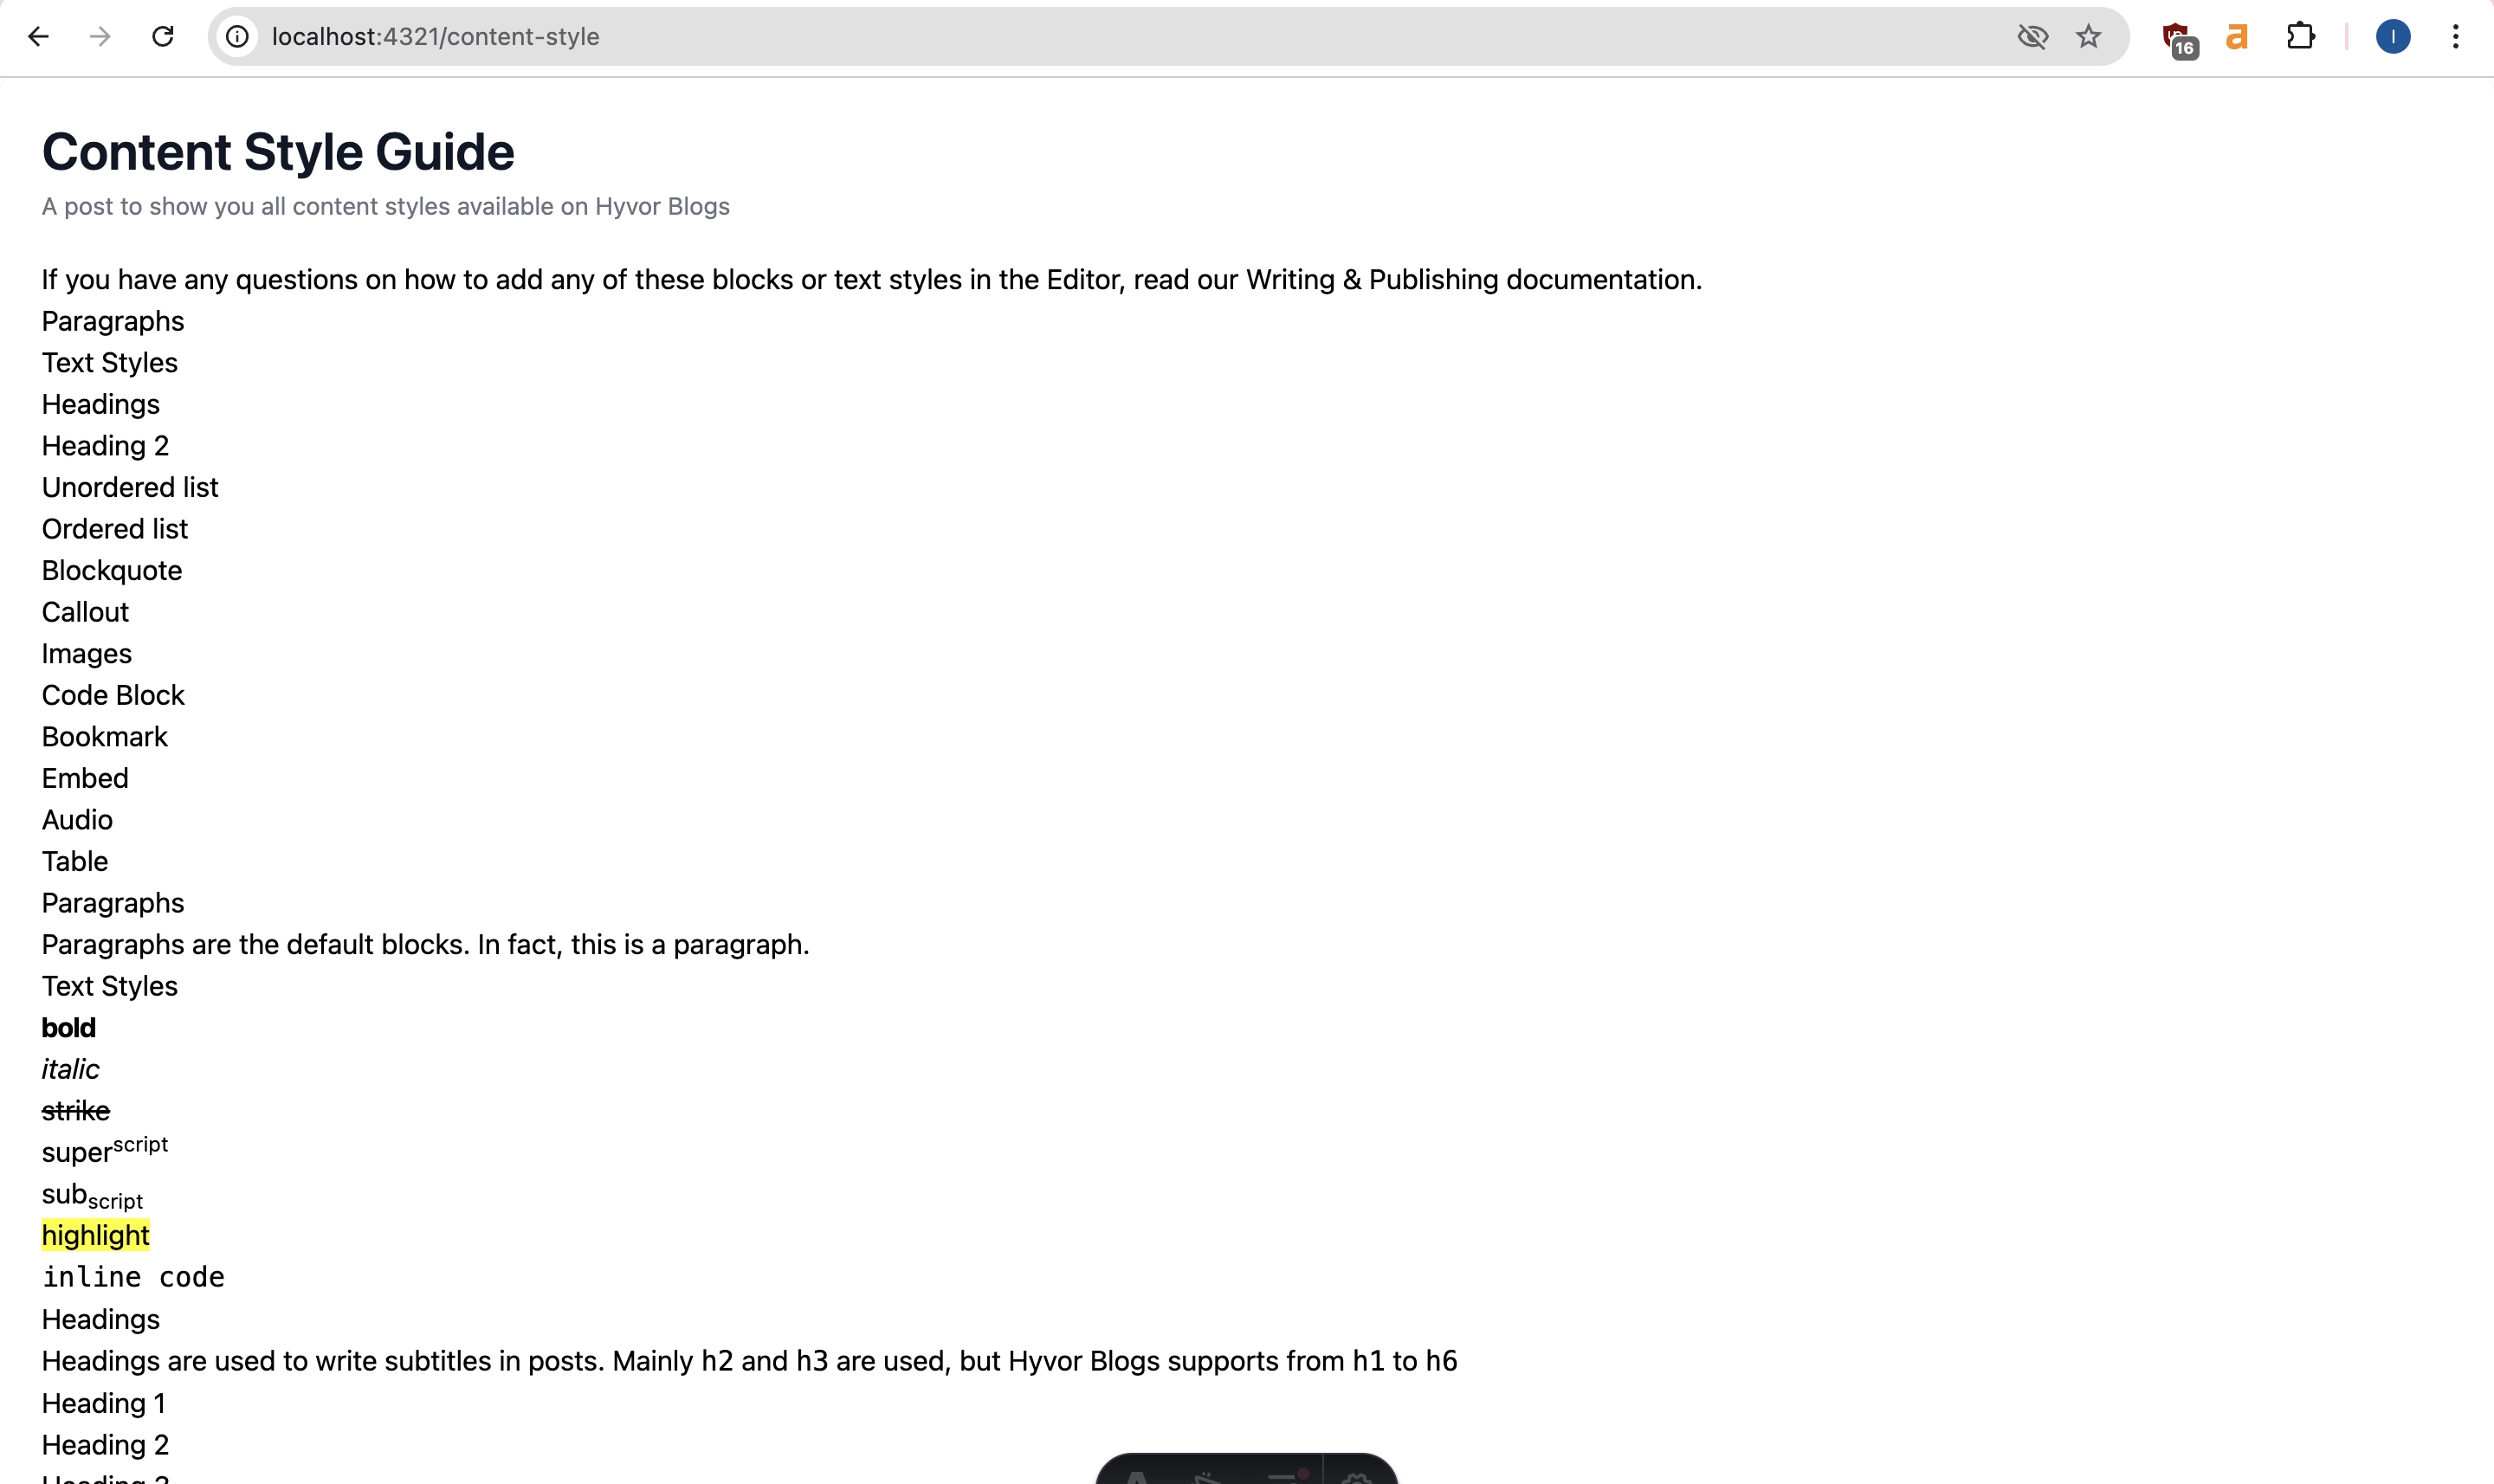
Well, I haven’t added CSS for the post content.

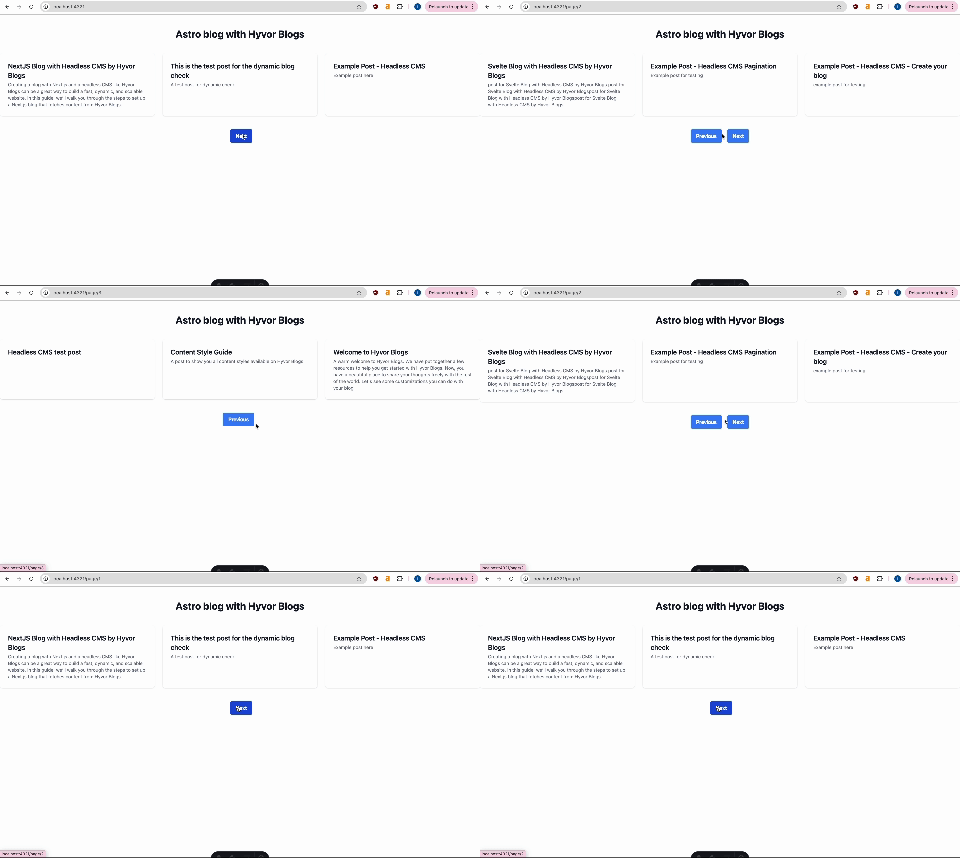
In this step, we are going to add pagination to our Astro blog. In this tutorial, paginated posts will be shown in URLs like /page/[page number] : /page/2 .
Create a folder named
pageinsidepagesfolder:/src/pages/page.We will have to use pagination buttons in our
index.astroand[page].astrofiles, and if you extend this project by adding author pages and tag pages, you will need to repeat the pagination UI codes everywhere, thus we are creating a component for that:/components/Pagination.astro.
1--- 2interface PaginationProps { 3 prev?: string; 4 next?: string; 5} 6In the
pagefolder create a file named[page].astrofor dynamic routes:/src/pages/page/[page].astro.
We use the paginate() function provided by Astro to handle pagination logic, including calculating the number of pages and assigning posts to each page.
1--- 2import Pagination from '../../components/Pagination.astro'; 3import PostList from '../../components/PostList.astro'; 4import Layout from '../../layouts/Layout.astro'; 5Now go back to the
index.astroWe have to make some changes to it only to get posts for 1 page.
1import Pagination from '../components/Pagination.astro'; 2import PostList from '../components/PostList.astro'; 3import Layout from '../layouts/Layout.astro'; 4const BASE_URL = "https://blogs.hyvor.com/api/data/v0"; 5const SUBDOMAIN = "headless-cms"; 6const POSTS_PER_PAGE = 3; 7And, that’s it! We’ve completed adding pagination to our Astro blog.
Step 6: Deployment of your Astro Blog
You can simply build your blog by running the following command on your terminal.
1npm run buildBy default, the build output will be placed at dist/. This location can be changed using the outDir configuration option.
After building your blog successfully, you can deploy it using a hosting provider you like. Astro supports many hosting providers such as Cloudflare pages, Netlify, Github Pages, Netlify, AWS, Google Cloud and so much more whether your blog is Static or Server-Side Rendered (SSR).
Tips
To add an author's page, utilize the
/authorsendpoint, which provides detailed information about the authors.To create a tags page, use the
/tagsendpoint to retrieve the tags object.For multi-language blogging, leverage the
languageparameter and language-specific objects to customize content for different audiences.
Et voila! You've successfully built an Astro blog powered by the Hyvor Blogs Headless CMS.
Take this project further by integrating additional features using our Data API endpoints and objects.
If you encounter any challenges or need help, feel free to reach out by leaving a comment below.
Explore our tutorials on creating headless CMS blogs with other front-end frameworks and libraries: Sveltekit, Next.js, etc.
If a headless setup isn’t your preference, you can always build a traditional Astro blog with Hyvor Blogs.
Happy blogging!

Comments