In this tutorial, we will build a Nuxt blog using Hyvor Blogs as the headless CMS (Content Management System). In other words, I will walk you through all the necessary steps to build a Nuxt headless blog.
Nuxt is a free and open-source framework that you can use for building websites with Vue.js.
Before starting this Nuxt blog tutorial, here is a brief explanation about Headless CMS for beginners. However, if you aren’t a novice, skip to the tutorial.
What is a Headless CMS and Why Use It?
Simply, a headless CMS is a type of CMS that exists among us. Mainly there are two types of CMS: traditional and headless. You might know what a traditional CMS is. If not, a traditional CMS is a platform that provides tools to create, manage, and deliver digital content, typically for blogs and websites. It combines both the backend (content management) and frontend (presentation) in a single system, making it an all-in-one solution for building and maintaining websites.
But, when it comes to a headless CMS, things are contradictory. Headless CMS is a content management system that focuses solely on managing and delivering content through an API, without being tied to any specific frontend (presentation layer).

The term “headless” comes with the meaning of having no literal head: you can add any kind of head you want. In other words, with a headless CMS, developers have the total freedom and the flexibility to build and customize the front end independently using any framework or technology.
That is exactly what we are doing in this tutorial. We are using Hyvor Blogs as our headless CMS just to manage content and fetch and retrieve data via a Data API. On the other hand, we are using Nuxt to build “the head”-the front—of the blog as we prefer. In case you are wondering, you can use SvelteKit, Next.js, Astro, and so much more instead of Nuxt if you want.
For further clarification, here is an infographic to help you understand the inner workings of a headless CMS.
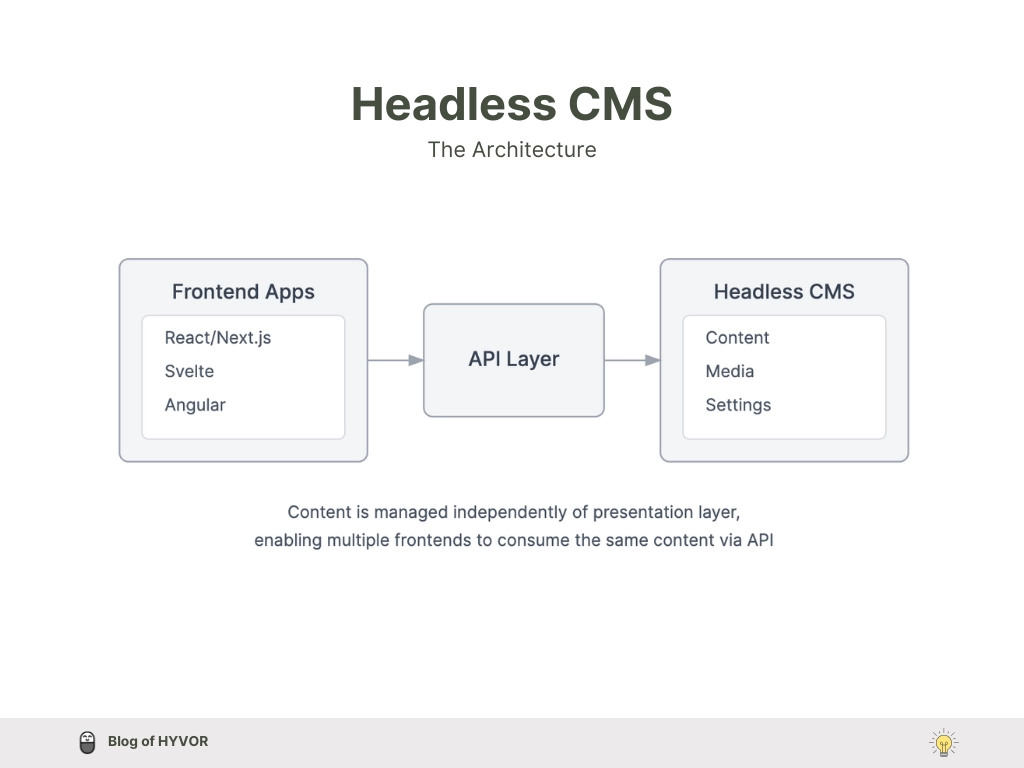
The Headless CMS market size is valued at around USD 605 Million in 2022 and is expected to grow to USD 3.8 Billion in 2032.
Why Hyvor Blogs?
Hyvor Blogs is an all-in-one headless CMS tailored especially for blogging. It provides you the perfect space to write, and manage your blog posts, including features like comments, memberships, and newsletters with Hyvor Talk, and offers an easy Data API approach to integrate your blog with any front-end framework or platform like Nuxt.
As a Hyvor Blogs user, you get to experience the following features, especially from Hyvor Blogs as a headless CMS. For example,
Multi-language blogging including RTL language blogging.
User-friendly, team-friendly console with markdown-friendly rich text editor
Data API for headless cms
Hosting privileges: subdomain, custom domain, sub-directory, or anywhere you like.
Developer-friendly: console API, delivery API, webhooks, etc.
Fast blogging and so much more.
This is the Hyvor Blogs console. This is where you will write, edit, collaborate with your team, and manage all your blog content.
Together, Nuxt and Hyvor Blogs enable you to create a high-performing, static/dynamic astro blog where content management and front-end customization work seamlessly. This duo will be a perfect integration for your headless CMS.
Now, let’s get started with the tutorial. First, we are going to set up a Nuxt project on our computer.
Step 1: Setup a Nuxt Blog Project
Prerequisites
Node.js -
18.xor newer (but Nuxt recommends the active LTS release)Text editor - There is no IDE requirement, but Nuxt recommends Visual Studio Code with the official Vue extension (previously known as Volar) or WebStorm, which, along with other JetBrains IDEs, offers great Nuxt support right out-of-the-box.
Terminal - To run Nuxt commands
Create your new Nuxt blog project. Run the following command in your terminal. Replace your preferred blog project name with
<project-name>.
1npx nuxi@latest init <project-name>Start the development server: Open your project from your IDE, and run the following command to start the development server.
1npm run devThis will start the development server and you can see your new project using http://localhost:3000/ .
It’ll look something like this.
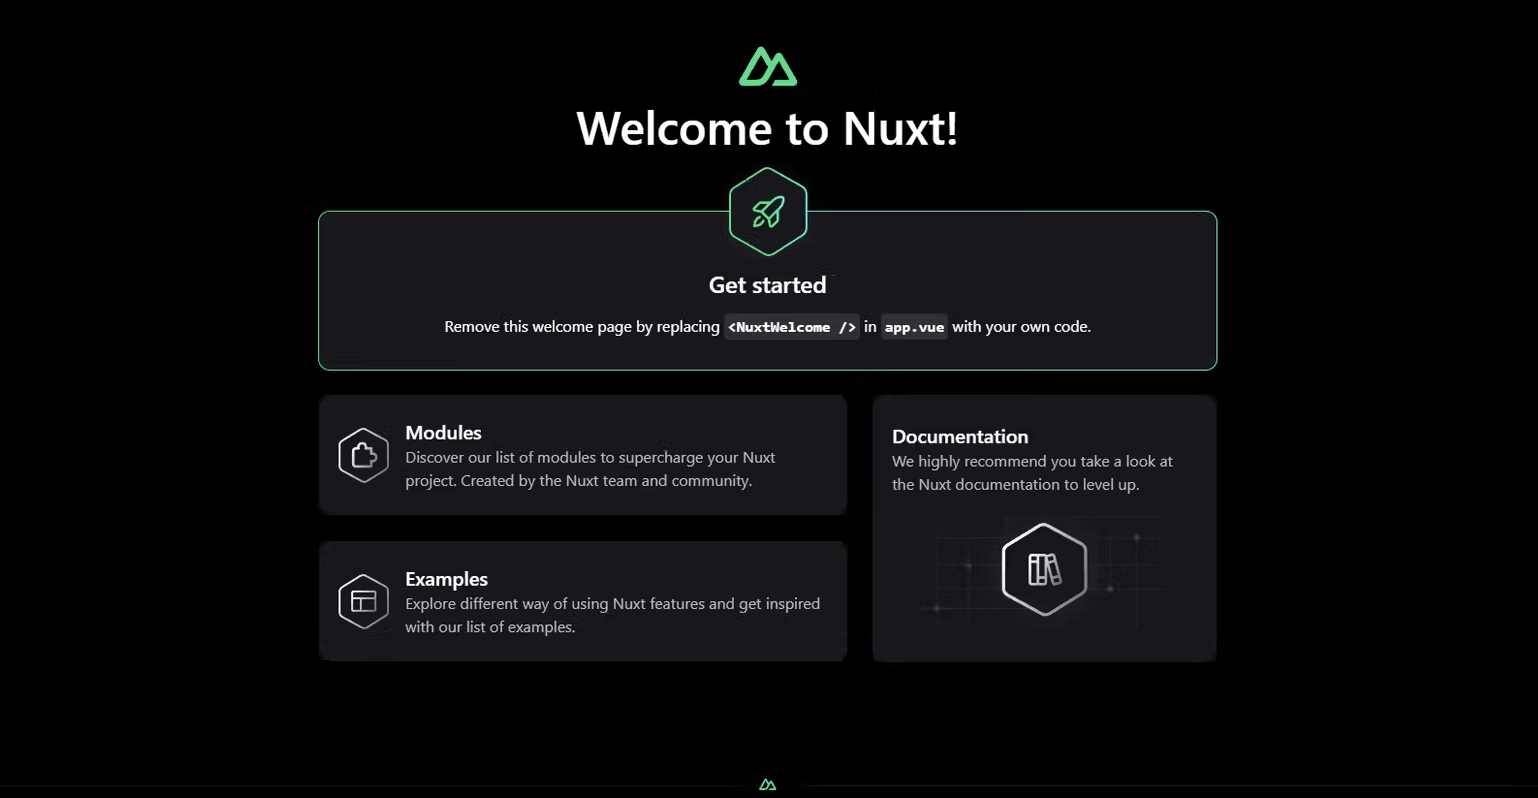
This is what our project hierarchy looks like initially.
1my-nuxt-blog/ 2├── assets/ 3├── composables/ 4│ └── useHyvorBlogs.ts 5├── public/ 6│ └── favicon.ico 7│ 8├── services/ 9│ └── hyvorBlogs.ts 10│11├── styles/ 12│ ├── main.css 13│ └── tailwind.css 14│15├── tests/ 16│ ├── unit/ 17│ ├── integration/ 18│ └── e2e/ 19│20├── .env 21├── .gitignore 22├── nuxt.config.ts 23├── package.json 24├── README.md 25└── tsconfig.json Now we have successfully set up our Nuxt blog project.
Step 2: Create your Blog at Hyvor Blogs
We have to create a blog space to start content writing and content management for our blog. To do that, go to the Hyvor Blogs console and create your blog.

Once completed Go to Console -> Settings -> Hosting -> Subdomain. Copy your blog’s subdomain.
For this tutorial, my blog subdomain is headless-cms .
For our next steps, we are going to use Hyvor Blogs Data API to fetch and render blog data. Here is the Data API documentation of Hyvor Blogs for your reference.
The Hyvor Blogs Data API provides responses in JSON format, with all endpoints using the HTTP GET method. The base path for the API is https://blogs.hyvor.com/api/data/v0/{subdomain}, in this case, https://blogs.hyvor.com/api/data/v0/headless-cms.
Let’s continue.
Step 3: Index page/ Home page
This is the step where we fetch post data and display it all on the blog's index page. Originally, Nuxt did not have any folders or files for layouts or components (but they have predefined components serving). So, first of all, we have to create several folder structures in our project to store our components, service files, and routes.
Create new folders named as
/pages,/components,/services,/layouts. After these folders are created, this will be our project hierarchy.
1├── README.md 2├── app.vue 3├── components --------------------------- components dir (store component files) 4├── layouts --------------------------- layouts dir (layout files) 5├── node_modules 6├── nuxt.config.ts 7├── package-lock.json 8├── package.json 9├── pages --------------------------- pages dir (pages/routes)10├── public11├── server12├── services --------------------------- services dir (API calls services)13└── tsconfig.jsonGo to
layoutsfolder and create a file nameddefault.vue. This is where we create the whole layout of our blog: page layout.I’m adding a header and a footer for our layout. Note that I have added the header and footer as components in the
componentsfolder. Thus we will be simply importing those indetault.vueas follows.
1<template> 2 <div> 3 <!-- Common Header --> 4 <Header /> 5In
/pagesfolder, create a new file namedindex.vue. This is where we write codes for our index page. In theindex.vue, just add some dummy text to check if everything works perfectly.
1<template>2some dummy texts here3</template>Go to
app.vue, remove the existing code and edit it as shown below to make the layouts and page routings work.
1<template>2 <div>3 <NuxtRouteAnnouncer />4 <NuxtLayout>5 <NuxtPage></NuxtPage>6 </NuxtLayout>7 </div>8</template>Now see whether the added dummy text and the layout you created display correctly.
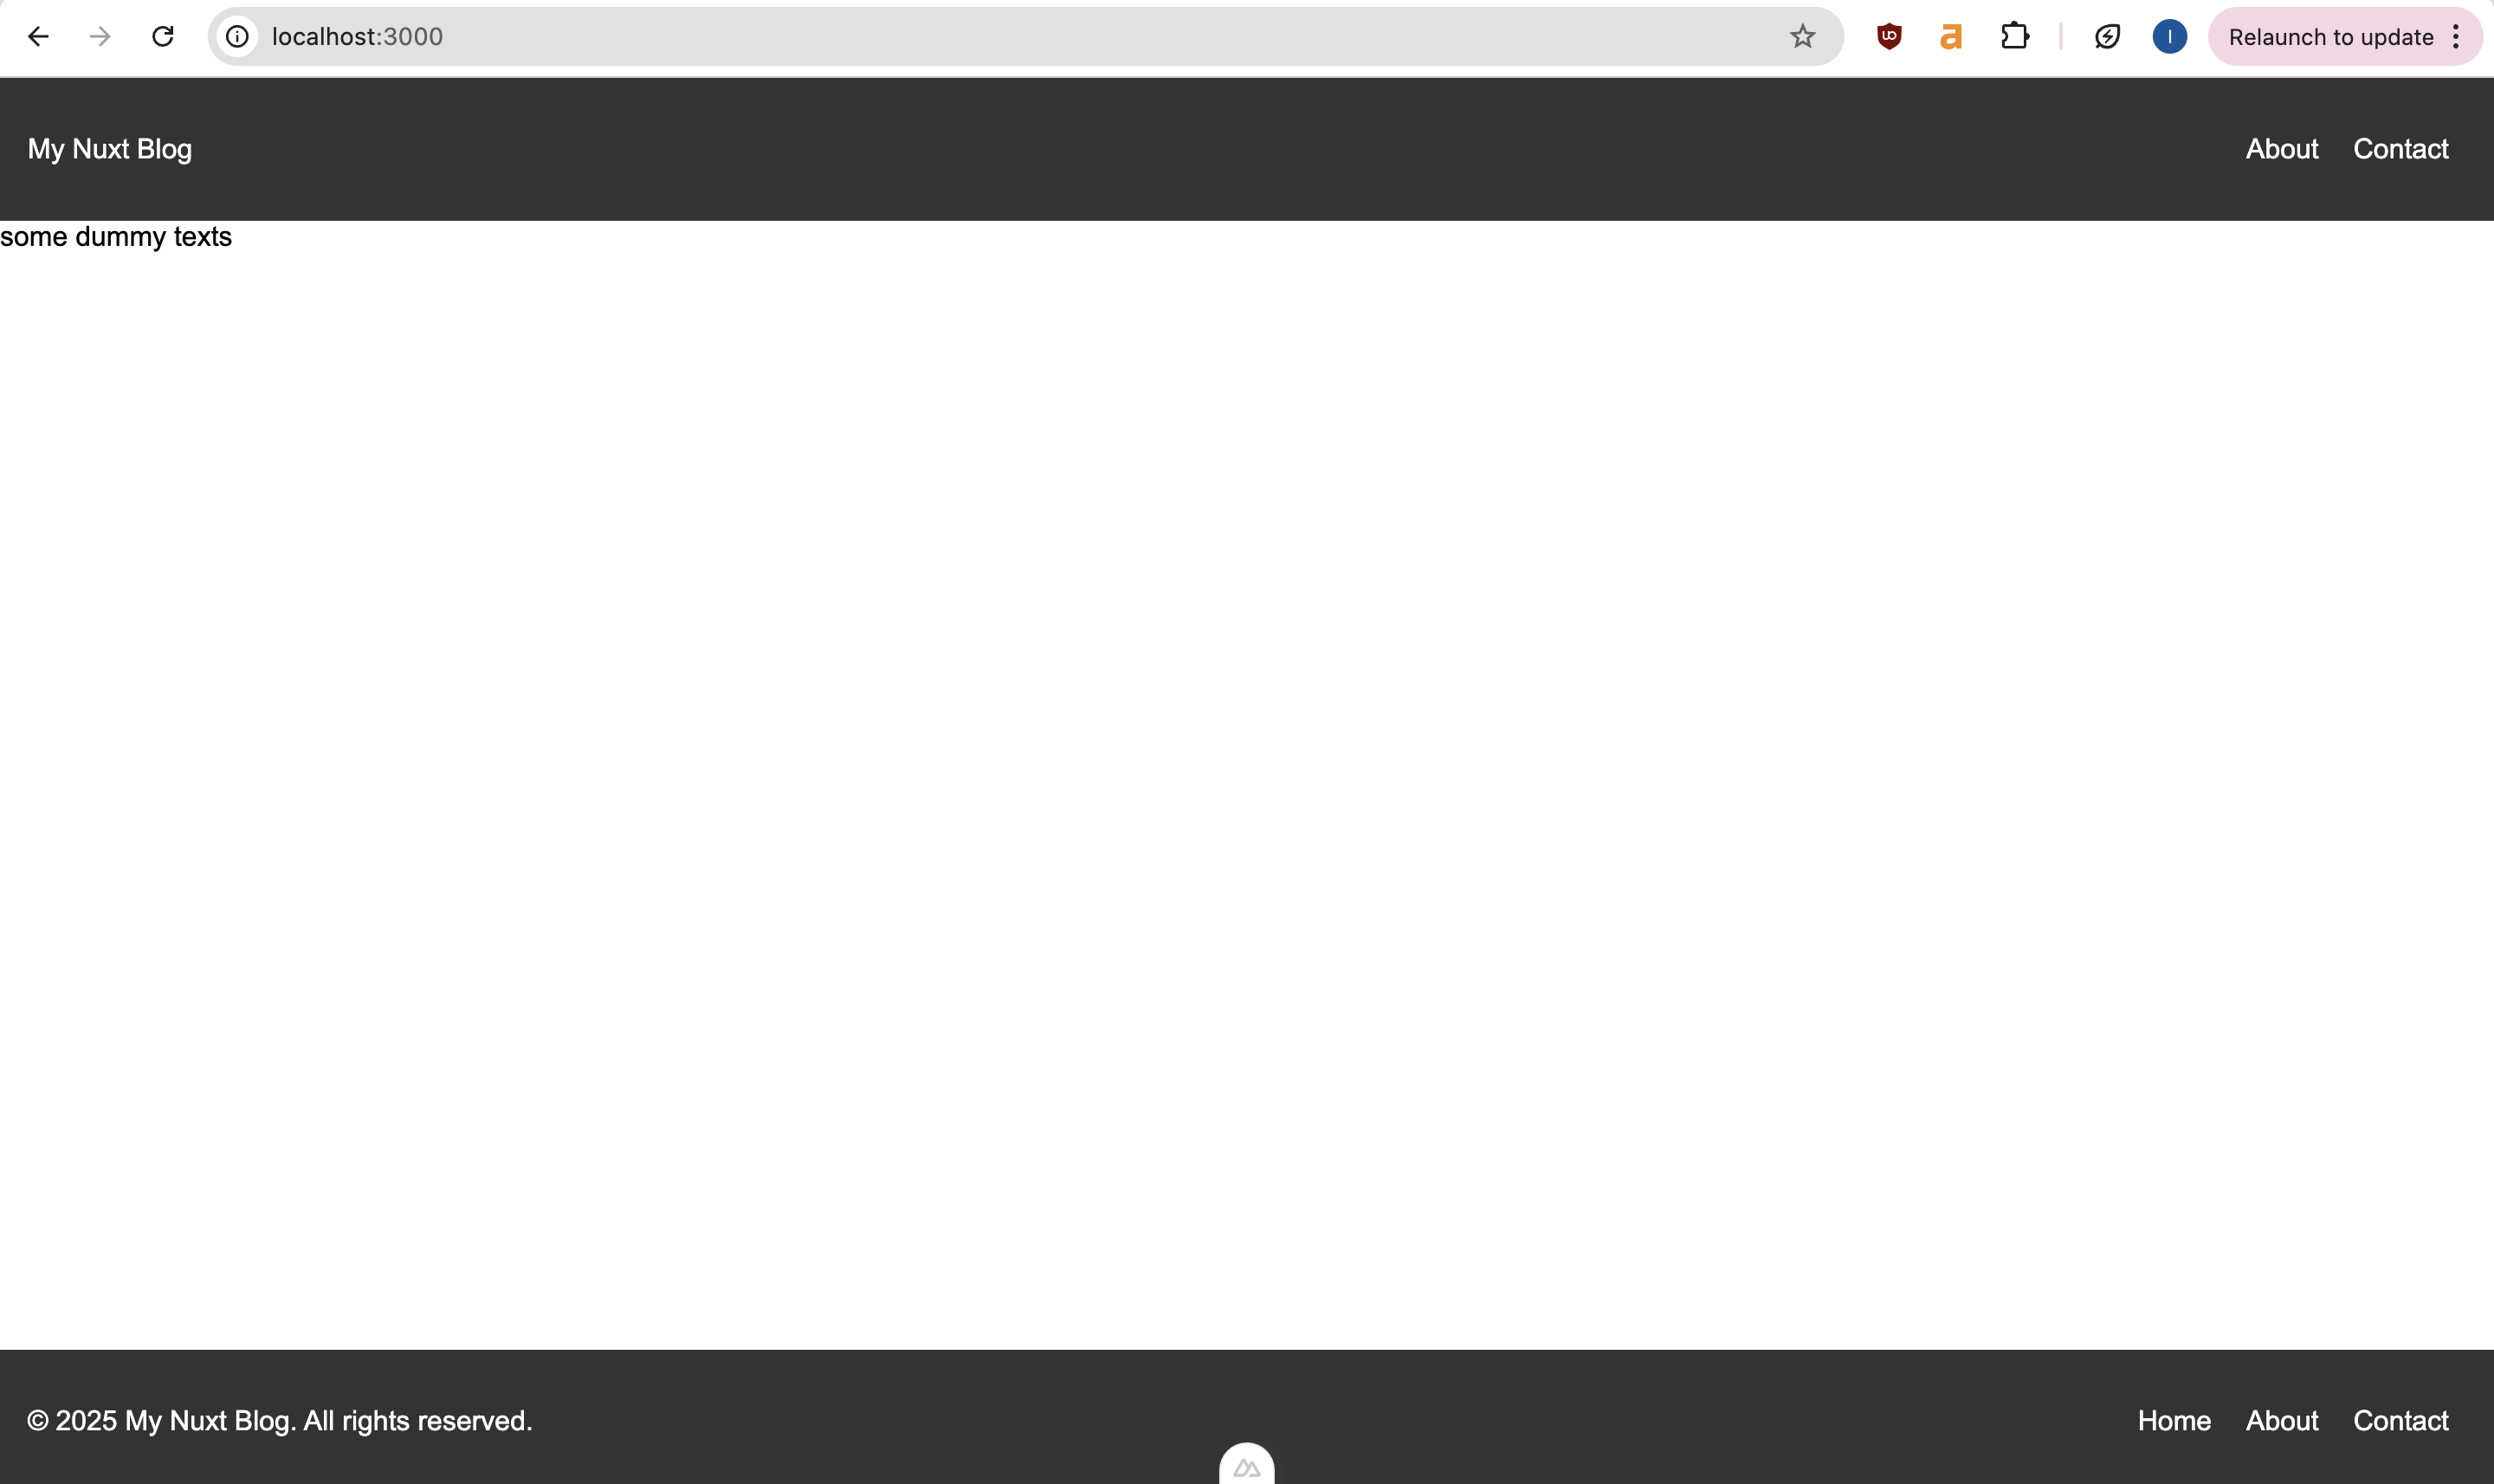
Create a file named
fetchPosts.tsin theservicesfolder. This is where we call the Hyvor Blogs data API to fetch the list of all posts of our blog using the/postsendpoint.
1export async function fetchPosts() { 2 try { 3 const response = await fetch( 4 "https://blogs.hyvor.com/api/data/v0/headless-cms/posts" 5 ); 6 if (!response.ok) { 7 throw new Error("Failed to fetch posts"); 8 } 9 const res = await response.json();10 return res.data;11 } catch (error) {12 console.error(error);13 return [];14 }15}Now, let’s create a component to show all those posts on our index page.
Create a file named
BlogPostCard.vuein thecomponentsfolder.
1<template> 2 <article class="post-card"> 3 <h2>{{ post.title }}</h2> 4 <p>{{ post.description }}</p> 5 <NuxtLink :to="`/${post.slug}`">Read more</NuxtLink> 6 </article> 7</template> 8Got to the
index.vueand retrieve all the data we fetched using thepostsendpoint usingfetchPosts.ts. We are using our BlogPostCard component here.
1<template> 2 <div> 3 <BlogPostCard v-for="post in posts" :key="post.id" :post="post" /> 4 </div> 5</template> 6Now here is what our index page looks like after displaying post data. PS: Don’t mind my CSS svp😜.
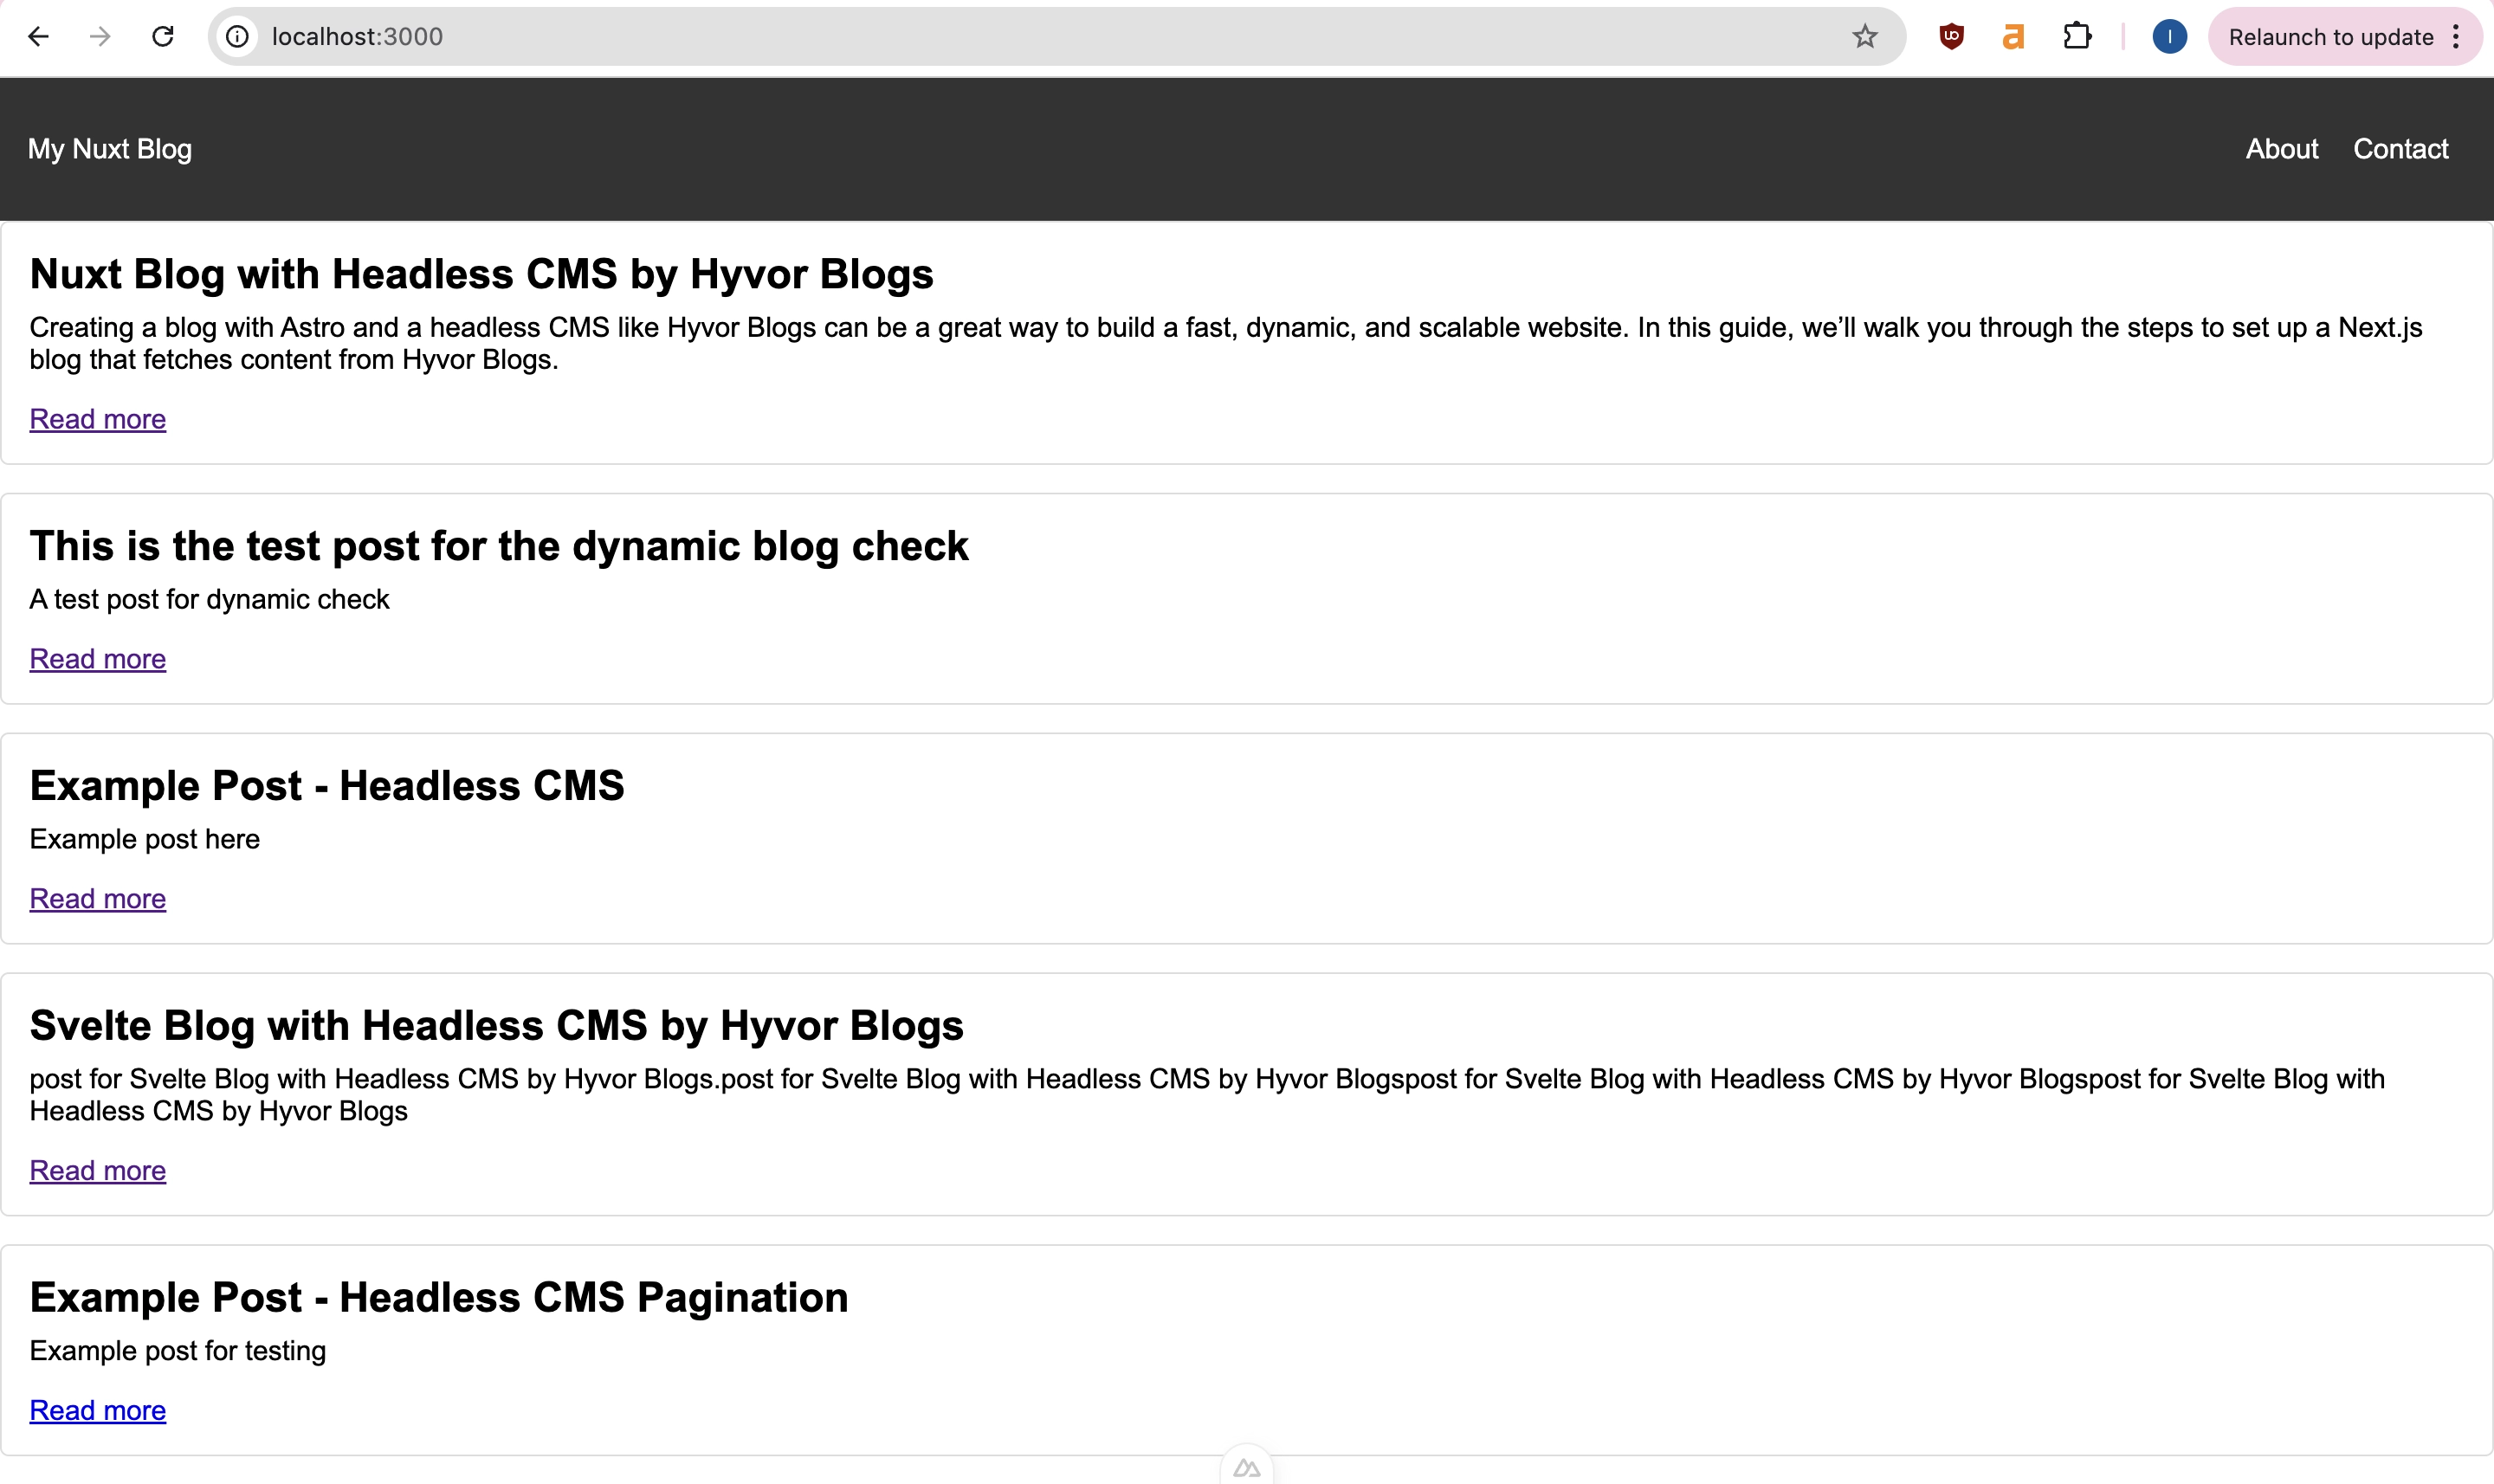
Note: Vue's reactivity system works best when state changes are made within lifecycle hooks like onMounted. If you place the fetch outside of onMounted, you could run into scenarios where Vue isn't aware of changes to posts and loading until much later. When you call fetchPosts() inside onMounted, it guarantees Vue will properly track the state and update the UI when data is loaded.
Step 4: Post Page.
In this step, we are going to fetch and display the content of a particular post in the URL /post-slug .
Create a typescript file
fetchPost.tsinservicesfolder.
We will be fetching post data by its slug.
1export async function fetchPost(slug: string) { 2 try { 3 const response = await fetch( 4 `https://blogs.hyvor.com/api/data/v0/headless-cms/post?slug=${slug}` 5 ); 6 if (!response.ok) { 7 throw new Error("Failed to fetch post"); 8 } 9 return await response.json();10 } catch (error) {11 console.error(error);12 return null;13 }14}And, now we are going to create a route for our post pages. Goto pages folder.
Create a file named
[slug].vue:/pages/[slug].vue.
And then using the fetchPosts function, we are retrieving and displaying our post content.
1<template> 2 <div> 3 <div v-if="loading">Loading post...</div> 4 <div v-else-if="error">{{ error }}</div> 5 <div v-else-if="post"> 6 <h1>{{ post.title }}</h1> 7 <div v-html="post.content"></div> 8 </div> 9 </div>10</template>11That’s it! Here is our post page without CSS.

Step 5: Pagination
It’ll be nice to have a pagination for our Nuxt blog right? For pagination, we are using limit param, page param and pagination object for this step.
We’ll create a structure where paginated pages are accessible under URLs like /page/1, /page/2, etc. Here's how we can achieve this step by step:
Create a dynamic page under
/pages/page/[page].vueto handle paginated routes. This will also handle the/route (/should behave like/page/1).Create a file named
Pagination.vuein your components folder: We are creating a component for pagination.
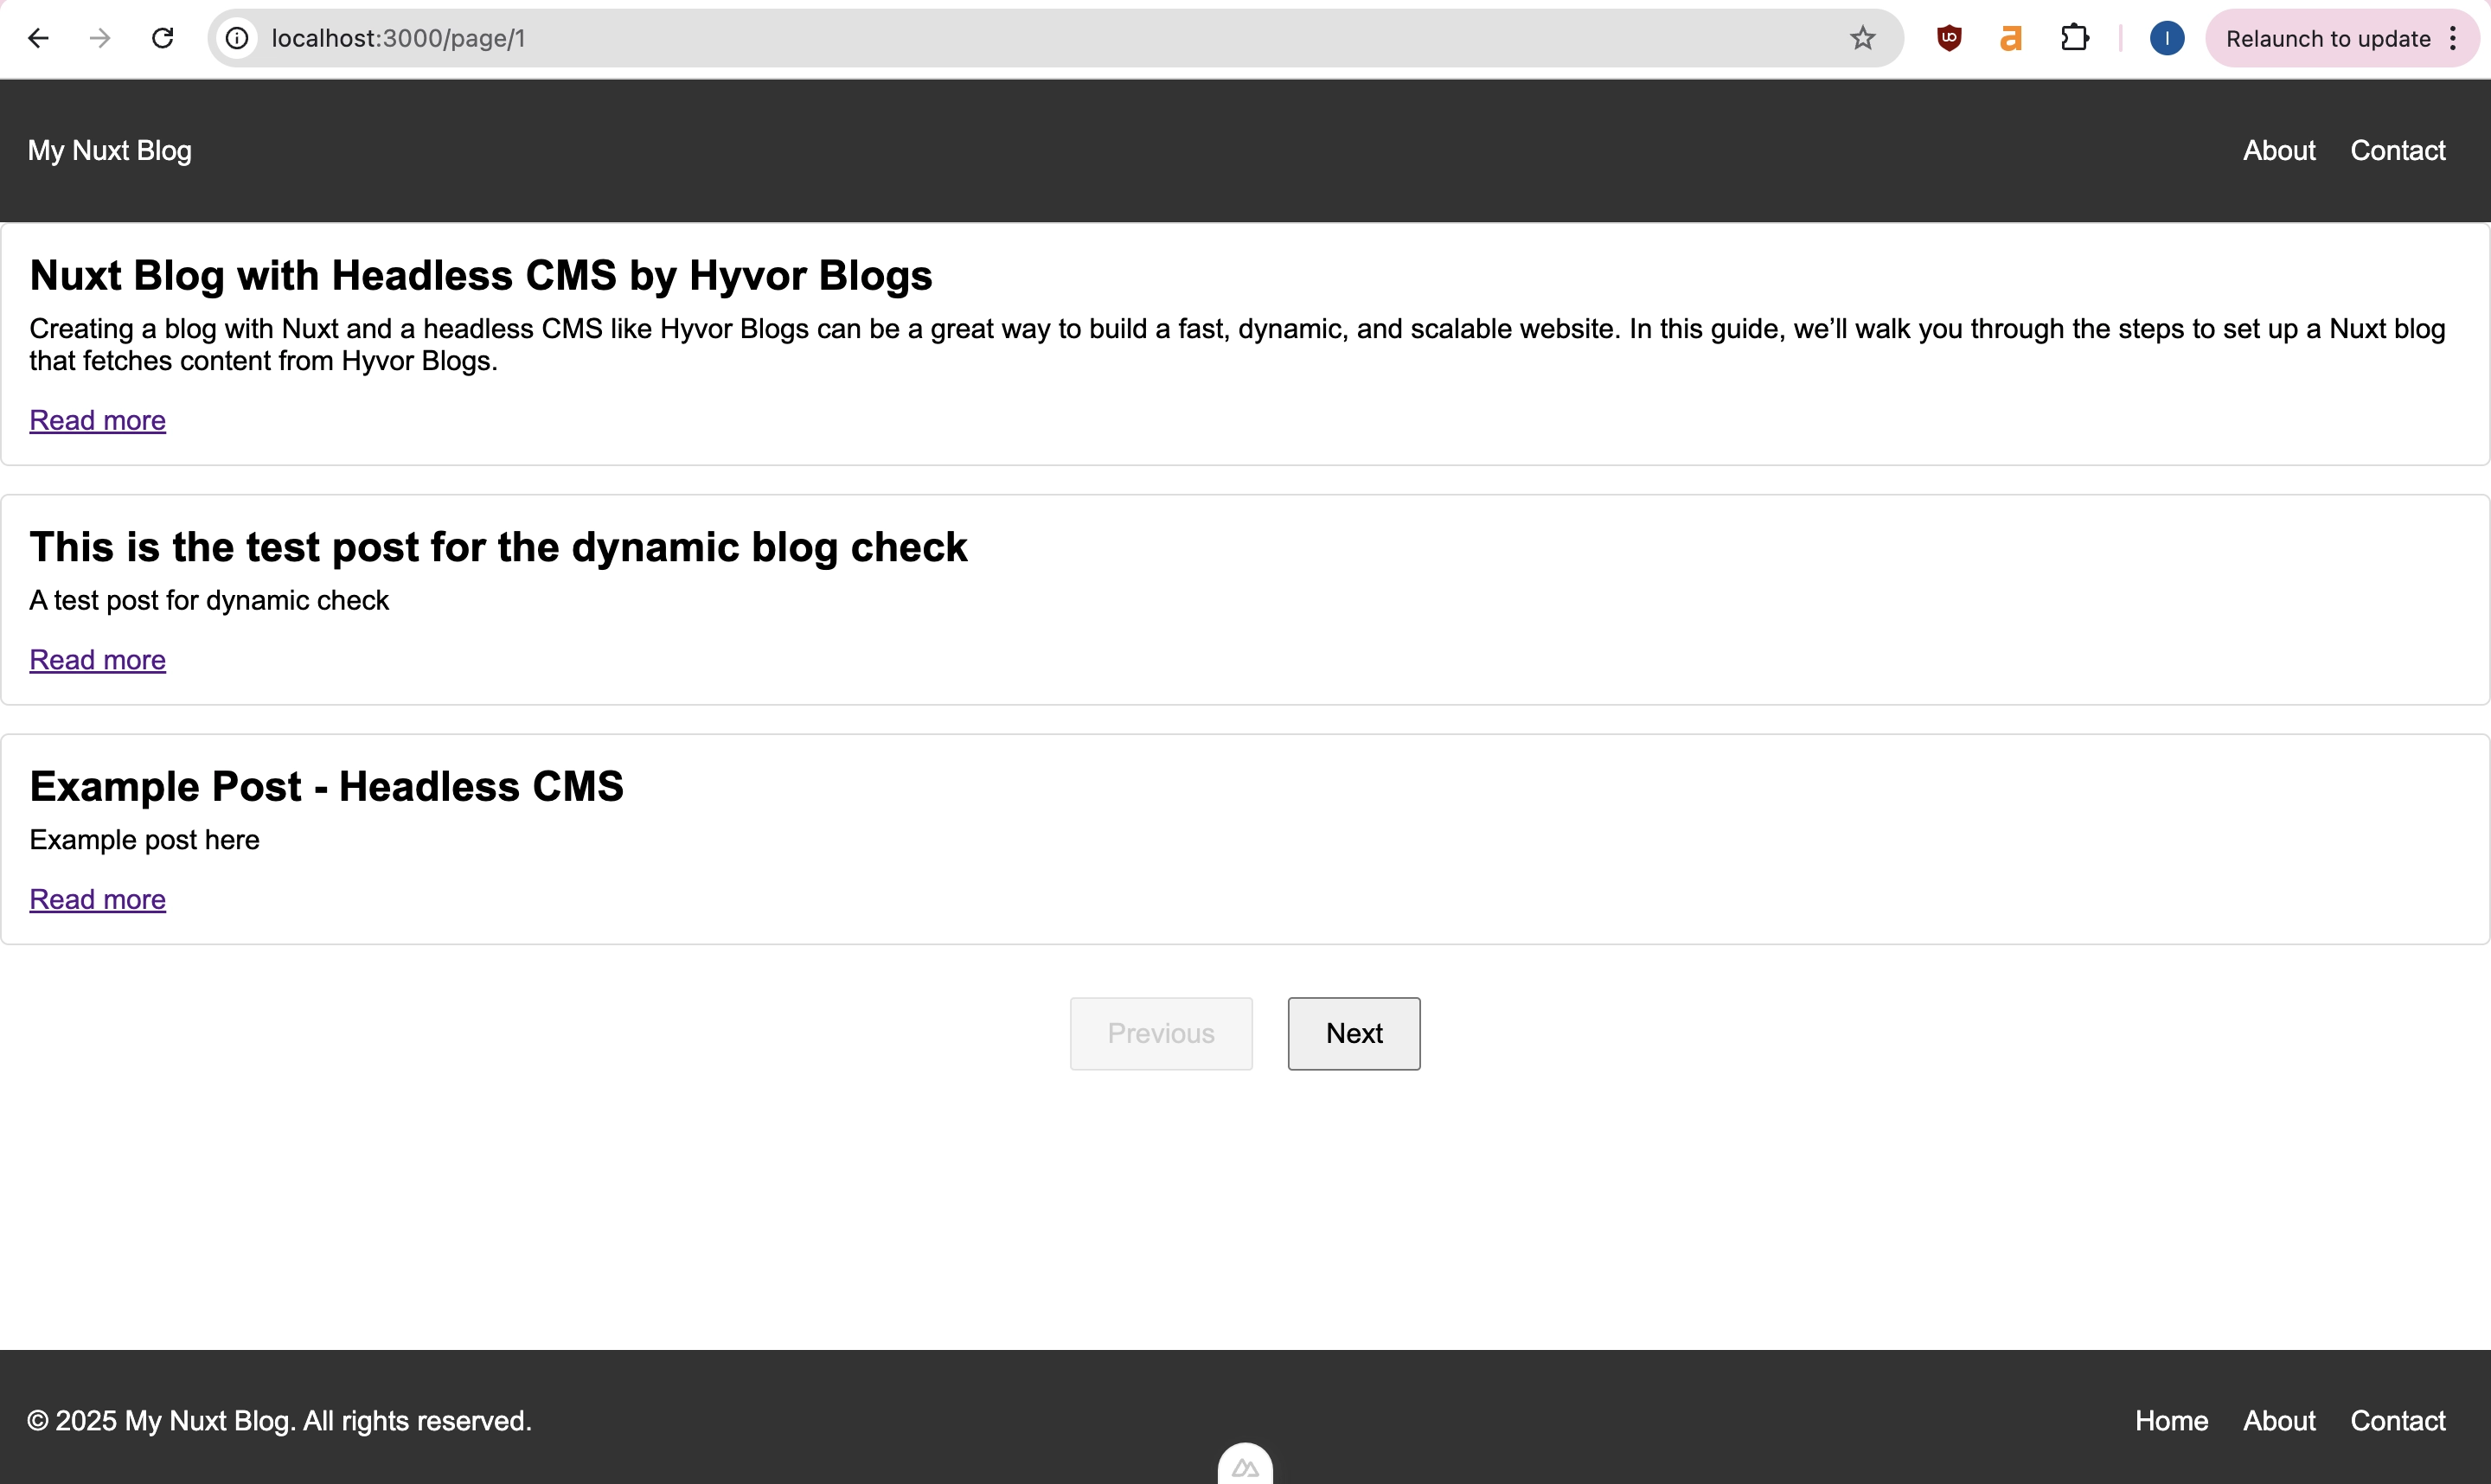
1<template> 2 <div class="pagination"> 3 <button 4 :disabled="!pagination.page_prev" 5 @click="goToPage(pagination.page_prev)" 6 > 7 Previous 8 </button> 9 <button10 :disabled="!pagination.page_next"11 @click="goToPage(pagination.page_next)"12 >13 Next14 </button>15 </div>16</template>17Create another service file to manage the pagination function.:
/services/fetchPaginatedPost.ts.
1export async function fetchPaginatedPosts(page = 1, limit = 3) { 2 try { 3 const response = await fetch( 4 `https://blogs.hyvor.com/api/data/v0/headless-cms/posts?limit=${limit}&page=${page}` 5 ); 6 if (!response.ok) { 7 throw new Error("Failed to fetch posts"); 8 } 9 const res = await response.json();10 return res; // Contains "data" and "pagination"11 } catch (error) {12 console.error(error);13 return { data: [], pagination: null };14 }15}Go to your
[page].vueand let’s handle how paginated pages work.
1<template> 2 <div> 3 <div v-if="loading">Loading posts...</div> 4 <div v-else-if="error">{{ error }}</div> 5 <div v-else> 6 <BlogPostCard v-for="post in posts" :key="post.id" :post="post" /> 7 <Pagination :pagination="pagination" /> 8 </div> 9 </div>10</template>11We have to make a slight change in index.vue file to manage the behavior of our index page to be as same as /page/1 .
Go to
index.vuefile and make the following changes. I have added the redirect to/page/1.
1<template> 2 <div> 3 <BlogPostCard v-for="post in posts" :key="post.id" :post="post" /> 4 </div> 5</template> 6And you can do the redirect the other way around too if you want (/page/1 to /).
Et voila! The pagination is ready.
Step 6: Build and Deploy
After you have created everything you need for your blog project, you must build the blog before deploying it.
Build the blog, and run the following command.
1npm run buildYou can preview the build using the following command.
1node .output/server/index.mjsThen visit http://[::]:3000 to view the build preview.
For deploying, there are several methods that Nuxt provides you for hosting such as Static, Server Side Rendering (SSR), and more. Refer to their documentation for further steps.
Tips
To add an author’s page, you can use the
authorsendpoint which returns the authors object.To add a tags page, you can use the
tagsendpoint which returns the tags object.To do multi-language blogging, you can use
languageparam and language object.

Yay! You've built a Nuxt blog using a Headless CMS: Hyvor Blogs. You can expand this project using our Data API endpoints and objects.
You can also check out our headless CMS tutorials that are written for other front-end frameworks and libraries.
If you have any questions, please comment below; I’d be happy to help.
Happy Blogging!

Comments