This article explores two ways to add a blog to your website: using Hyvor Blogs for seamless integration and full customization or Medium for quick publishing. We highlight why Hyvor Blogs is the superior choice, offering SEO tools, branding control, and engagement features. Visit the blog of Hyvor to learn more about starting and growing a profitable blog.
Struggling to add a blog to your website?
A blog can boost your website’s visibility, attract more visitors, and establish your authority. But with so many options, choosing the right way to add one can be confusing. Should you use a dedicated blogging platform or integrate a custom solution?
In this Hyvor article, we’ll walk you through two simple methods to add a blog to your website. Whether you need a quick, hassle-free setup or a more customizable approach, we’ll help you find the best fit.
But first…
Why listen to us?
At Hyvor, we specialize in helping individuals and businesses create and grow their blogs effortlessly. Since launching in 2020, our tools; Hyvor Blogs and Hyvor Talk, have powered countless blogs and millions of conversations worldwide. With our experience, we know what works, and that’s why we’re here to guide you through the best ways to add a blog to your website.
What does it mean to add a blog to your website?
Adding a blog means creating a space on your site, usually as a subdirectory (e.g., yourwebsite.com/blog) or subdomain (e.g., blog.yourwebsite.com), where you can publish content like news, tutorials, updates, or case studies. It keeps your content under one roof, which is better for SEO, brand consistency, and user experience.
Why is adding a blog to your website important?
Boosts SEO: Regularly posting fresh content improves your search engine rankings, making it easier for potential visitors to find your site. With Hyvor Blogs, you can automate SEO optimization and handle meta tags and sitemaps for better visibility.
Builds Authority: Sharing valuable insights positions you as an expert in your field, fostering trust with your audience.
Enhances Engagement: A blog allows direct interaction with your audience through comments, feedback, and discussions. With Hyvor Talk, you can integrate a privacy-friendly commenting system that boosts engagement and community interaction.
Supports Marketing Efforts: Your blog can integrate with newsletters, social media, and other channels to strengthen your marketing strategy.
Add a Human Touch: Blogs show the people behind the product. Personal stories, updates, and lessons create a relatable, memorable brand experience.
How to add a blog to your website (step-by-step)
Method 1: Using Hyvor Blogs (Recommended)
At Hyvor, we believe in providing simple, user-friendly tools to help you create and manage your blog effortlessly. Hyvor Blogs is an all-in-one blogging platform designed to make blogging easy, whether you're starting a new site or adding a blog to your existing website.
Here's how you can do it step by step.
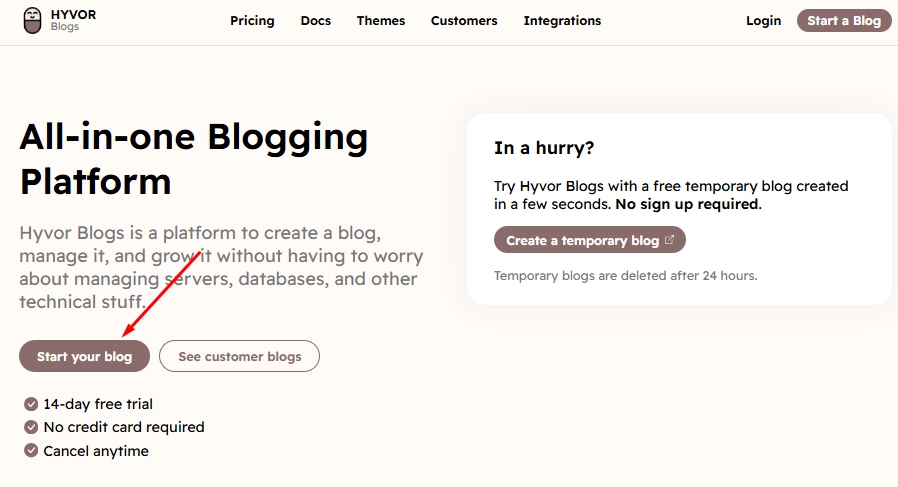
Step 1: Create a Hyvor Blogs account
Sign up: Visit the Hyvor Blogs website and click on "Start your blog."
Complete the registration process by providing the necessary details.
We offer a 14-day free trial with no credit card required so you can get used to our platform before upgrading.
Step 2: Start a new blog
After signing up, you'll be prompted to name your blog and enter a subdomain.
Choose a name: Input a name that suits the purpose of your blog. Keep in mind that this may be visible to readers.
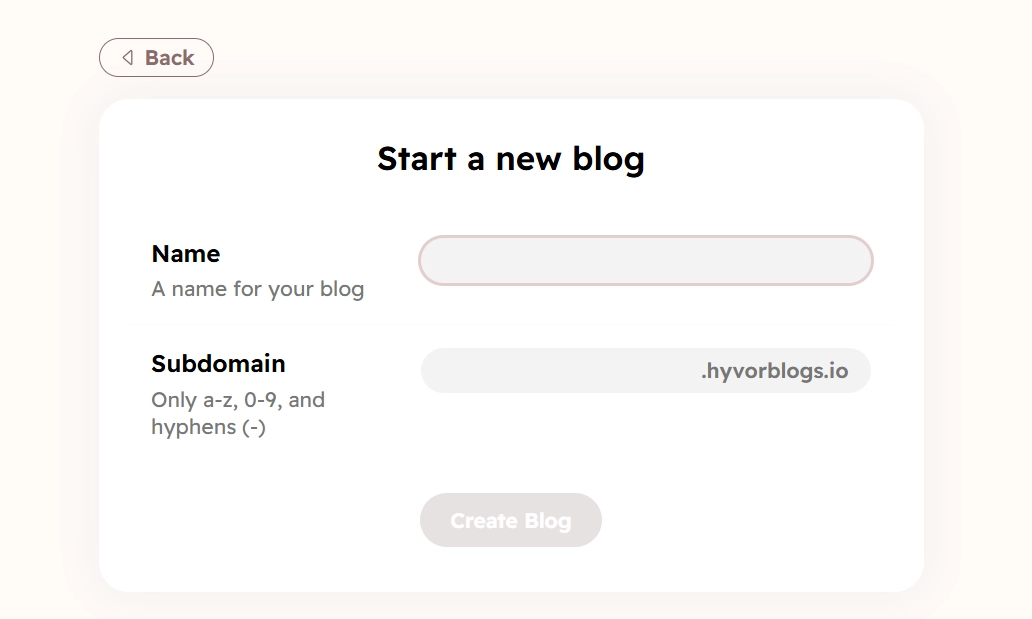
Choose a name Set your subdomain: This will automatically be used as the subdomain, but you can change it. The subdomain will be appended to “.hyvorblogs.io.” You are limited to alphabet characters, numbers, and hyphens (-).
Example:
yourblogname.hyvorblogs.io.After filling in the details, make sure the subdomain is available, then click the “Create Blog” button.
The system will take a moment to set up your blog.
Step 3: Familiarize and customize your blog
Once your blog is created, you'll be directed to your dashboard, where you can customize your blog:
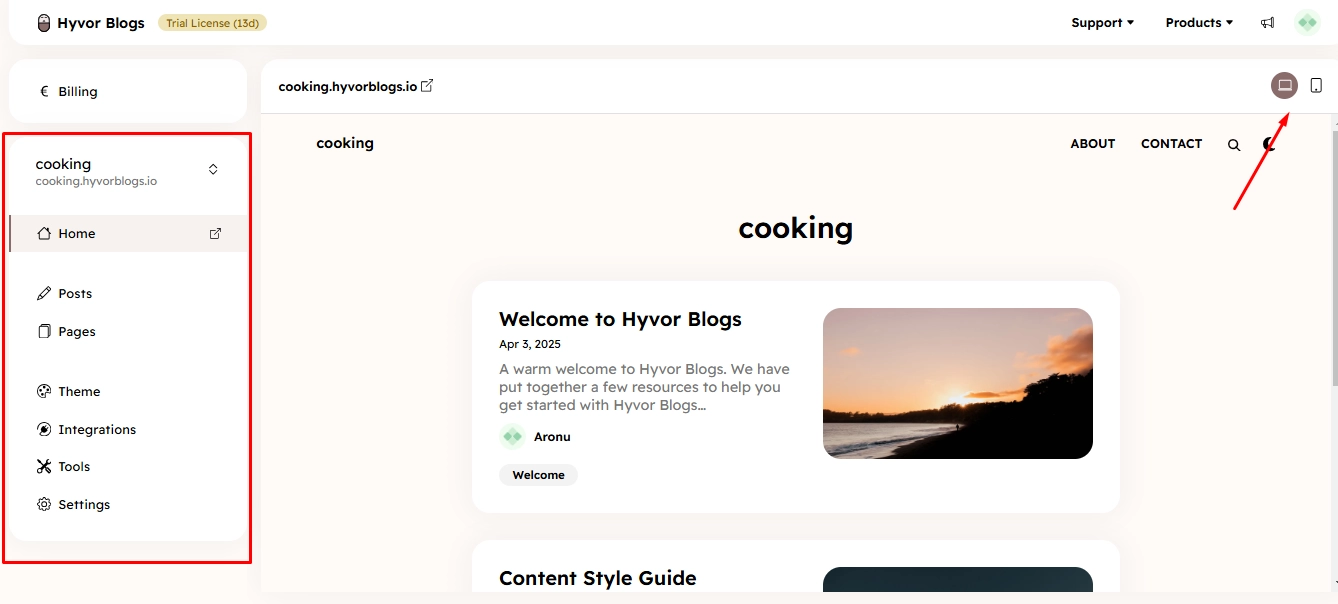
Switch views: On the top right, you'll see two buttons to switch between desktop and mobile views while customizing your blog.
Left menu options:
Home: Takes you to the default admin end of your blog.
Posts and Pages: Add and manage your blog posts and pages. Hyvor Blogs includes built-in SEO features to optimize your content for better visibility and search engine ranking.
Themes: Use this to customize your blog’s design.
Integrations: You can integrate Hyvor Talk for newsletters, membership, and commenting features.
Tools: This menu includes the media library, link analysis tool, and import/export options.
Settings: Here, you can change your blog’s name, enable multi-language support, and adjust other settings.
Customization options: Customizing your blog is straightforward, though full instructions are available in the Hyvor Blogs Documentation.
Step 4: Configure hosting settings
Hyvor Blogs can be integrated with almost any website, including those built on:
To configure your hosting setting and embed the blog into your existing site, follow these instructions:
Go to the "Settings" menu > "Hosting" in the Console.
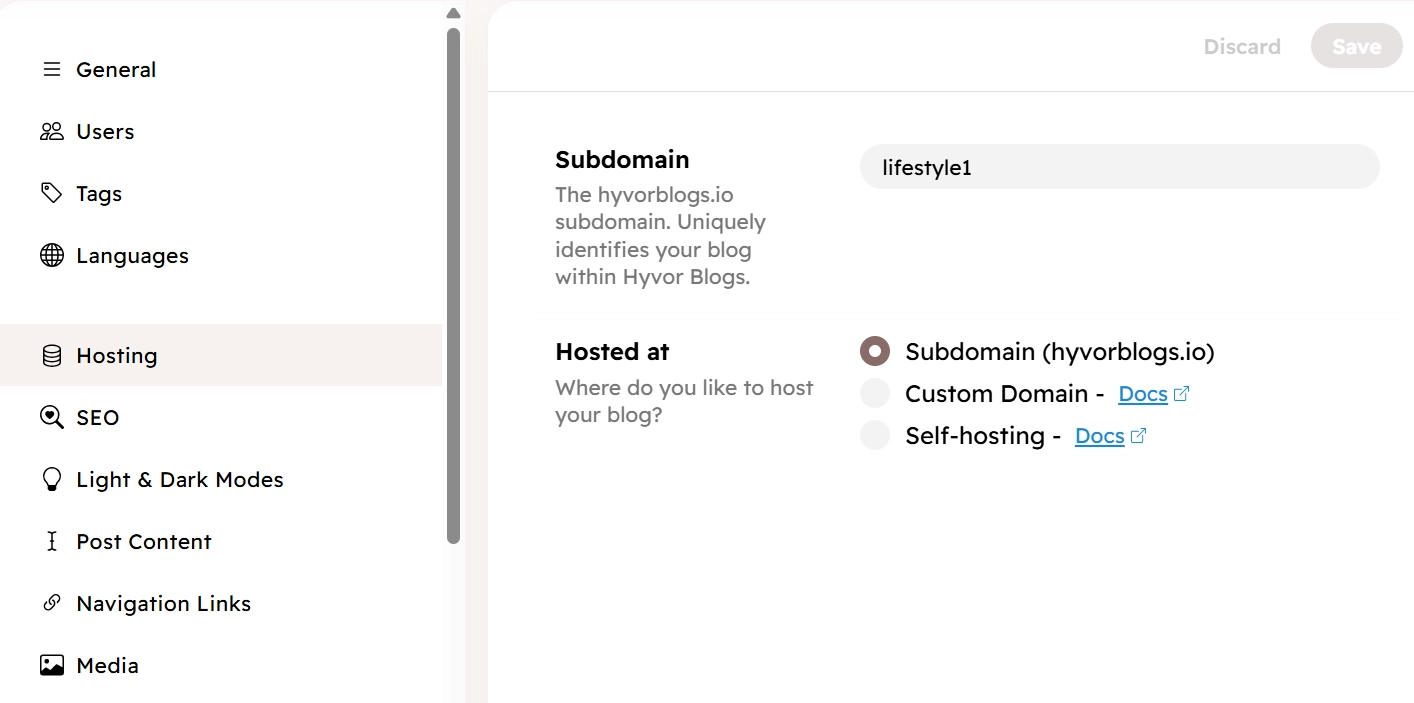
Hosting
You see 3 hosting options:
Subdomain: The default setting.
Custom domain: Example: blog.example.com
Self-hosting: Example: example.com/blog
Set the "Hosting At" option to "Custom domain."
Type the full domain name (example.com or blog.example.com) in the custom domain field and save. Do not add https:// or anything else other than the domain name.
Toggle the Redirect Subdomain button to ensure users are redirected to your new blog URL.
Click "Save" in the top right corner.
Voila! Your blog is now available at your custom domain.
Now you can visit the custom domain and see if everything is working correctly. Hyvor Blog will auto-generate an SSL certificate for your domain.
Method 2: Using Medium
Medium is a popular free blogging platform known for its simplicity and wide audience. While it’s not as customizable or feature-rich as Hyvor Blogs, it still offers an easy way to share your content with a broad readership.
Here’s how you can add a Medium blog to your website.
Step 1: Create a Medium account
First, sign in to your Medium account.
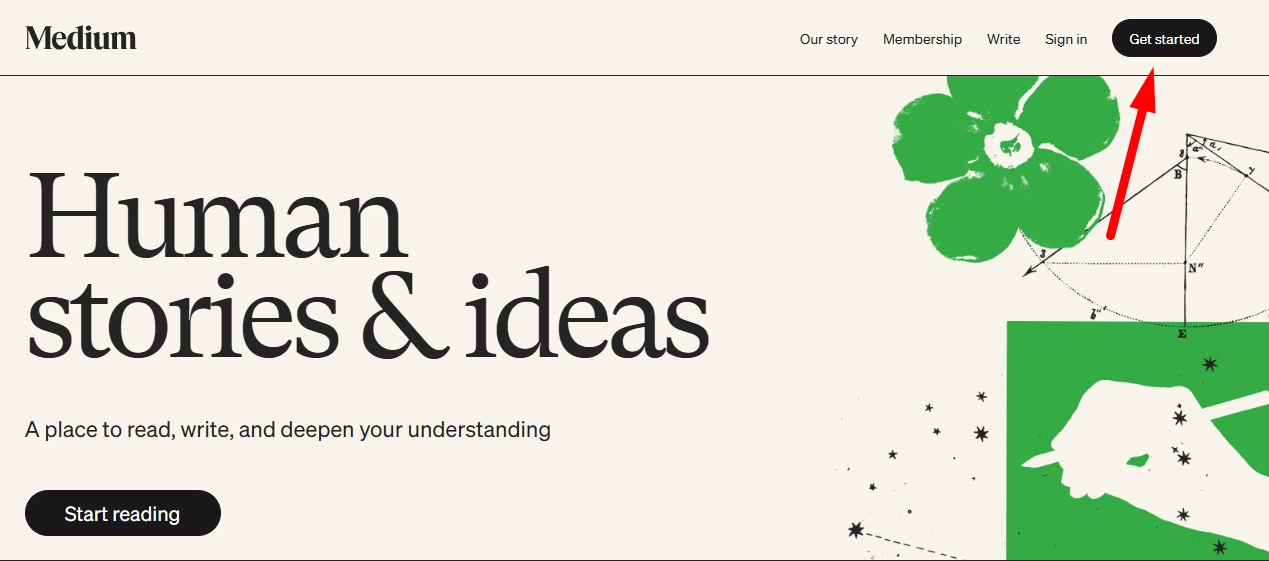
If you don't have one, you'll need to create it by visiting medium.com and clicking the “Get Started” Button.
Step 2: Select the blog post
If you have already written a blog post, click on your profile icon in the top-right corner of your Medium account and select "Stories" from the drop-down menu. This will take you to a list of your past posts.
If you haven't written a post yet, skip this step and move on to creating new content.
From your list of stories, choose the post you'd like to share on your website. Click on the title of the post to open and preview it.
Step 3: Write and publish your blog posts
If you’ve already selected a post, you can skip this step.
Click on "Write" at the top of Medium's homepage to start a new post.
Use Medium's intuitive editor to compose your content, format text, and add images or embeds.
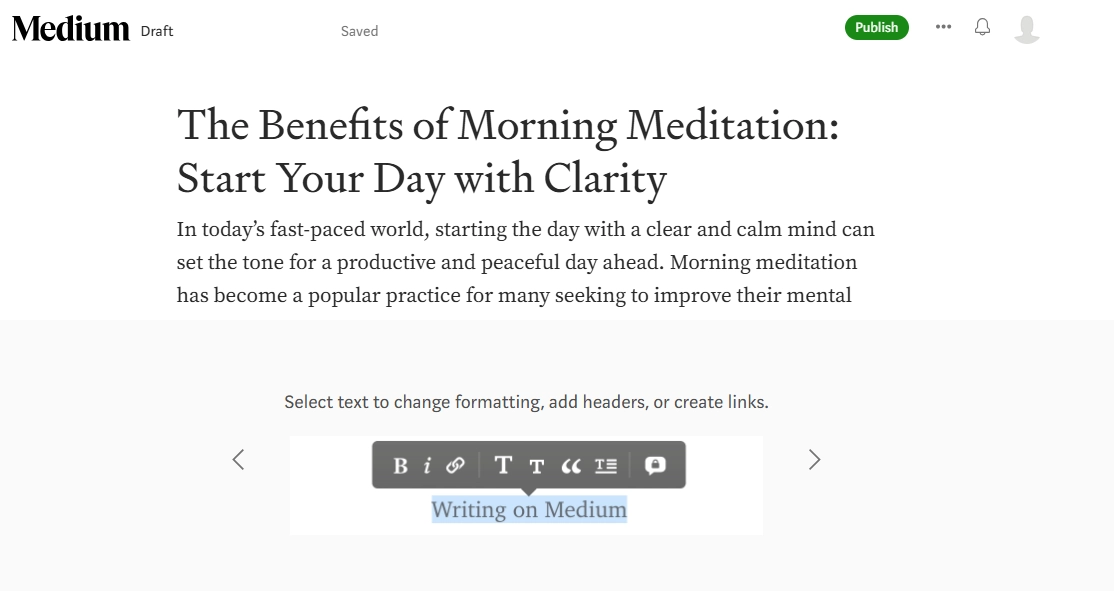
Medium Editor Once satisfied, click "Publish".
You'll be prompted to add a cover image and select a topic tag to help categorize your post.
After completing these details, click “Publish Now” to make your post live.
You will be taken to the post preview page.
Step 4: Share the blog post
In the post preview page, look for the "Share" button. This is usually located at the top or bottom of the post. Click on the share icon, which will open sharing options.
From the available options, select "Copy link." This will copy the URL of your Medium post to your clipboard, which you'll need for the next step.
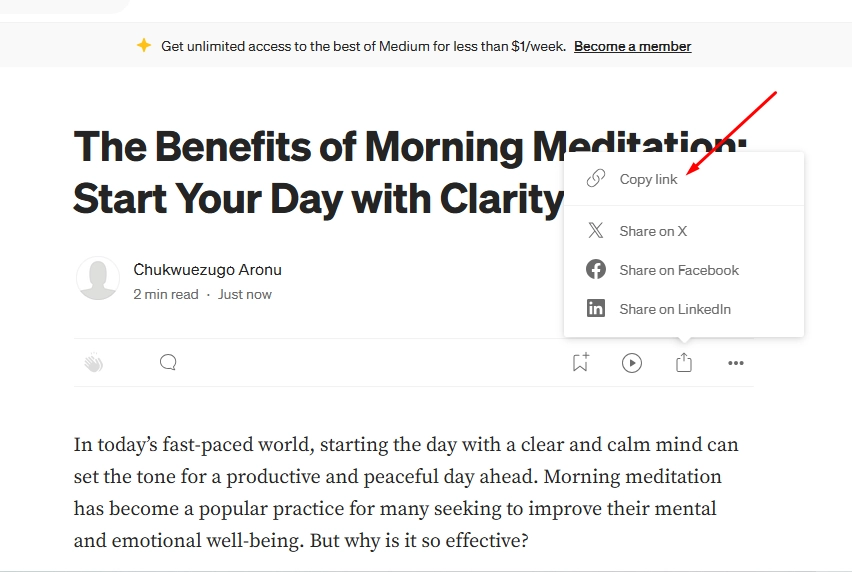
Copy the URL
Step 5: Log in to your website admin panel
Next, log in to the admin panel of your website. You should have access to the backend or dashboard where you manage your site’s content.
Step 6: Create or update a page
In your website admin panel, create a new page or choose an existing page where you want to add the Medium blog post. If you are creating a new page, select the appropriate option to start a new page and give it a title that matches the topic of your Medium post.
Step 7: Add the Medium link and save your page
Now, link it to your Medium post by using the "link" option available in your website builder. Paste the Medium link you copied earlier into the URL field.
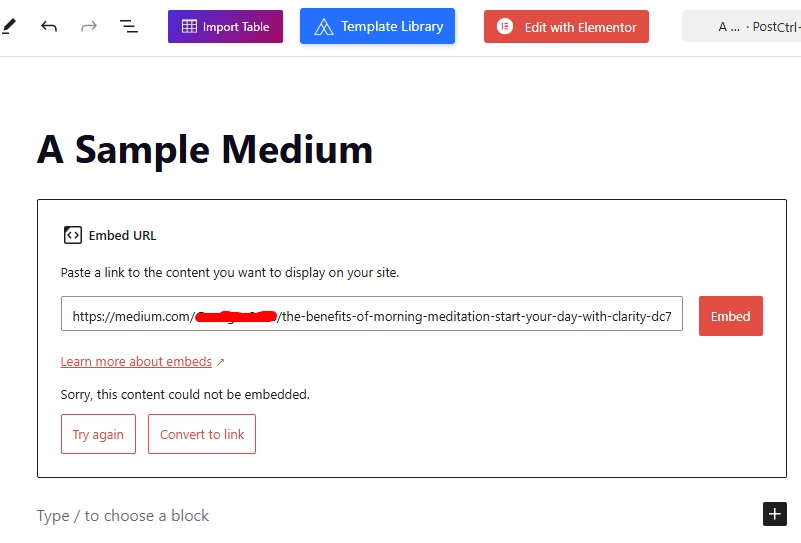
Paste the link After pasting the Medium post link onto your page, the post will be automatically embedded. This means visitors will see the full blog post displayed in a readable format without needing to leave your website. Once the post appears as expected, save your page to apply the changes.
Step 9: Create a Medium blog feed
If you want to create a Medium blog feed on your website, you’ll need to repeat steps 1 onwards to add more Medium posts.
Why Hyvor is the best solution for adding a blog to your website
While Medium provides a simple way to publish content, it lacks the flexibility and control needed for a fully integrated blog.
Seamless integration
Manually sharing Medium posts on your website takes extra steps, from copying links to embedding content repeatedly for each post. This process is not only time-consuming but also lacks automation. Hyvor Blogs eliminates this hassle by offering a fully integrated blogging system that connects directly to your website, ensuring that new posts are instantly available without additional manual work.
Full customization and branding
With Medium, your blog’s appearance is restricted to its platform’s design. In contrast, Hyvor Blogs lets you fully customize your blog’s look and feel. Choose from built-in themes or create your own to match your brand perfectly. You can even integrate custom code for additional functionality.
A comprehensive blogging solution
Hyvor Blogs is not just a place to publish articles; it’s a complete blogging platform with all the tools you need. It supports posts, pages, media management, SEO settings, and more. Plus, it seamlessly integrates with any website, whether it’s built on Squarespace, WordPress, Webflow, or a custom framework.
Ownership and control
When you publish on Medium, your content is hosted on their platform, meaning you don’t have full control over its visibility, ads, or monetization. With Hyvor Blogs, you own your content and can host your blog under your custom domain or subdirectory, giving you complete control over your site’s structure and branding.
Built-in SEO tools
Hyvor Blogs automatically takes care of essential SEO elements like meta tags, sitemaps, canonical URLs, and schema markup. Unlike Medium, which prioritizes its own domain in search rankings, Hyvor Blogs ensures your blog gets full SEO benefits under your own website’s domain.
Multi-language support
Reaching a global audience is easy with Hyvor Blogs’ multi-language support. You can create multilingual content, and with translation for up to 25 languages, your blog can cater to different regions effortlessly. Medium doesn’t offer native multi-language support, making Hyvor Blogs the better choice for international websites.
Commenting and engagement tools
Engaging your audience is crucial for growing a successful blog. Hyvor Blogs integrates seamlessly with Hyvor Talk, a privacy-focused commenting system that supports user memberships, newsletters, and discussions. This level of engagement is far beyond what Medium’s limited commenting features offer.
Effortlessly Add a Blog to Your Website with Hyvor
A blog is a powerful tool for building your brand, engaging your audience, and driving traffic to your website. While platforms like Medium offer a quick way to publish content, they come with limitations in customization, SEO, and ownership. You need a more flexible solution if you want a blog that truly works for your website.
Hyvor Blogs gives you everything you need to run a fully integrated, customizable, and SEO-optimized blog. Hyvor seamlessly embeds into your site, ensuring your content stays under your domain. With built-in SEO tools, multi-language support, and advanced commenting features, you can create a blog that grows with your business.
Get started today with a 14-day free trial—no credit card required.
Related Readings

Comments